The rapid-firing catapult

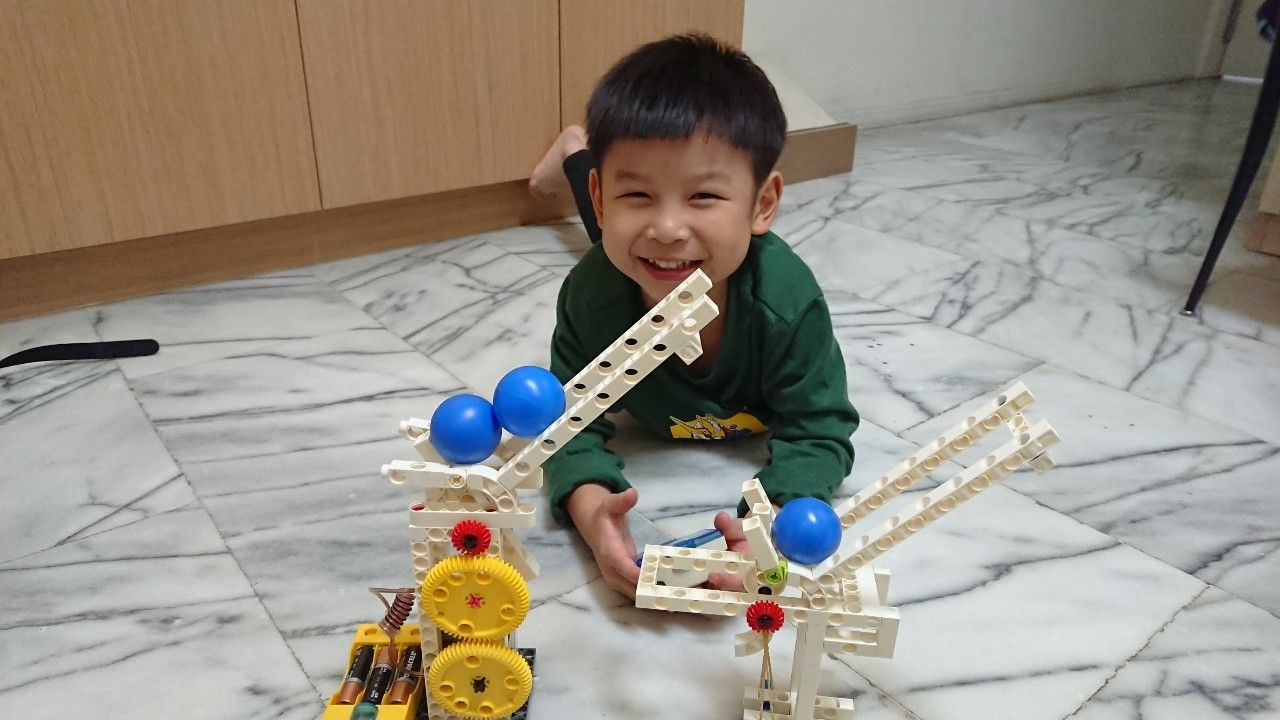
In the video game "Besiege," players can create various whimsical medieval siege machines to combat castles or armies. Among them, the most impressive one is undoubtedly this rapid-firing catapult!
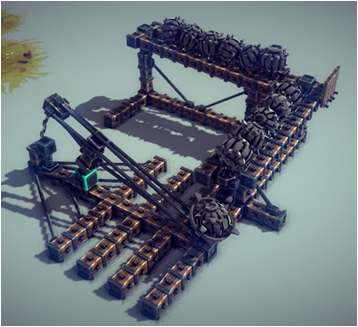
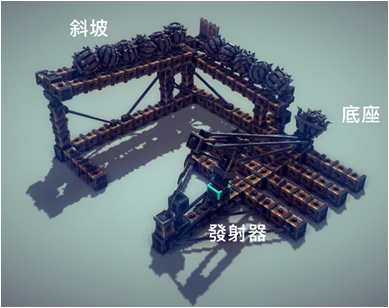
This catapult uses two ramps to transport ammunition. Players only need to click the fire button. After the first ammunition is launched, the second one will automatically load into position due to gravity, allowing us to continuously fire ammunition with astonishing power!
And this formidable catapult can actually be easily created using Gigo building blocks. Now, let's unleash our maker spirit and step-by-step make the "Rapid-Firing Catapult"!
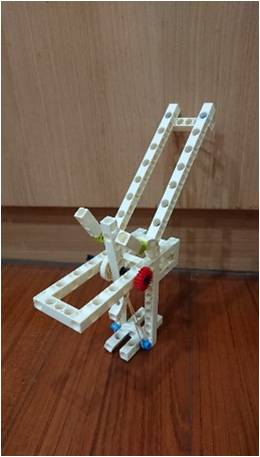
★ Finished Model would look like this:
★ Parts List
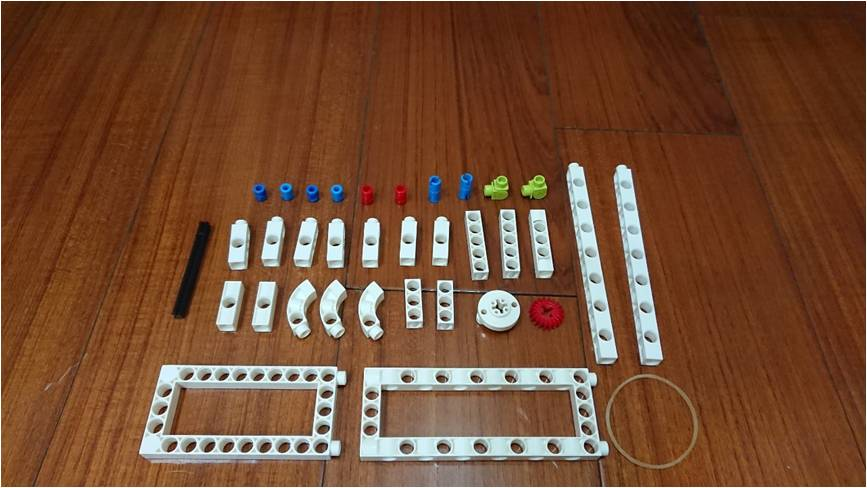
The materials you'll need are shown in the image above. In addition to common rectangular frames and extra-long rods, we'll also need the rubber bands and C-HINGE. Rubber bands serve as the power source, providing elasticity to create our launcher, while C-HINGE allows us to adjust the launching point.
★ Assembly Steps
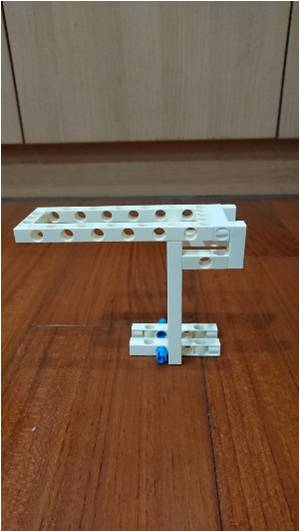
Base
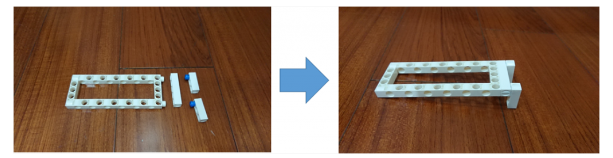
First, let's start with the base. Combine a C-5X10 FRAME with four C-3 HOLE DUAL ROD, and attach the C-AXLE CONNECTOR to the front two C-3 HOLE DUAL ROD to complete the lower half.
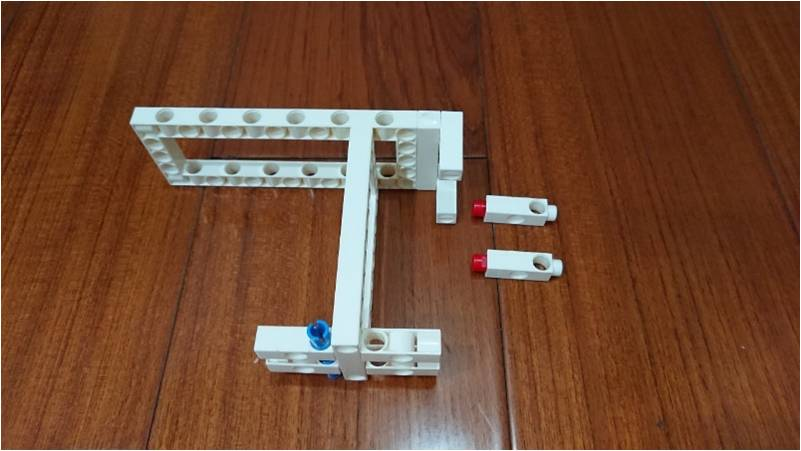
Next, follow the figure to connect C-5x13 DUAL FRAME, C-5 HOLE DUAL ROD, C-3 HOLE DUAL ROD, and B-SHORT PEG to complete the upper half.
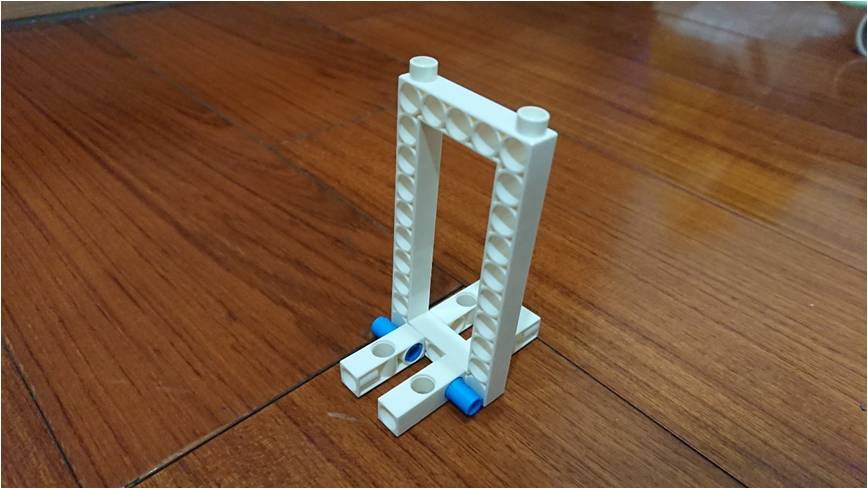
Now, connect the upper and lower halves to complete the base of the catapult.
For added stability, attach two C-3 HOLE DUAL ROD to the base, as shown in the image below.
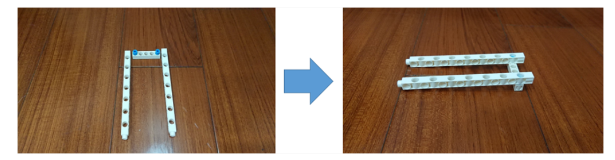
Track
After completing the base, we can start planning the track for the ammunition!
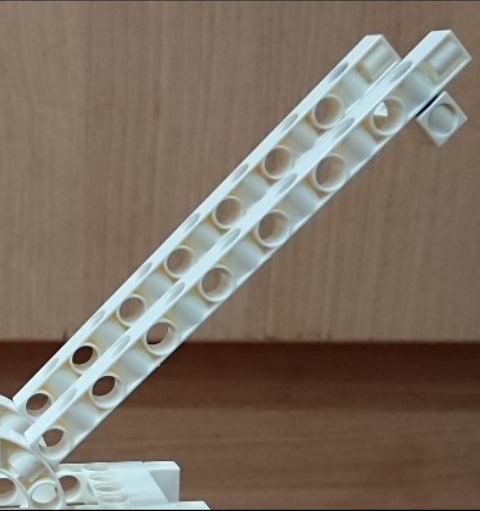
First, assemble a C-15 HOLE ROD, a C-5 HOLE ROD, and a B-SHORT PEG as shown below.
Then, combine a C-BENDED ROD, C-HINGE, and a C-3 HOLE ROD with holes on the side. After completing this part, attach it to the previously assembled C-15 HOLE ROD to complete the track.
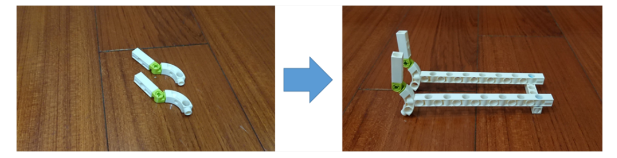
Finally, attach the track to the base, and the overall structure of the model is nearly completed!
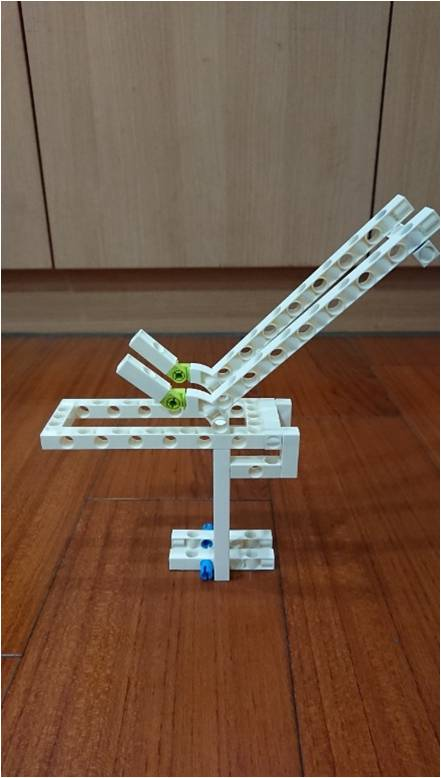
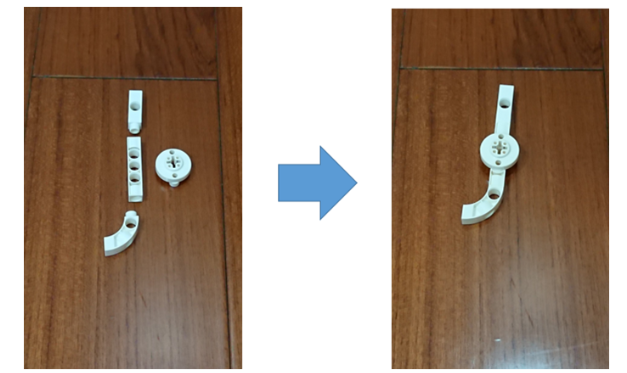
Launch Rod
Now, let's move on to the exciting part: the launch rod! Start by assembling a C-3 HOLE DUAL ROD, a C-5 HOLE ROD with holes on the side, a C-BENDED ROD, and a C-ROD CONNECTOR as shown below.
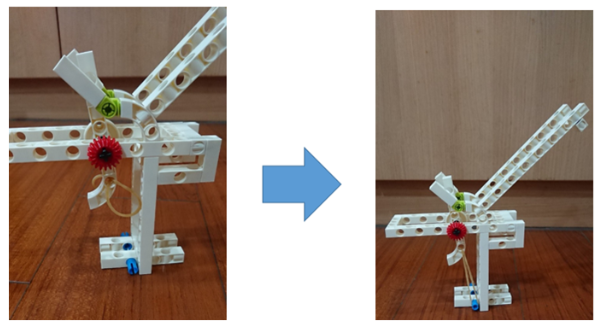
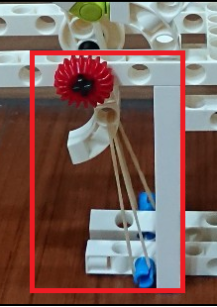
Next, use an axle and a C-20T GEAR to attach the launch rod to the catapult. Make sure the position of the launch rod is close to the track to avoid any issues with launching.
Finally, thread the rubber band through the bottom of the launch rod and loop it over the C-AXLE CONNECTOR on the base to complete our rapid-firing catapult!
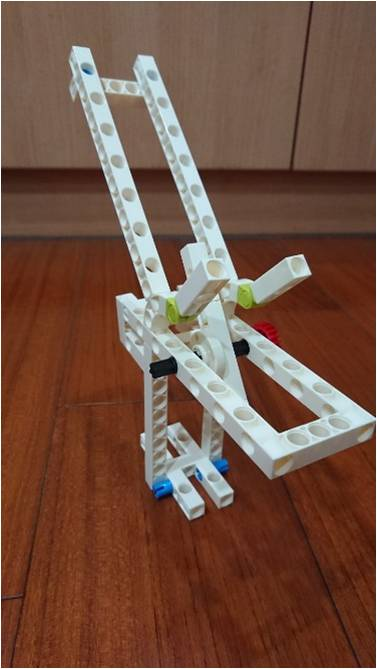
★ Model

★ Creative Extensions
You can also prepare a motor, gears, a battery holder, and a remote control to transform the model into a remote-controlled firing turret (as shown below).
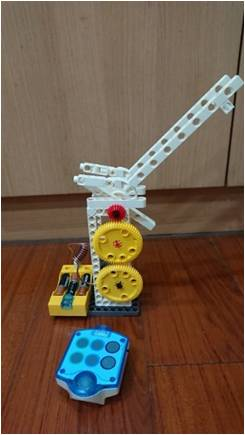
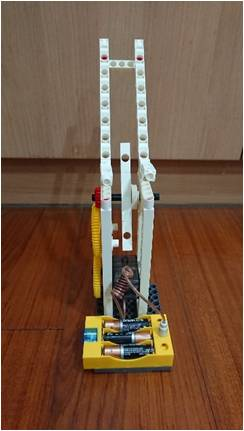
This model replaces the rubber band with a motor for power and uses gears to drive the launch rod for firing, eliminating the fatigue of manual firing. However, it's important to ensure that the gears mesh properly because it uses gear transmission.
★ Operation Video
★ Scientific Principles
The primary scientific principles used in this project are "elasticity" and "inclined plane."
Elasticity refers to the force generated when an elastic material returns to its original shape after deformation. For example, when we twist a rubber band and release it, the rubber band returns to its original shape and releases energy. In this catapult, we use the rubber band on the launch rod. When we pull back the launch rod, the rubber band is stretched, and when we release it, the rubber band's elasticity propels the projectile.
An inclined plane is a sloped surface that can be used to raise or lower objects, making work easier. For example, the sloping ramps on which vehicles drive are examples of inclined planes, allowing vehicles to ascend and descend slopes safely and slowly. In our model, we use an inclined plane on the ammunition holder, allowing the projectile to automatically load onto the launch rod due to gravity, achieving continuous firing.
★ Conclusion
Although the catapult is a simple model, we've added functionality to it by incorporating an inclined plane, cleverly merging two simple mechanisms together. When creating new models, consider how you can improve existing models or combine them with different scientific principles. Perhaps you can achieve unexpected results!
Please sign in to vote.