Science in daily life: EP10 – Cork Opener

Hello, everyone. I'm Teacher Raccoon. When it comes to bottle openers, the first thing that comes to mind for most people is using them to open soda or beer bottle caps. However, besides that, there's another type of bottle opener specifically designed to open cork stoppers, known as a cork opener or a butterfly corkscrew.
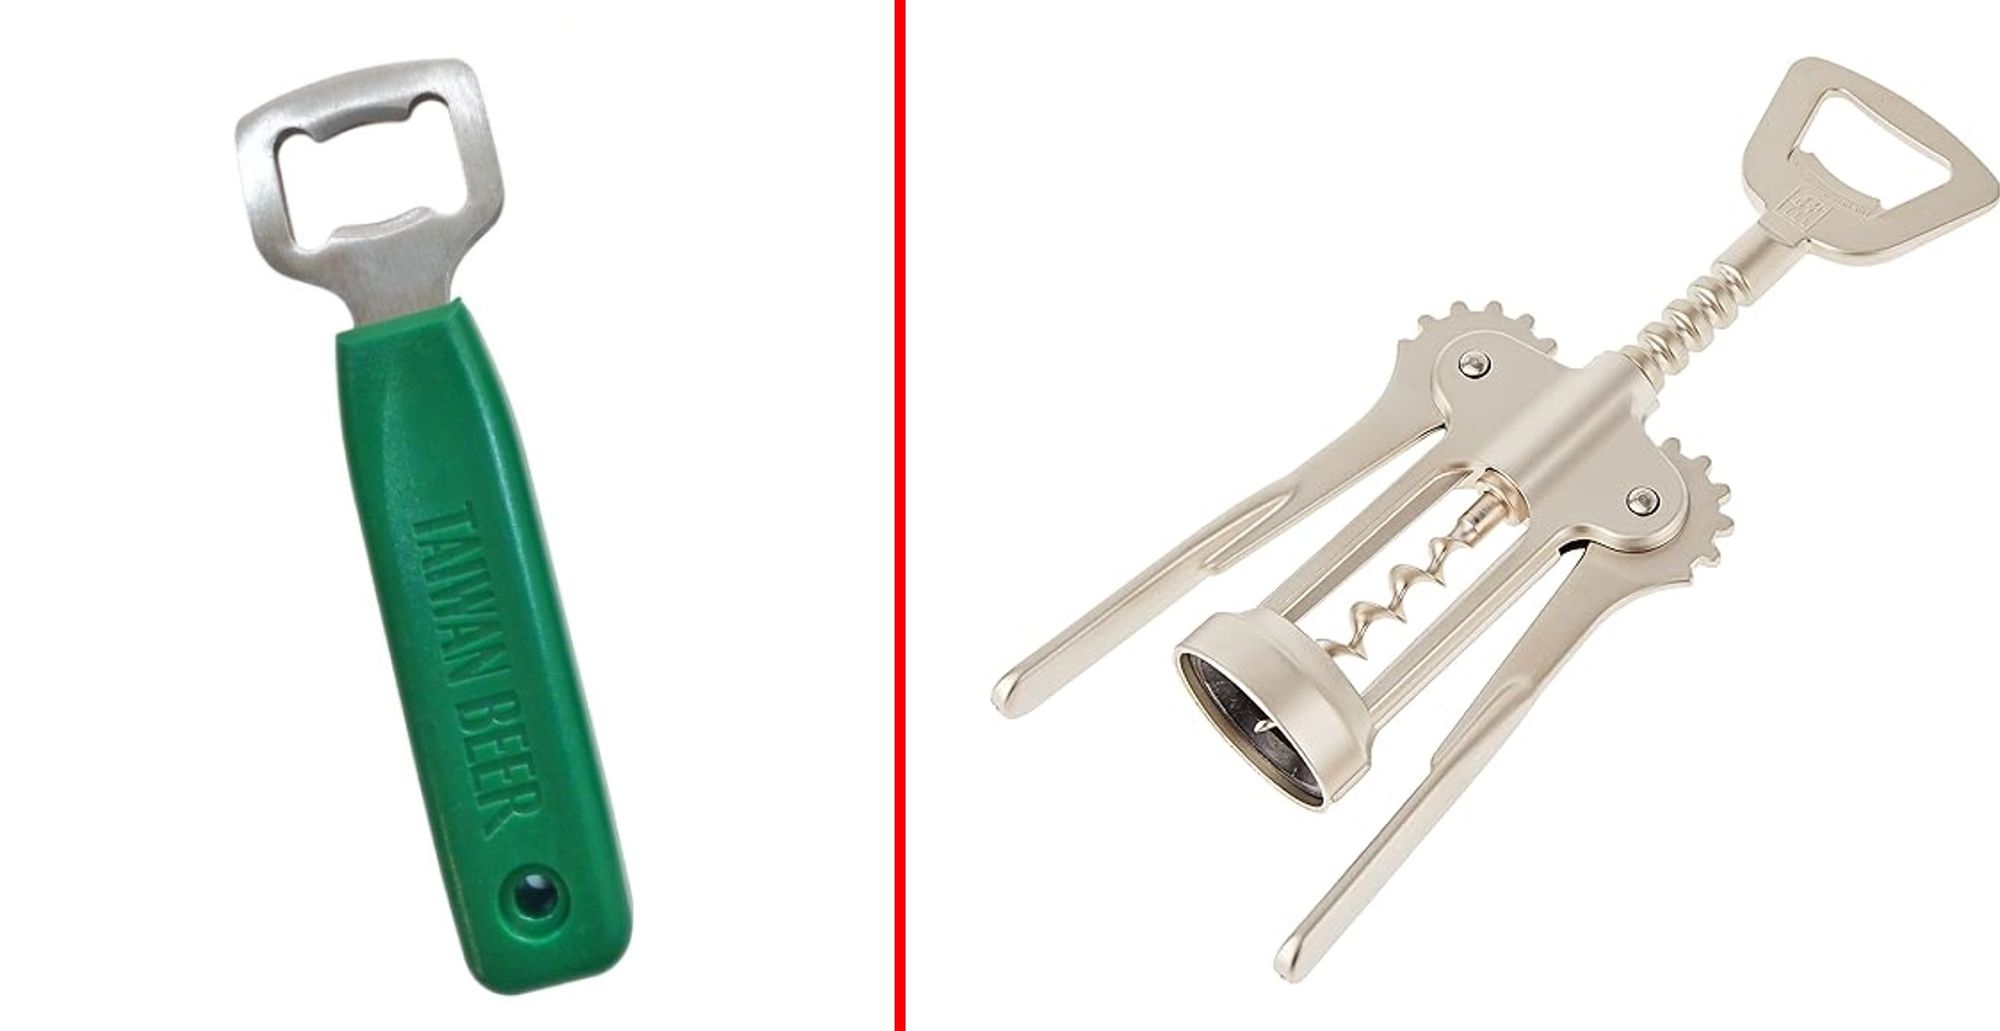
Corks are primarily used in bottles containing spirits such as red wine, grape wine, and so on. Similar to bottle caps, they serve the purpose of sealing the bottle, but in addition to isolating the external air, cork stoppers also allow a small amount of oxygen to penetrate during the aging process, enhancing the taste of the wine. By using a cork opener, we can smoothly extract the cork from the bottle opening. Now, let Teacher Raccoon guide you step by step on how to make a cork opener!
Before proceeding with the assembly steps, Teacher Raccoon would like to remind everyone that the main purpose of this model is to simulate the use of a cork opener, so please do not use this model to open a real red wine bottle!
◆Assembly Steps
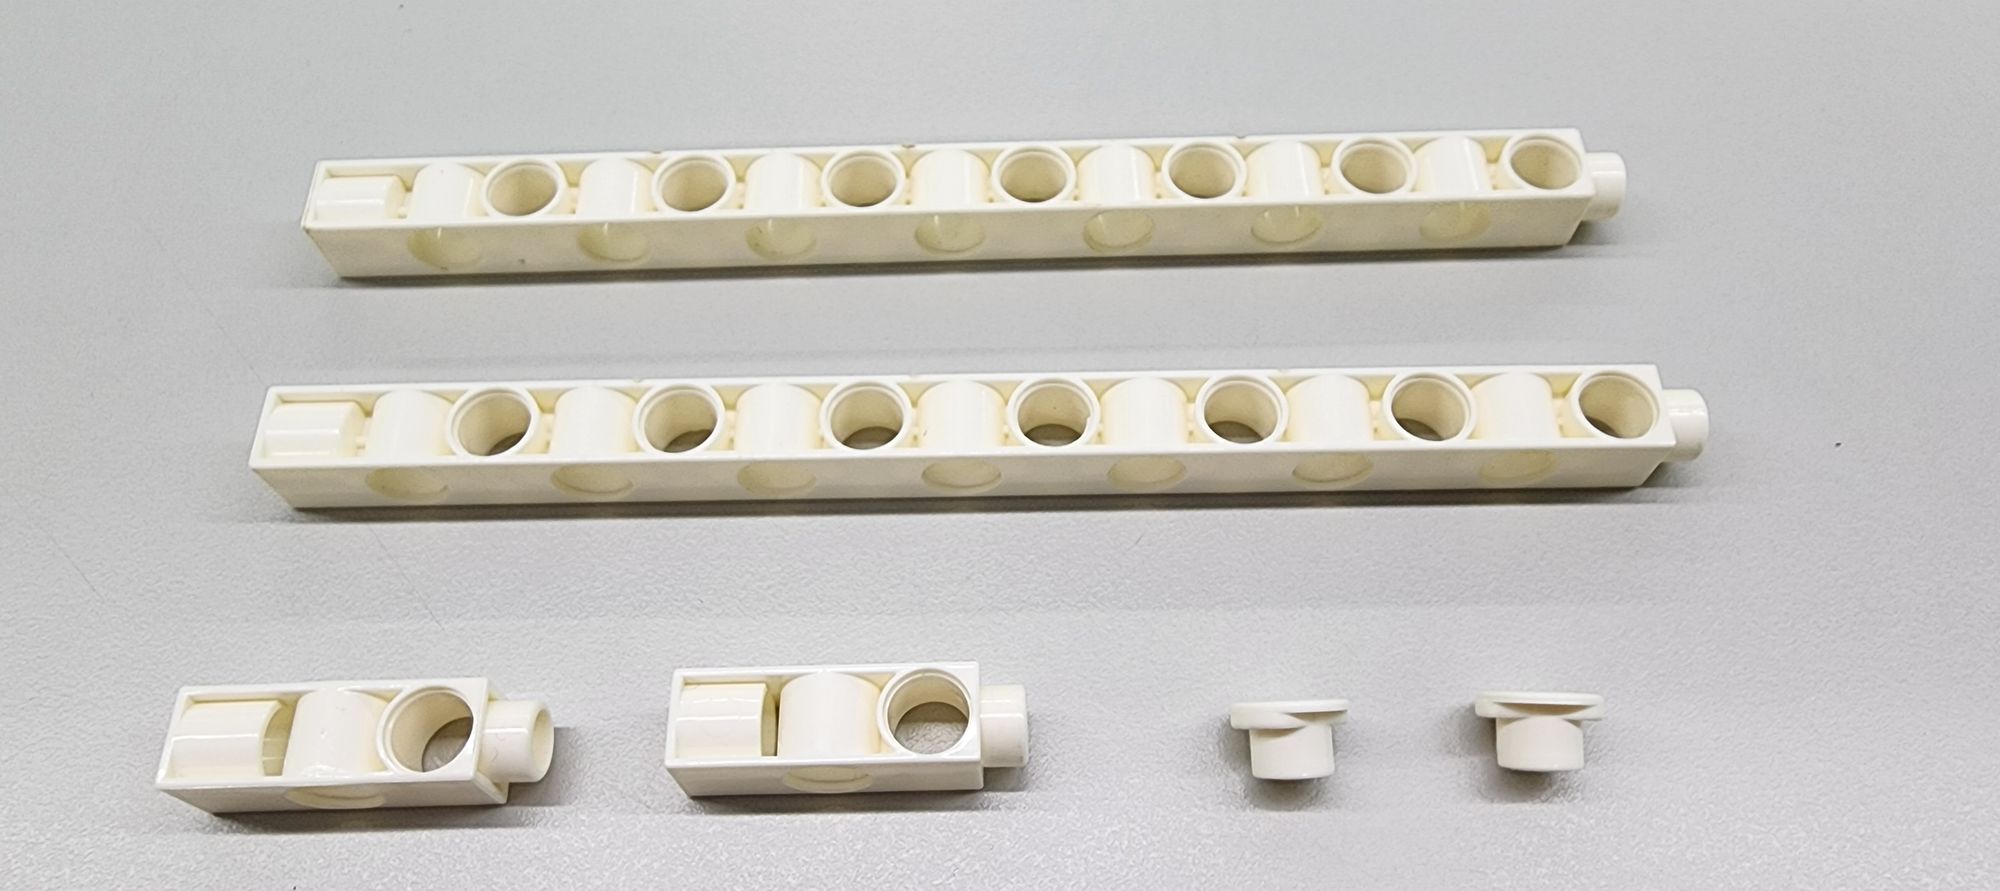
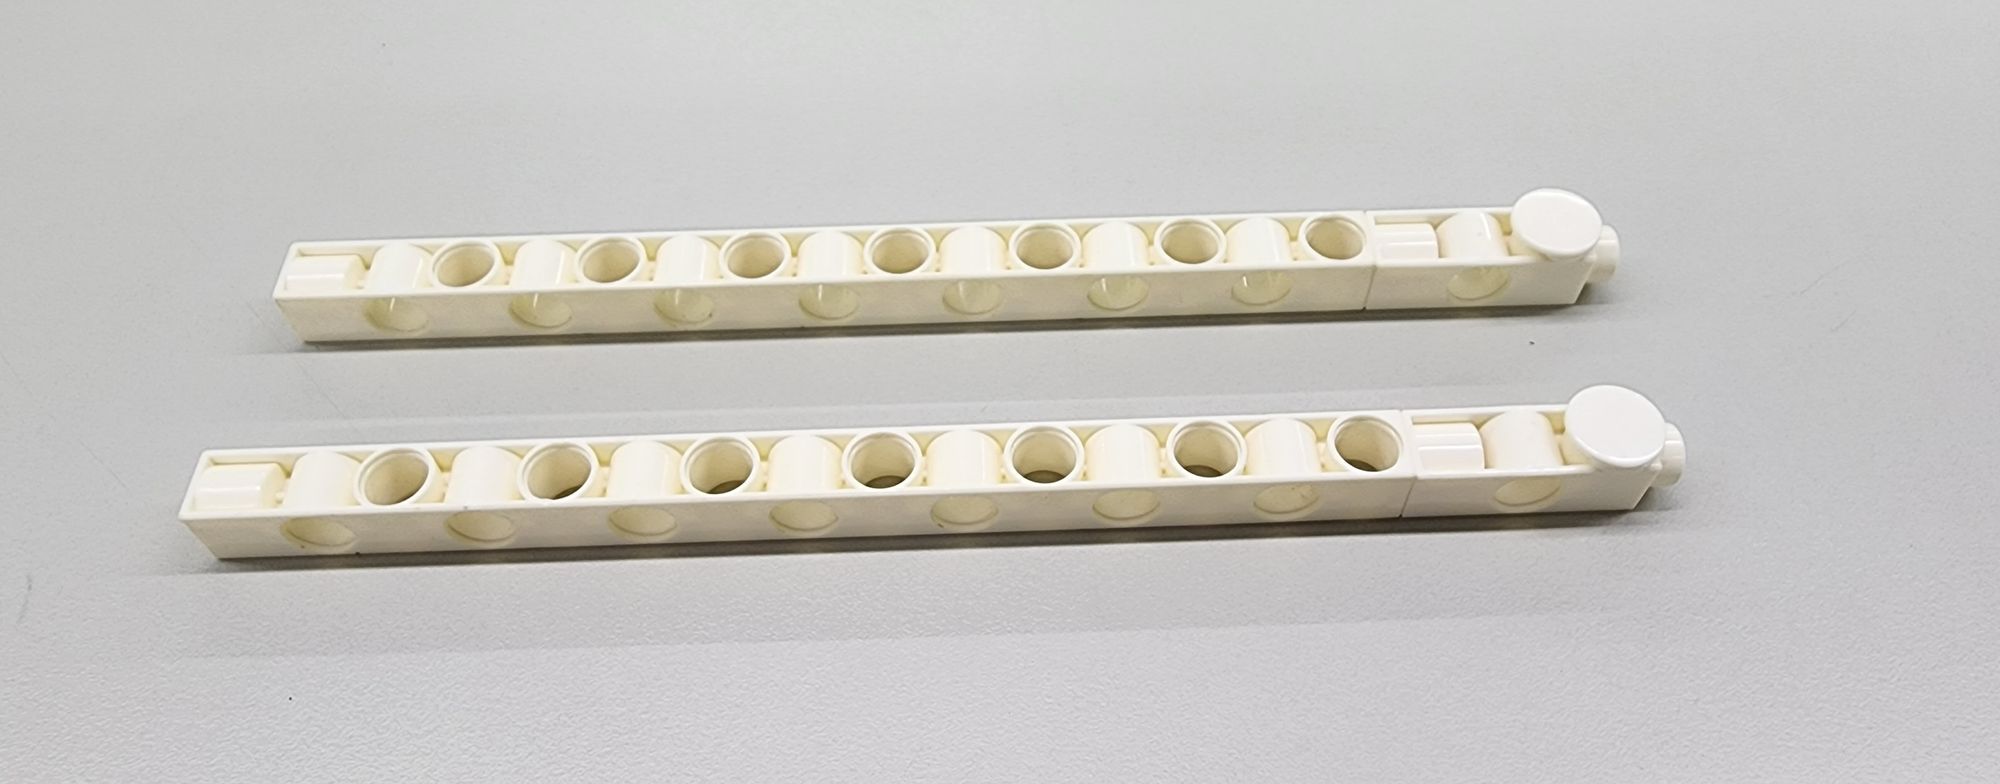
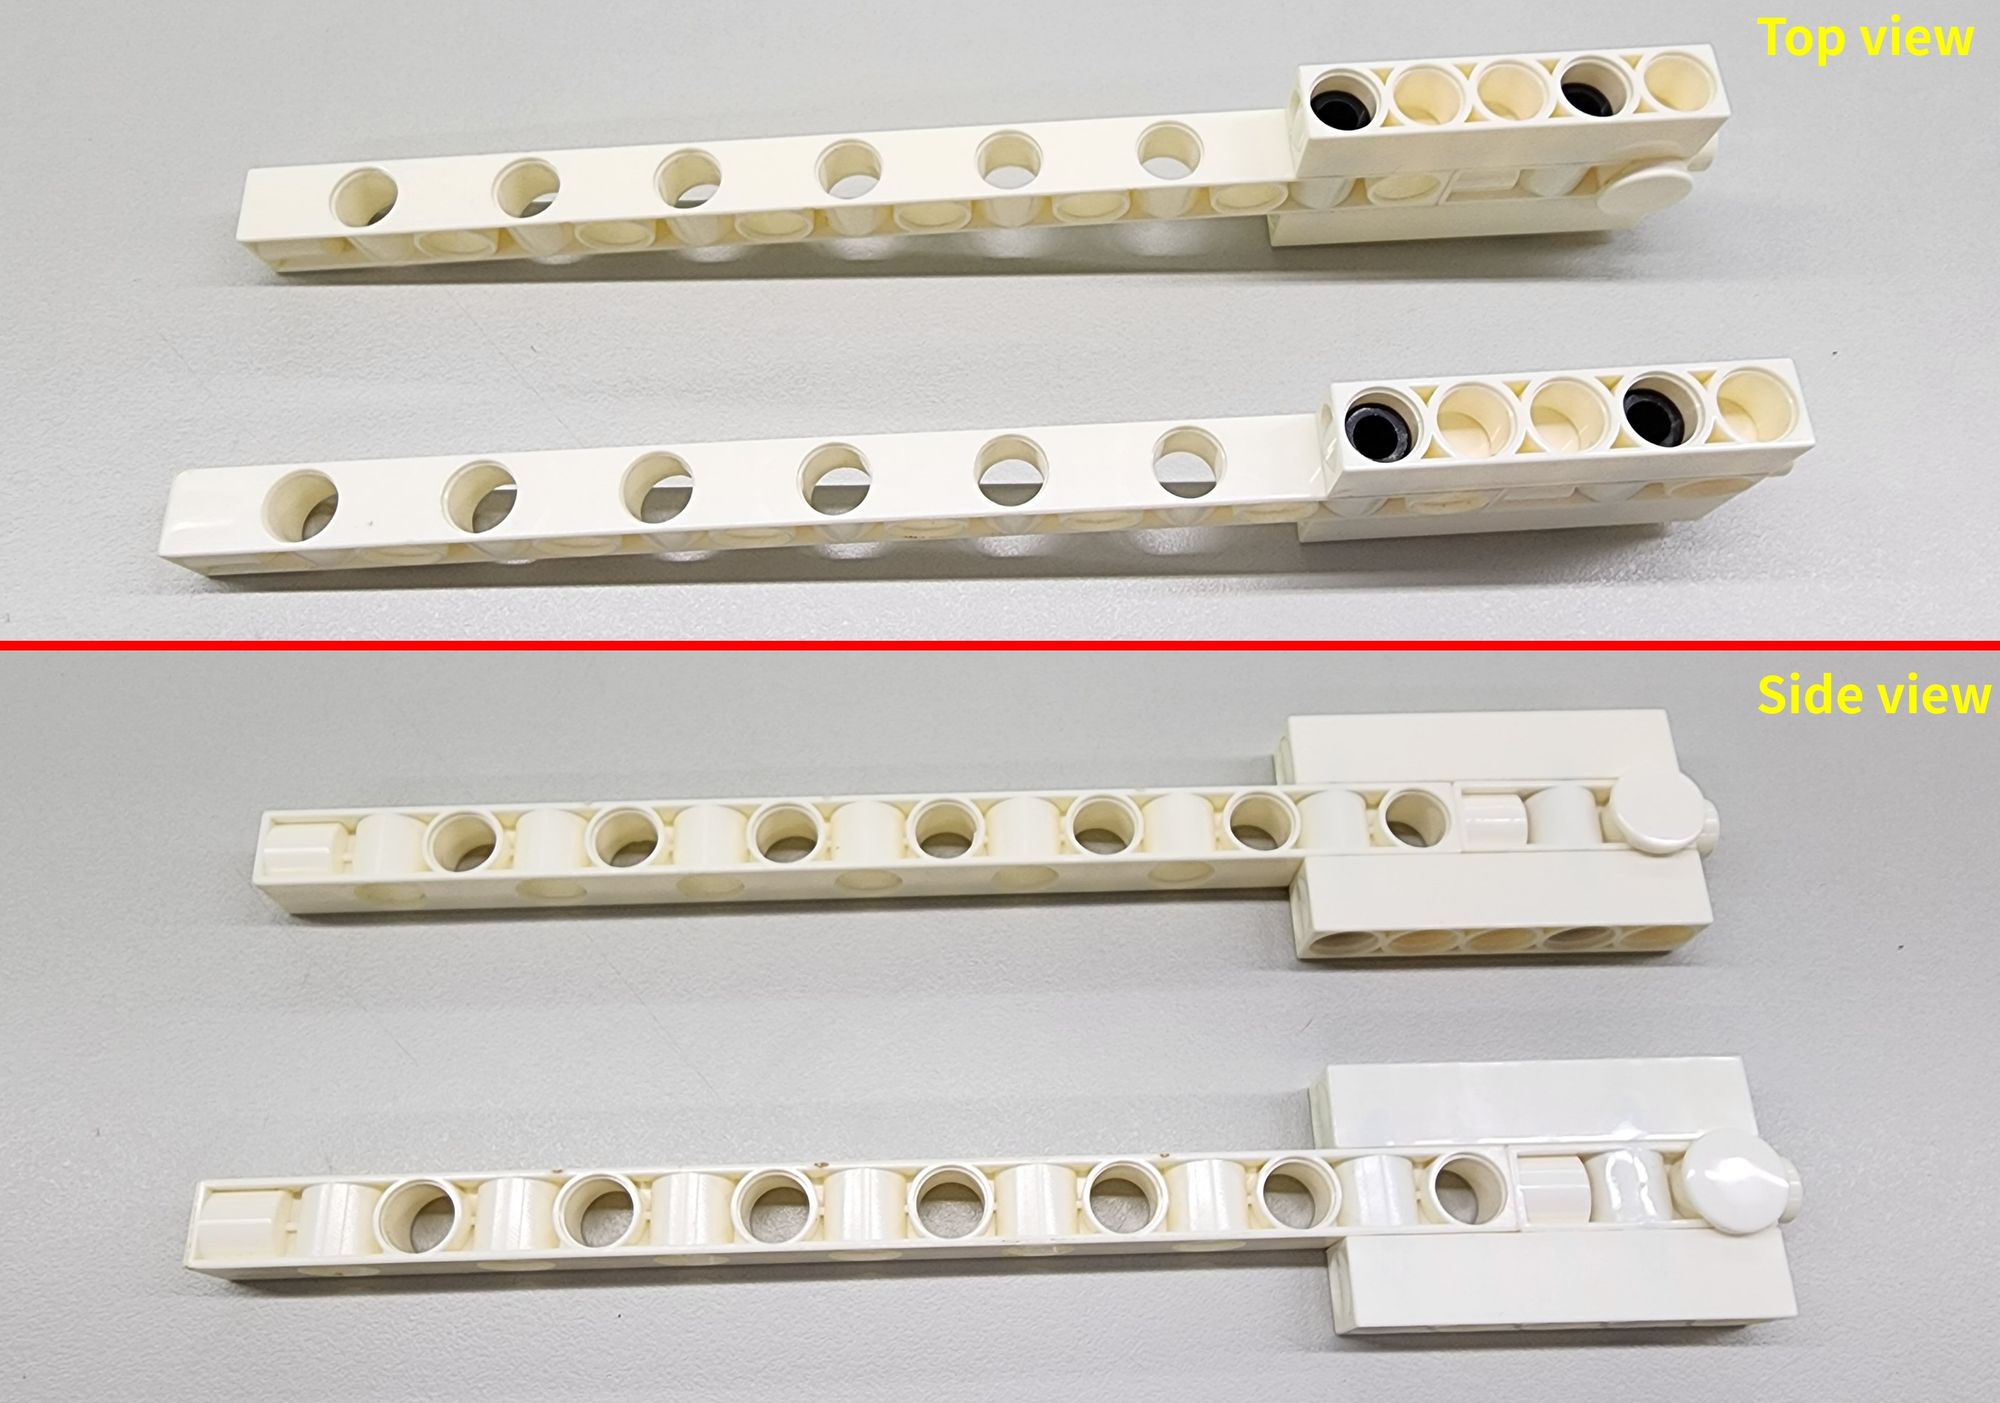
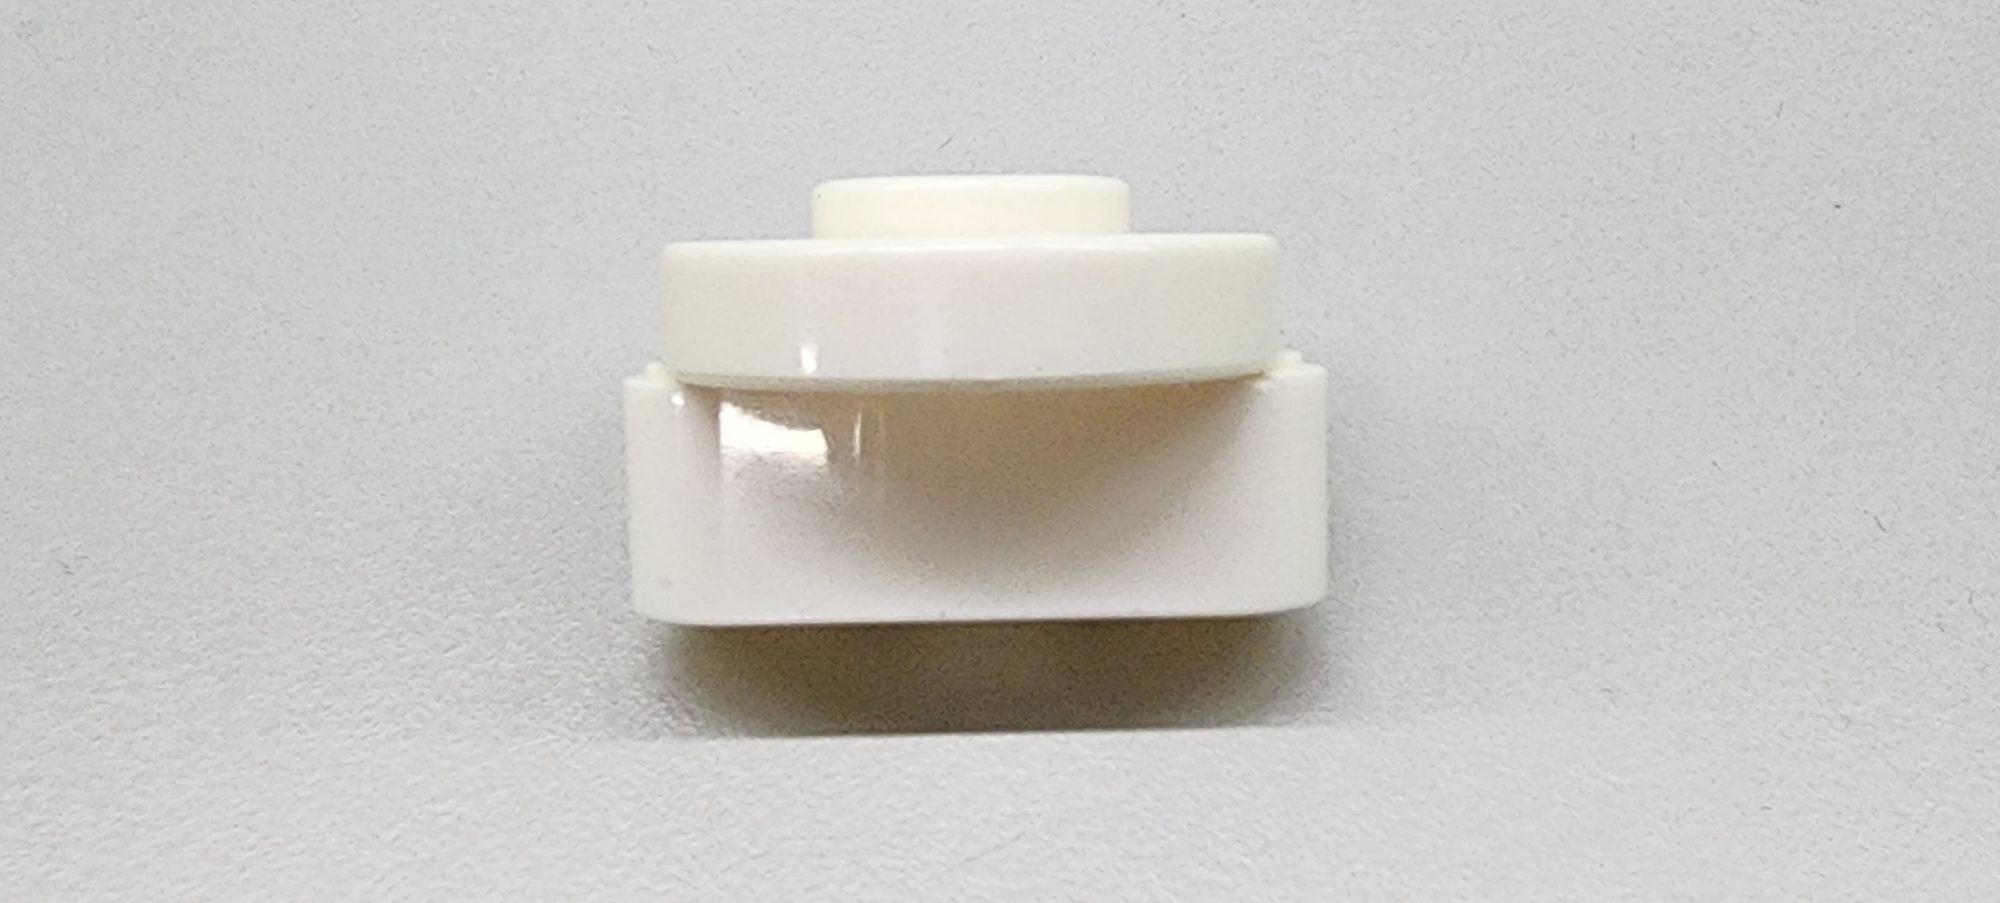
Step 1: We make the main body of the cork opener. We need to use C-15 HOLE DUAL ROD, C-3 HOLE DUAL ROD and C-SHORT BUTTON FIXER (Figure 1), and combine them as shown (Figure 2).
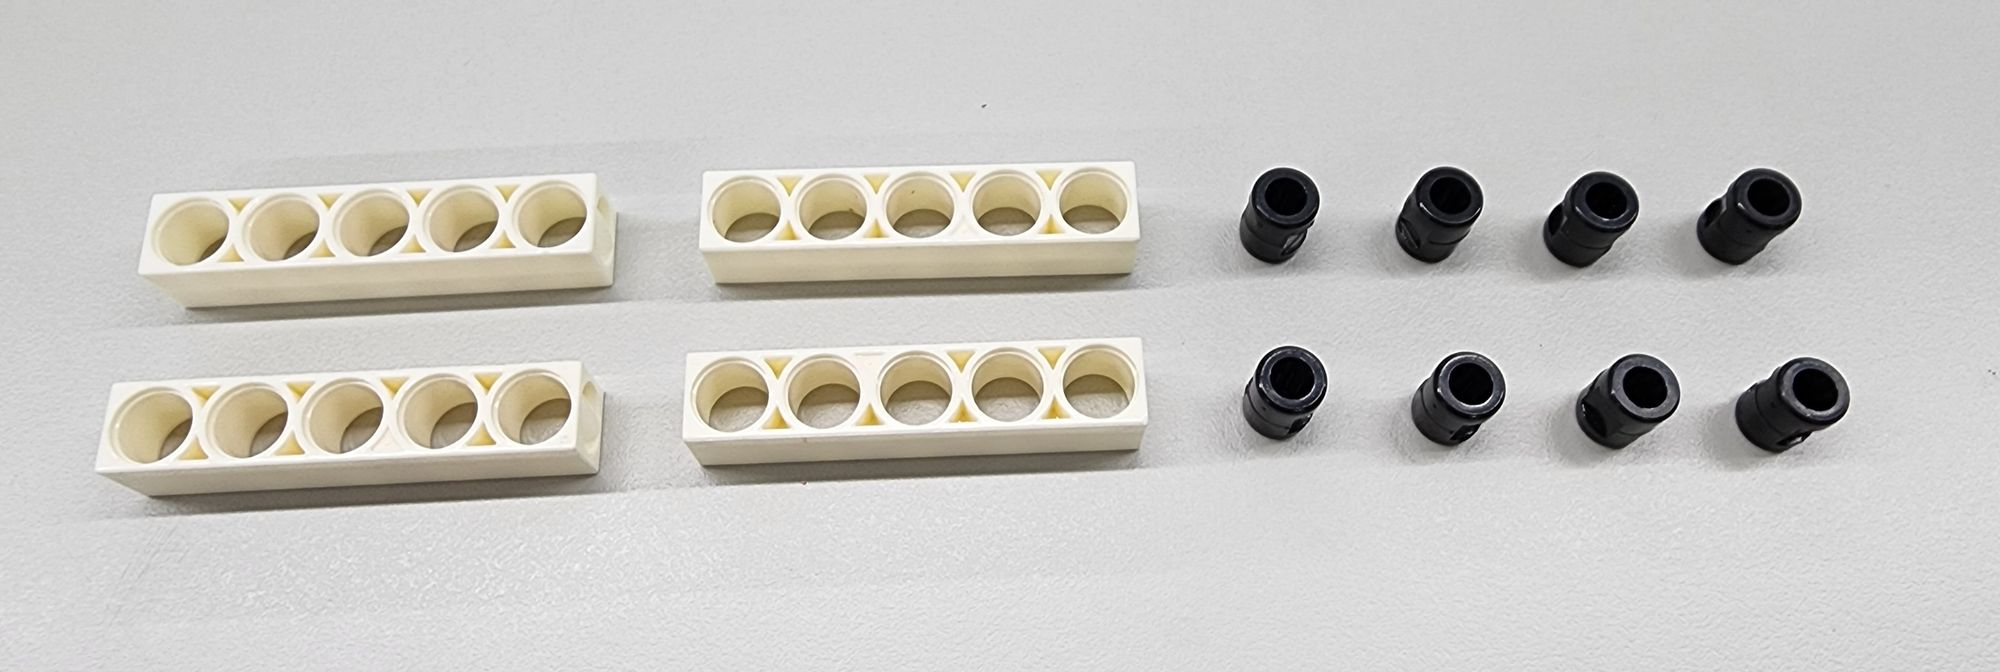
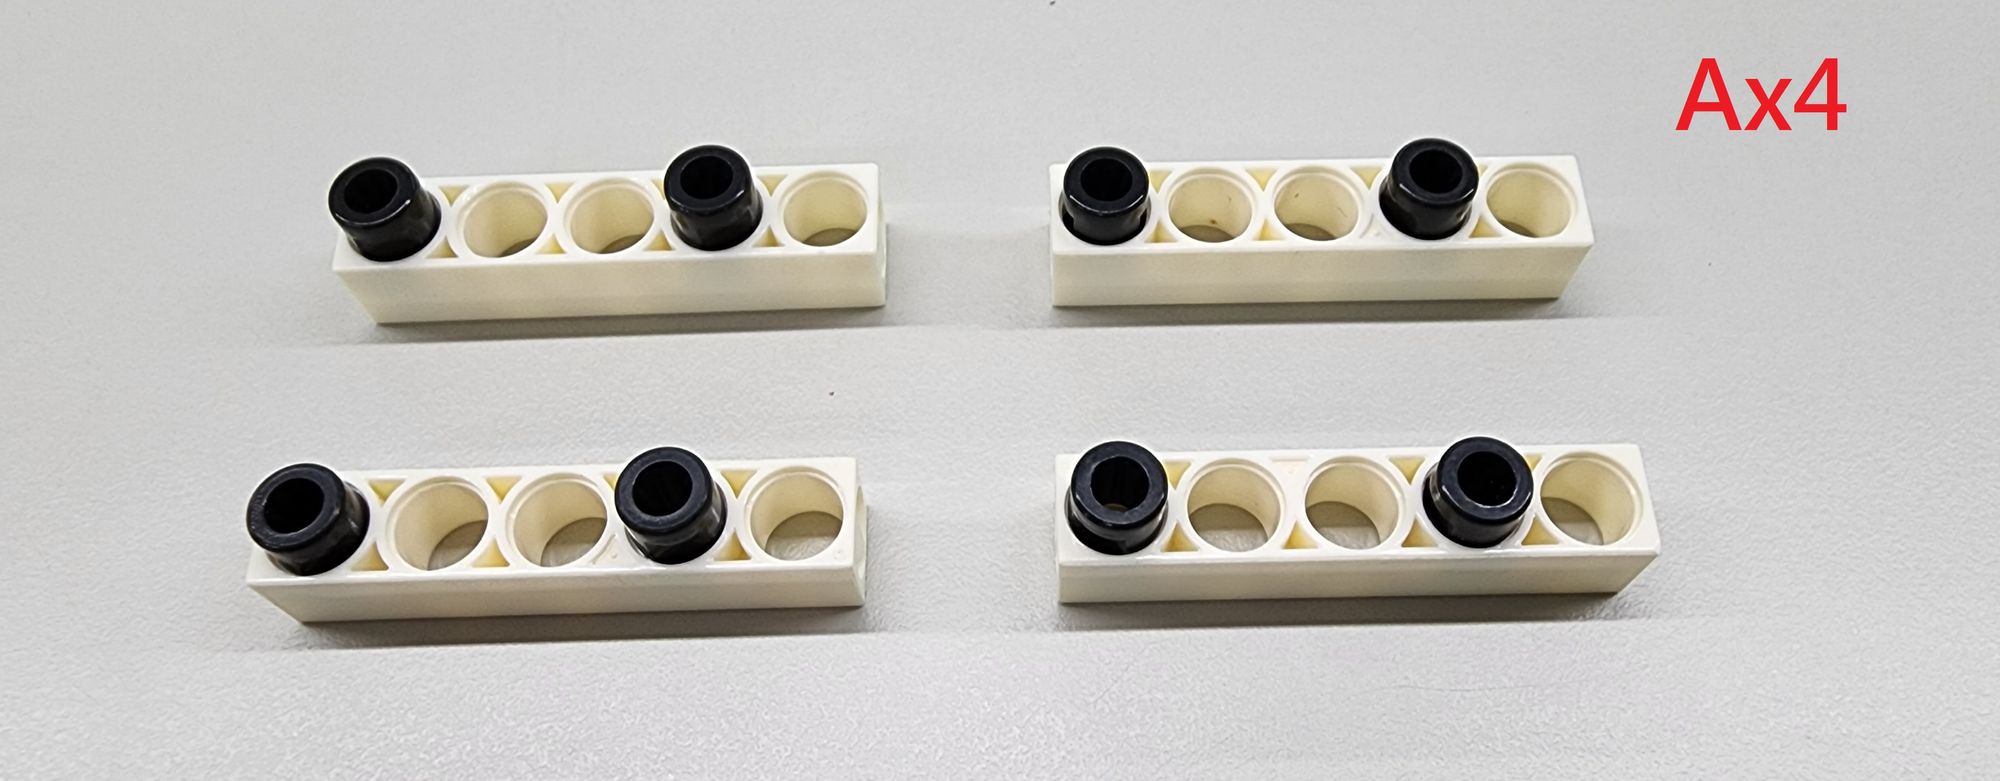
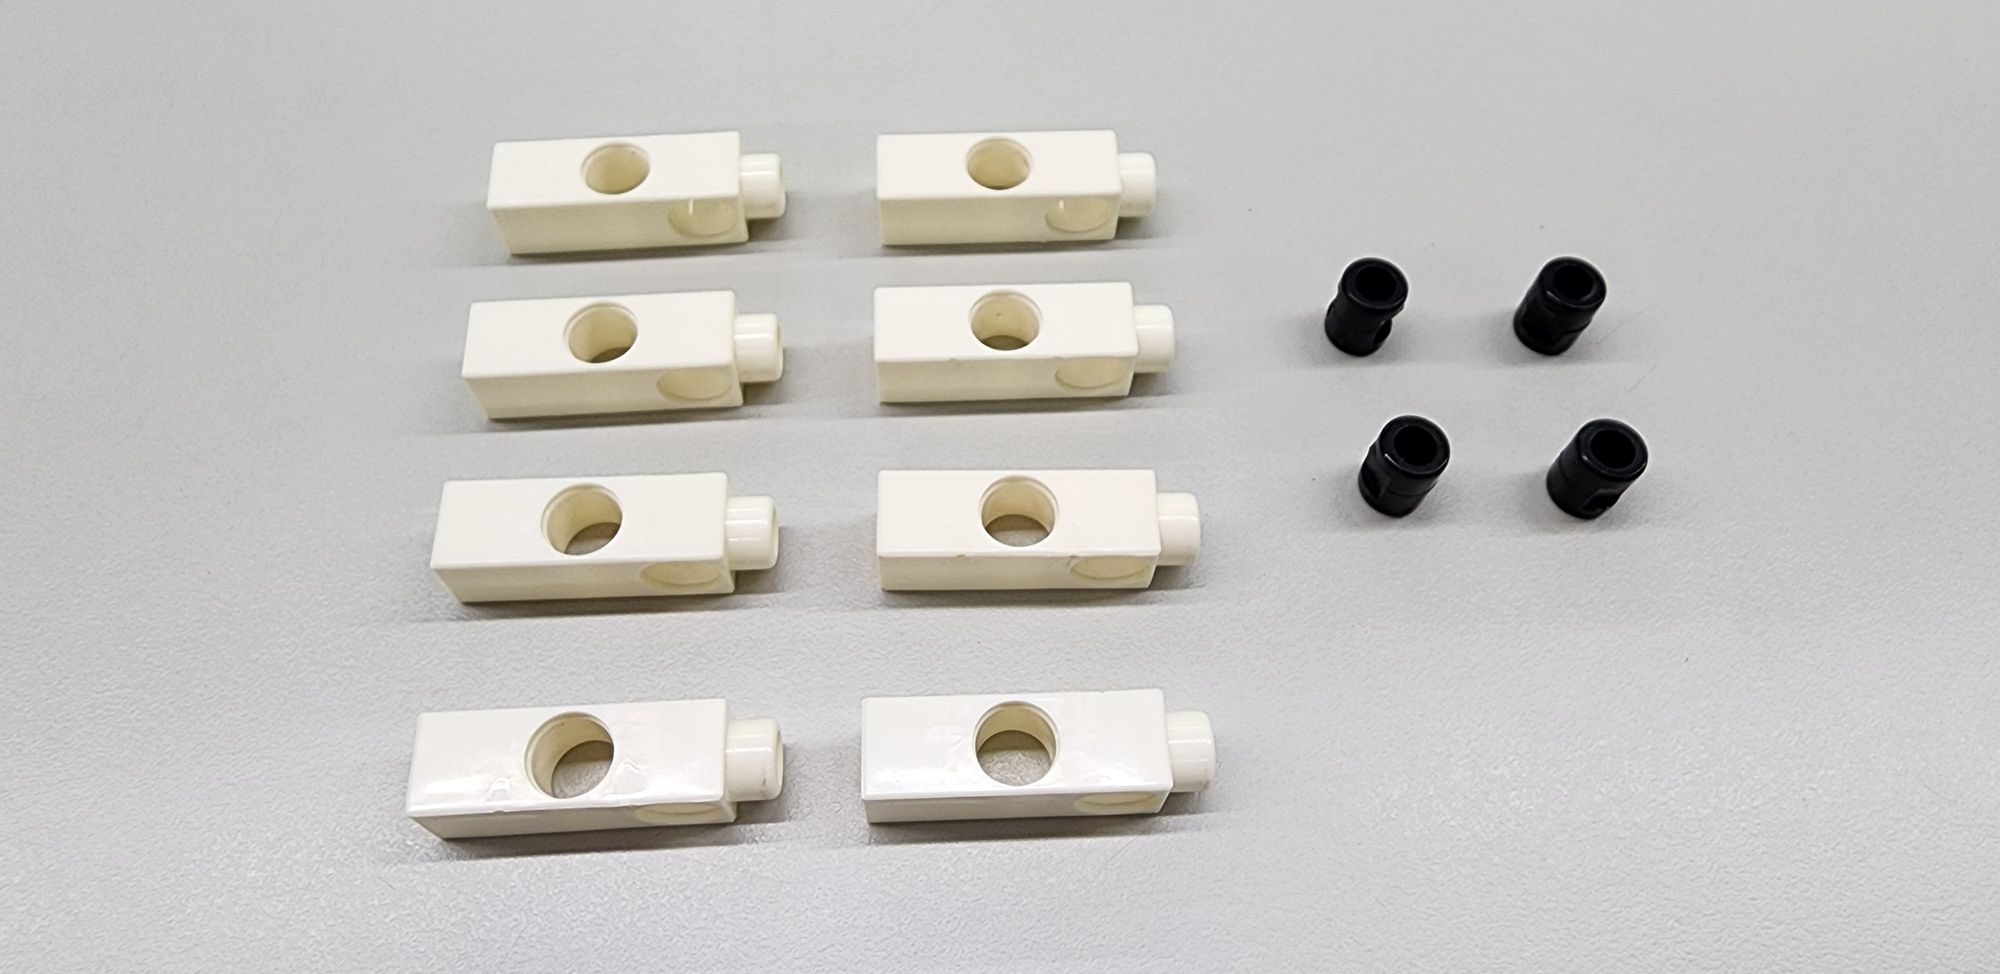
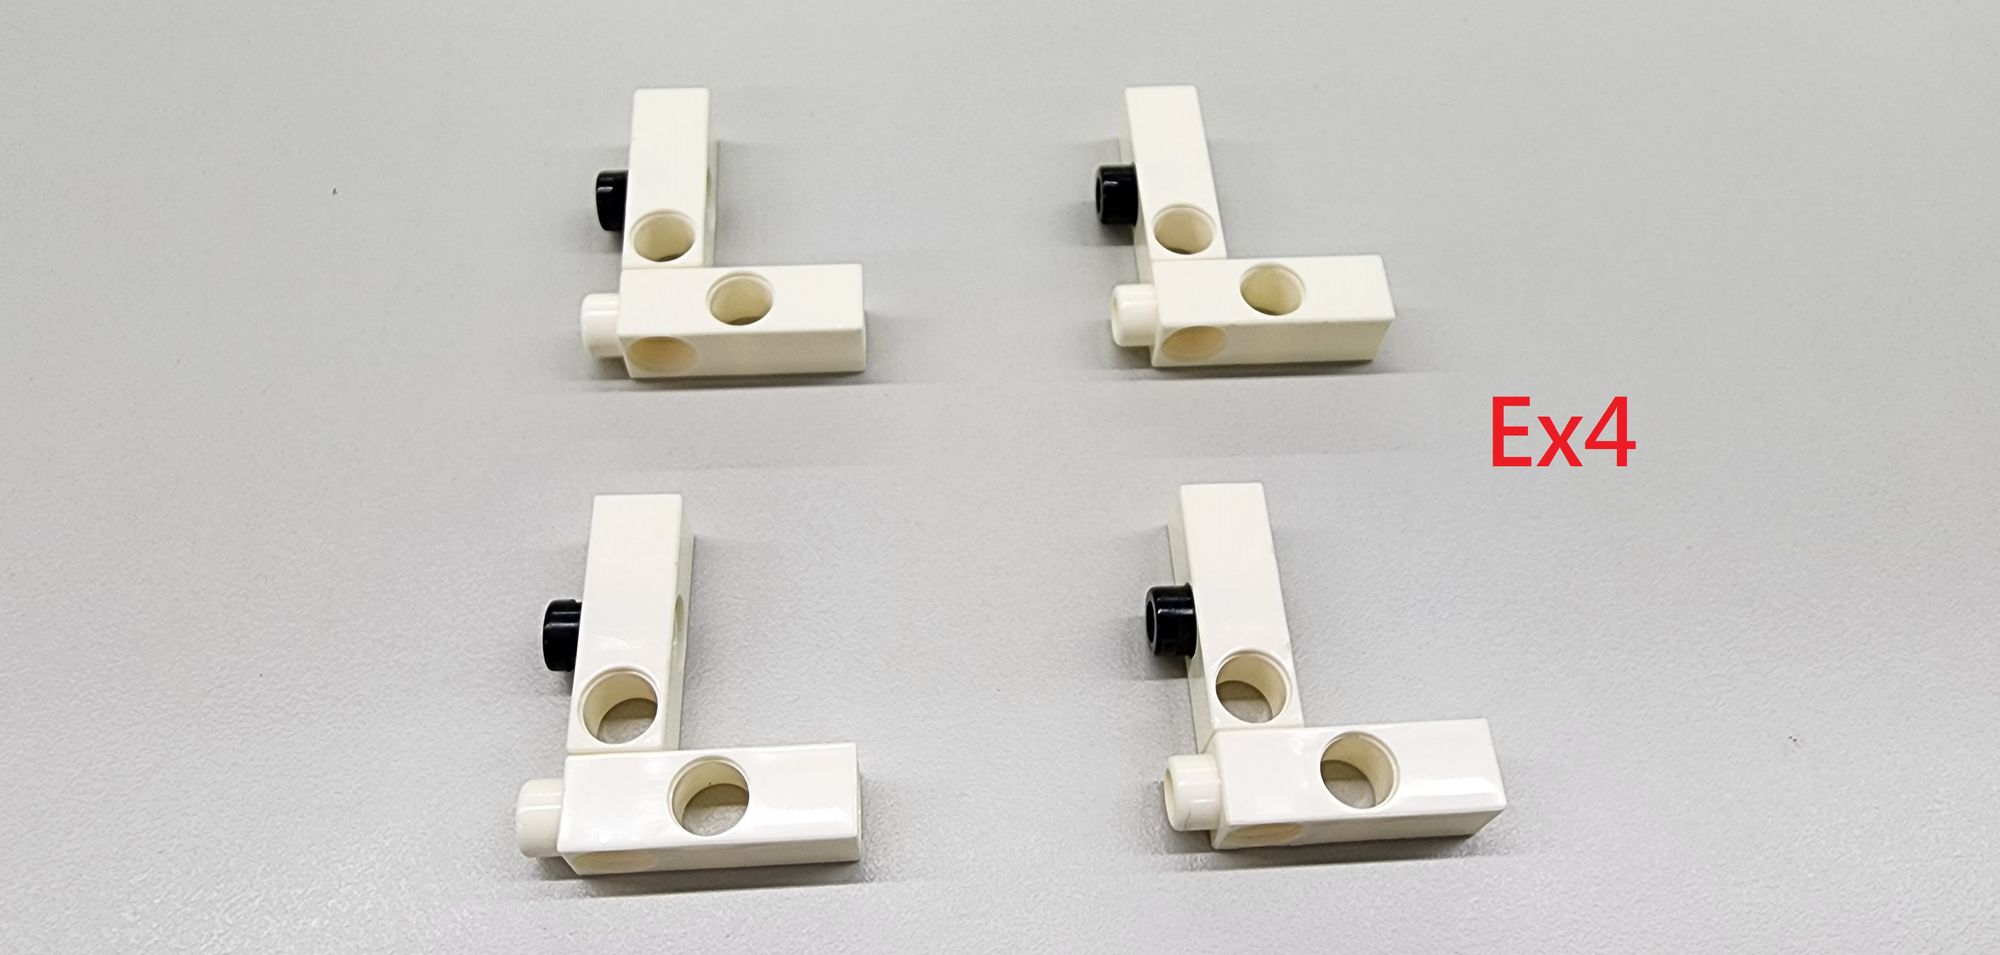
Step 2: We now reinforce the main body of the cork opener, mainly using the C-5 HOLE ROD and the B-SHORT PEG (Figure 3), and assemble them into four sets of parts A (Figure 4).
Next, we need to assemble the part A with the main body of the cork opener. Follow the pictures below to secure the C-5 HOLE ROD at the junction of the C-15 HOLE DUAL ROD and the C-3 HOLE DUAL ROD (Figure 5).
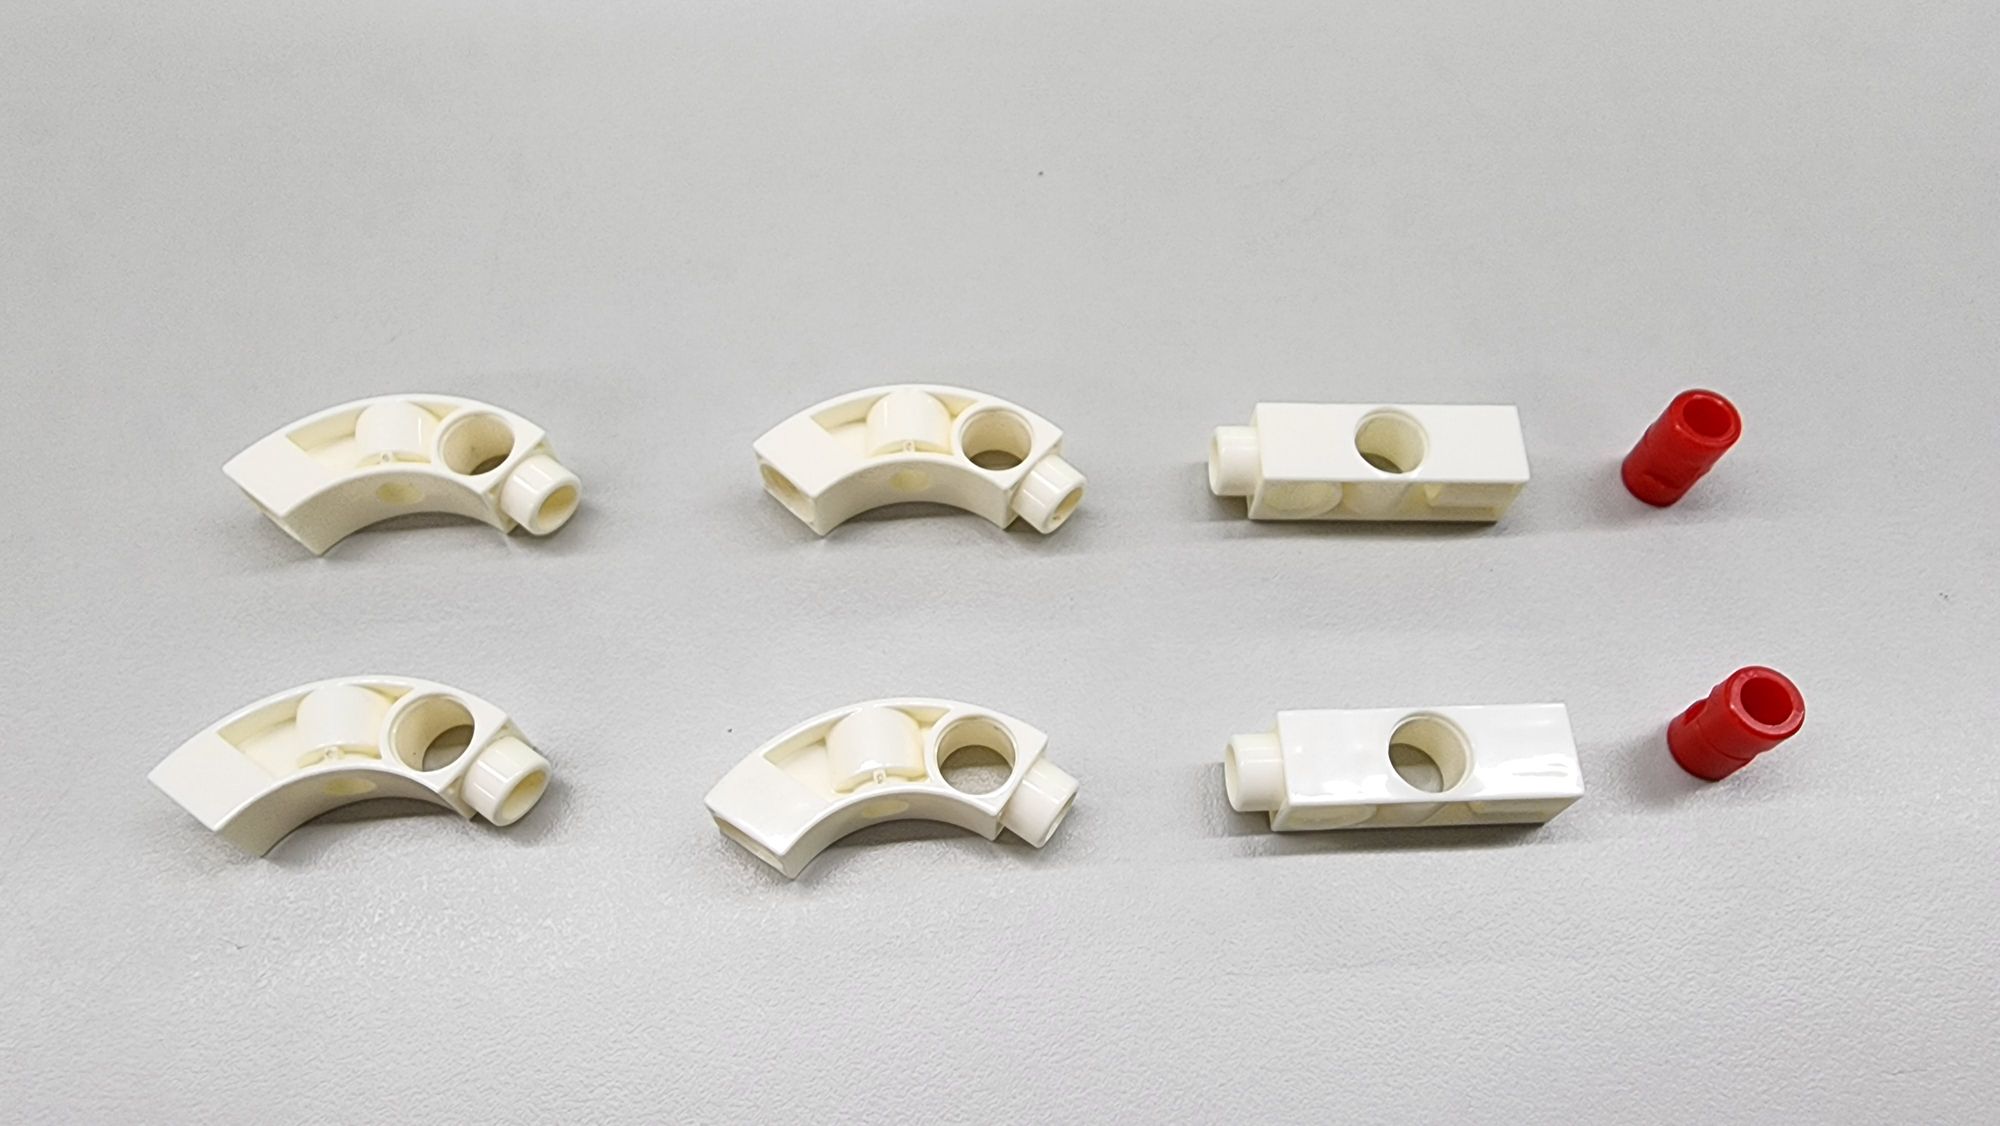
Step 3: We now need to use the C-BENDED ROD, the C-3 HOLE DUAL ROD, and the C-LONG PEG (Figure 6). First, use four C-BENDED ROD to make a circular structure. Install the C-LONG PEG onto the C-3 HOLE DUAL ROD to complete the parts B and C (Figure 7).
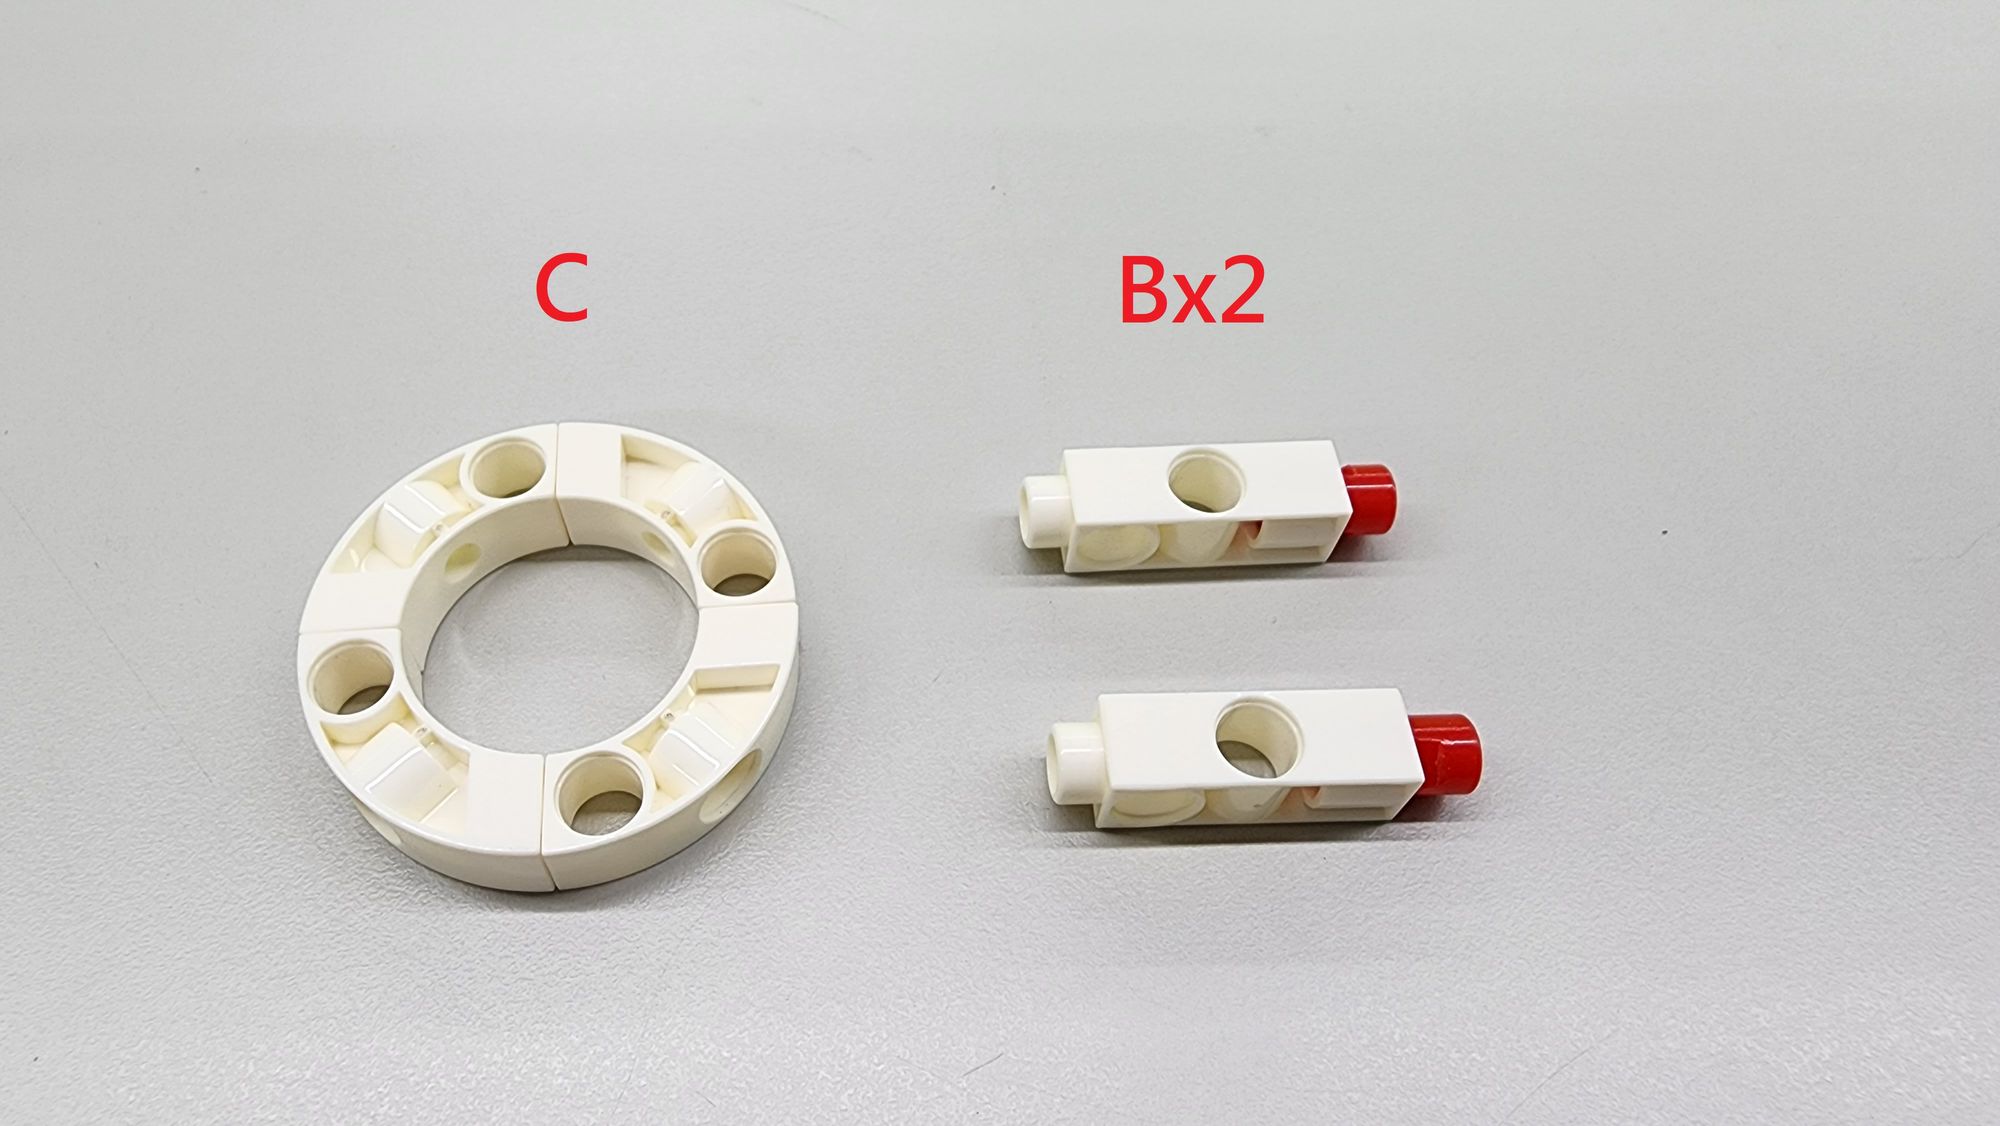
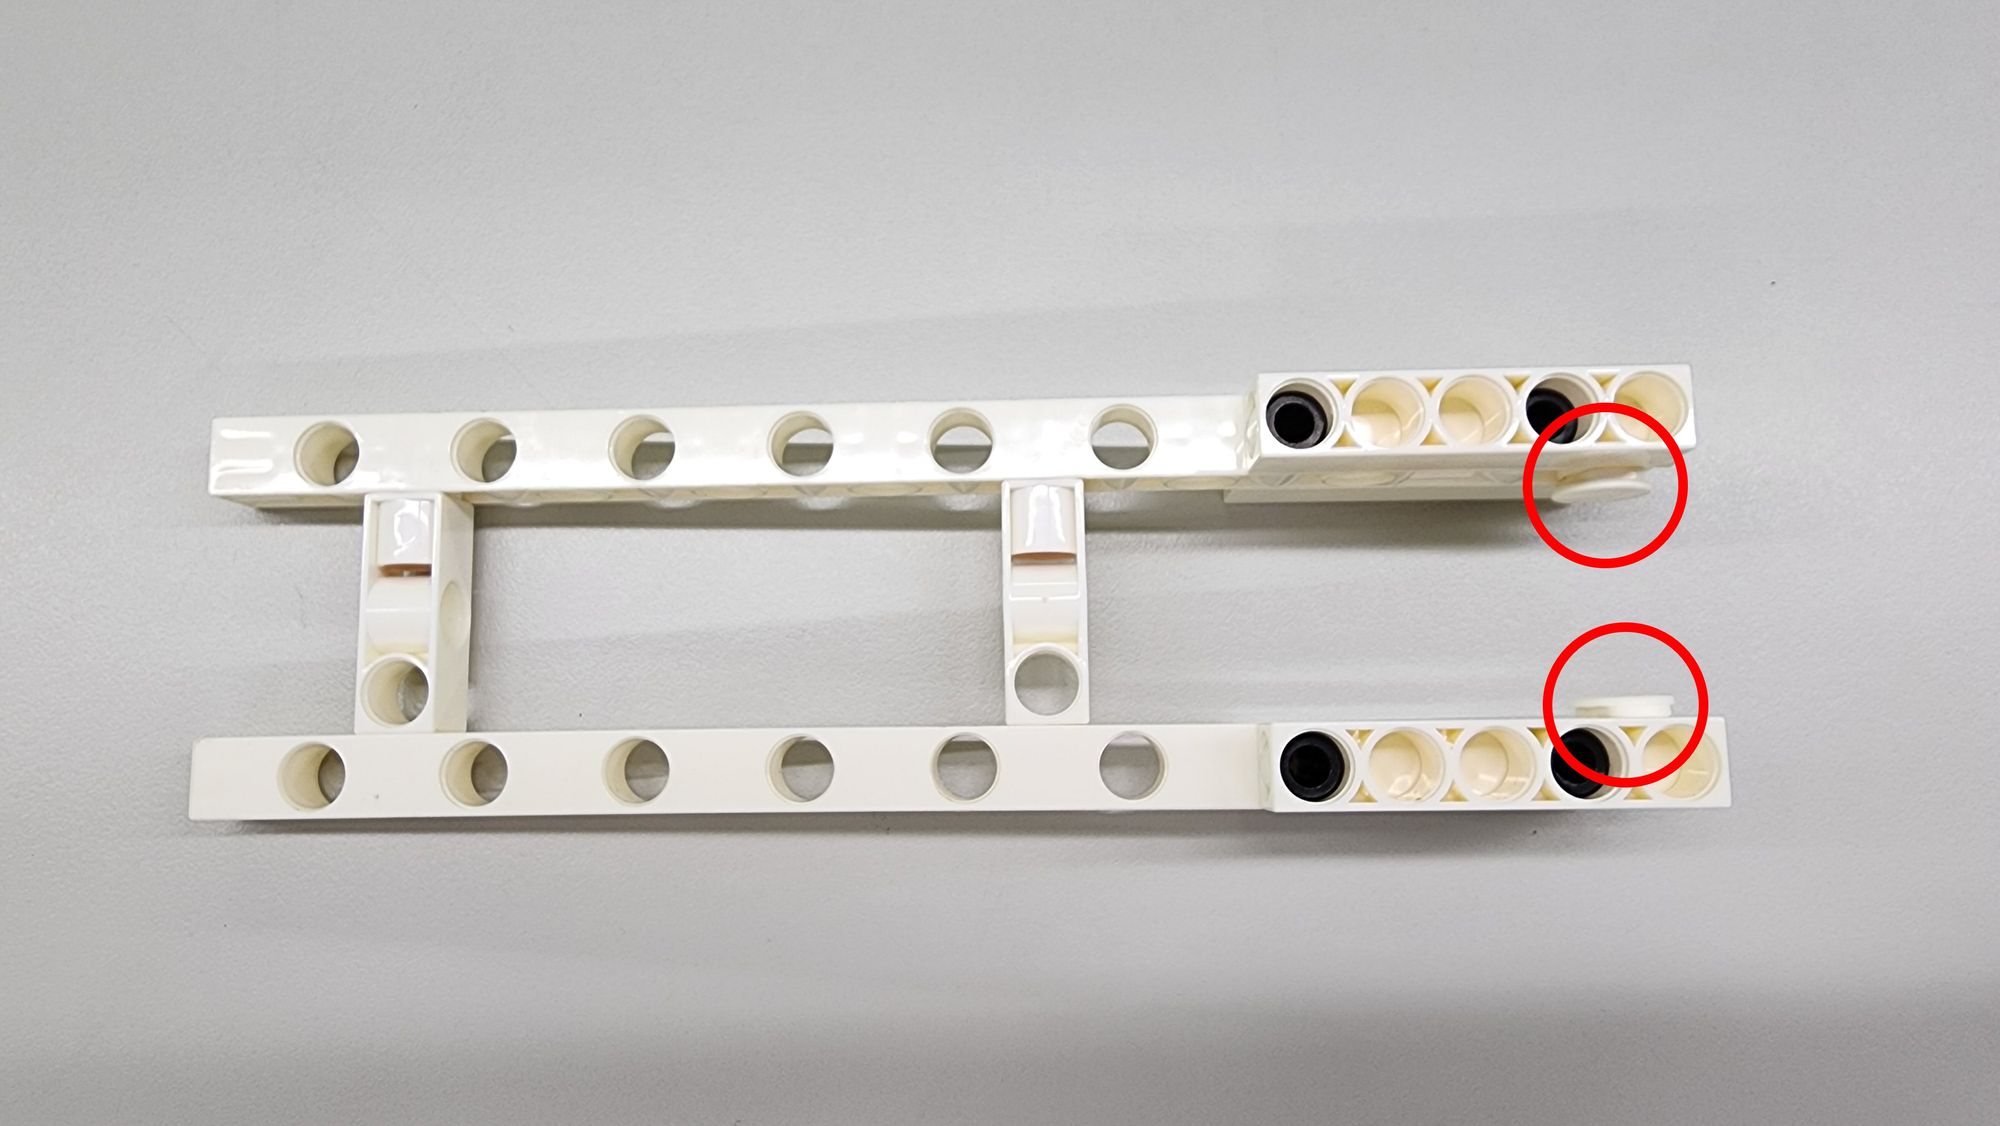
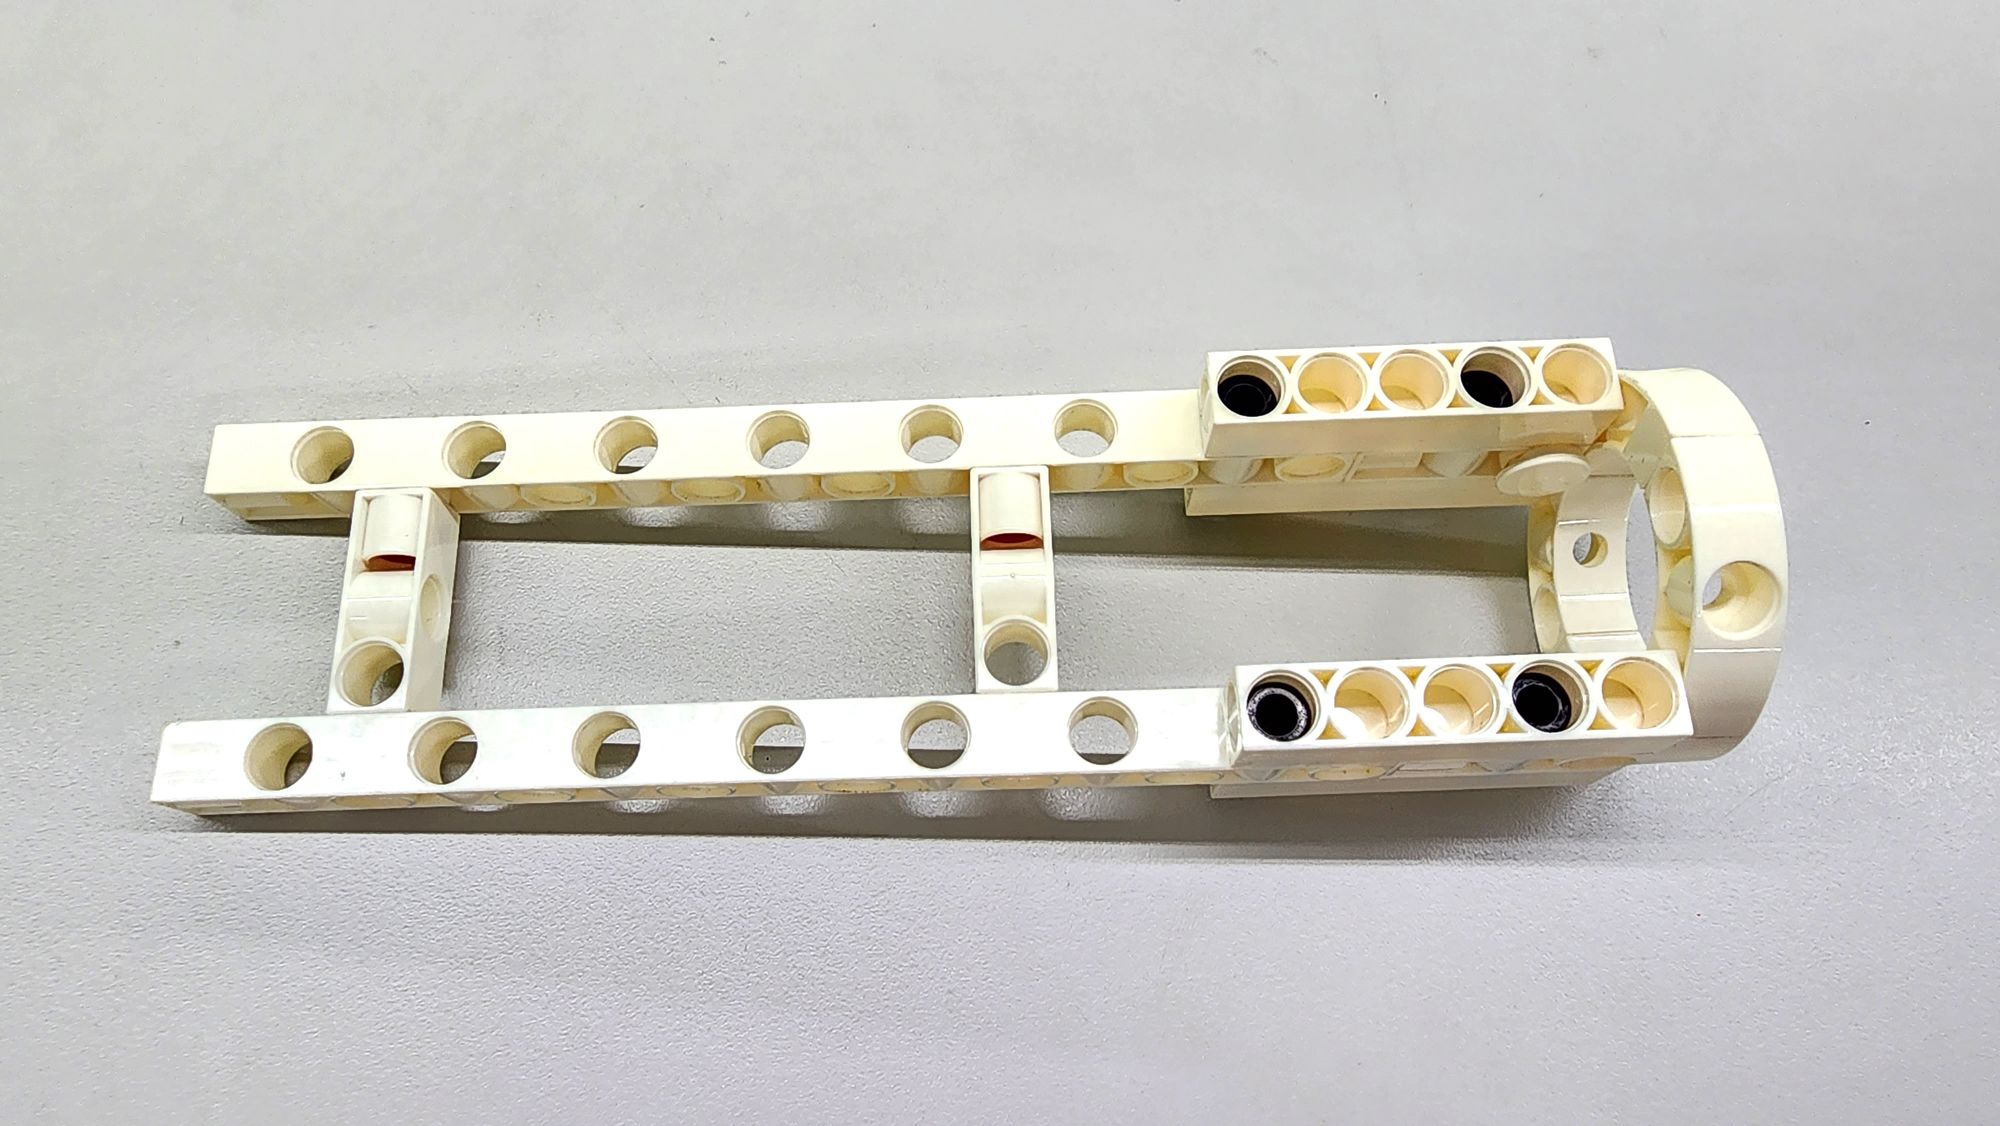
Next, use the part B to assemble the main body of the cork opener, ensuring that the directions of the two C-SHORT BUTTON FIXER are facing inward (Figure 8). After completing this step, attach the part C to the bottom of the main body (Figure 9).
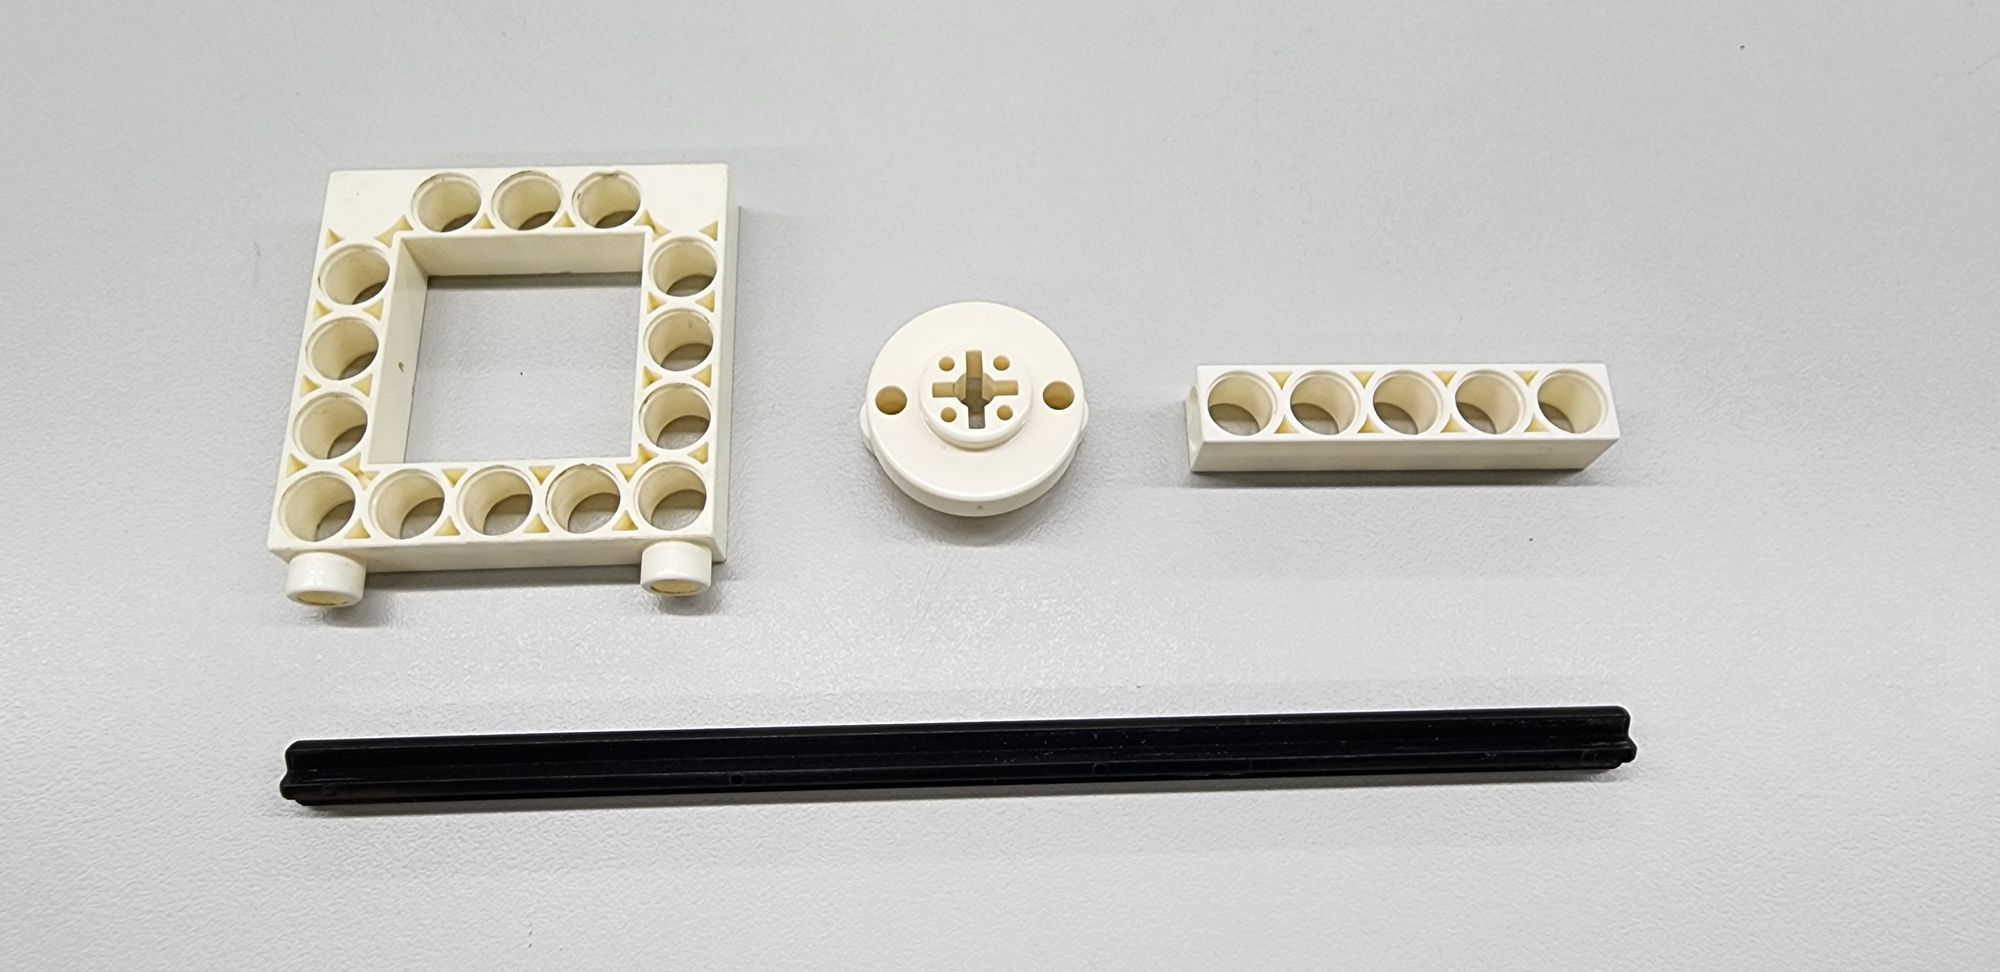
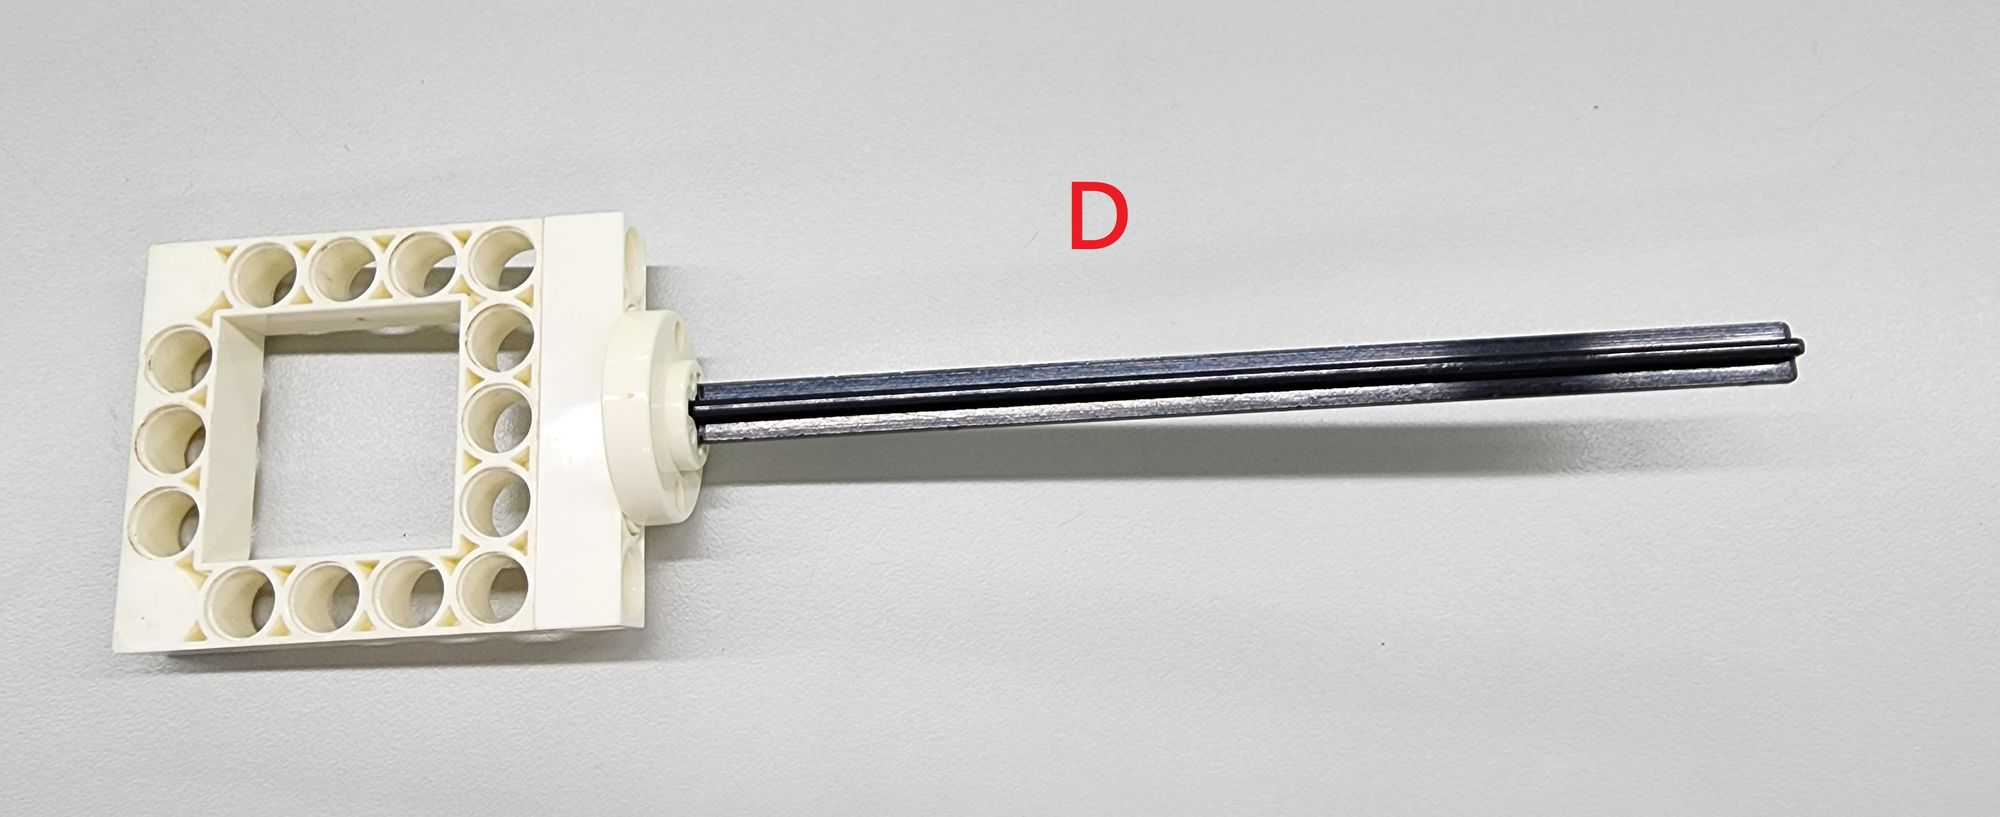
Step 4: We now make the handle of the cork opener with the C-5X5 FRAME, C-ROD CONNECTOR, C-5 HOLE ROD, and C-150mm AXLE Ⅰ(Figure 10). Assemble the part D accordingly (Figure 11).
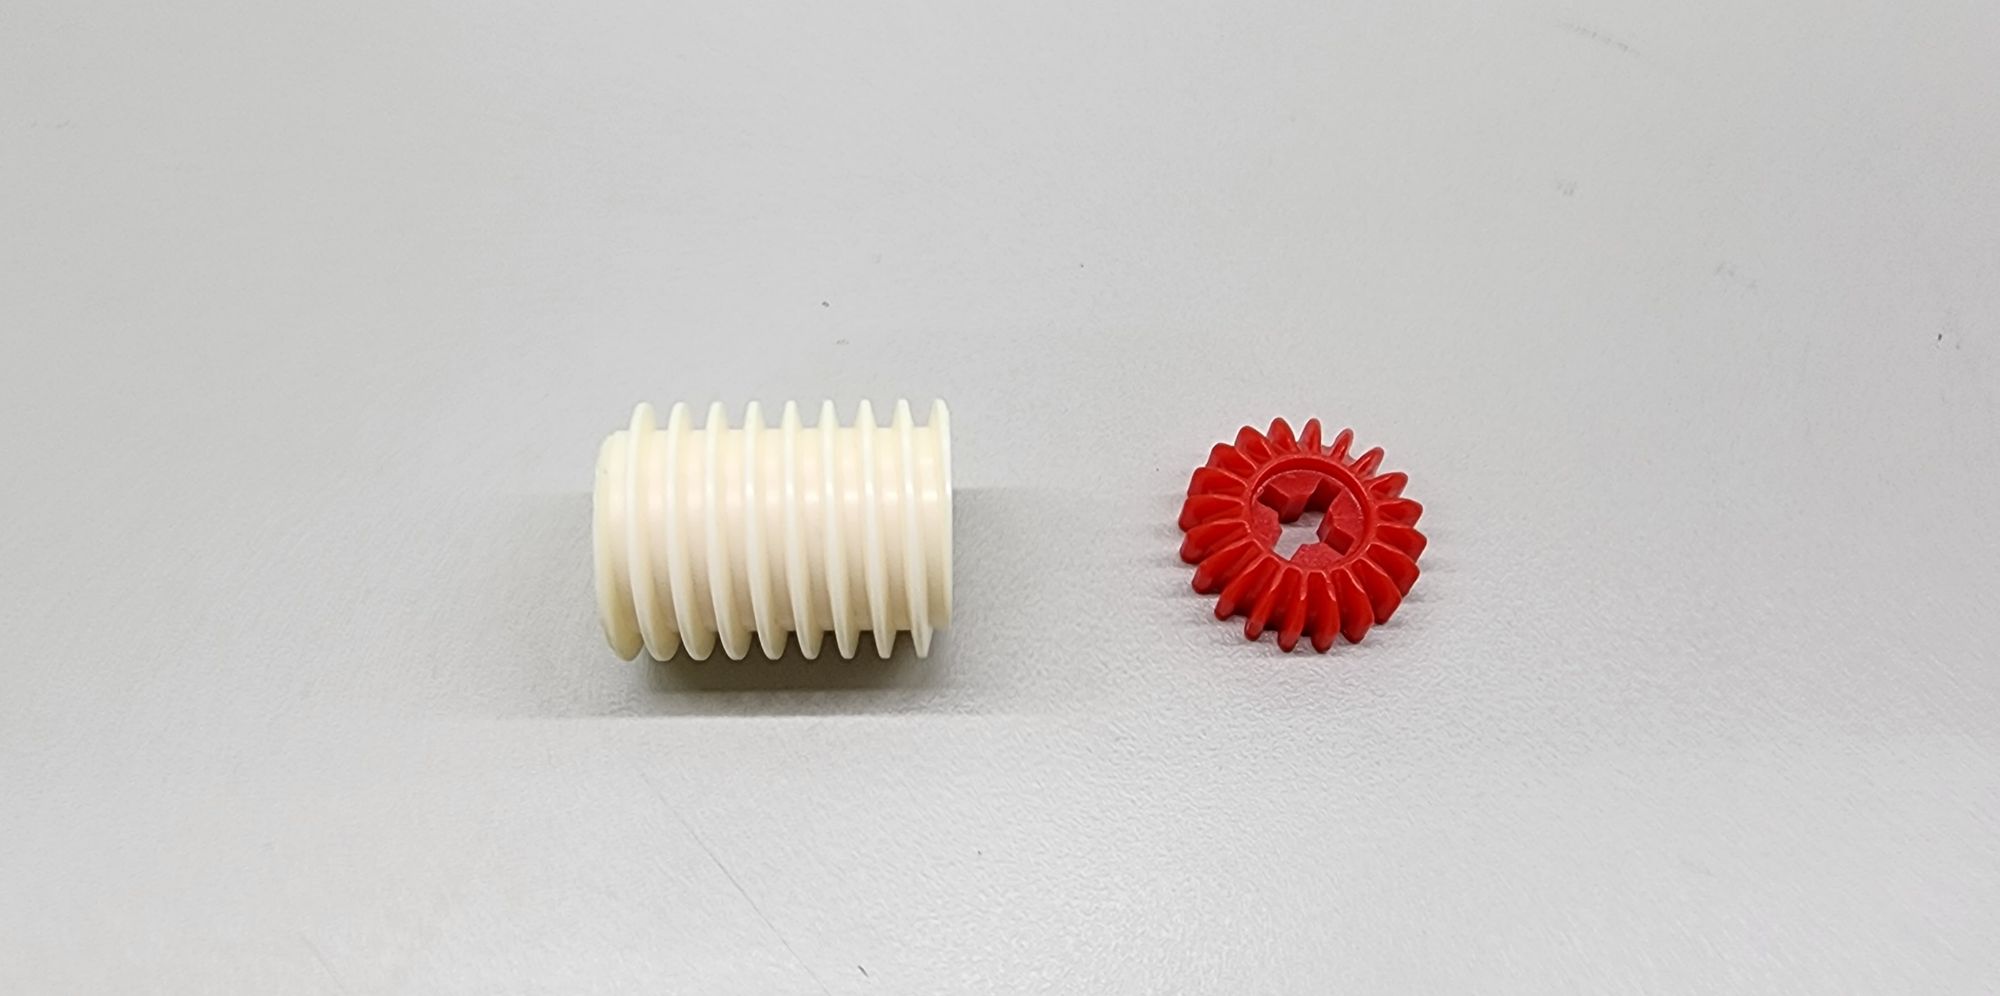
Step 5: We need to add a threaded structure to the handle. The components used here are the C-WORM GEAR and the C-20T GEAR (Figure 12).
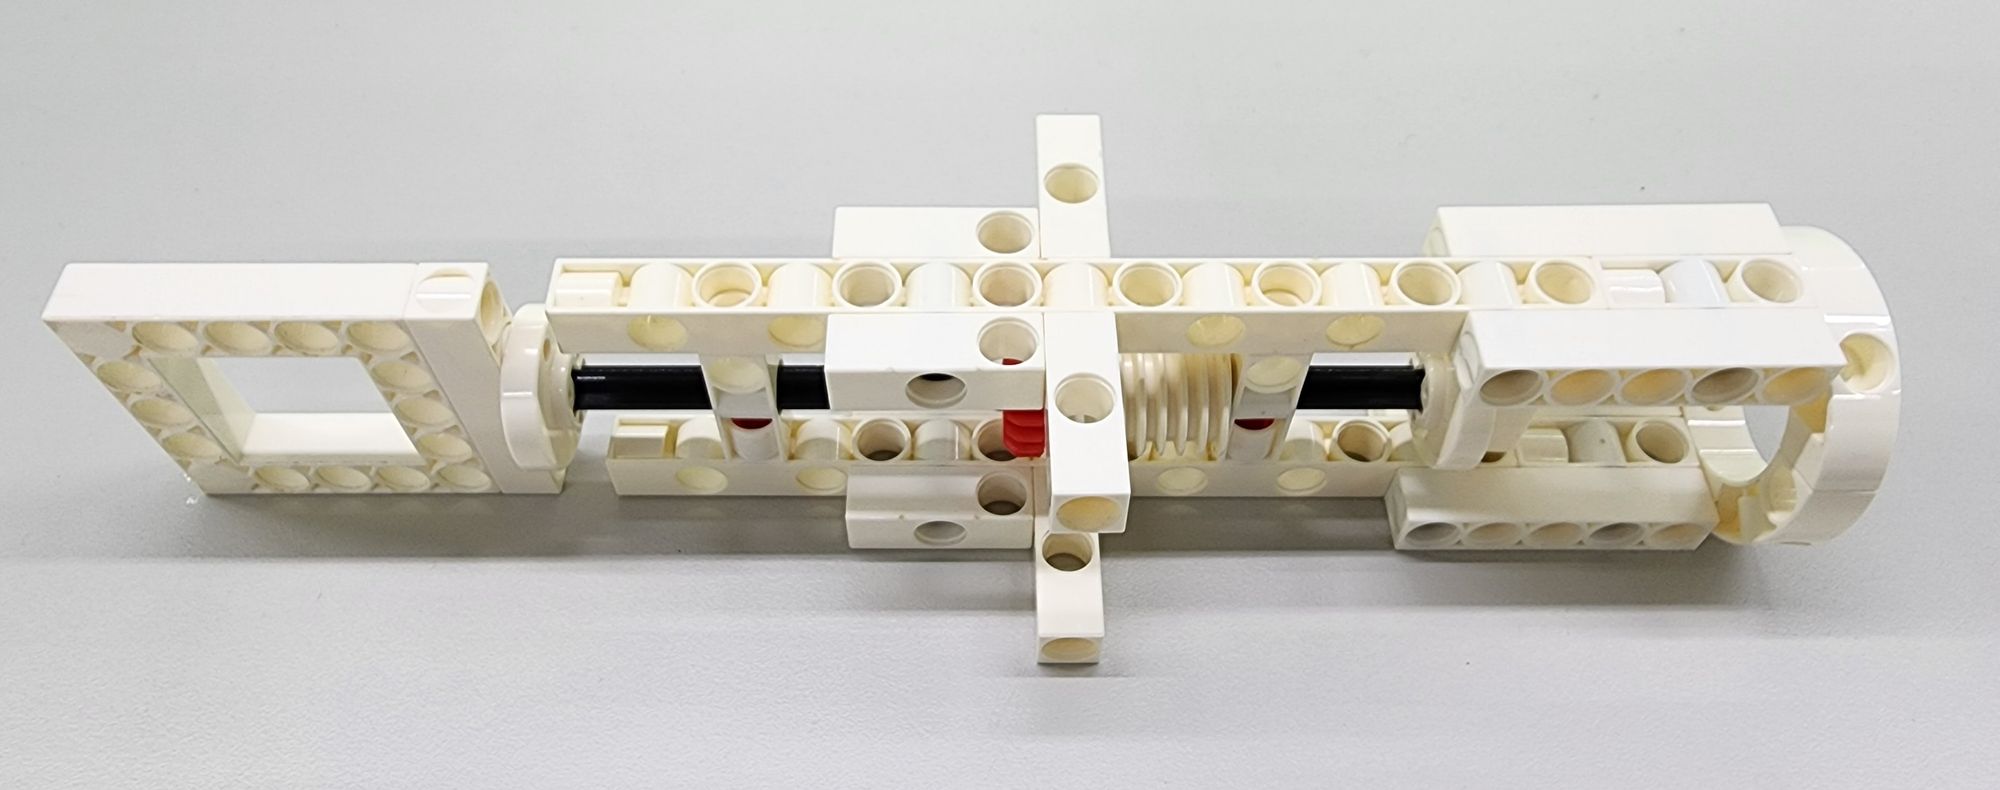
First, thread the C-150mm AXLE Ⅰ through the first C-3 HOLE DUAL ROD on the handle. Next, sequentially place the C-20T GEAR and the C-WORM GEAR. Finally, insert the C-150mm AXLE Ⅰ through the second C-3 HOLE DUAL ROD to complete the installation of the handle (Figure 13).

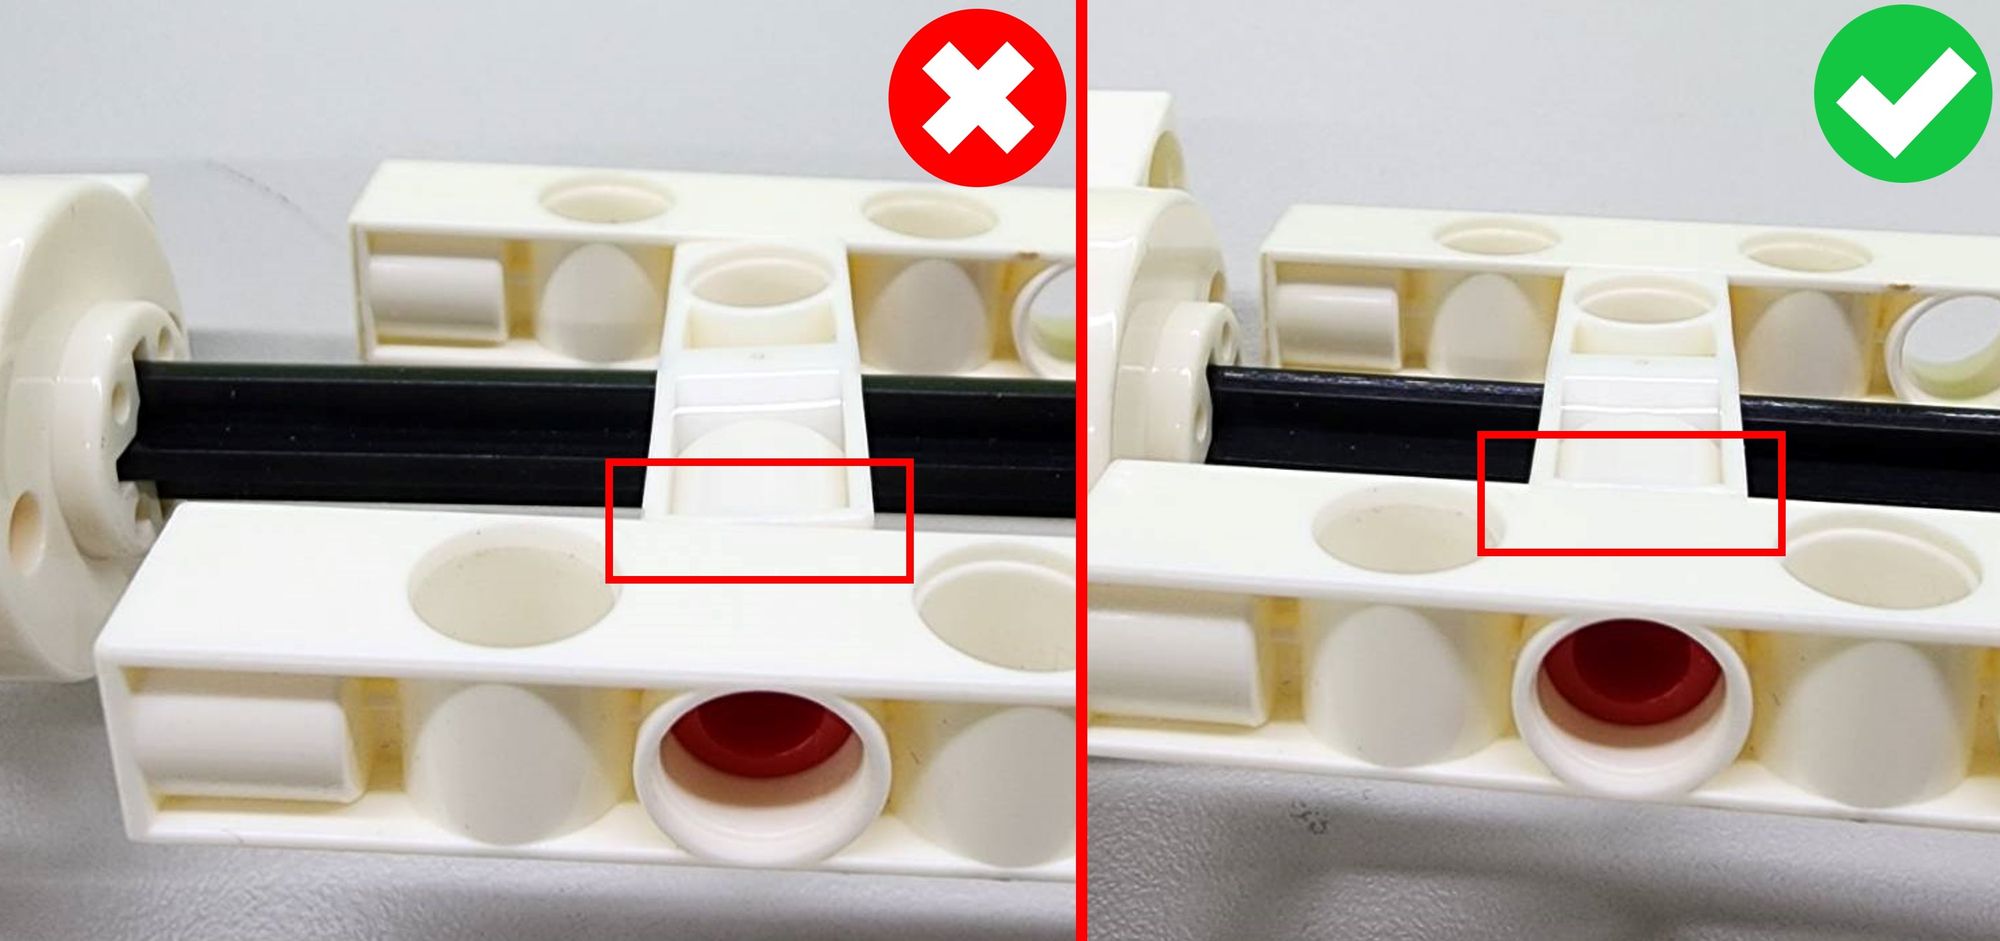
Once completed, try rotating the handle. If you find that there is too much friction hindering smooth rotation, you can adjust the angle of the holes by rotating the two C-3 HOLE DUAL ROD. When the angles of the two holes are perfectly aligned, the handle should rotate smoothly (Figure 14).
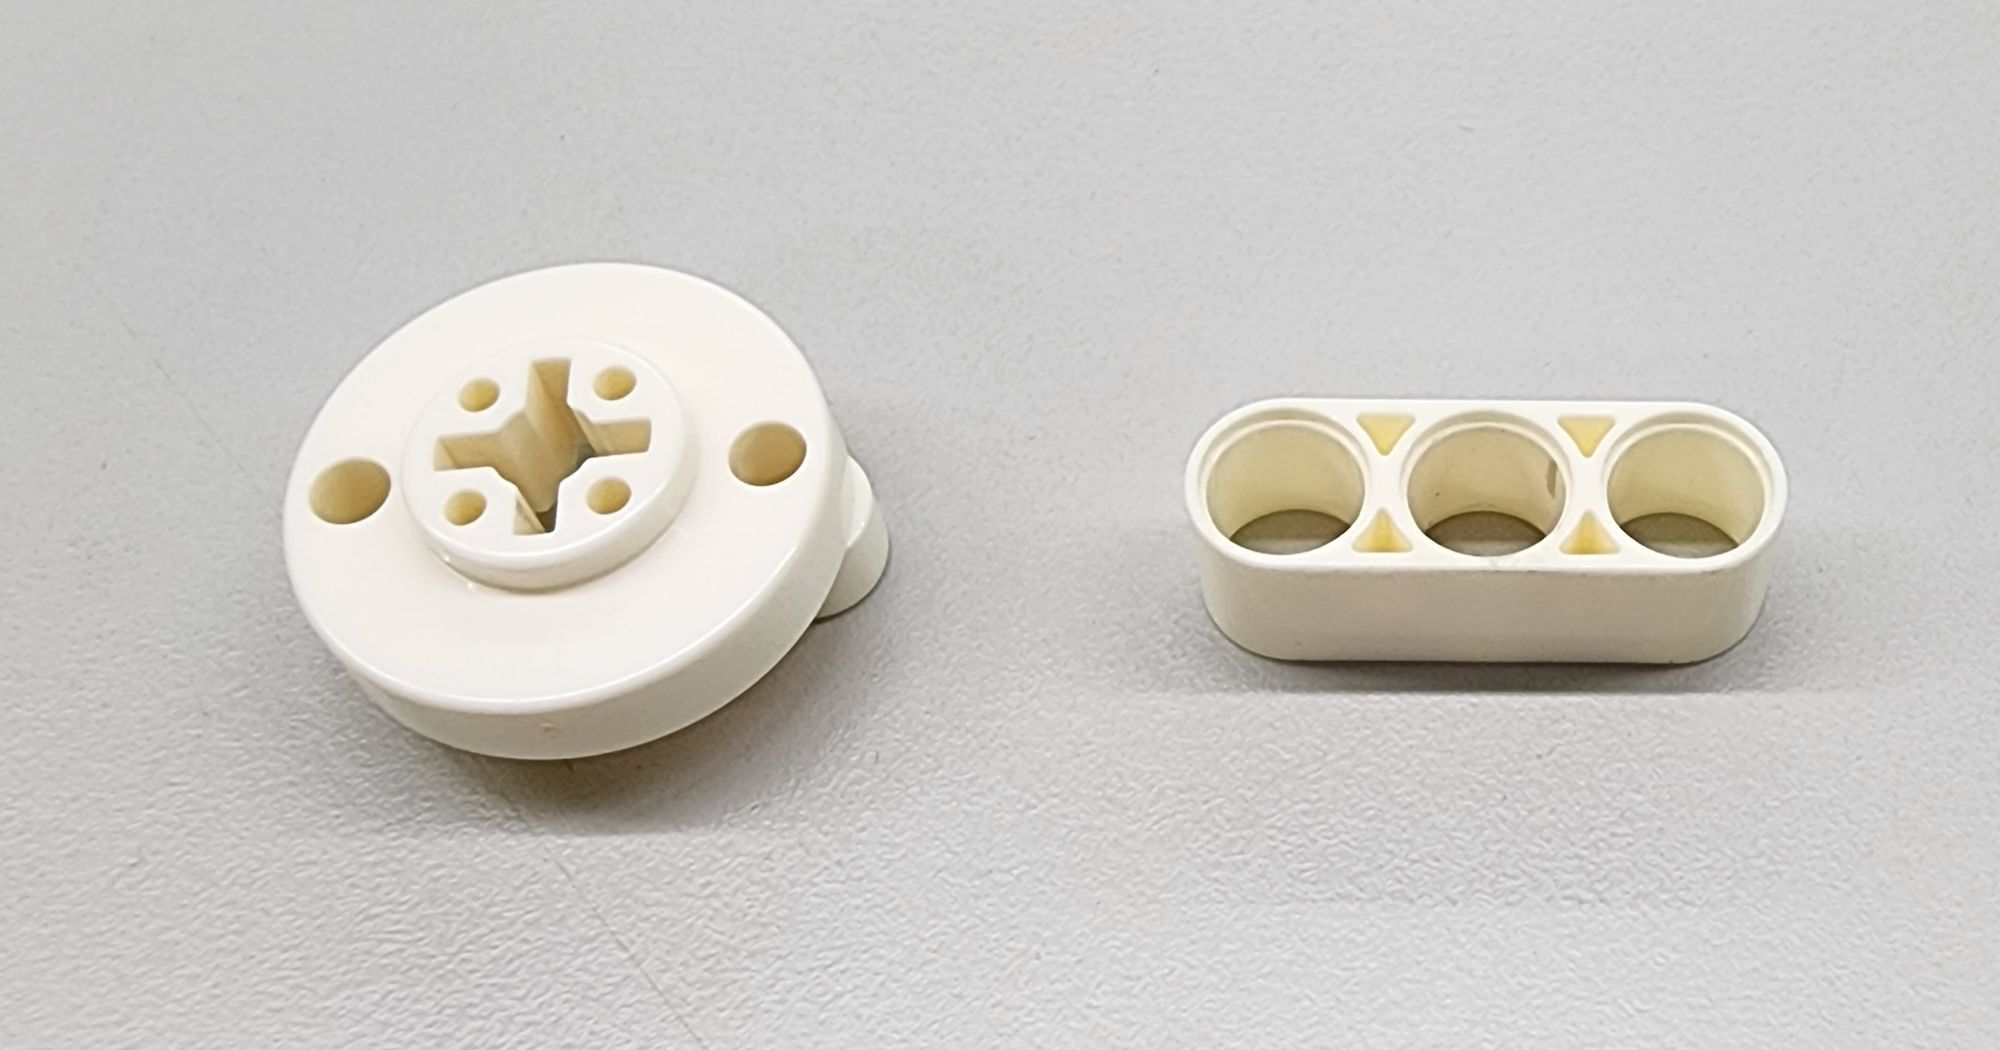
Step 6: We now make a screw that can lock into the cork. In this step, we need to use the C-ROD CONNECTOR and the C-3 HOLE ROUND ROD (Figure 15).
Combine the C-ROD CONNECTOR with the C-3 HOLE ROUND ROD, and then the structure of the screw is complete. This model is primarily used to simulate the operation of a cork opener, so we won't add actual screws. This part here only serves as a representation of the screw (Figure 16).
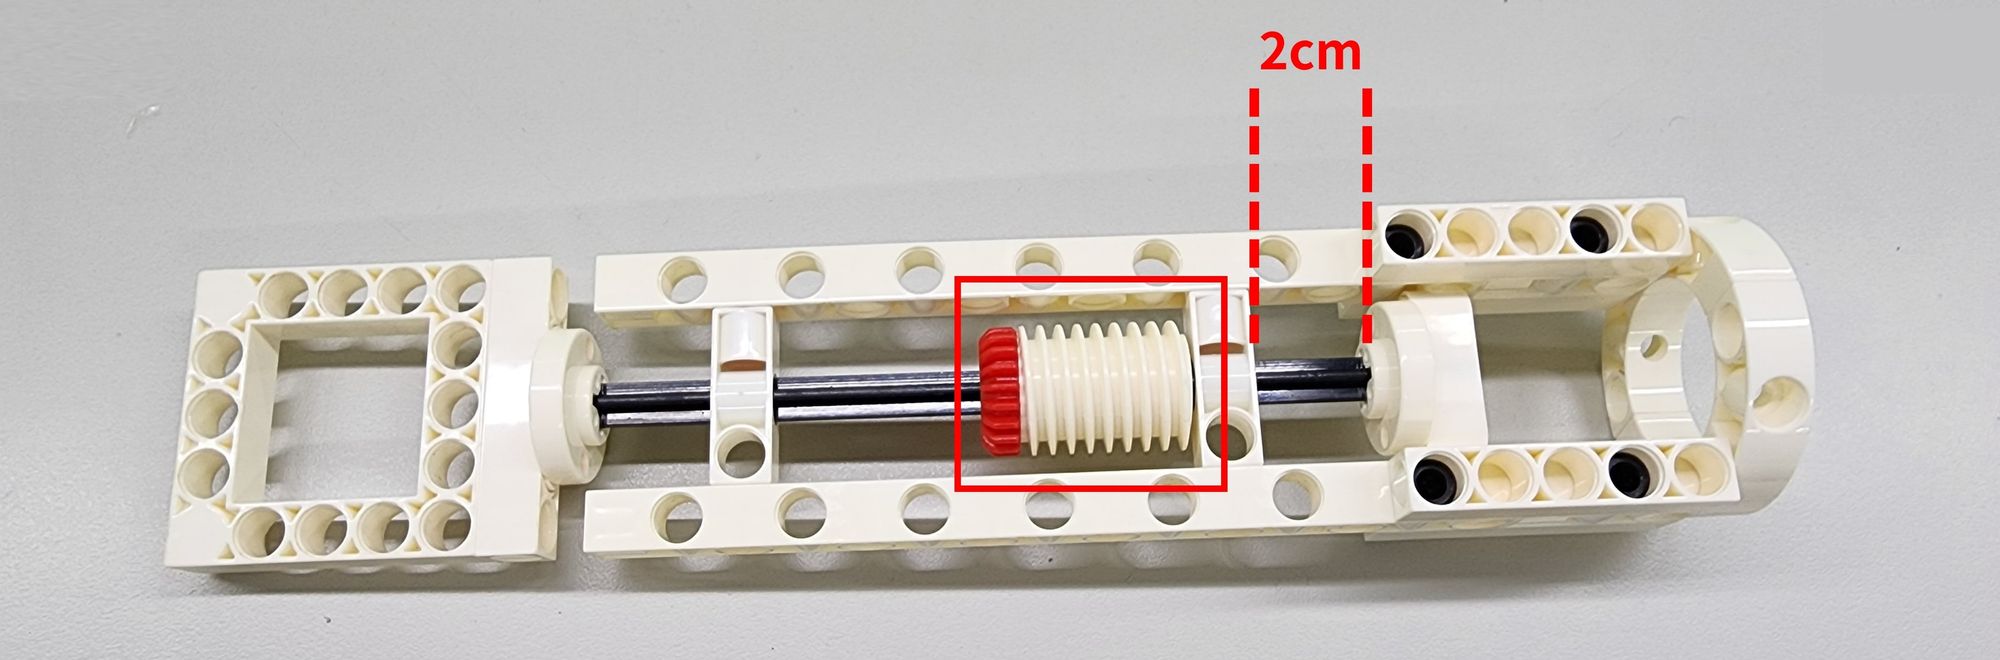
Next, combine the C-ROD CONNECTOR on the screw with the C-150mm AXLE Ⅰ on the handle to complete the installation of the screw. Finally, adjust the position of the C-WORM GEAR on the C-150mm AXLE Ⅰ accordingly. When the C-WORM GEAR contacts the lower C-3 HOLE DUAL ROD, there should be a 2 cm gap between the screw and the lower C-3 HOLE DUAL ROD (Figure 17).
Step 7: We now make the bracket to secure the handle, primarily using the C-3 HOLE DUAL ROD and B-SHORT PEG. Assemble them following the figure below (Figure 18) to complete these four sets of part E (Figure 19).
Next, assemble the four sets of part E on both sides of the main body's C-15 HOLE DUAL ROD accordingly (Figure 20).
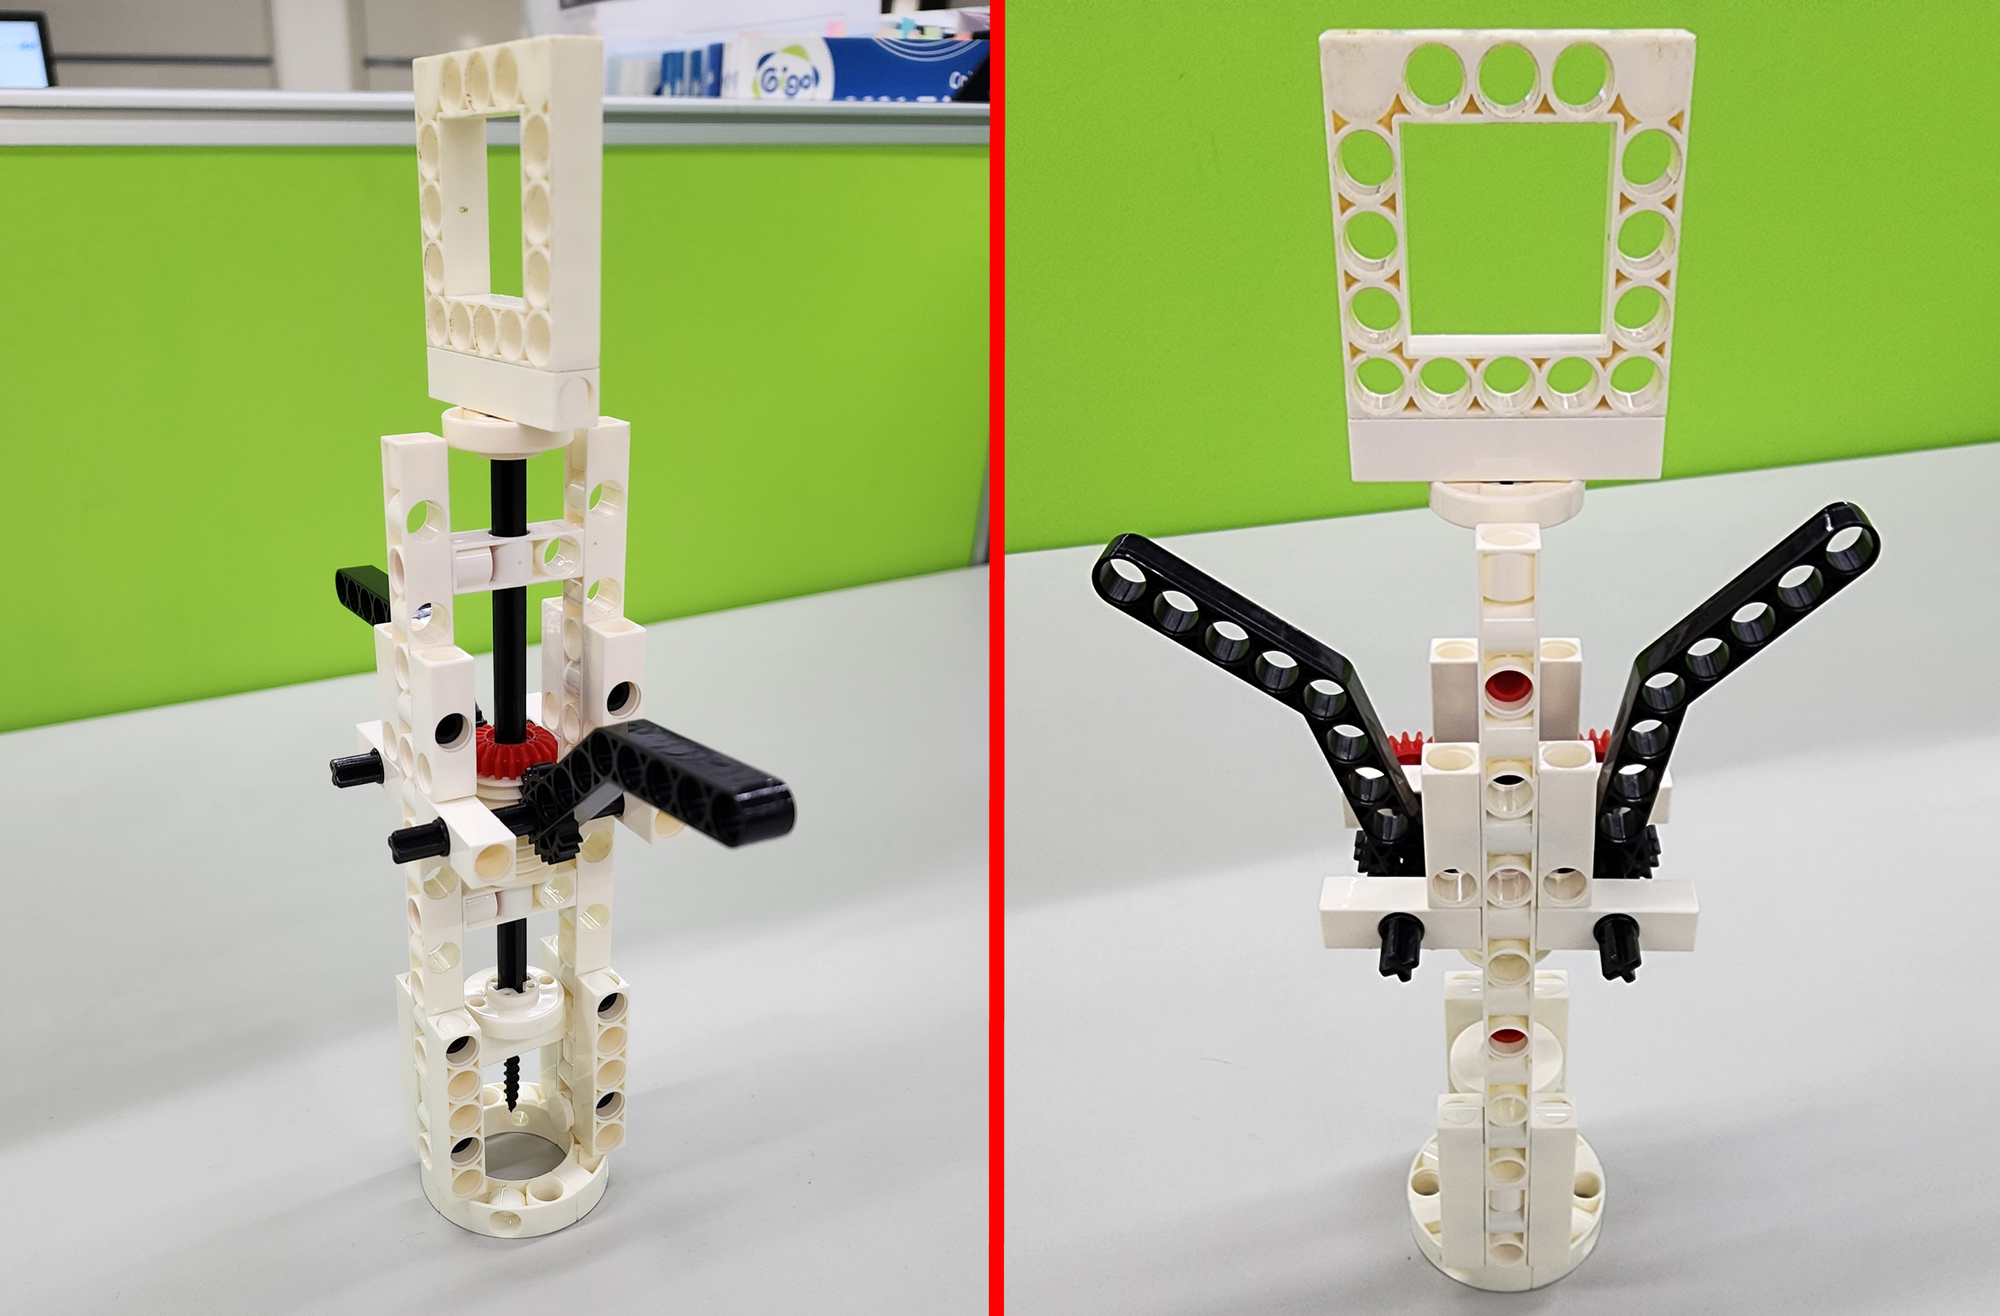
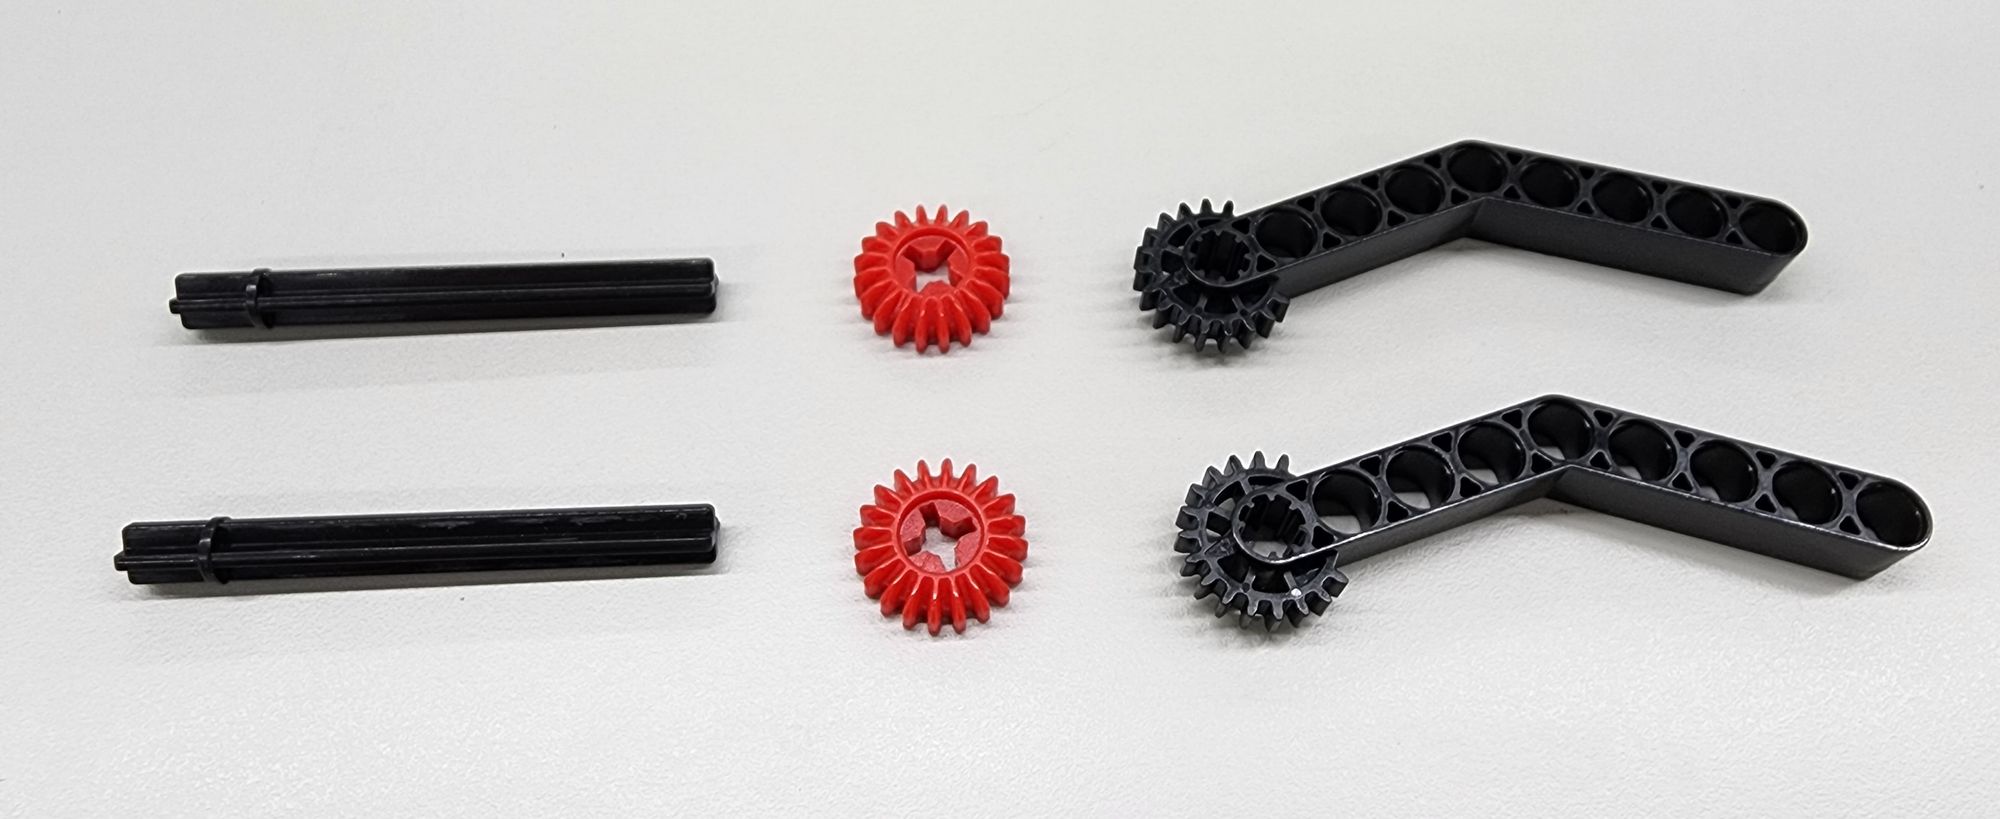
Step 8: We now install the handle with the C-70mm AXLE Ⅱ, the C-20T GEAR, and the C-145°CRANKSHAFT GEAR-A (7411-W10-C1D) (Figure 21).
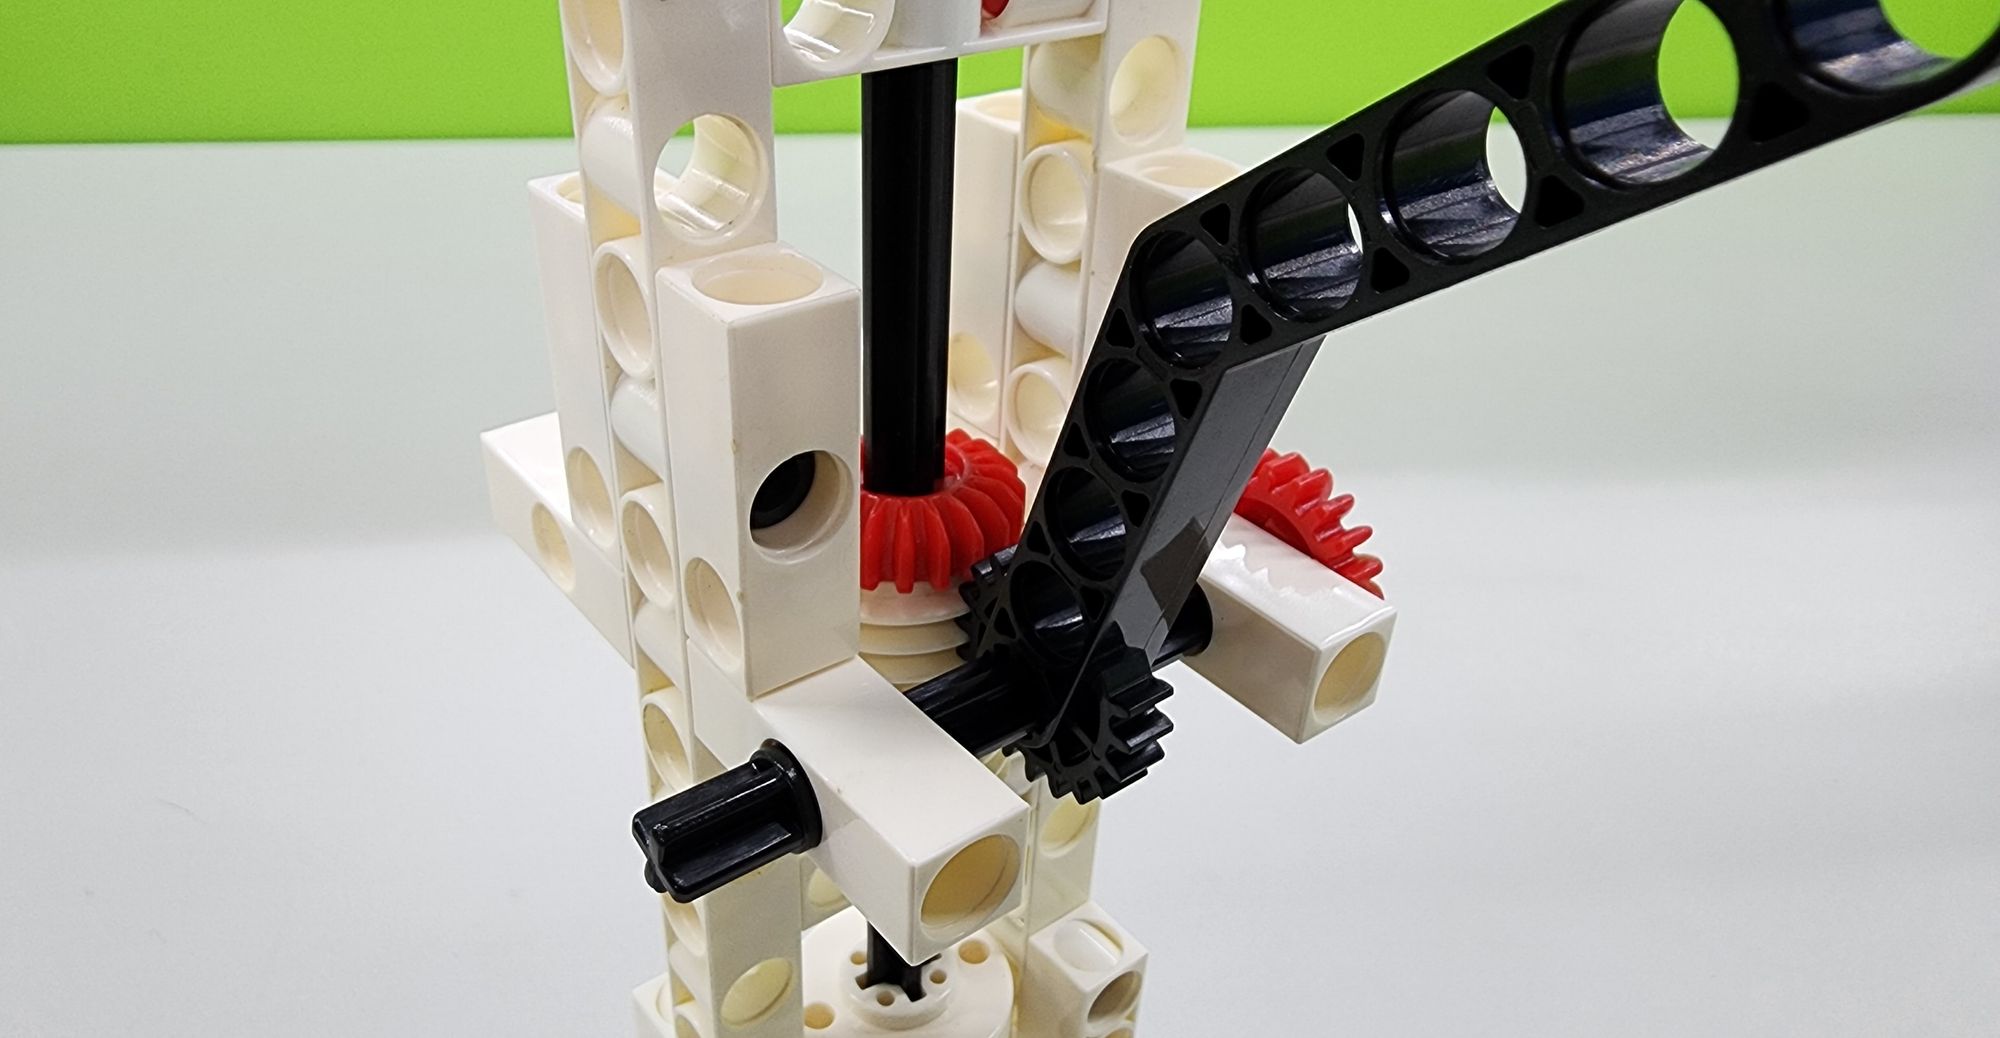
First, thread the C-70mm AXLE Ⅱ through one side of the C-3 HOLE DUAL ROD, passing through the middle of the C-145°CRANKSHAFT GEAR-A. Then, thread the C-70mm AXLE Ⅱ through the other side of the C-3 HOLE DUAL ROD. Insert the C-20T GEAR to secure the C-70mm AXLE Ⅱ, and finally, adjust the position of the C-145°CRANKSHAFT GEAR-A to the center. Confirm that the C-145°CRANKSHAFT GEAR-A and the gear of C-WORM GEAR mesh with each other. The installation of the handle is now completed (Figure 22).
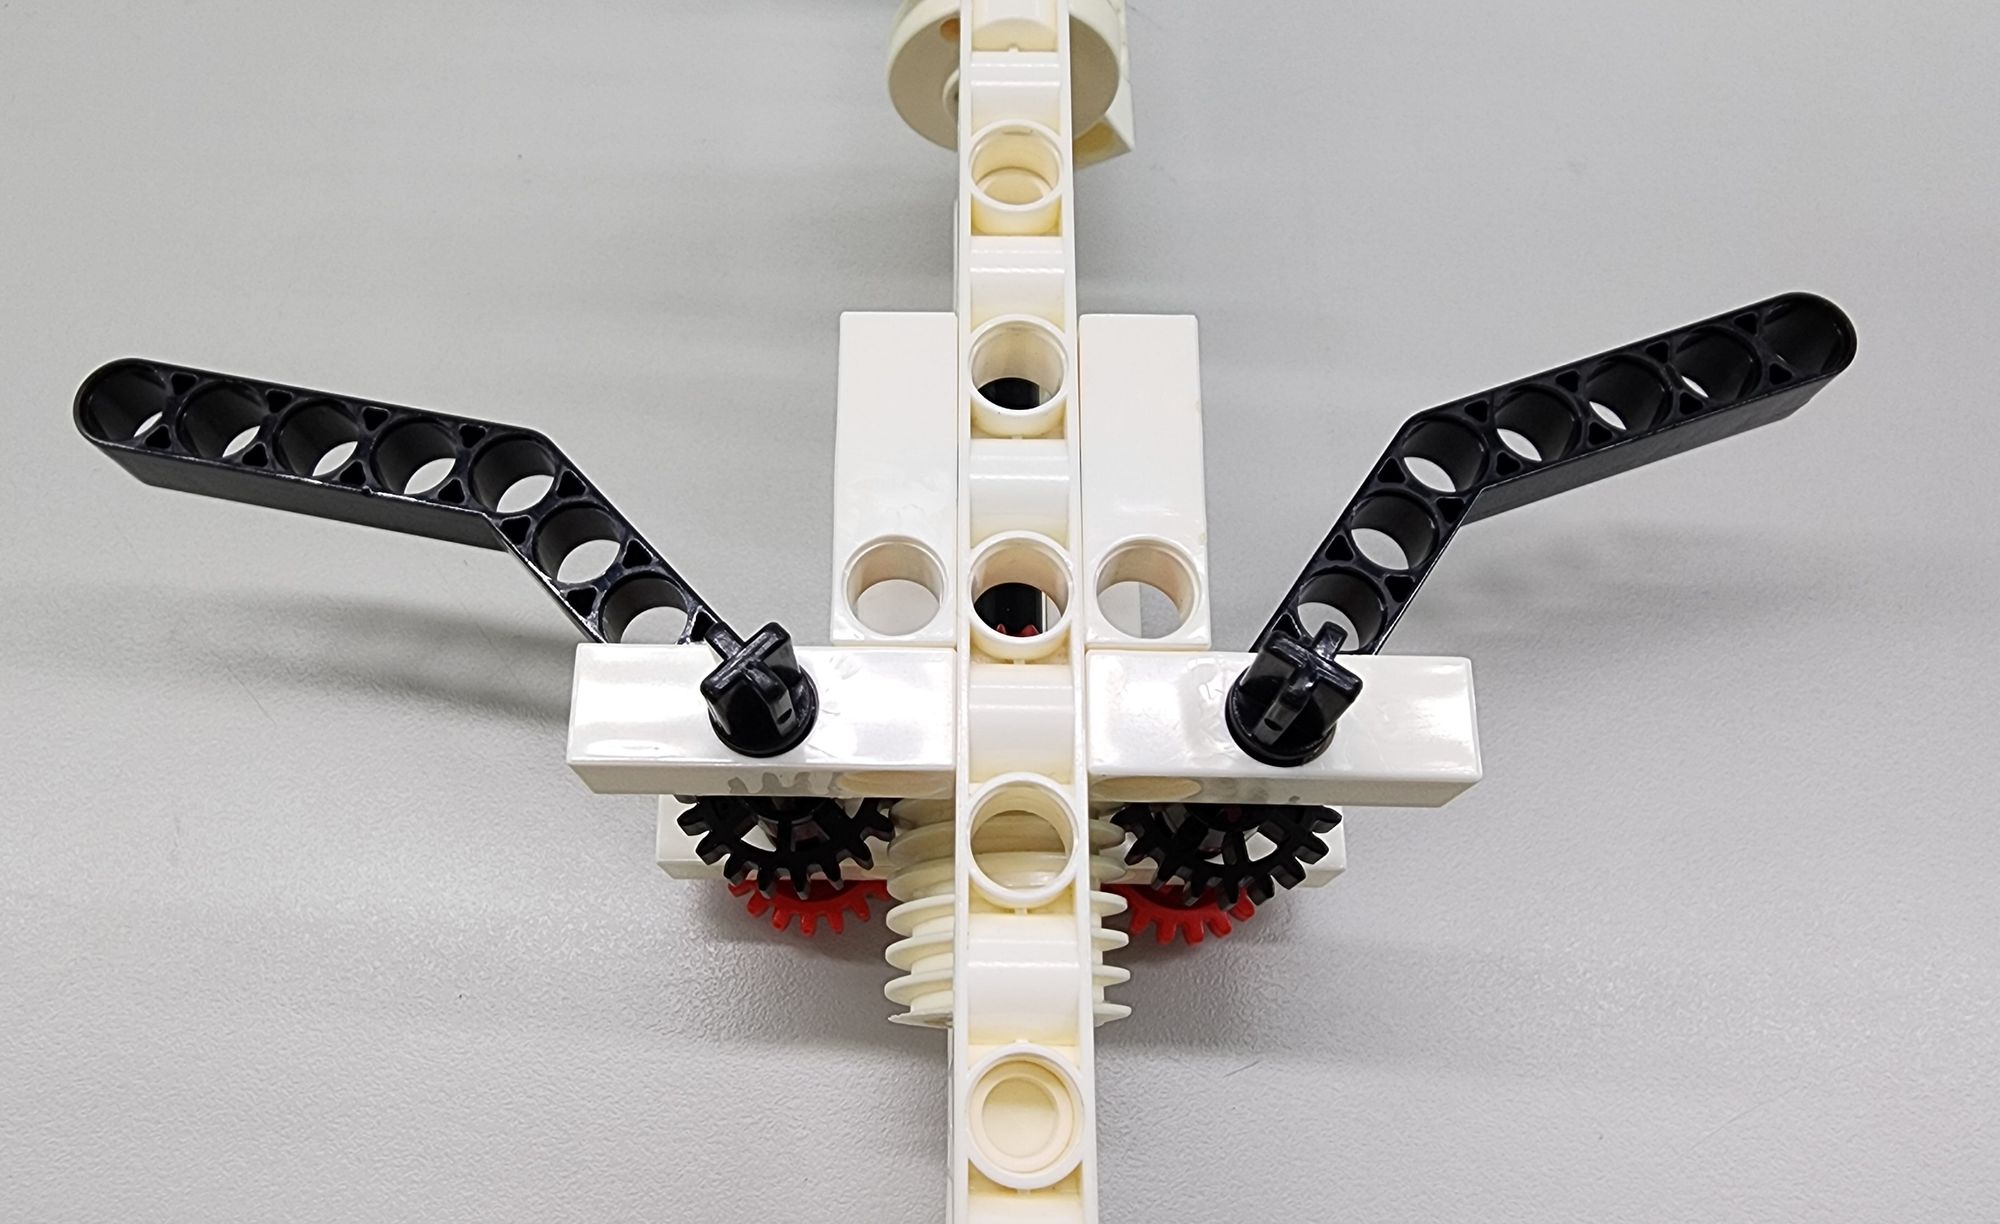
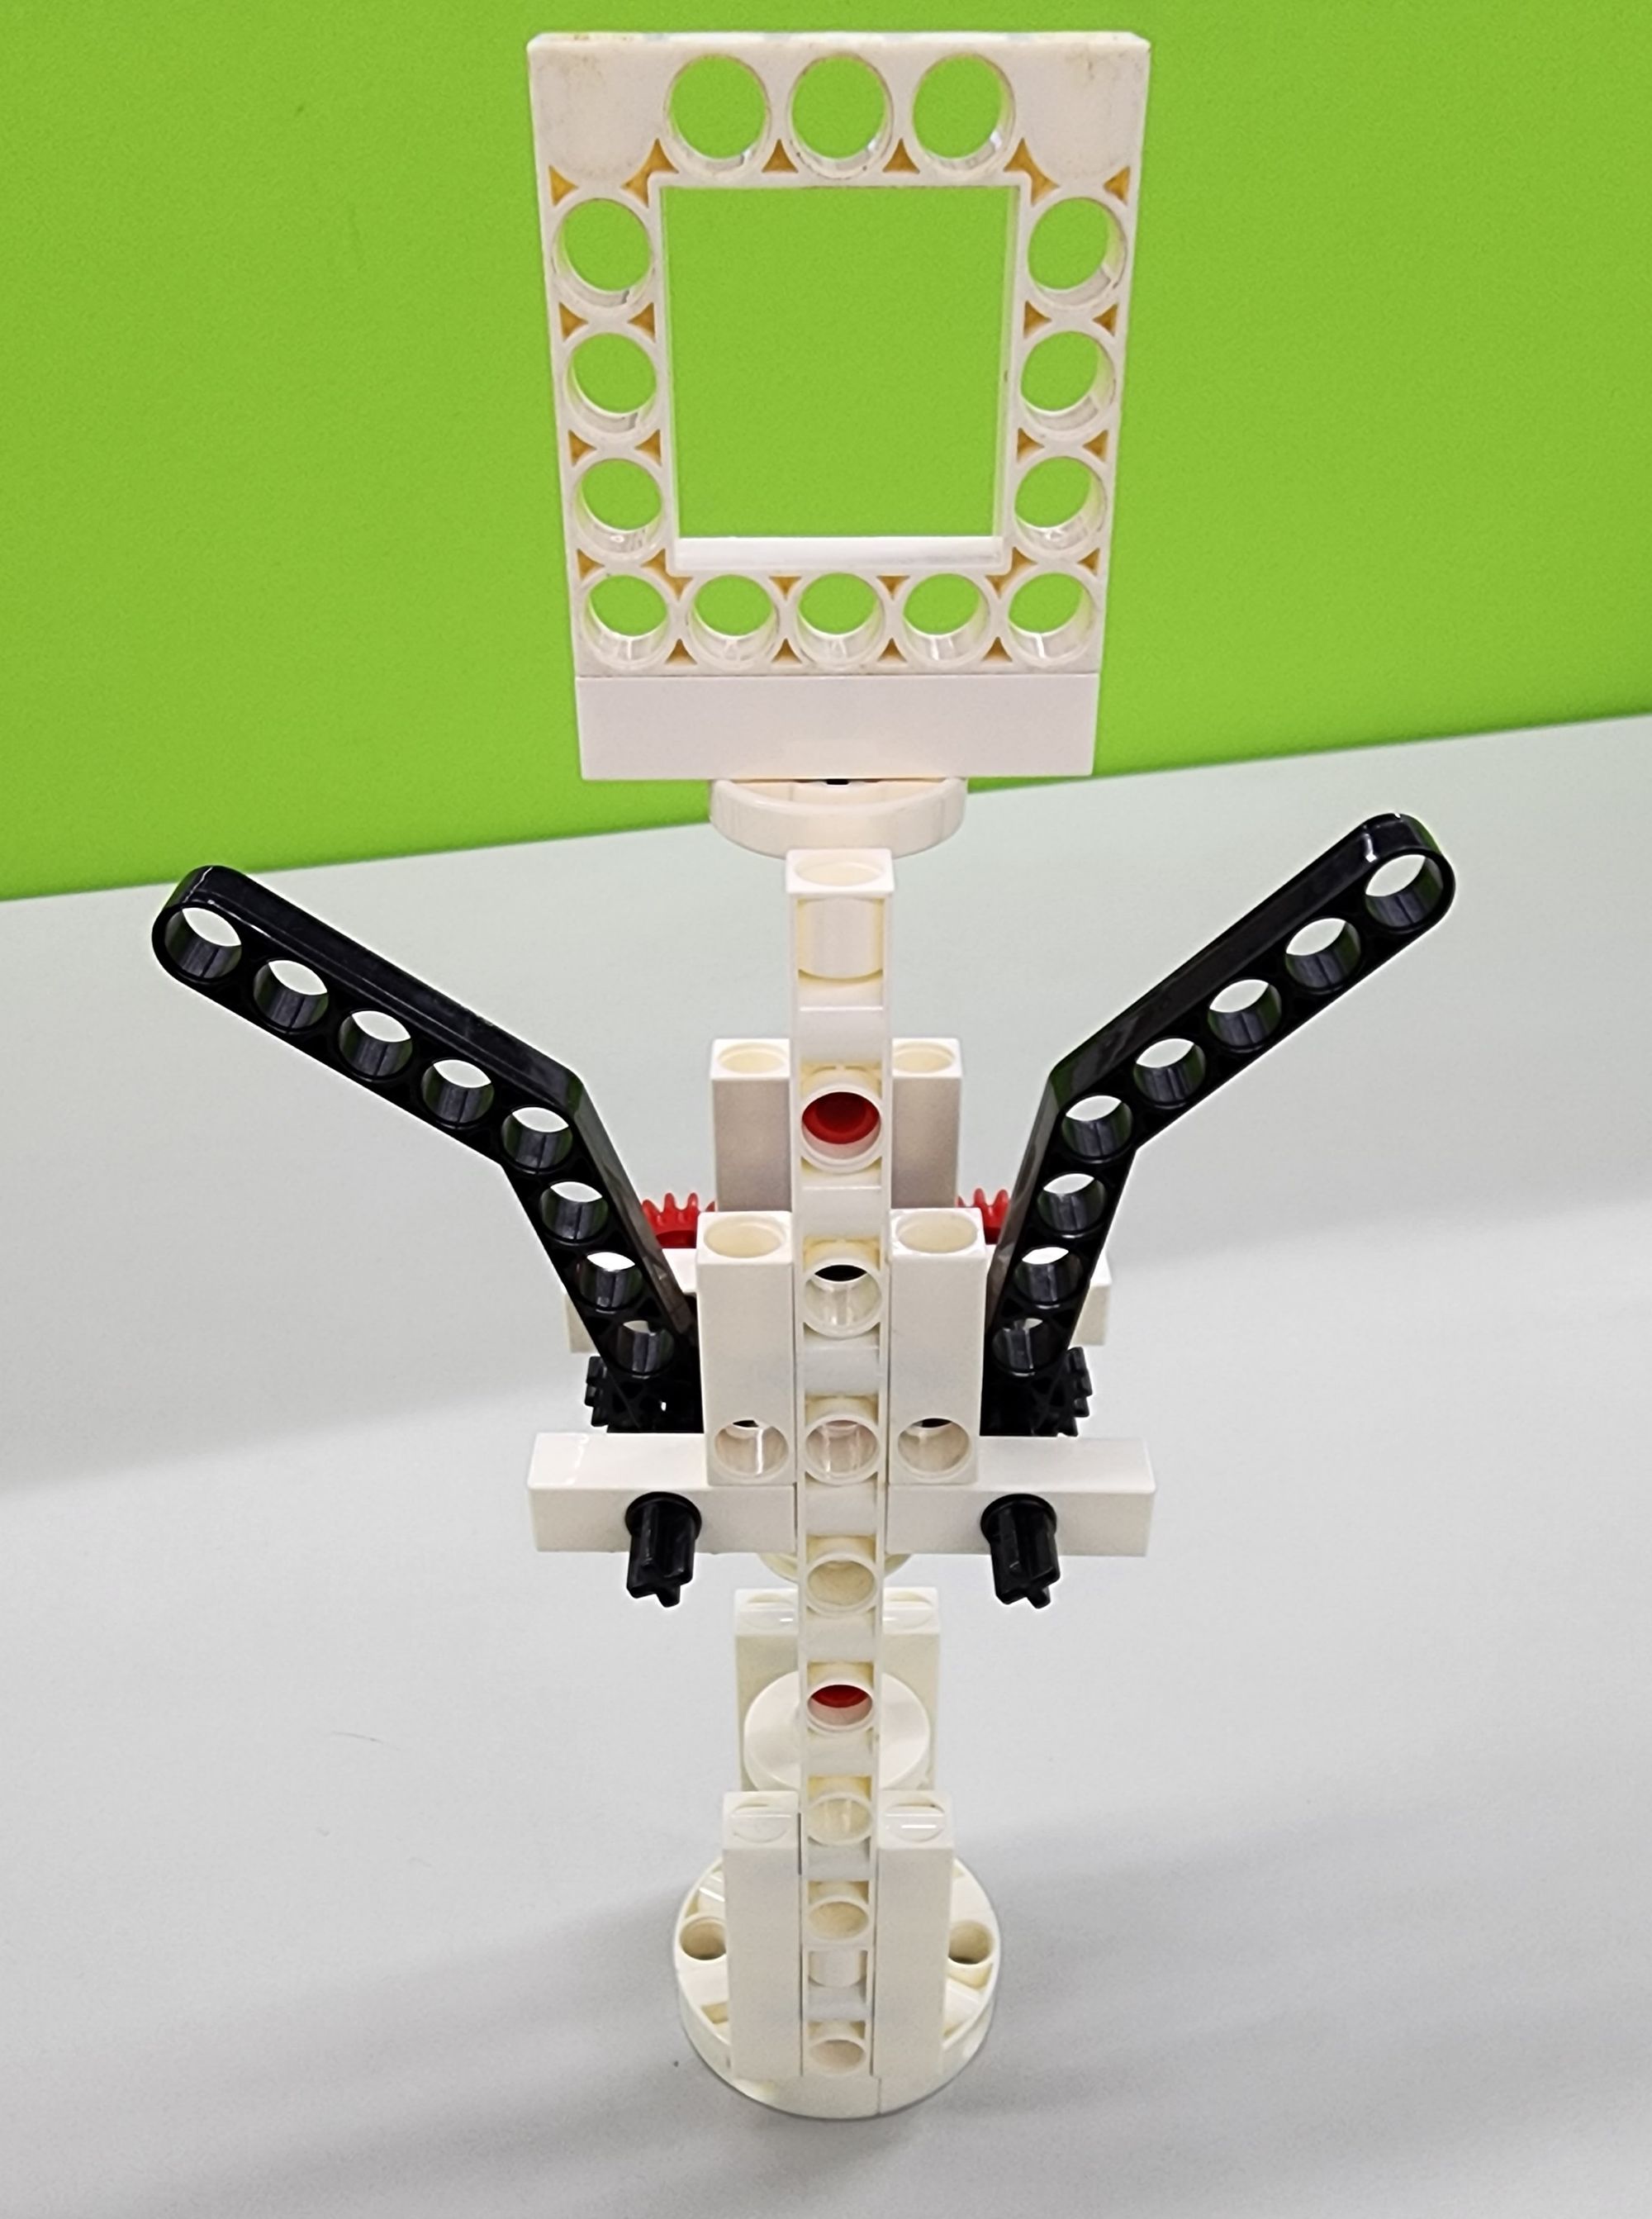
Next, install the handle on the other side in the same way. During installation, try to ensure that the heights of the handles on both sides are equal, and their shapes are symmetrical (Figures 23). In this way, the model of the cork opener is complete (Figure 24).
◆ Operating Instructions
Now, let's try operating the cork opener!٩(๑>∀<๑)۶(Video 1)
To start, rotate the handle counterclockwise, simulating the process of screwing the screw into the cork. As we turn the handle, the handles on both sides will gradually lift due to the action of the worm (00:05~00:16). Once the screw is fully embedded in the cork, the handles will reach their highest position. Next, press down on the handles; through the engagement of gears, the entire handle will lift upward, pulling out the entire cork.
◆ Bottle Opening Demonstration
After putting effort into completing the cork opener model, it would be disappointing not to witness its bottle-opening prowess, wouldn't it? Don't worry! Teacher Raccoon is here to demonstrate how to enhance the cork opener model and use it to open a bottle's cork.
Before we proceed, Teacher Raccoon wants to remind everyone that the following modifications involve a higher level of difficulty. If you want to give it a try, make sure that an adult handles the process!
◆ Conclusion:
The cork opener model created this time may appear simple in both appearance and mechanism, but it hides many intricacies. Calculating the height configuration of the axle and the displacement distance of the worm, for example, took Teacher Raccoon quite some time to complete the model. Many things in life are similar; without trying, one will never know how challenging they can be. Therefore, try experimenting with various things, as only through firsthand experience can you gain your most authentic feelings.
That's it for today's sharing. If you enjoyed this article, you can share it to your friends. Goodbye!
◆ Scientific Principles
The cork opener model utilizes mechanisms such as the worm, rack and pinion, and spiral, with the worm part being the most crucial. It serves the dual function of a worm and a rack. When the handle is rotated counterclockwise, it functions as a worm, gradually lifting the handles by means of a reduction mechanism, providing space for downward pressure. When pressing down on the handles, it functions as a rack, utilizing engagement with the C-145°CRANKSHAFT GEAR-A to generate upward force and extract the cork (refer to the above video 1). The spiral is one of the six simple machines, commonly seen in everyday items like screws and bottle caps. In this context, it is used for a 1-1/4" flat head screw to secure it into the cork. For a more in-depth understanding of the spiral, you can refer to the Science in daily life: EP8 – Hand-operated Jack article.
Curriculum(NGSS):
K-2-ETS1-1 Engineering Design
K-PS2-2 Motion and Stability: Forces and Interactions
HS-PS3-3 Design, build, and refine a device that works within given constraints to convert one form of energy into another form of energy.
#Gigo#Gigo Lab#Learning Lab#Fun Lab
◆Reference:
 Contributors to Wikimedia projects
 Contributors to Wikimedia projects
Please sign in to vote.