[Educational Time Machine EP8] micro:bit x Disco Robot

![[Educational Time Machine EP8] micro:bit x Disco Robot](/content/images/size/w2000/2023/11/318477.jpg)
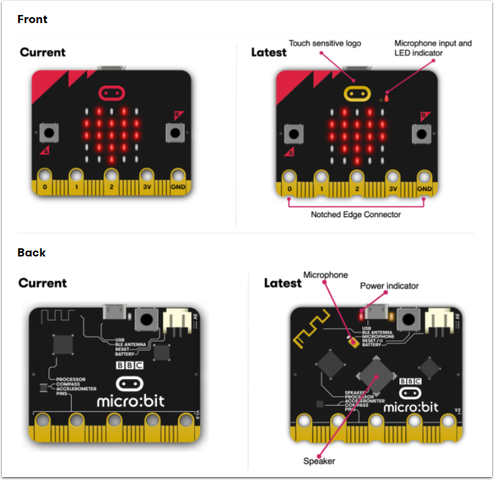
As market demands evolve rapidly, and competition becomes more intense, the ability to provide continuously improving products in line with the demands of the times is a critical factor for a company's survival. Therefore, in 2020, three years after the release of micro:bit v1.5, the UK's BBC developed micro:bit v2.0. It incorporated more sensors, enhanced hardware performance, and a more user-friendly design. This development allowed creators worldwide to unleash their creativity without limitations.
Micro:bit v2.0 has a similar appearance to v1.5 but extends the following features:
1. Built-in speaker, microphone, and touch sensor (improving creativity).
2. Toothed pins (convenient for connecting alligator clips).
3. More LED indicators (for easier status checking, e.g., downloading, power switch).
4. A noticeable yellow antenna (improving the stability of broadcasting, remote control, and Bluetooth functions).
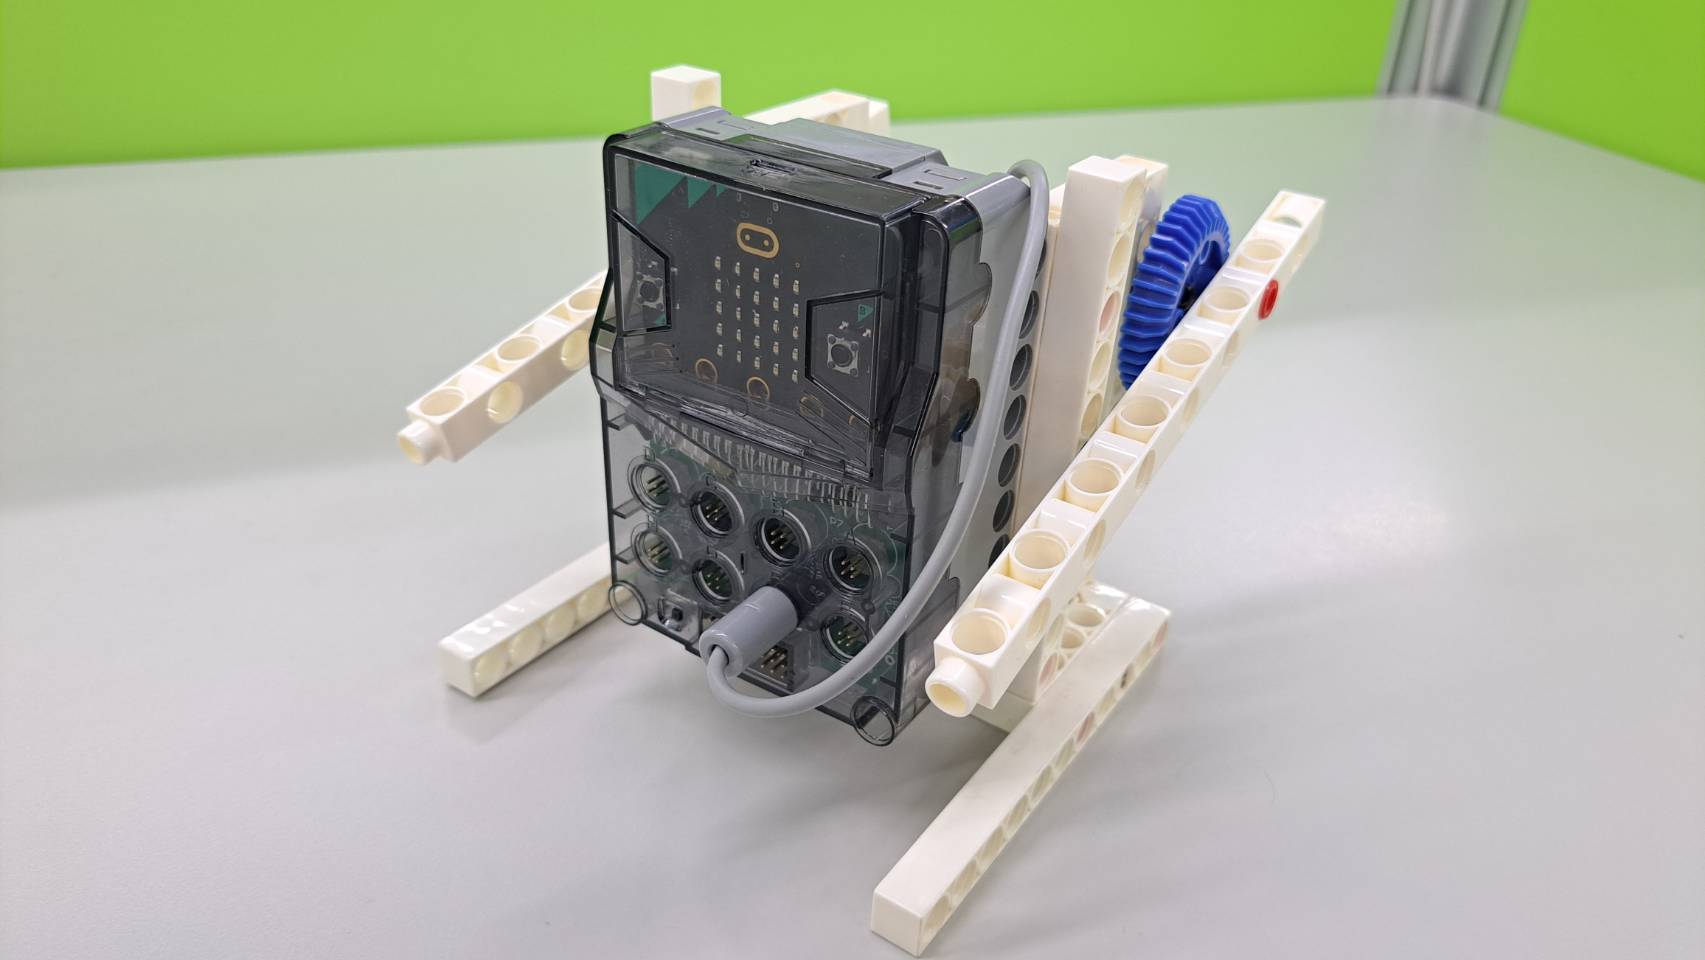
Today, let's utilize one of the new functions of the micro:bit v2.0 mainboard, sound sensing, to create a disco robot that dances along with the sound waves!
◆Preparation (10 minutes)
1. Teachers can introduce the differences between micro:bit v1.5 and v2.0 to the learners.
2. Prepare the necessary parts for the model.
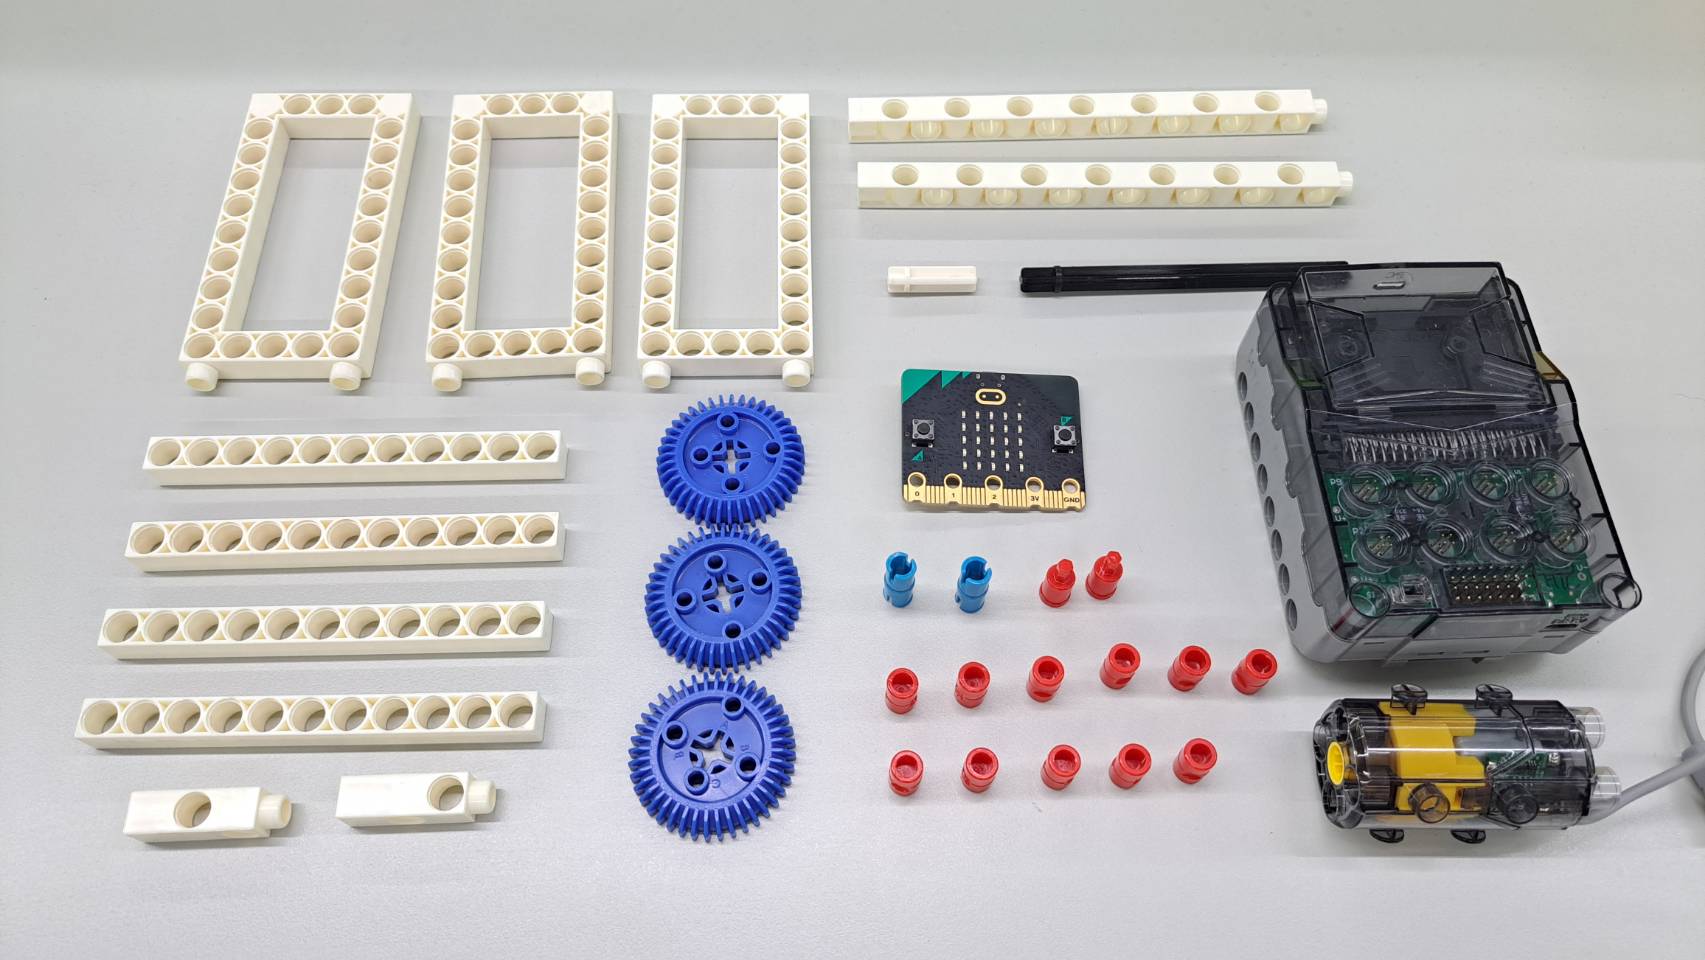
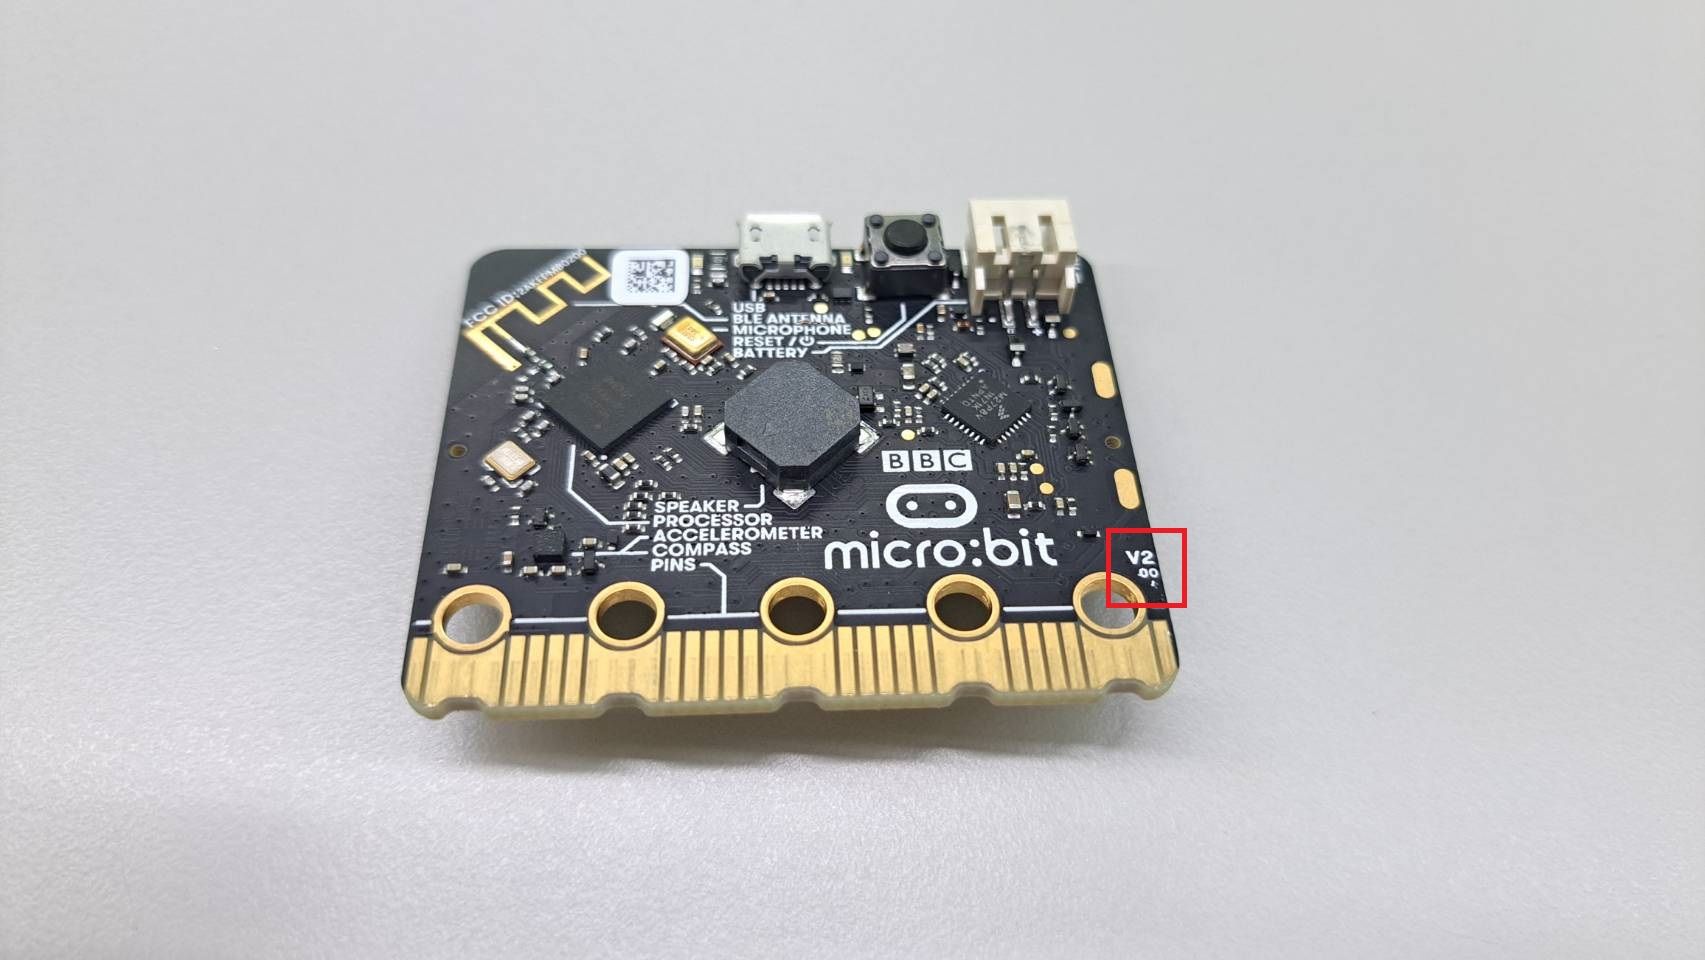
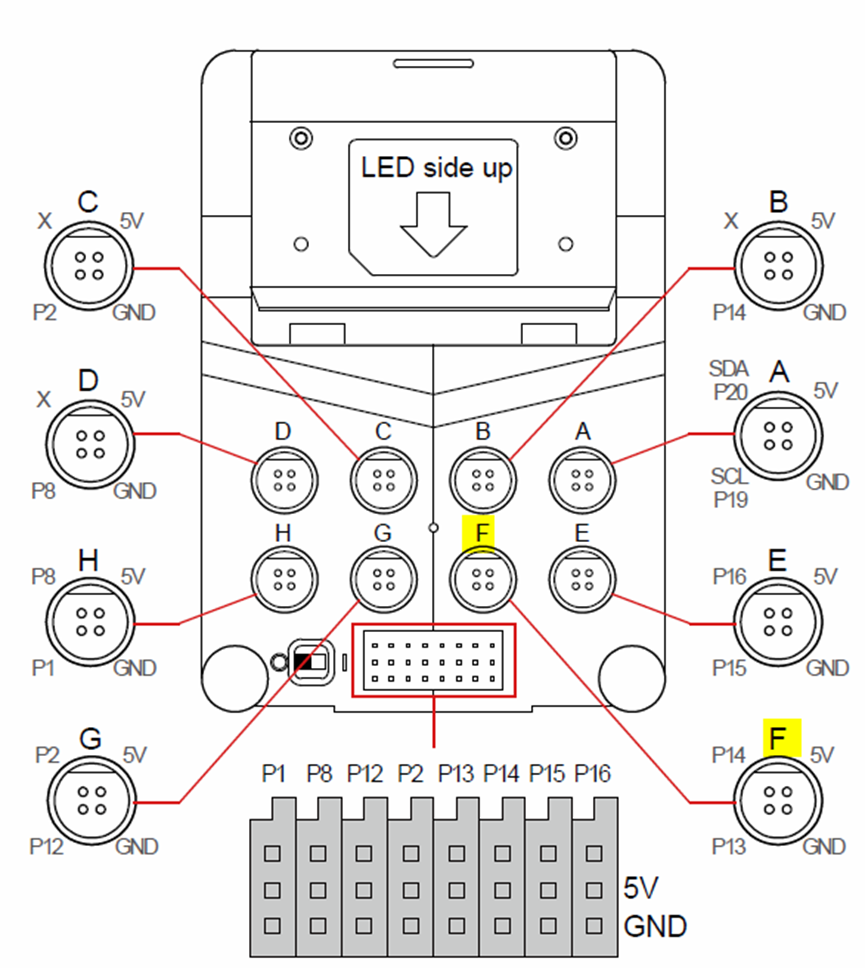
Please note that both the micro:bit mainboard and the Gigo main control box should be of the V2.0 version to support sound control!

◆Demonstration of model making (40 minutes)
You can follow the assembly steps to build the model.
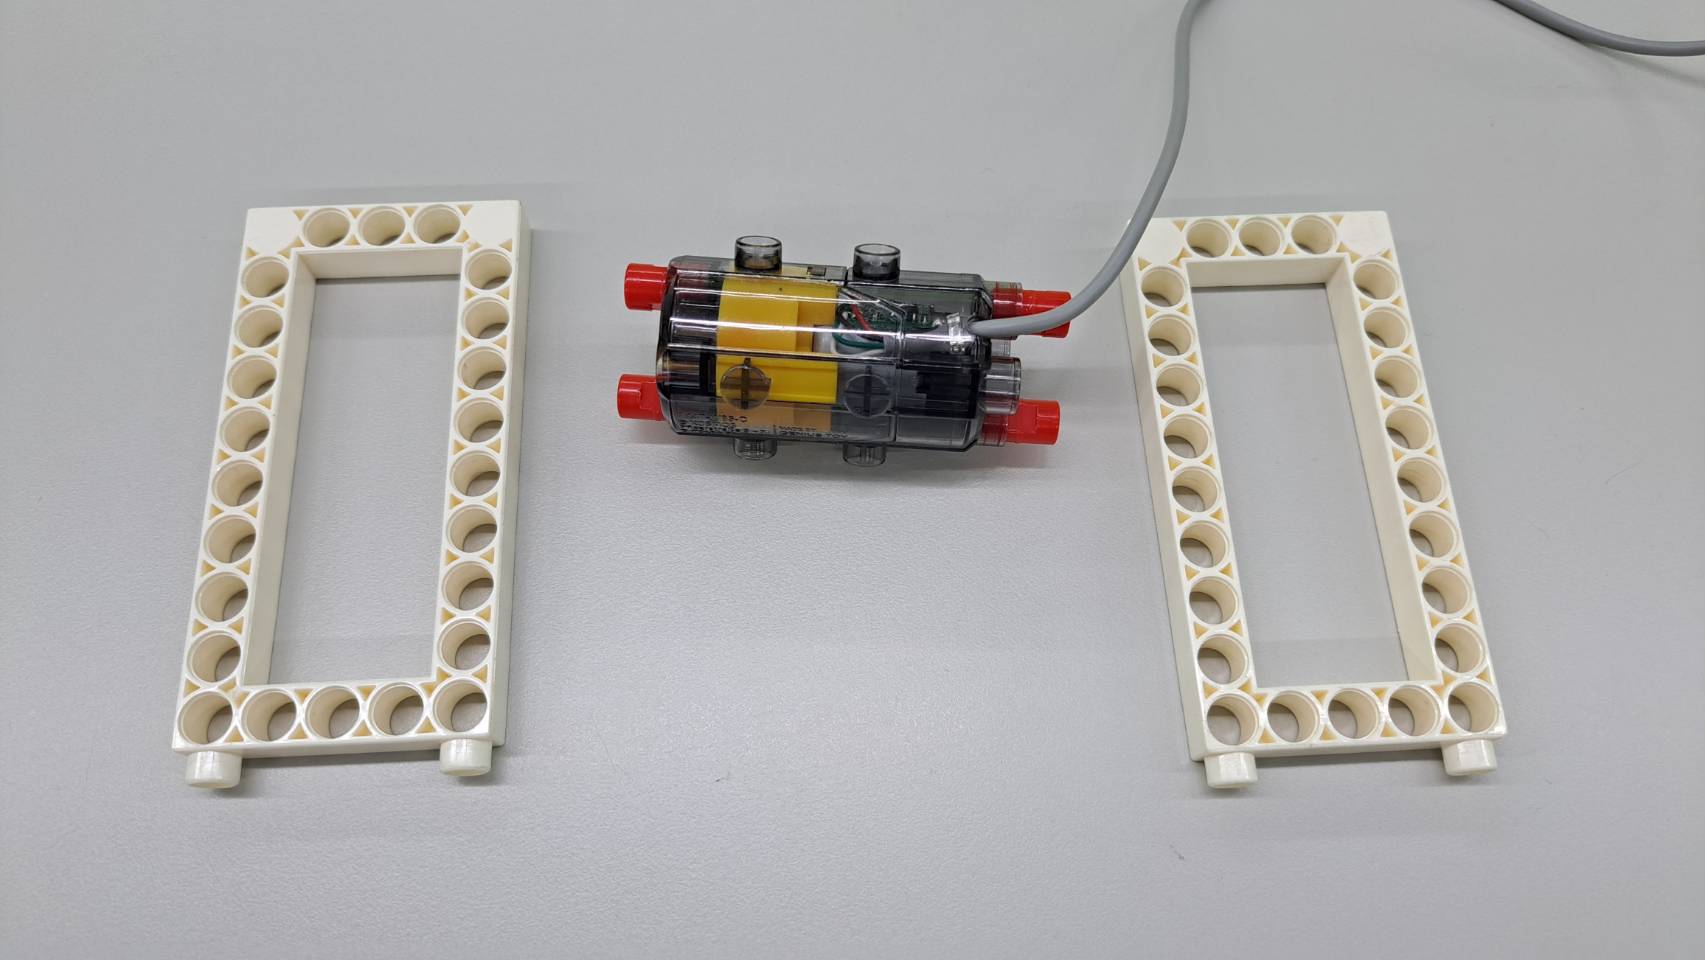
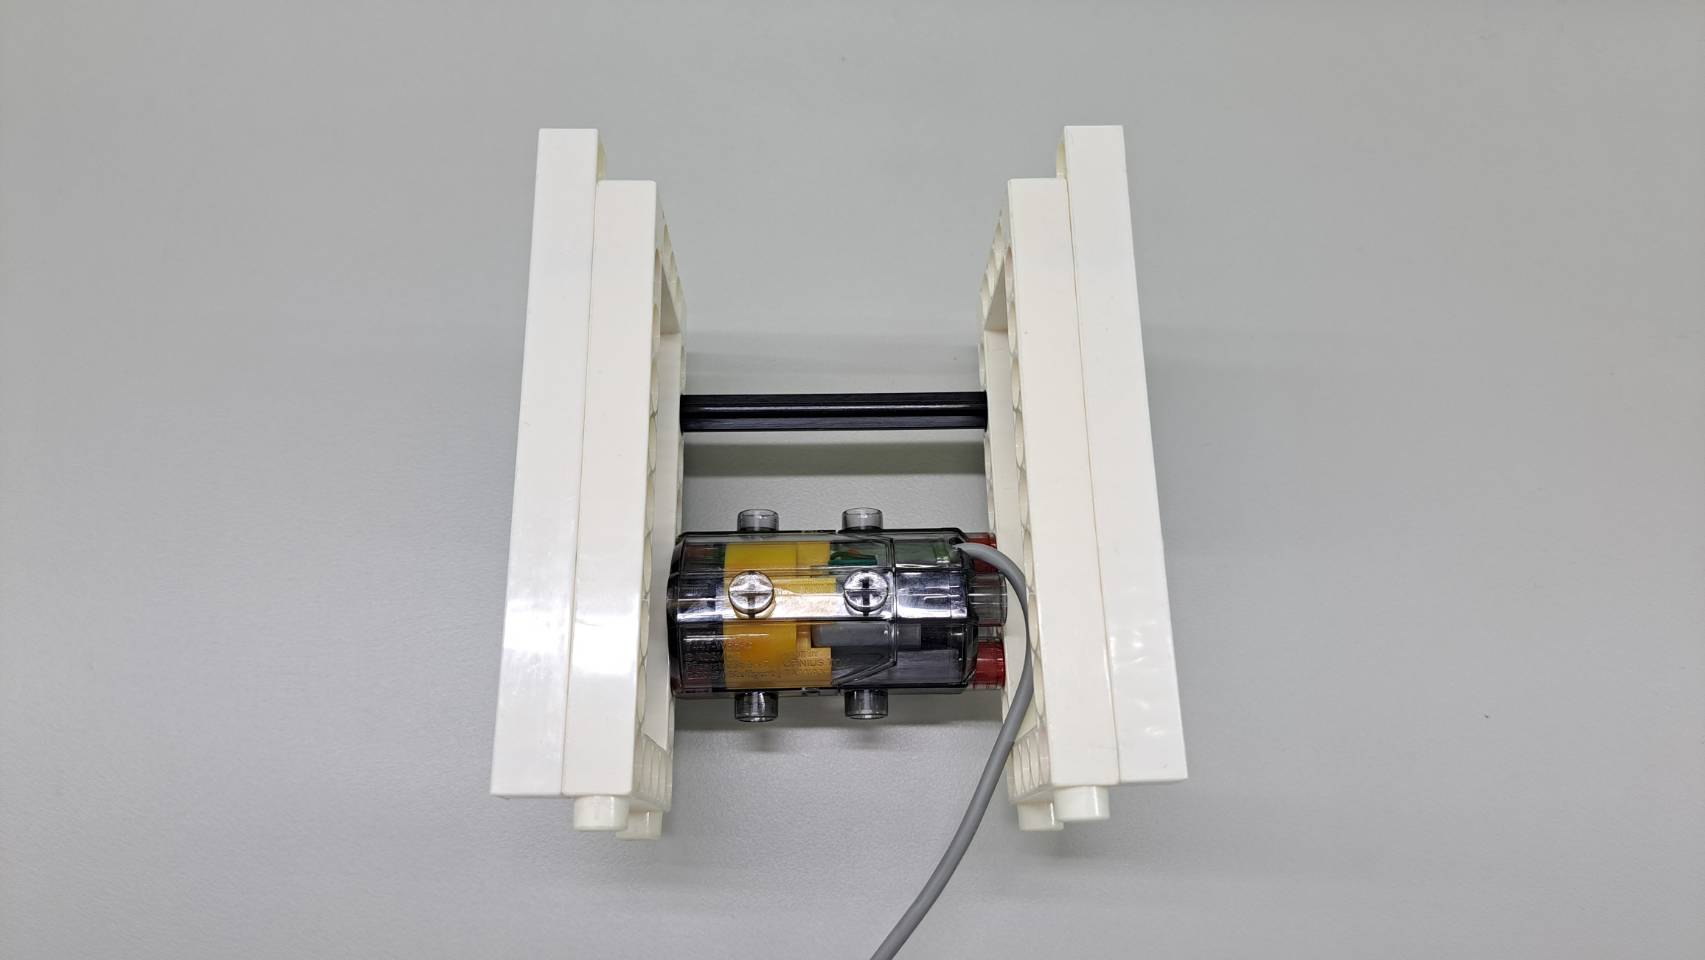
Step 1: Attach the C-LONG PEG on the two sides of C-50X PLANETARY GEARBOX and attach it to a C-5X10 FRAME.
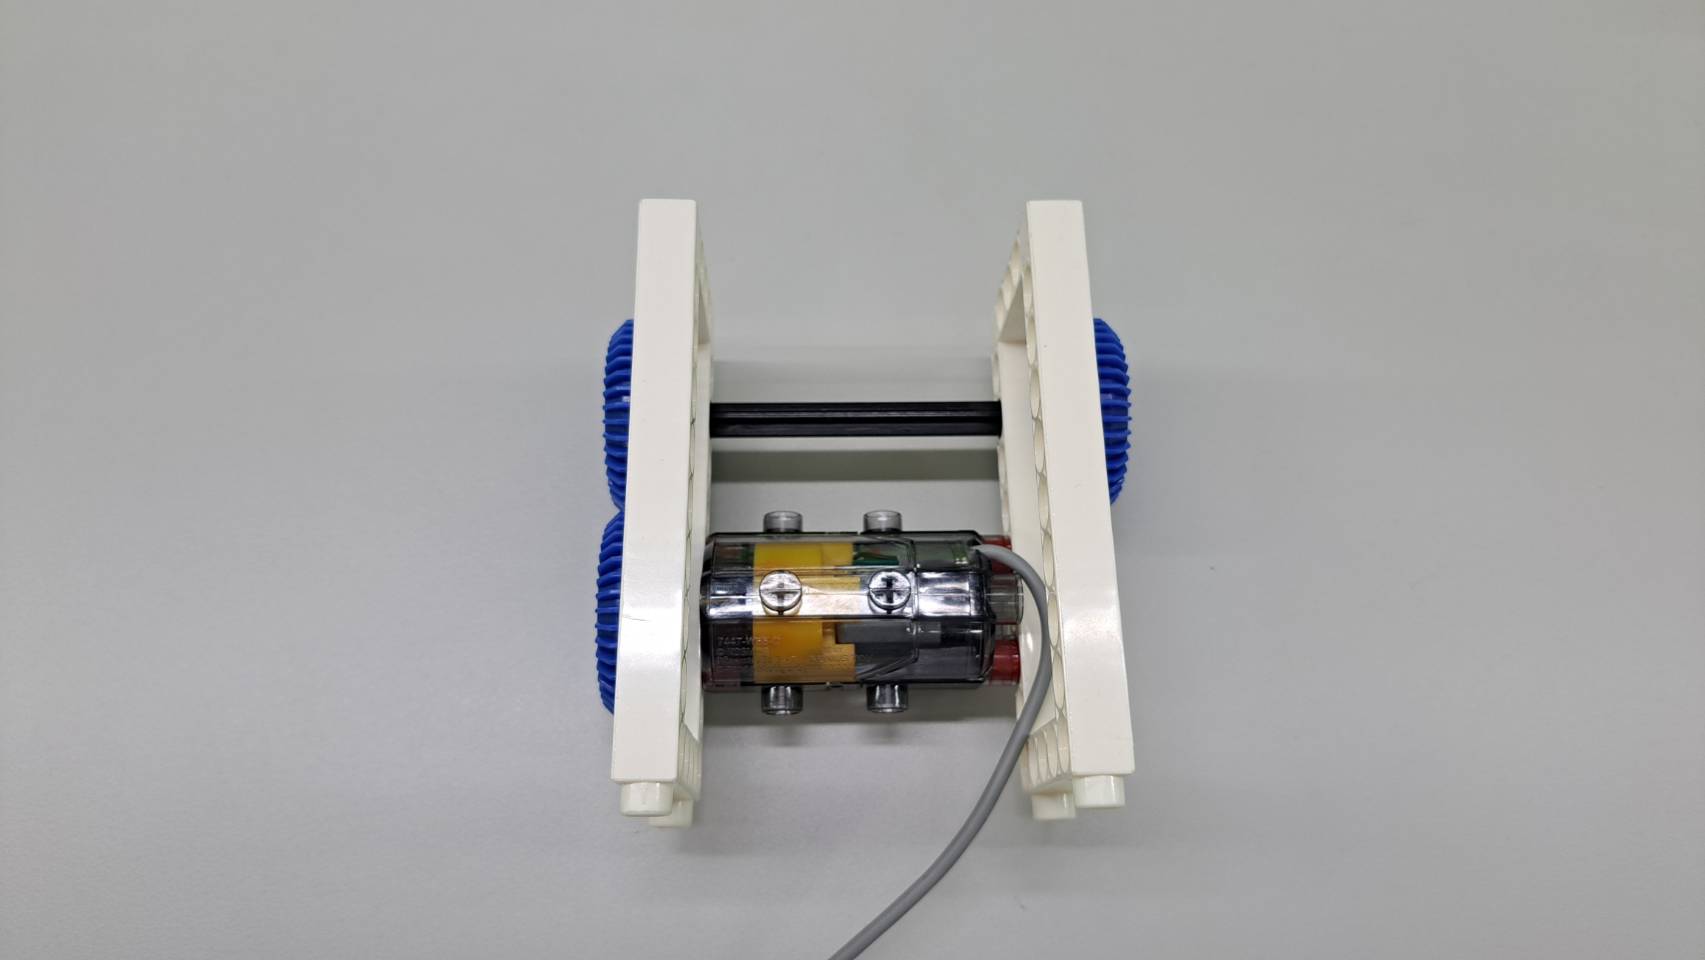
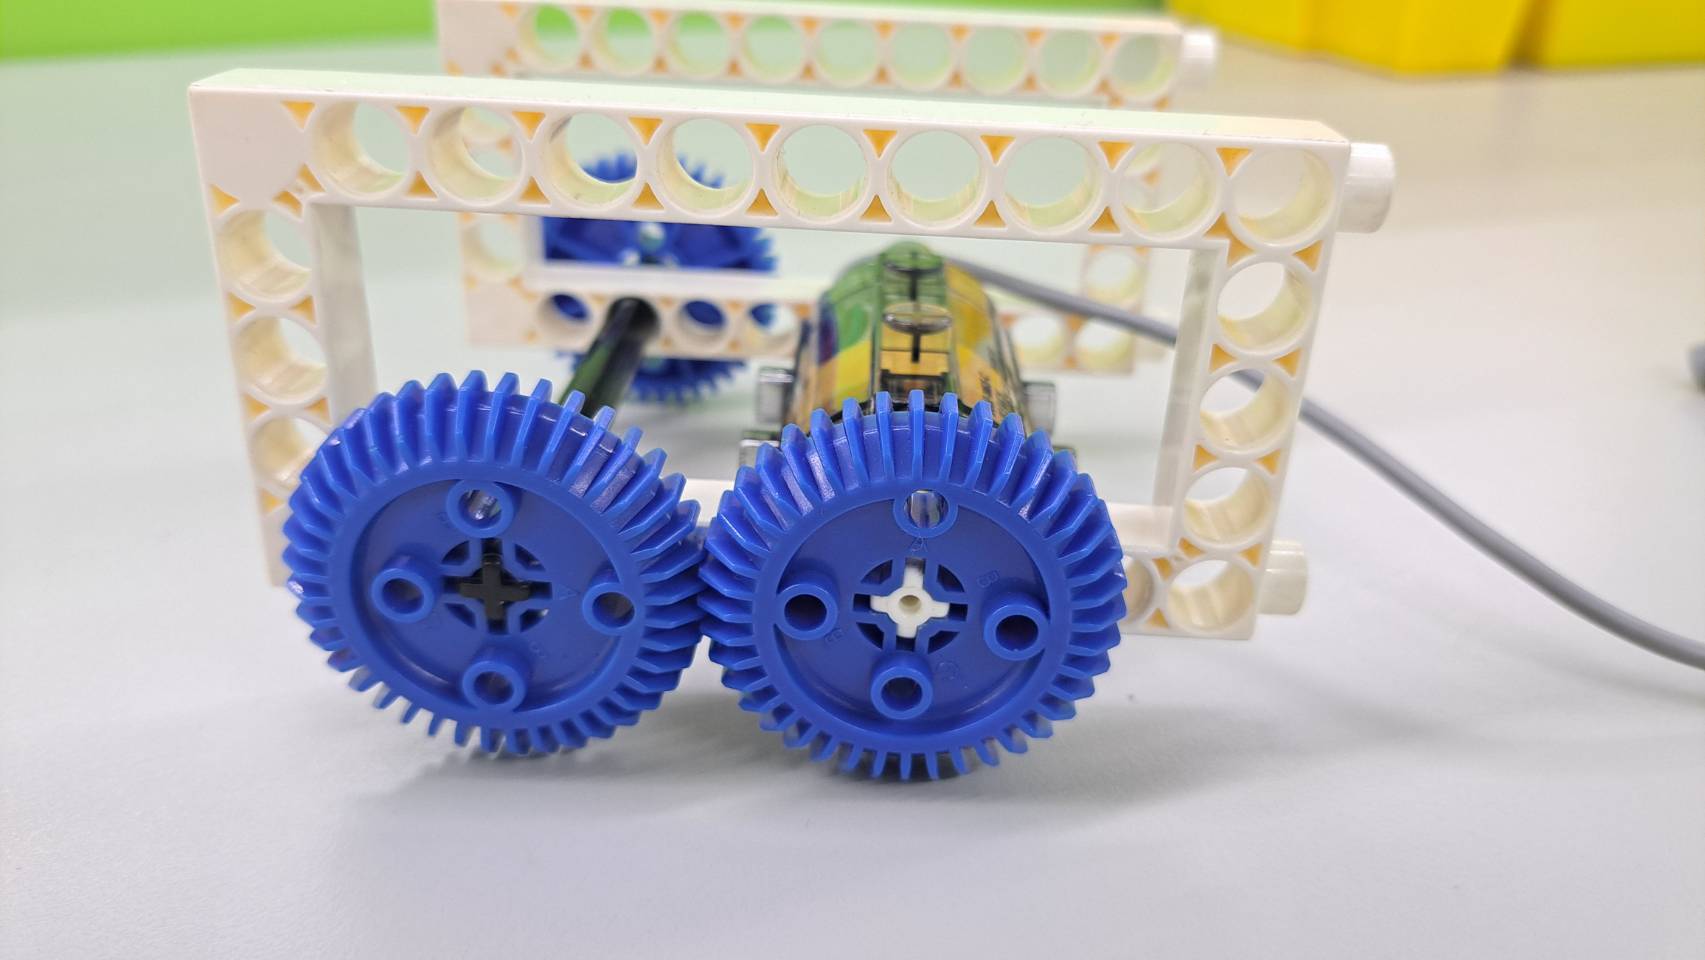
Step 2: Connect the C-MOTOR AXLE to the motor and connect a 40T gear and a 100mm axle using gear transmission.
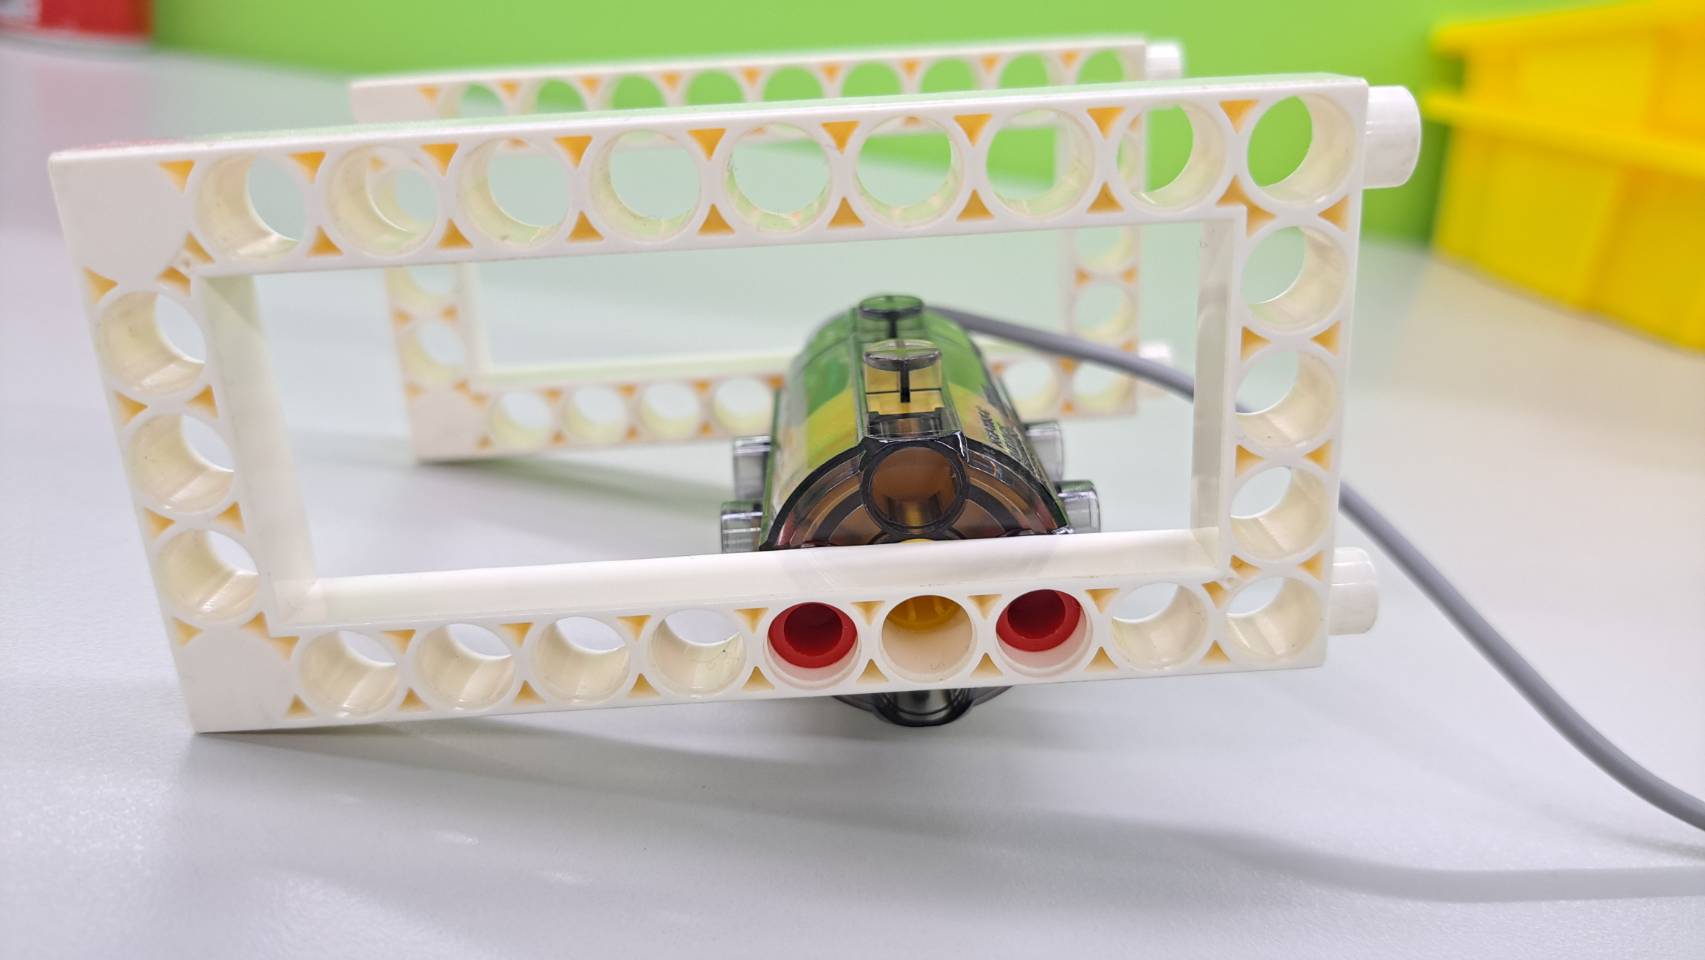
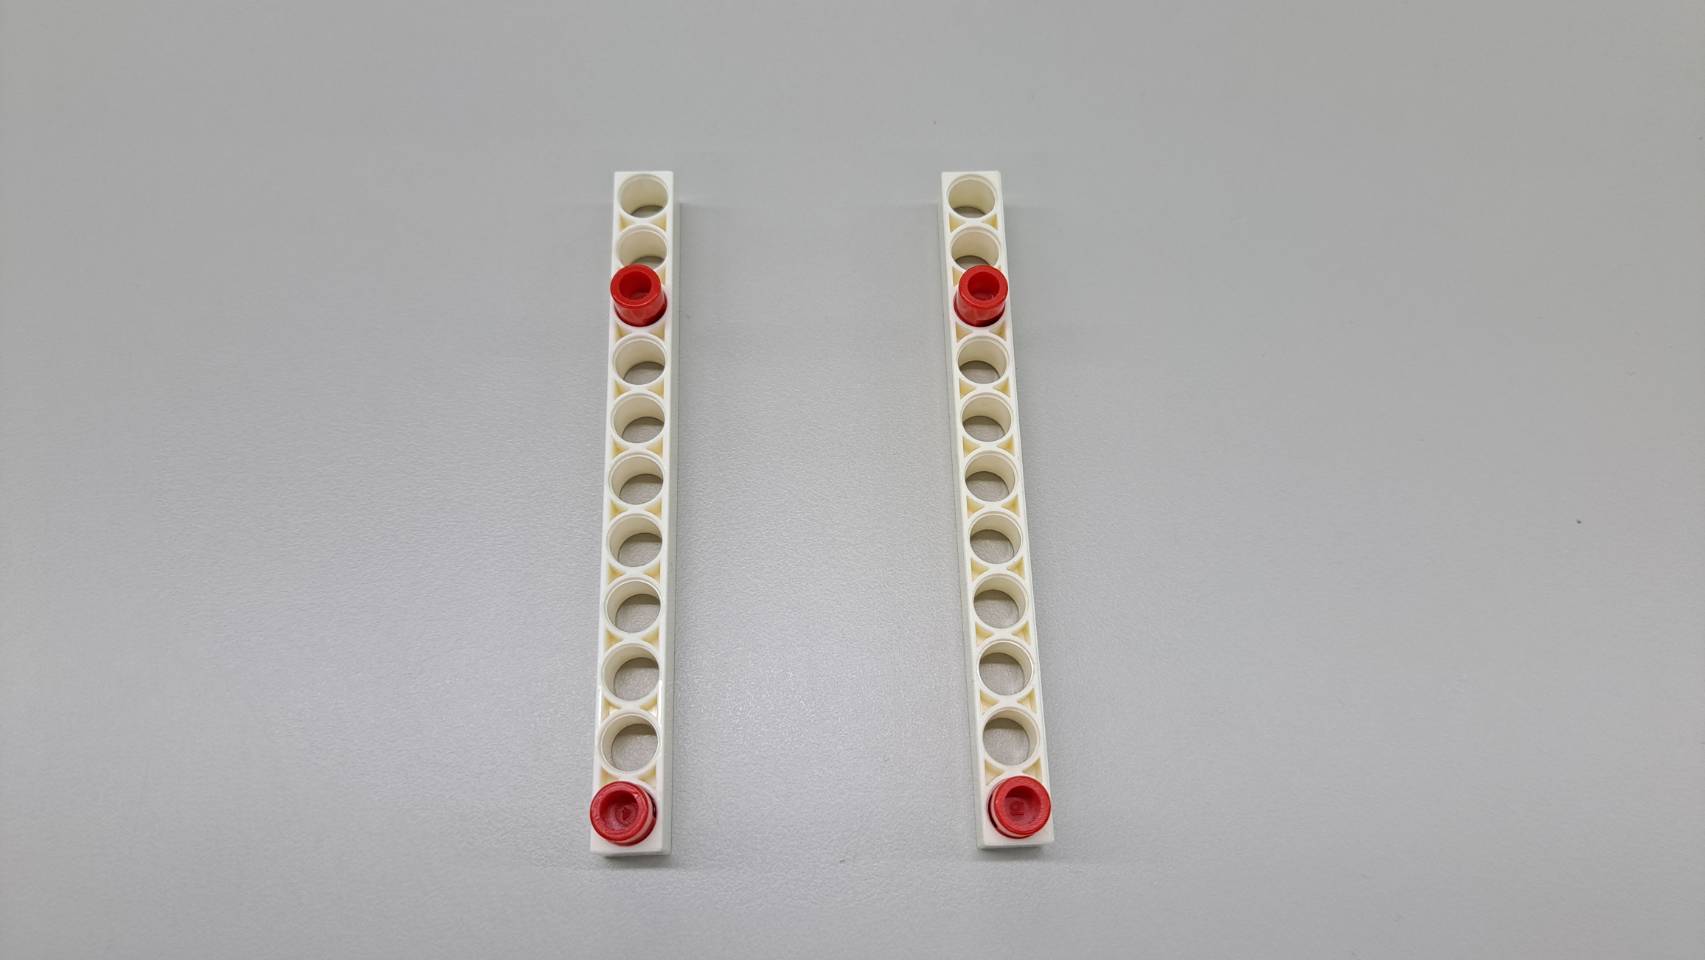
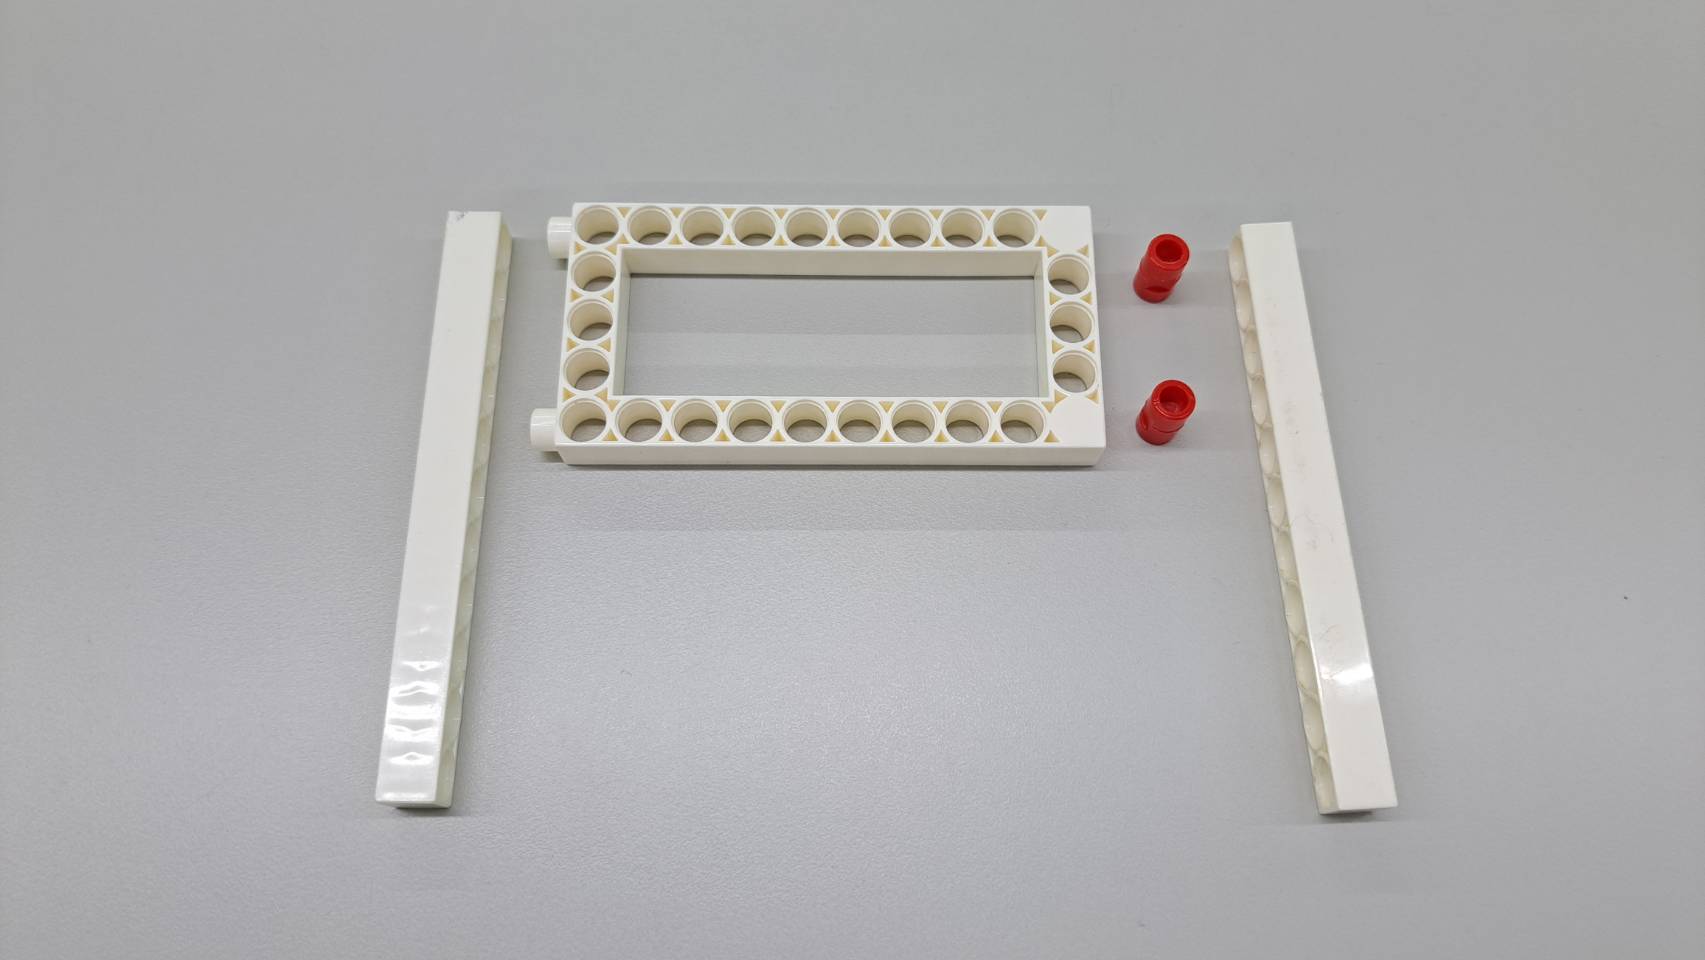
Step 3: Attach C-LONG PEG to the third and last holes of the C-11 HOLE ROD and place them on the left and right sides of the C-5X10 FRAME.
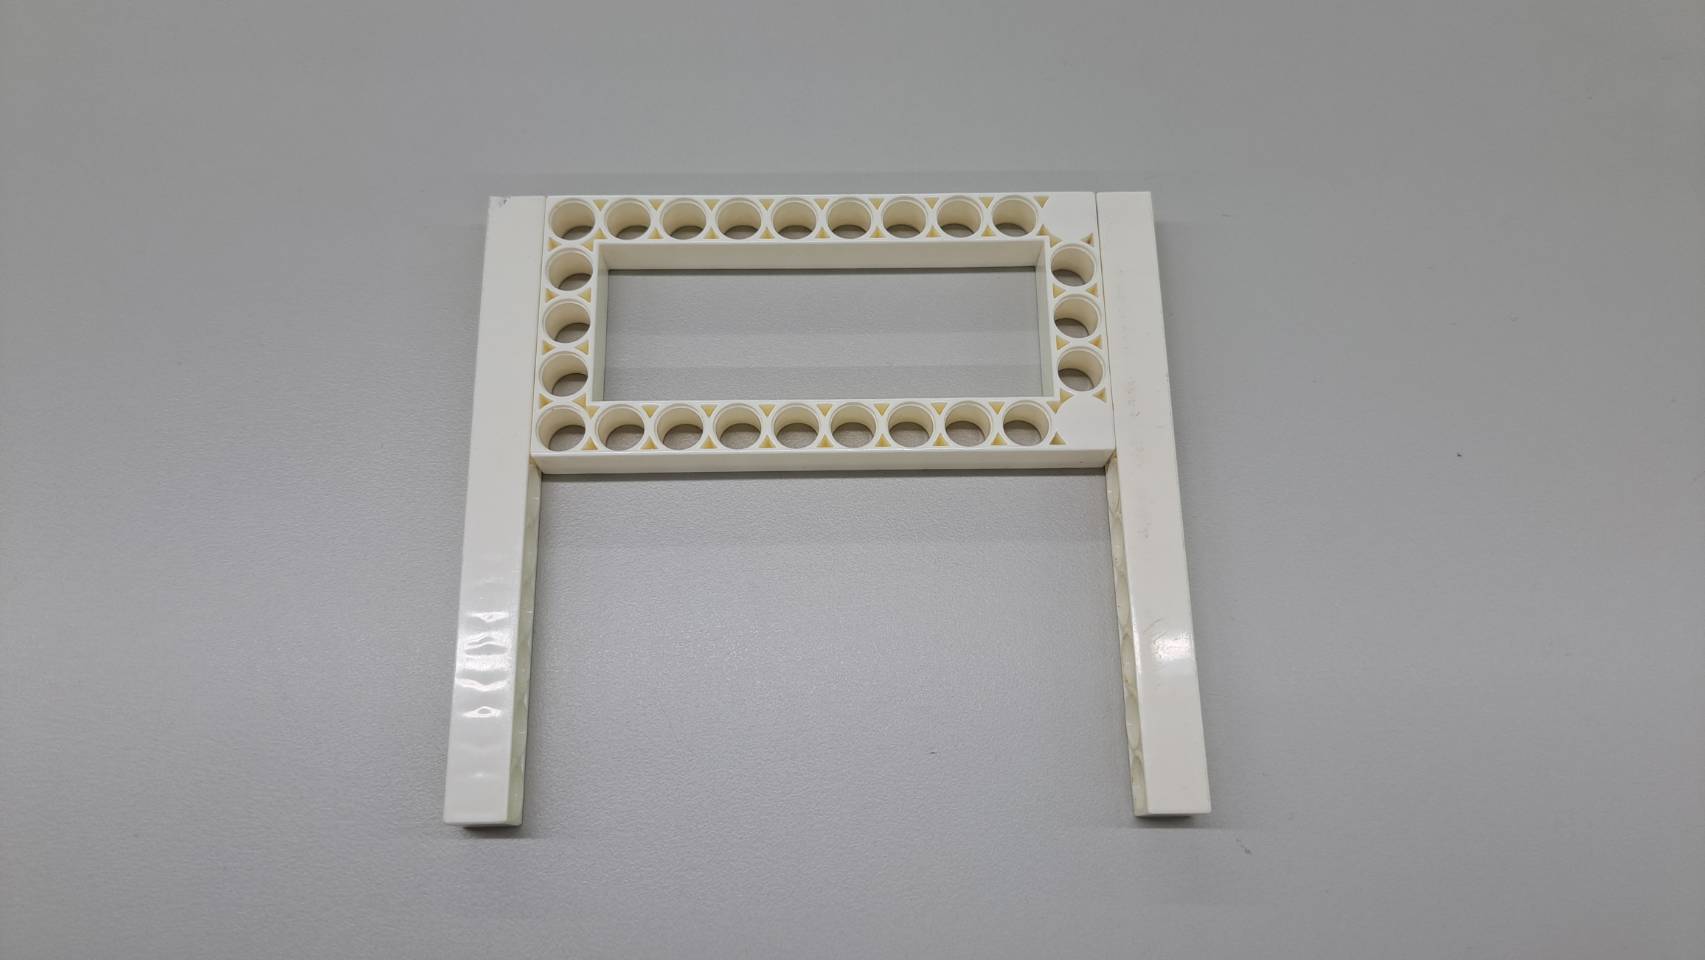
Step 4: Connect the C-11 HOLE ROD, C-5X10 FRAME, and C-LONG PEG to form the robot's legs.
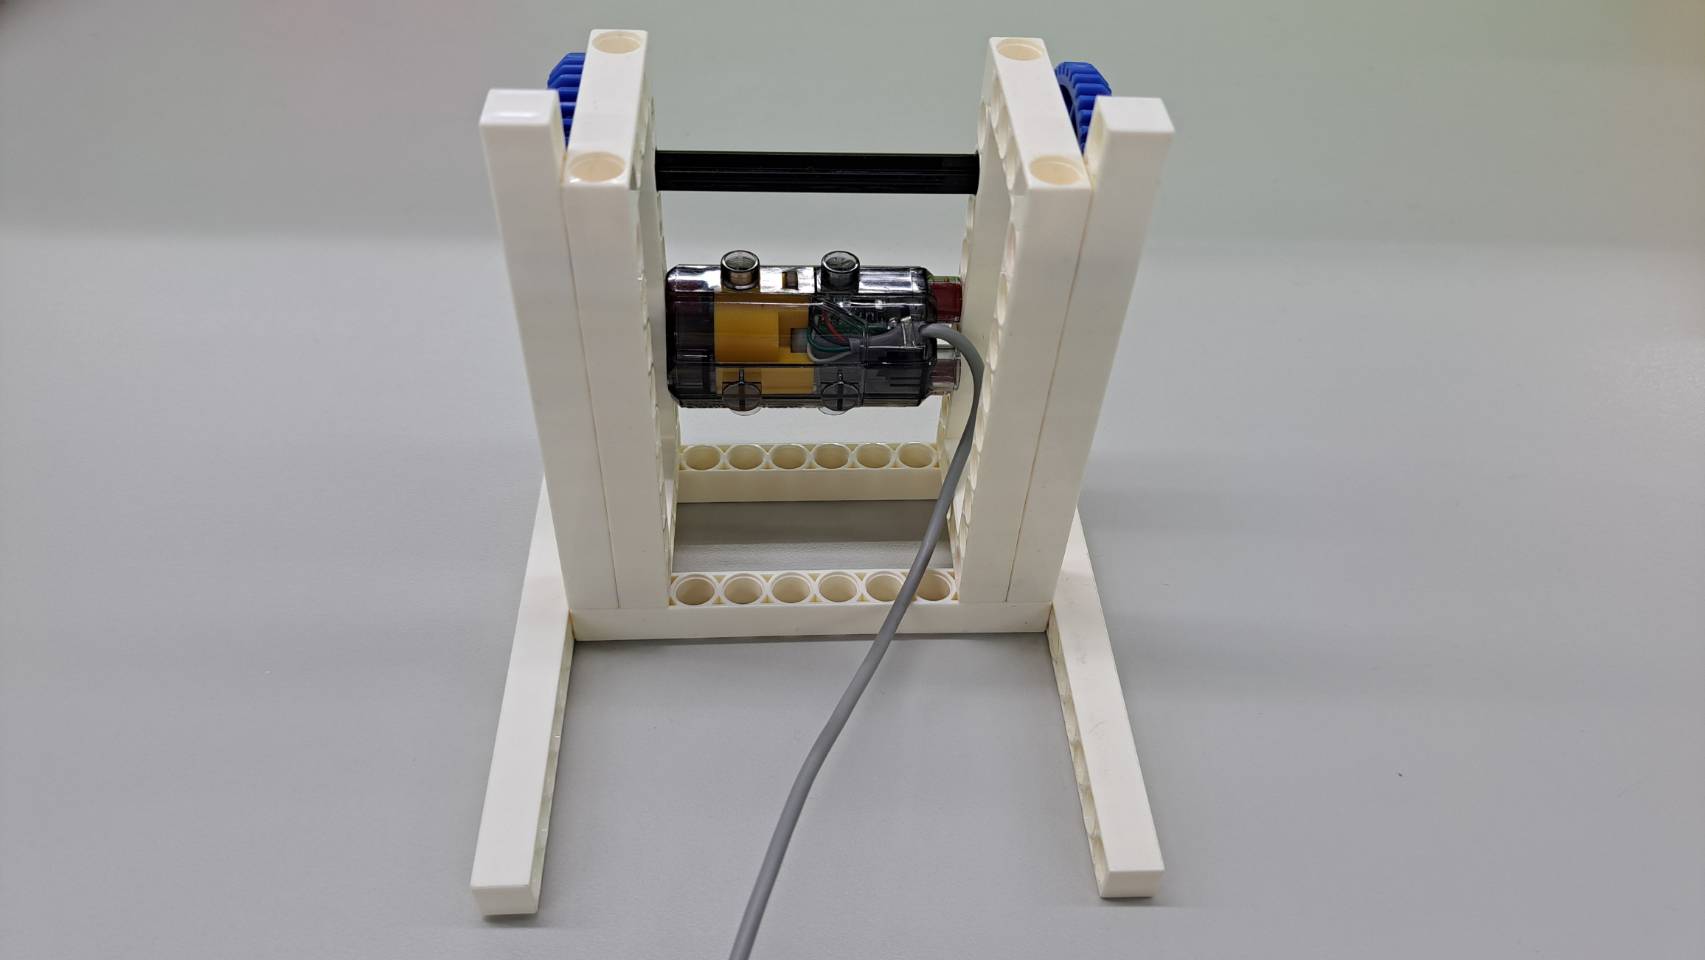
Step 5: Assemble steps 3 and 4 together to complete the robot's shape.
Step 6: Install a C-15 HOLE DUAL ROD, a C-CAM CONNECTOR, and C-AXLE CONNECTOR on the left and right sides of the robot.
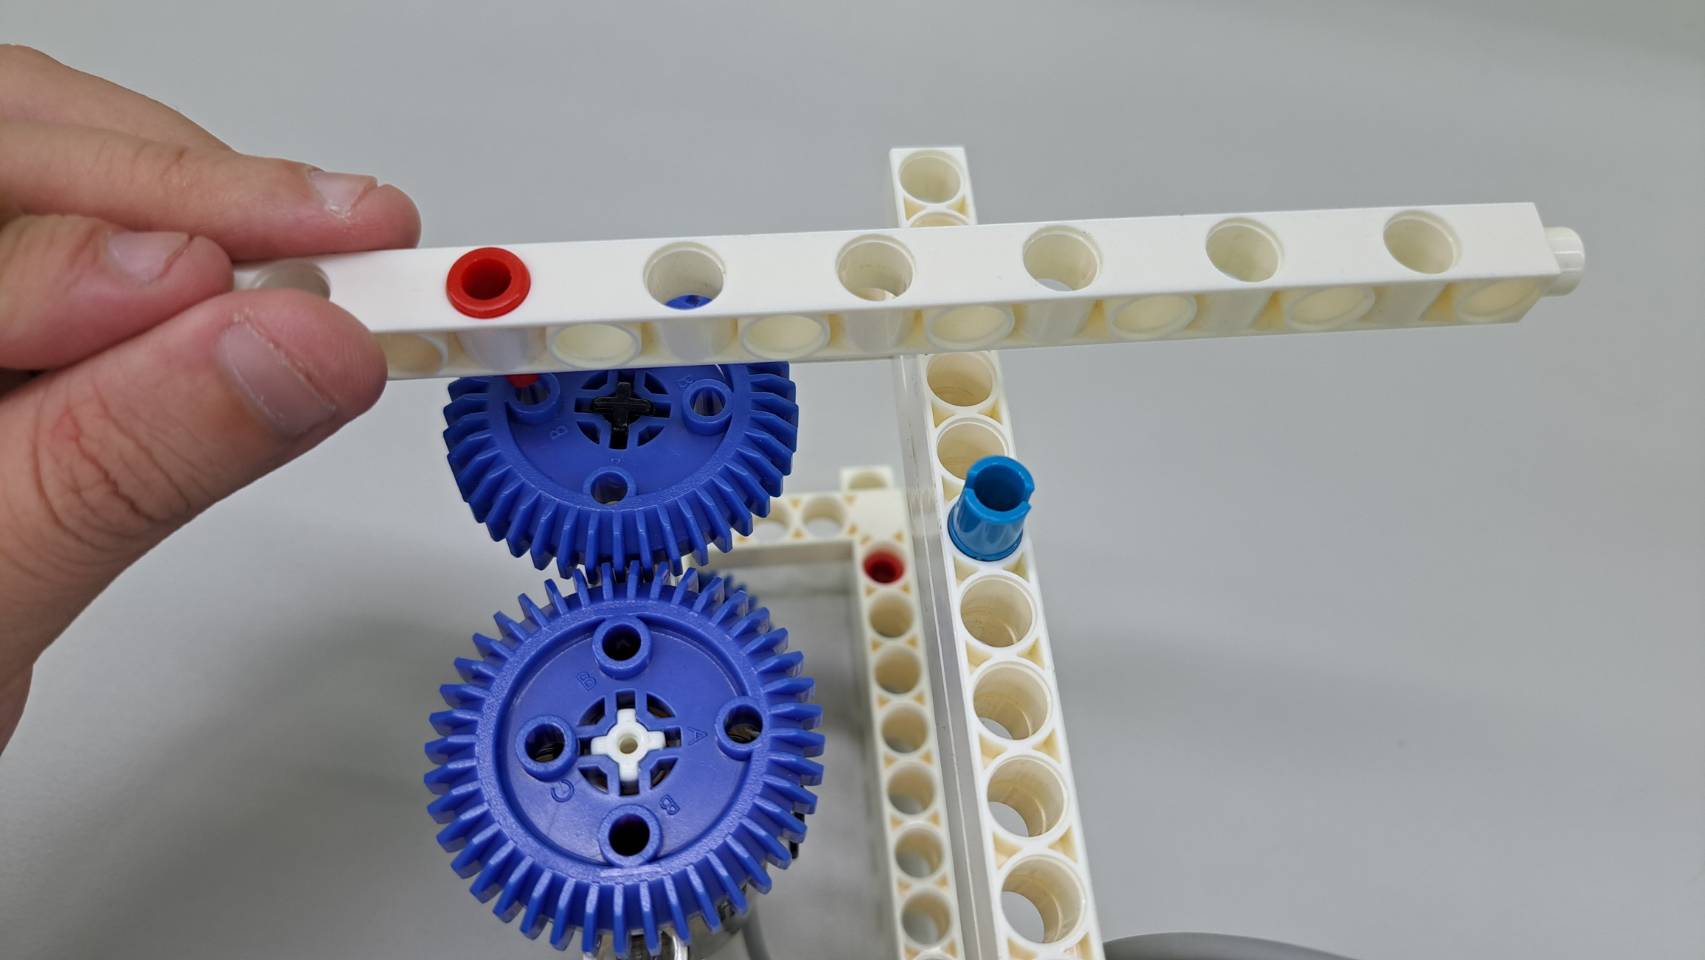
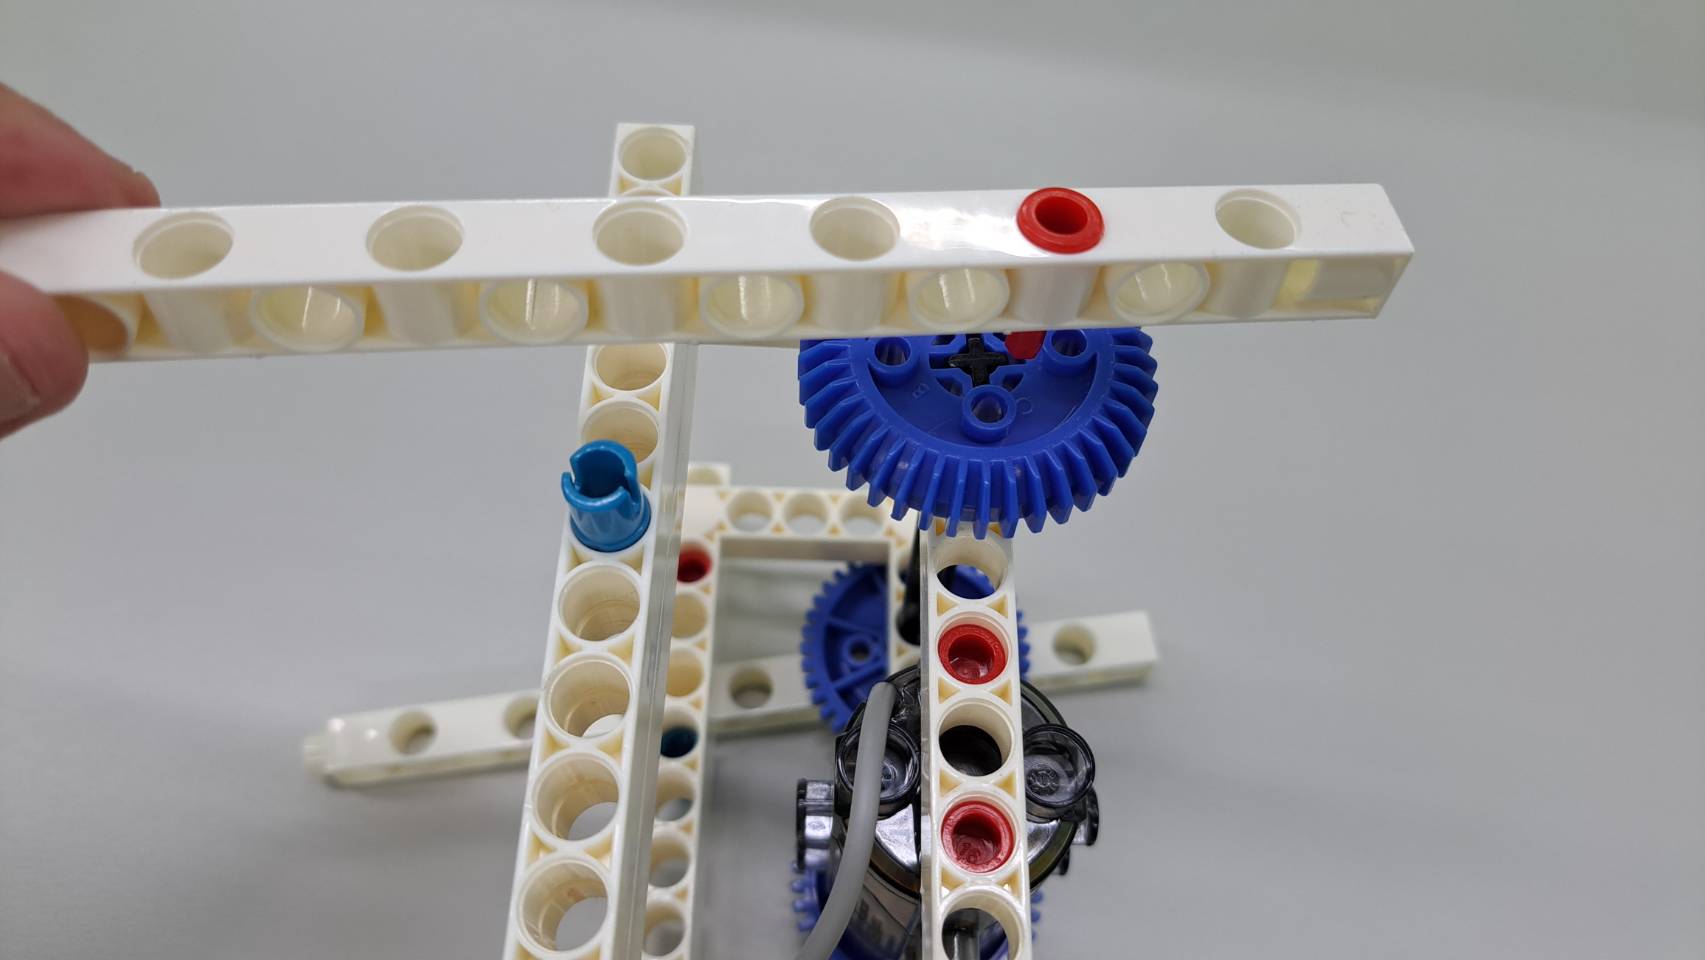
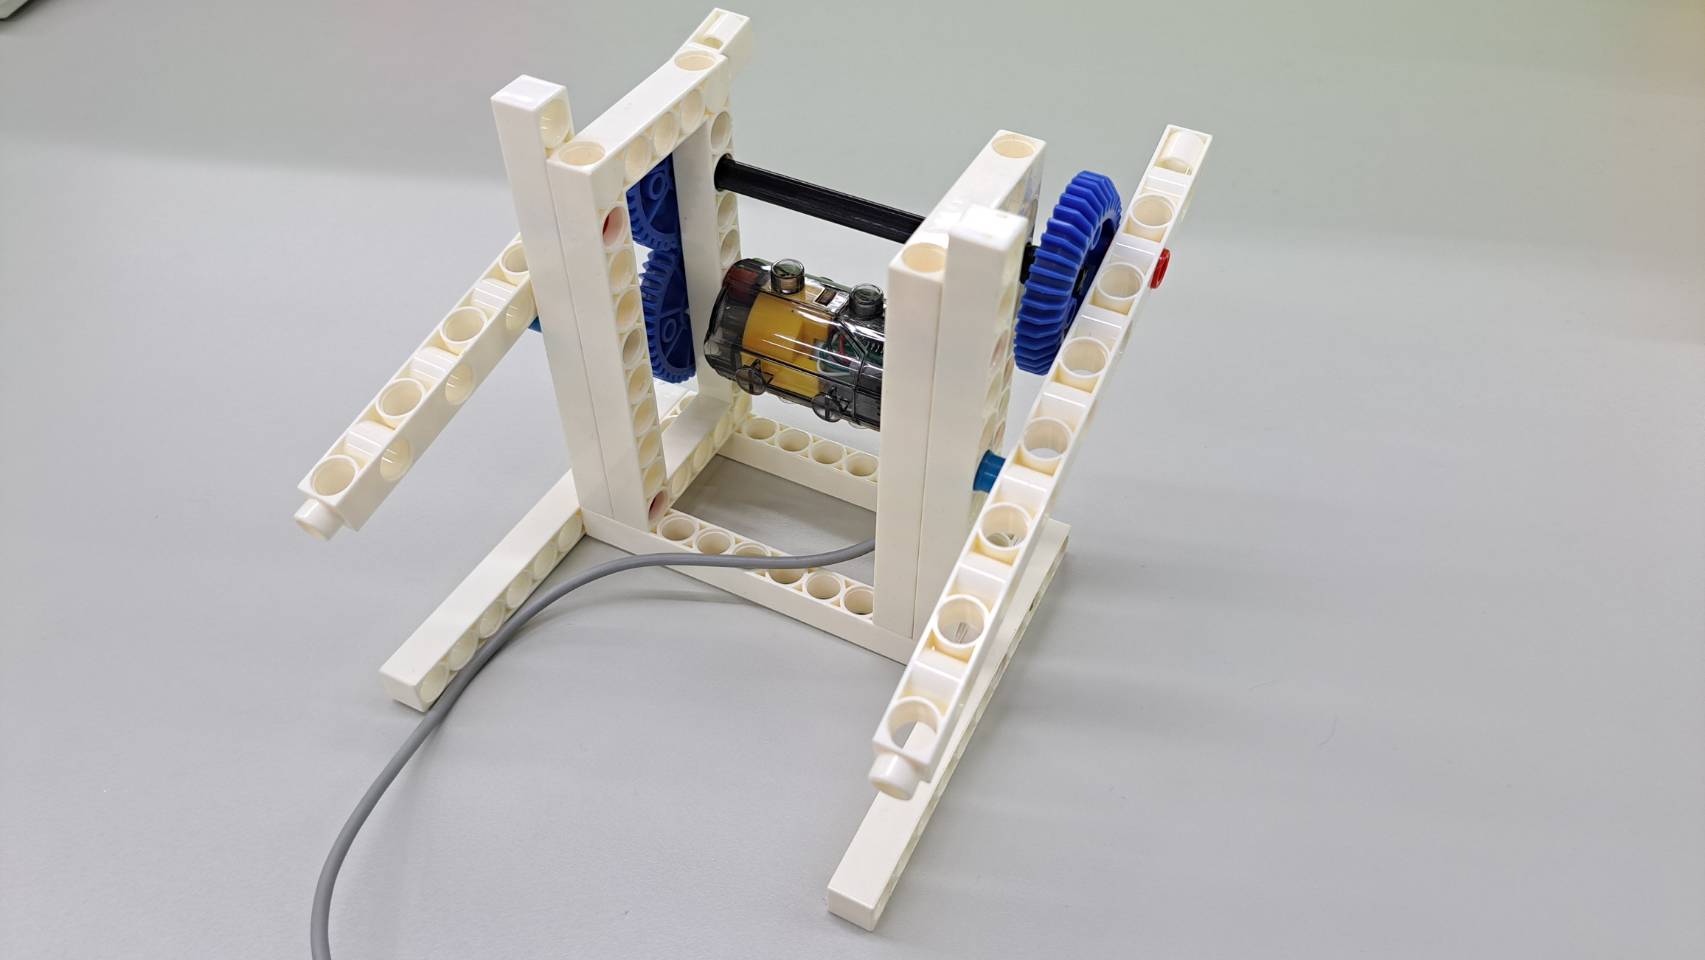
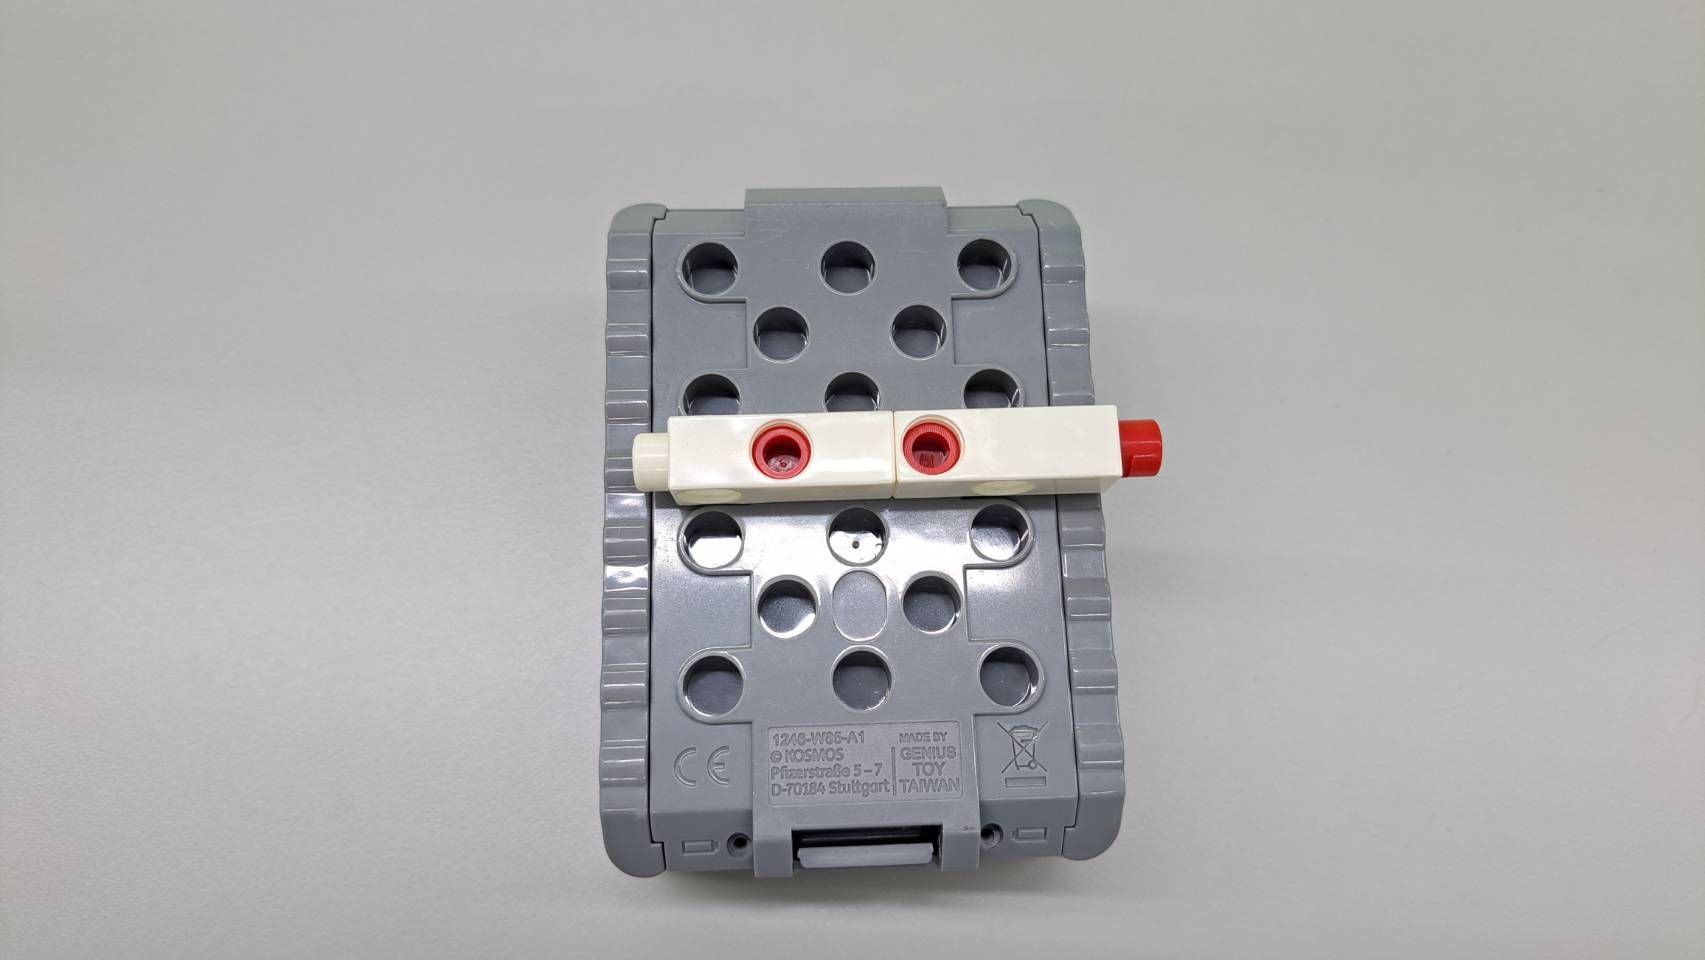
Step 7: Connect two C-3 HOLE DUAL ROD, C-LONG PEG, and the C-Gigo micro:bit CONTROL BOX, placing them in the center of the C-5X10 FRAME.
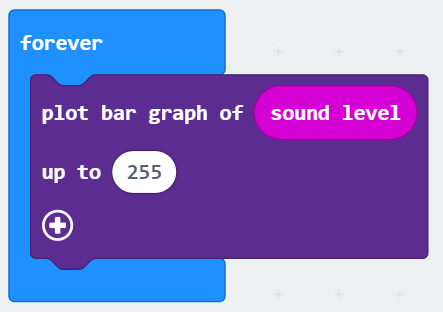
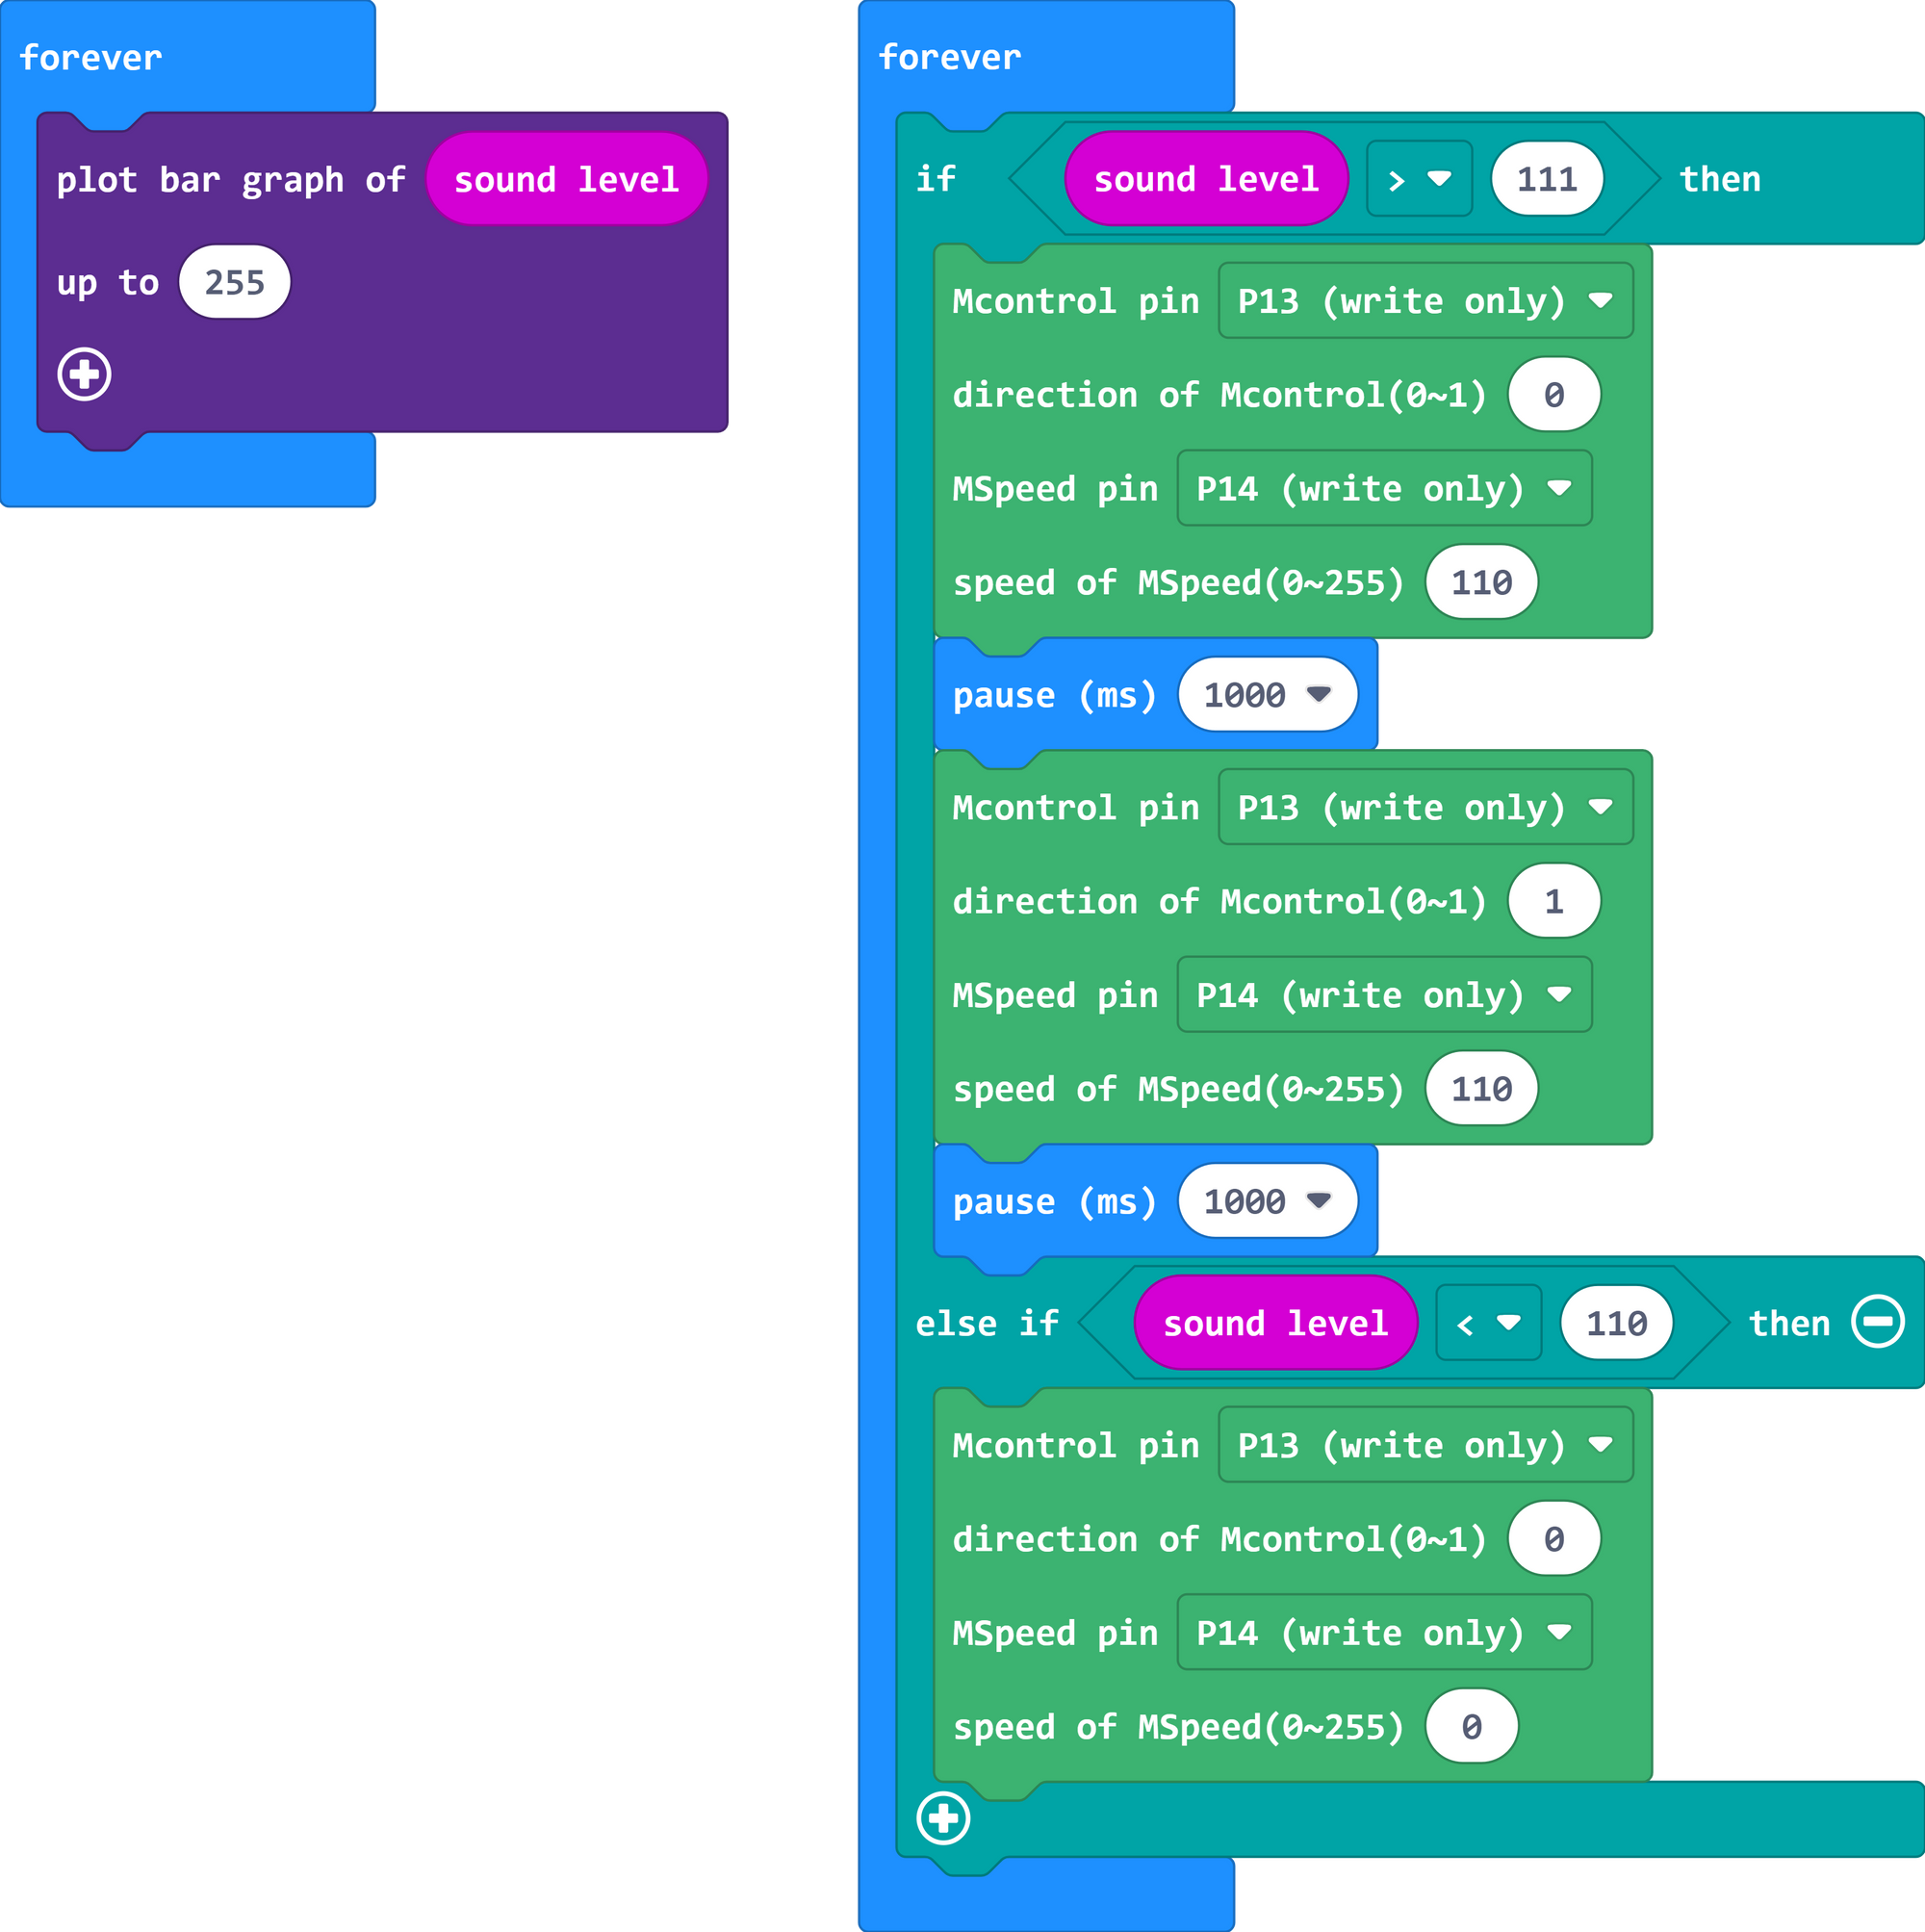
Step 8: Got to the webpage to write the following program.
1. The program uses a loop to continuously measure the sound input from the microphone and draws a bar graph on the LED screen to represent the sound level.
2. When the received sound level is greater than 111, the robot starts dancing its arms forward and backward. If the sound level is less than 110, the robot changes the LED lights but doesn't move its arms.
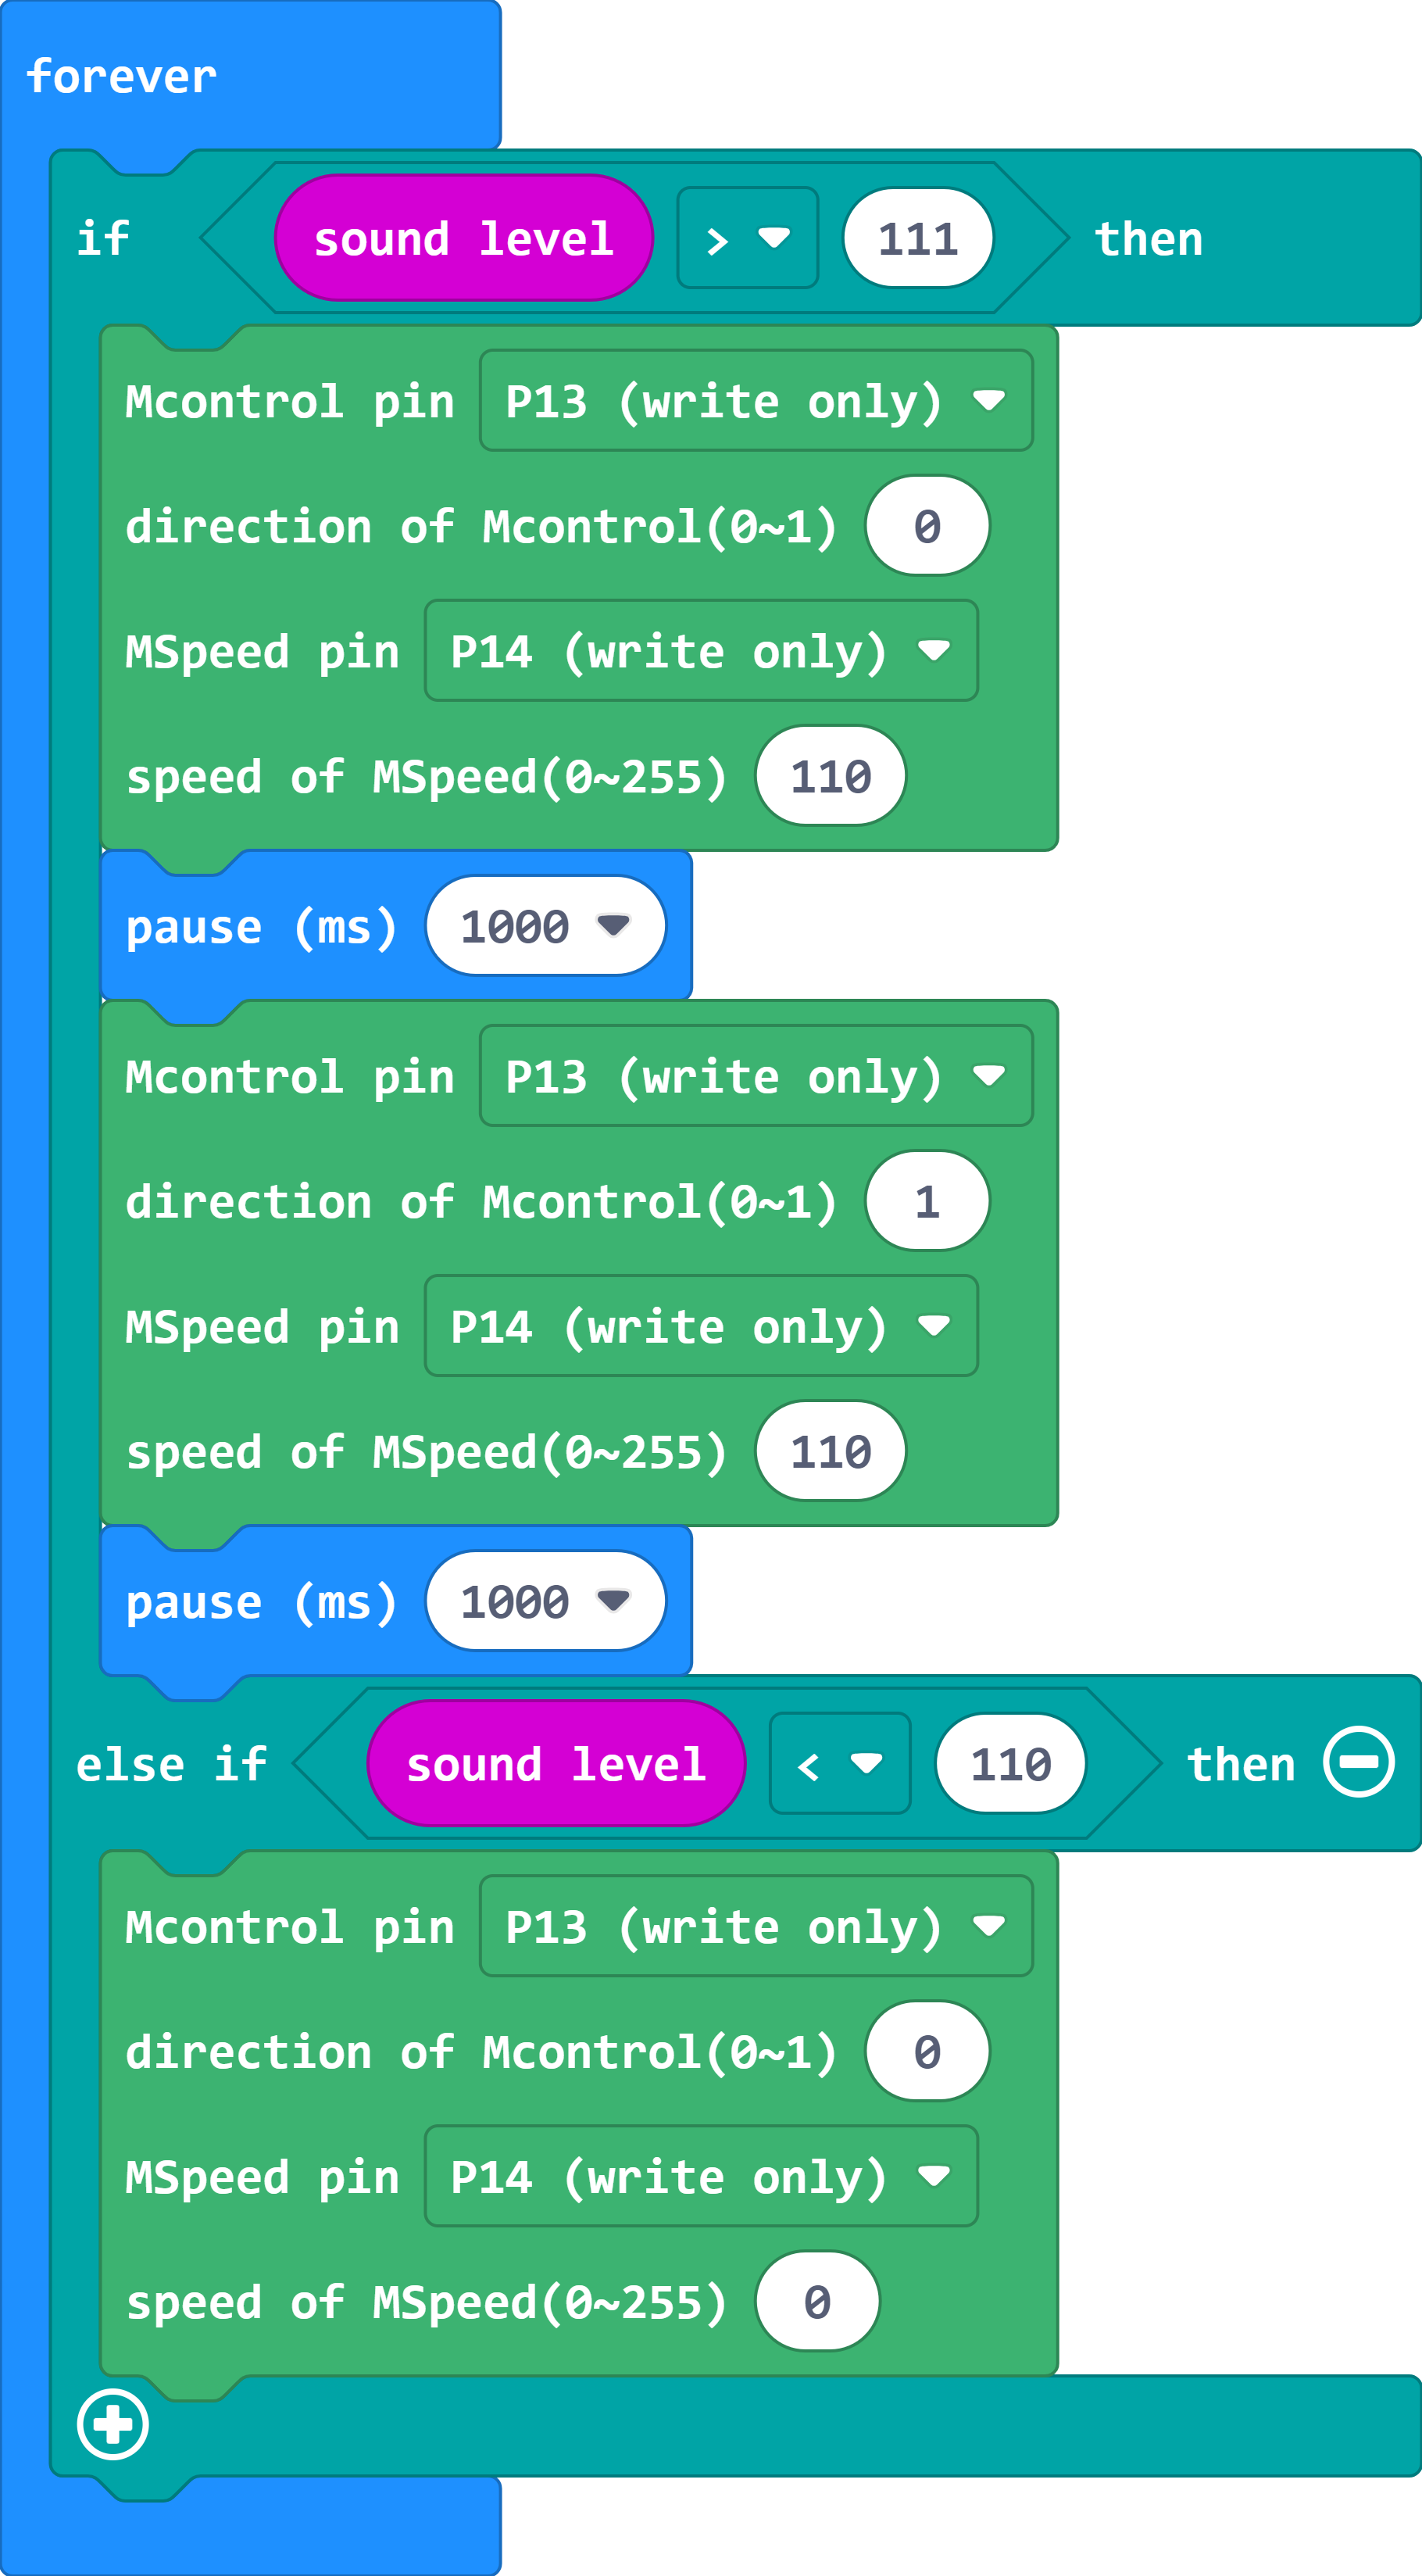
3. The complete program is as follows.
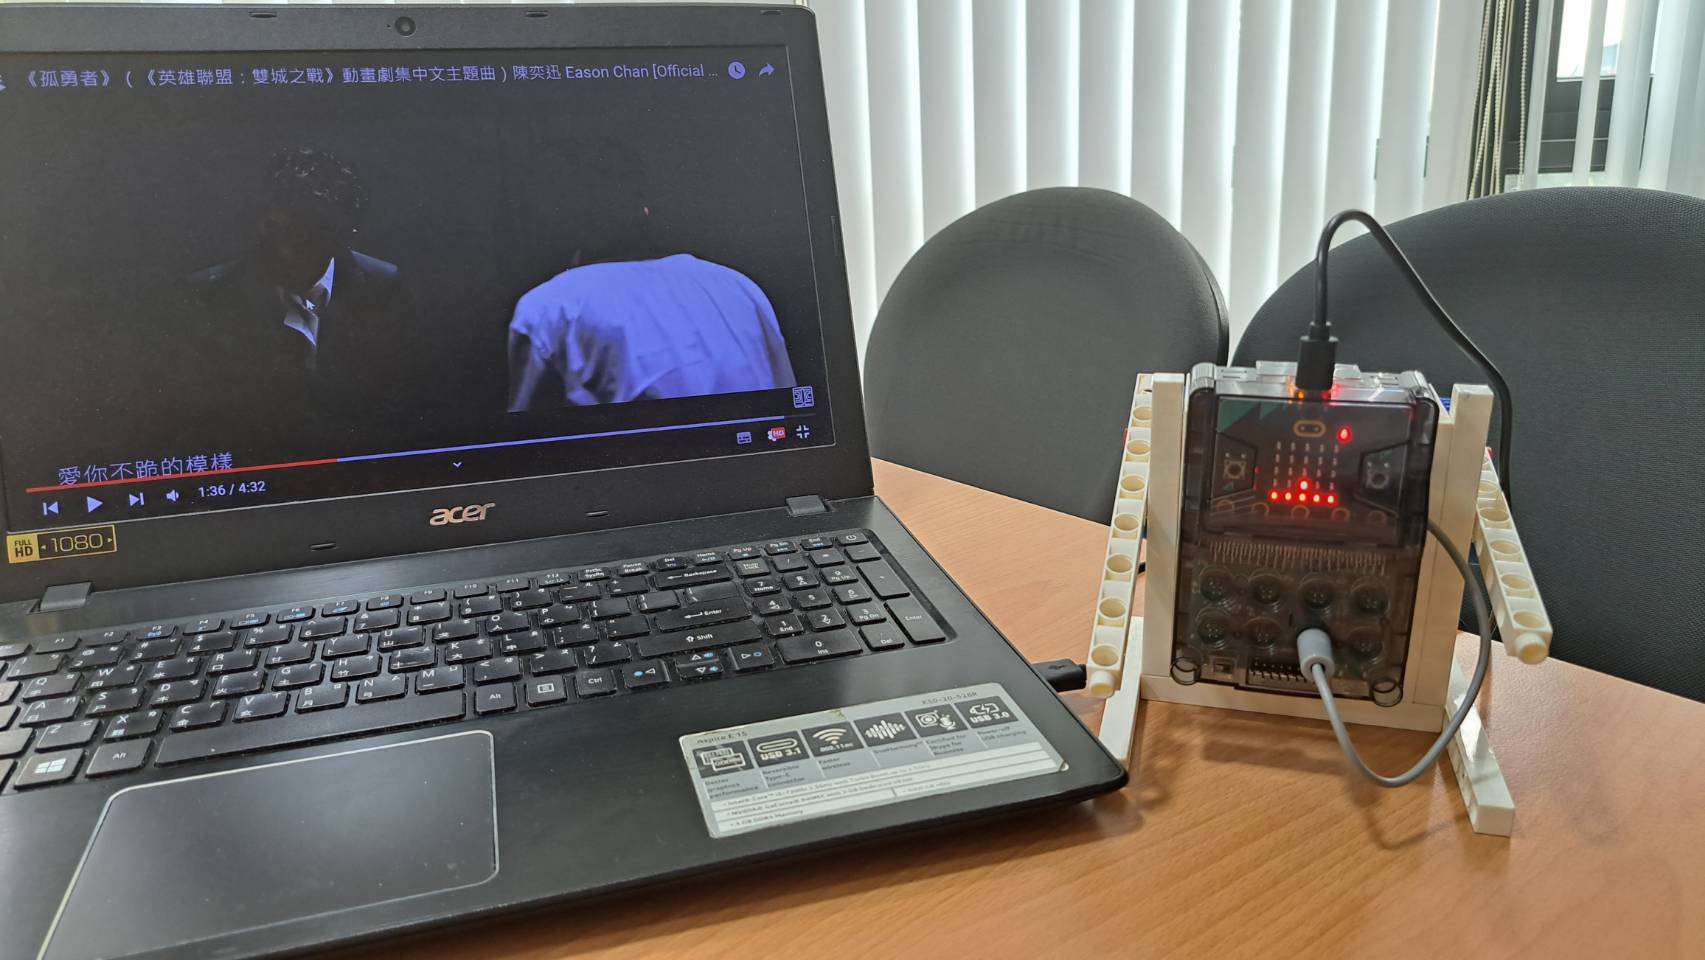
◆ How to play
Choose a song you like and let the robot dance along with you!
◆Production and Play (30 minutes)
1. Encourage students to complete the model and write the program on their own, and the teacher can help in a timely manner.
2. Students who complete the model can start modifying the program to add more variation, such as displaying different emoticons based on different sound amplitudes.
◆Summary and Tidy up (10 minutes)
1. The teacher can summarize the lesson, introducing the definition and origin of "disco."
Disco, derived from the French "discothèque," originally referred to dance halls where pre-recorded dance music was played. Later, it became a term for a genre of dance music that became popular worldwide, especially in Europe, in the late 1970s. This music mixed elements of funk, jazz, rock, and Latin American rhythms. Disco music is characterized by a strong rhythmic feel and features improvised free dance, with dancers moving to the strong beat.

2. Students should disassemble the model, sort the parts, and store them properly, being reminded to use a peg remover for disassembly instead of forcing parts apart.
◆Scientific Principle
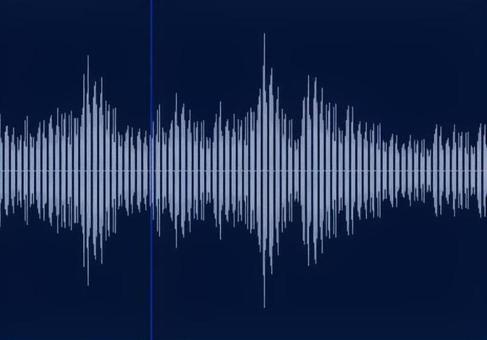
The scientific principle used in this model is "sound sensing." In micro:bit, the sound sensor module is a microphone component used to detect the intensity of sound waves in the environment. Detected sound waves are converted into numerical values that can be adjusted within the program.
Sound waves are vibrations produced by matter, and sound must travel through a medium, such as gas or liquid, to be perceived. For example, we can hear conversations or singing because sound waves travel through the air. Without a medium, sound waves cannot propagate, which is why astronauts can't speak directly on the moon.
◆Postscript
Even for a large-scale company like the BBC, constant quality improvement, functionality, and extensibility updates are necessary to stay relevant in an ever-evolving market. Just as we need the spirit of "lifelong learning" – continuously improving our knowledge and expanding our horizons – to enhance our competitiveness in all aspects!
Let's look forward to the adventures ahead in the world of education!
Keywords:
Programming education, micro:bit, disco robot, disco, sound sensing, sound waves, sound level, decibels
Curriculum(NGSS):
3-PS2-1 Plan and conduct an investigation to provide evidence of the effects of balanced and unbalanced forces on the motion of an object.
3-5-ETS1-1 Define a simple design problem reflecting a need or a want that includes specified criteria for success and constraints on materials, time, or cost.
3-5-ETS1-2 Generate and compare multiple possible solutions to a problem based on how well each is likely to meet the criteria and constraints of the problem.
Please sign in to vote.