Science in daily life: EP17 – Woodpecker Doorbell

Hello everyone! I am Teacher Raccoon.
Have you ever carefully observed the doorbell in your home? A doorbell is a tool that makes a sound to remind the host that a guest is visiting and to ask the host to open the door.
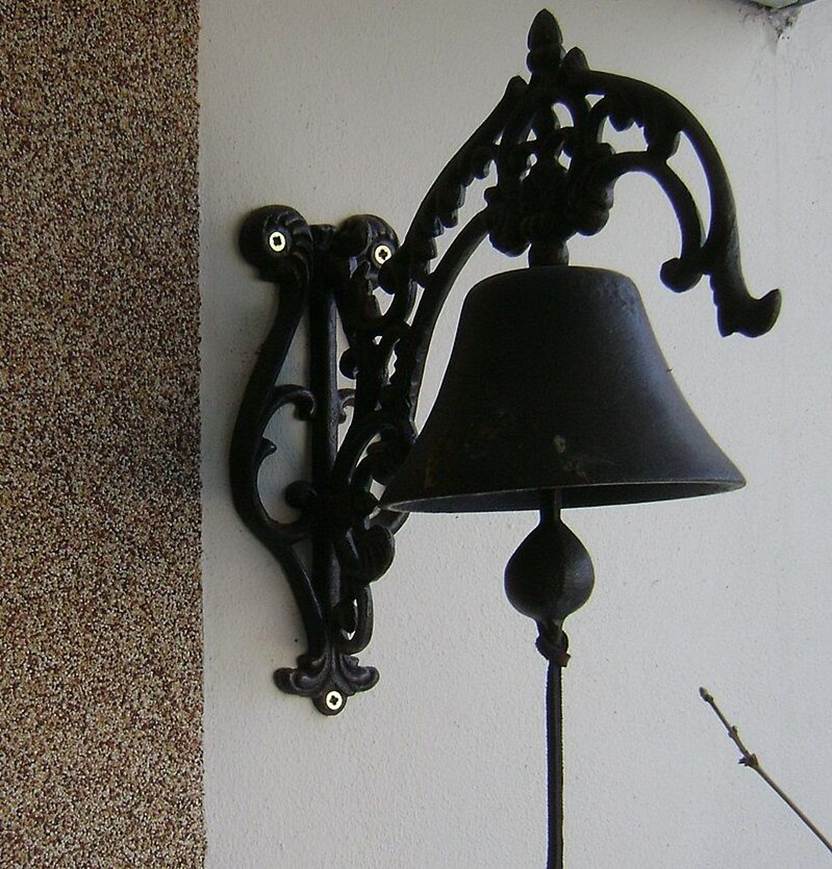
There are many types of doorbells. In ancient China, people would pull the beast-faced ring handle on the door to notify the people inside. In Europe, people would pull a rope to move a heavy object to strike the door bell and make a sound. In modern times, doorbells usually use buzzers to make sound. Some even come with a microphone and camera, allowing homeowners to see their visitors and talk with them.
Today, let Teacher Raccoon lead everyone to use Gigo building blocks to simulate a Woodpecker Doorbell!
Now let Teacher Raccoon walk you through how to make one, step by step!
◆ Assembly Steps
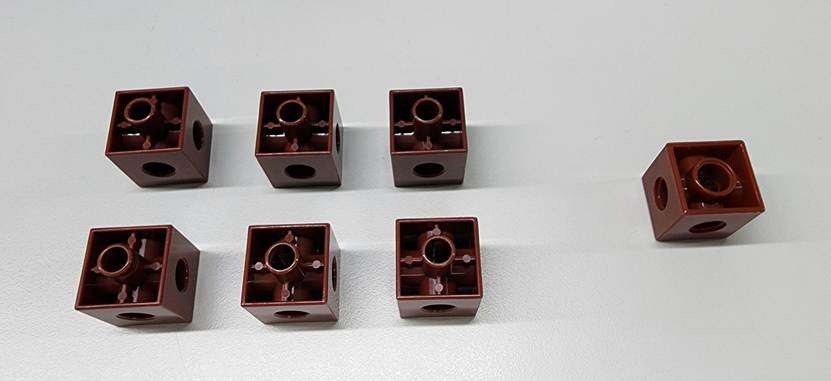
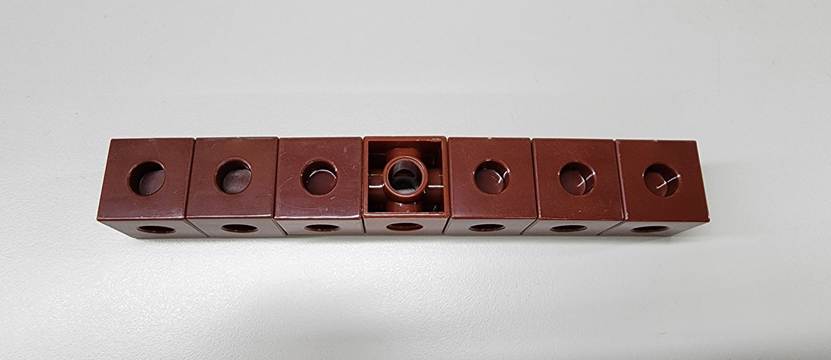
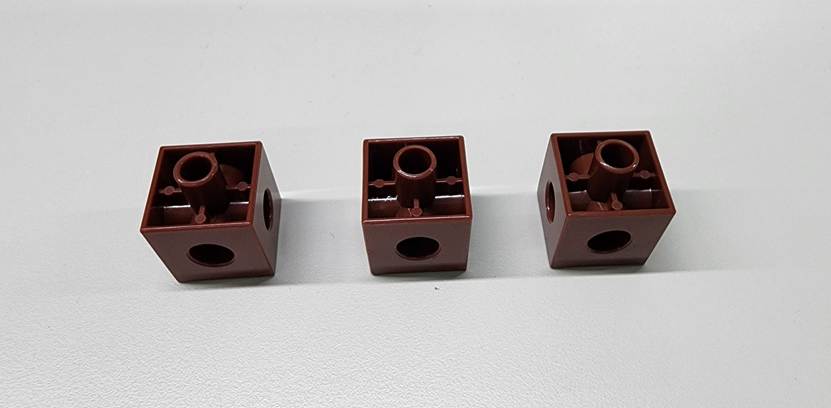
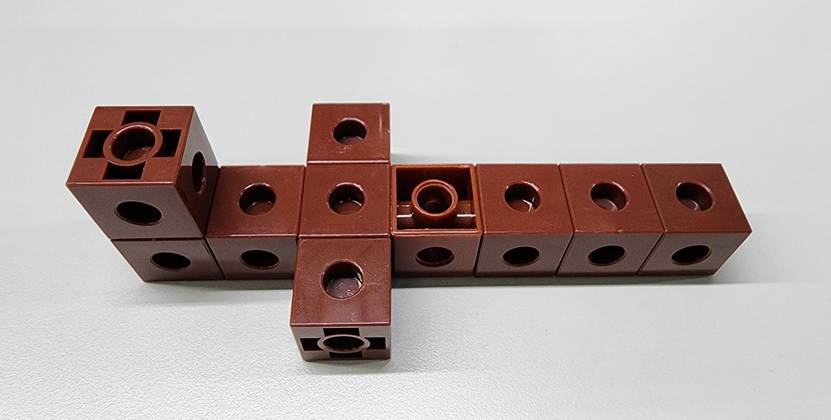
Step 1: In the first step, we are going to make the tree trunk. We need to use the B-CUBE(BROWN) and the B-6 HOLE CUBE (BROWN) (Figure 1). Assemble the parts together as shown in the diagram. When building, please pay attention to the direction of the B-6 HOLE CUBE (Figure 2).
Next, we also need the B-CUBE (BROWN)(Figure 3). Attach them to the left and right sides, as well as the top of the tree trunk, as shown in the diagram (Figure 4).
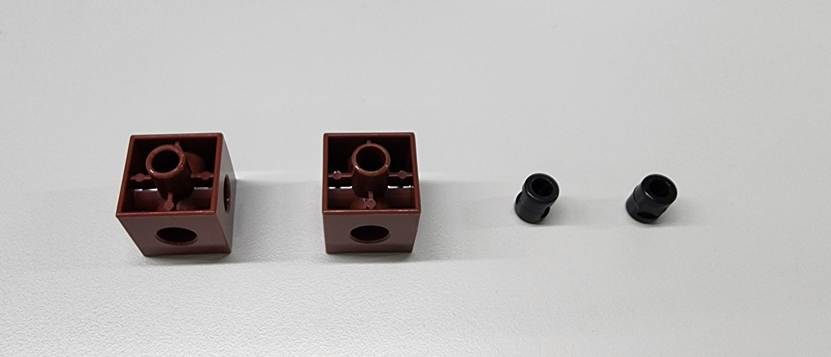
Step 2: Now, let's create a place to secure the rubber band. You will need the B-CUBE (BROWN) and the B-SHORT PEG (Figure 5). Insert the B-SHORT PEGinto the B-CUBE as shown in the diagram, and then attach it to the tree trunk (Figure 6).
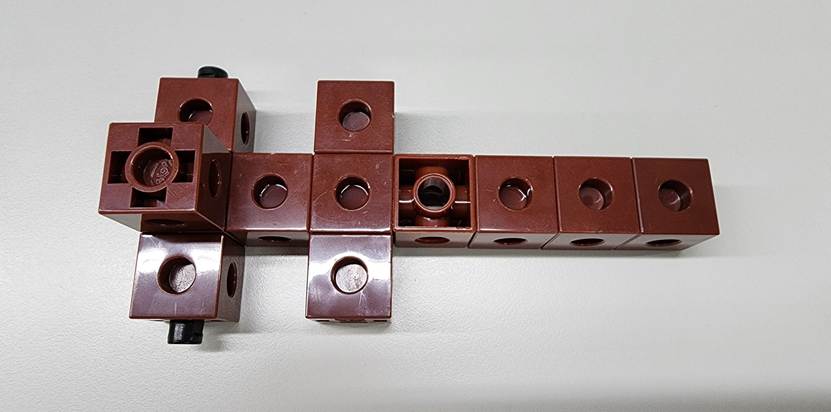
Step 3: You will need the B-SHORT PEG (Figure 7). Install the B-SHORT PEG on the back of the tree trunk as shown in the diagram (Figure 8). This will let us attach it to the C-JUMBO BASE GRID later.

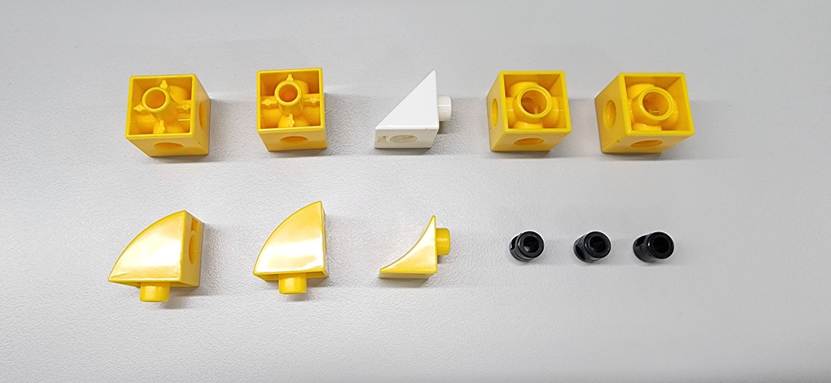
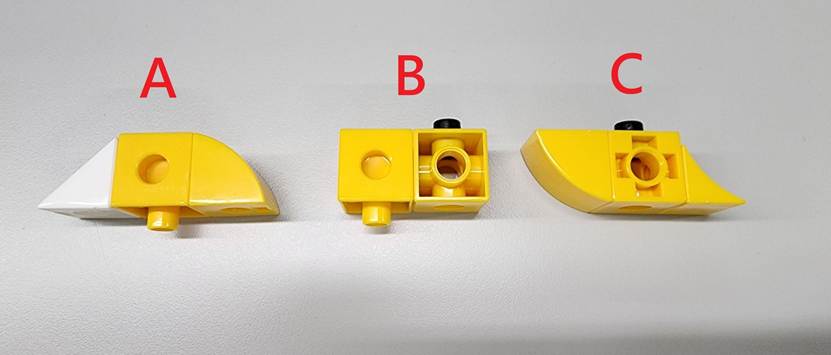
Step 4: Now, we are going to make the woodpecker! You will need the B-CUBE (YELLOW),B-CONVEX (YELLOW), B-CONCAVE (YELLOW), B-6 HOLE CUBE (YELLOW), B-TRIANGLE (WHITE), and the B-SHORT PEG (Figure 9). Assemble them into parts A, B, and C separately as shown in the diagram (Figure 10). Again, please pay attention to the direction of the B-6 HOLE CUBE.
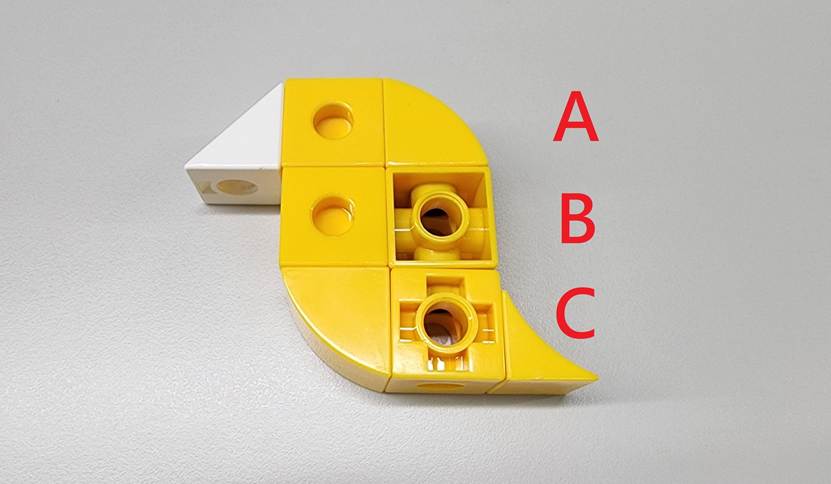
Next, assemble Parts A, B, and C together from top to bottom. The woodpecker's body is now complete! (Figure 11).
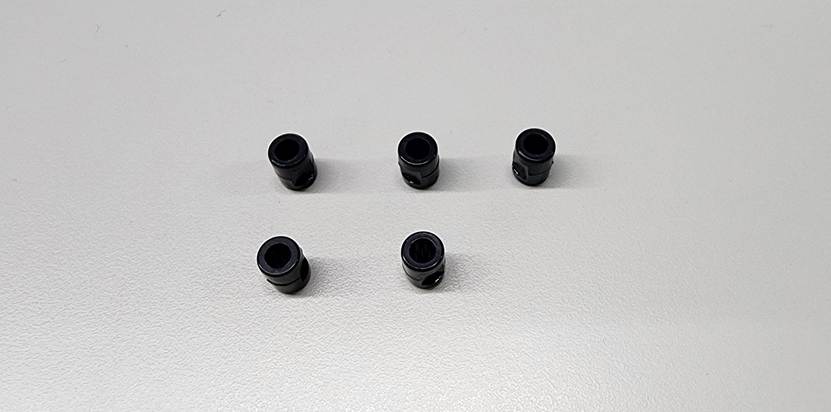
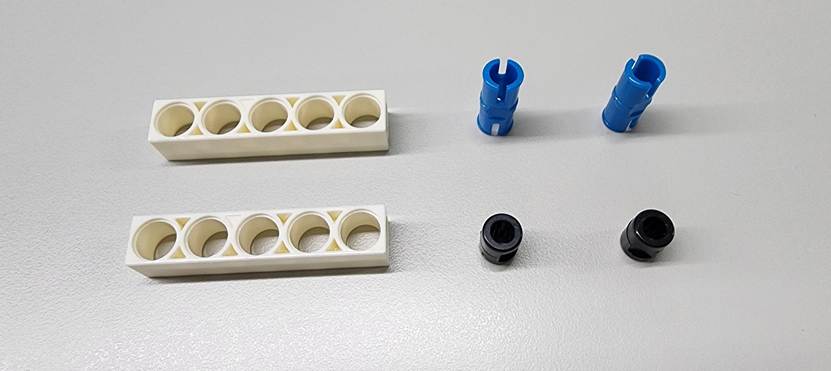
Step 5: Now, let's connect the woodpecker to the tree trunk. You will need the C-5 HOLE ROD, C-20mm AXLE CONNECTOR, and the B-SHORT PEG (Figure 12). Assemble them into two "Part D" units as shown in the diagram (Figure 13).
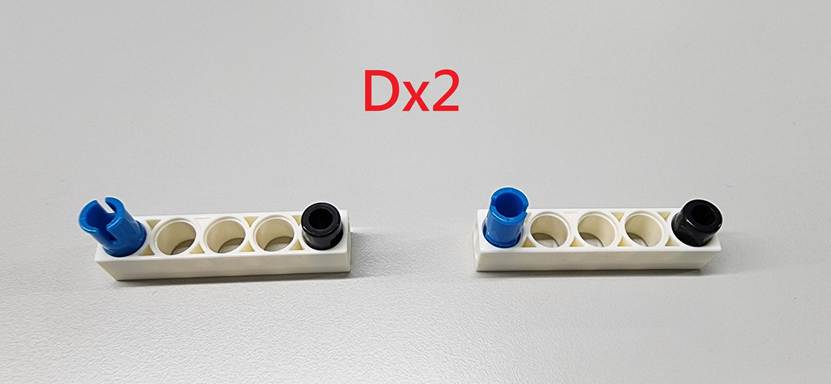
Next, follow the diagram to attach the B-SHORT PEG of Part D to the tree trunk. The C-20mm AXLE CONNECTOR should connect to the woodpecker (Figure 14). Once both Part D units are installed, let's do a movement test! Make sure the woodpecker can rotate smoothly (Video 1).
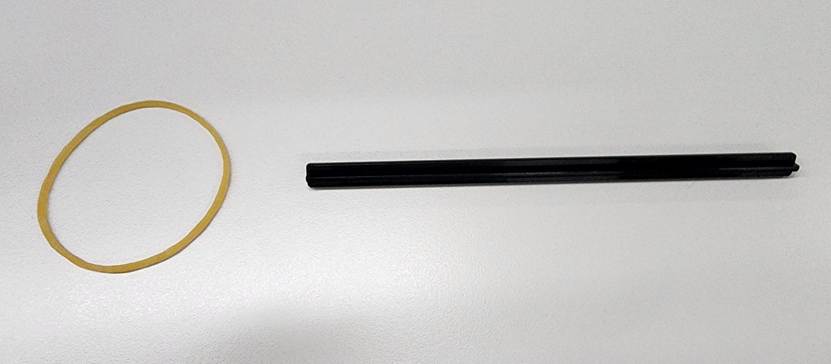
Step 6: Now, let's install the rubber band. You will need a RUBBER BAND and a C-150mm AXLE I (Figure 15). First, place the RUBBER BAND onto the C-150mm AXLE I. Thread the axle through the B-6 HOLE CUBE inside the woodpecker's body. Once through, pull the axle out and hook both ends of the RUBBER BAND onto the B-SHORT PEGs on the left and right sides. When you finish, the tension from the rubber band will automatically pull the woodpecker's body upright! (Video 2).
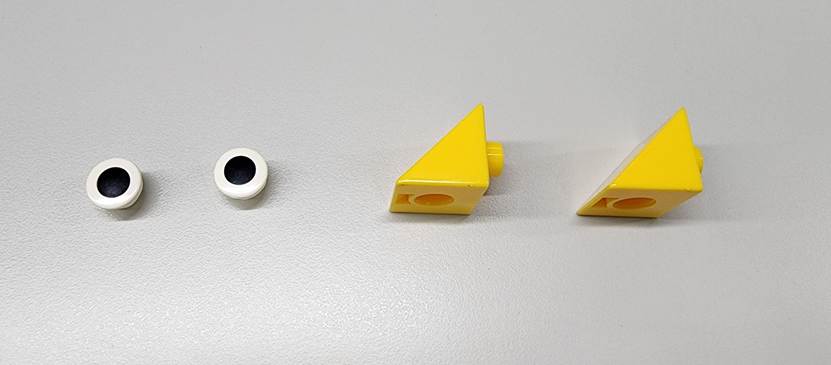
Step 7:Let's give the woodpecker eyes and wings! You will need the B-EYE BALLand the B-TRIANGLE (YELLOW) (Figure 16). Attach them to both sides of the woodpecker's body as shown in the diagram (Figure 17). Now, your cute woodpecker is finished!
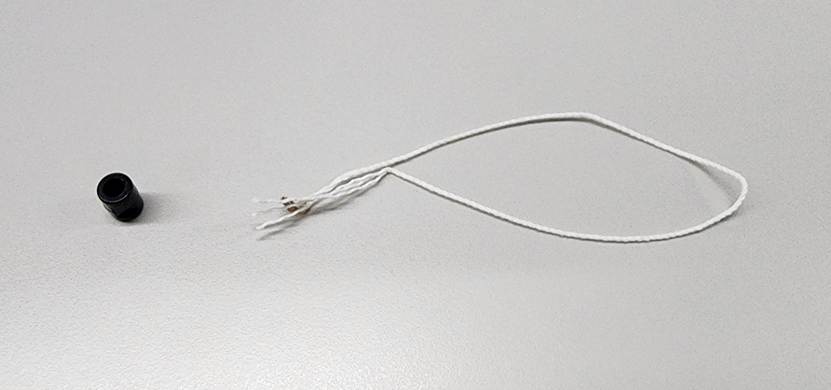
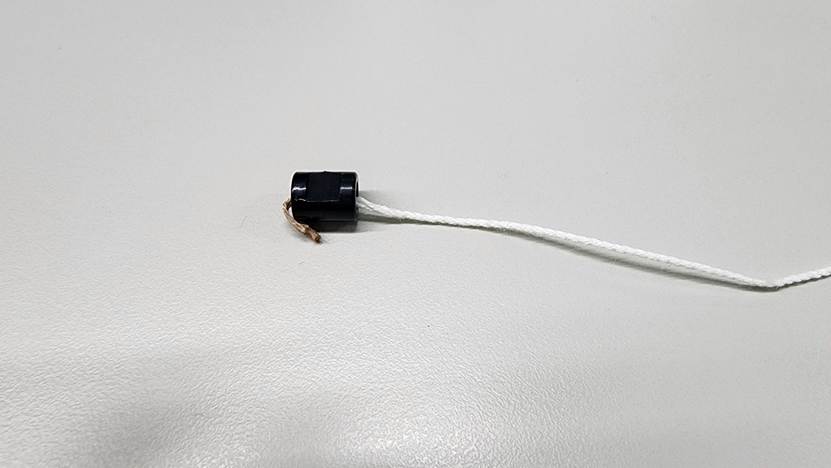
Step 8: Now, let's install the string. You will need the STRING and a B-SHORT PEG(Figure 18). First, thread the STRING through the hole in the B-SHORT PEG as shown in the diagram. Be sure to leave a short length of string at the end (Figure 19).
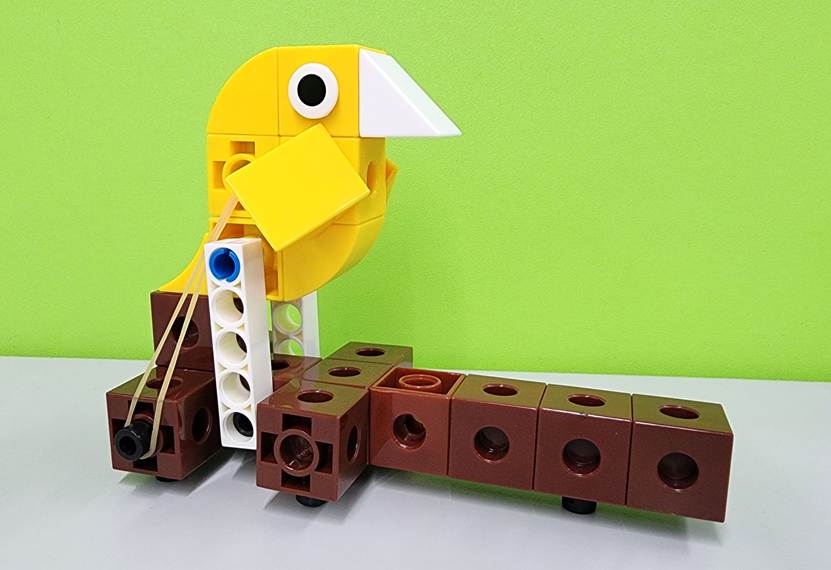
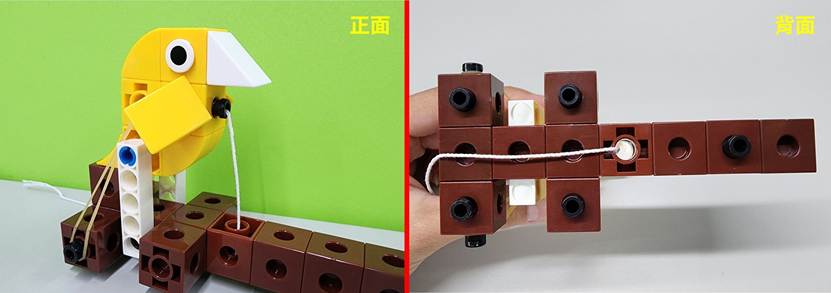
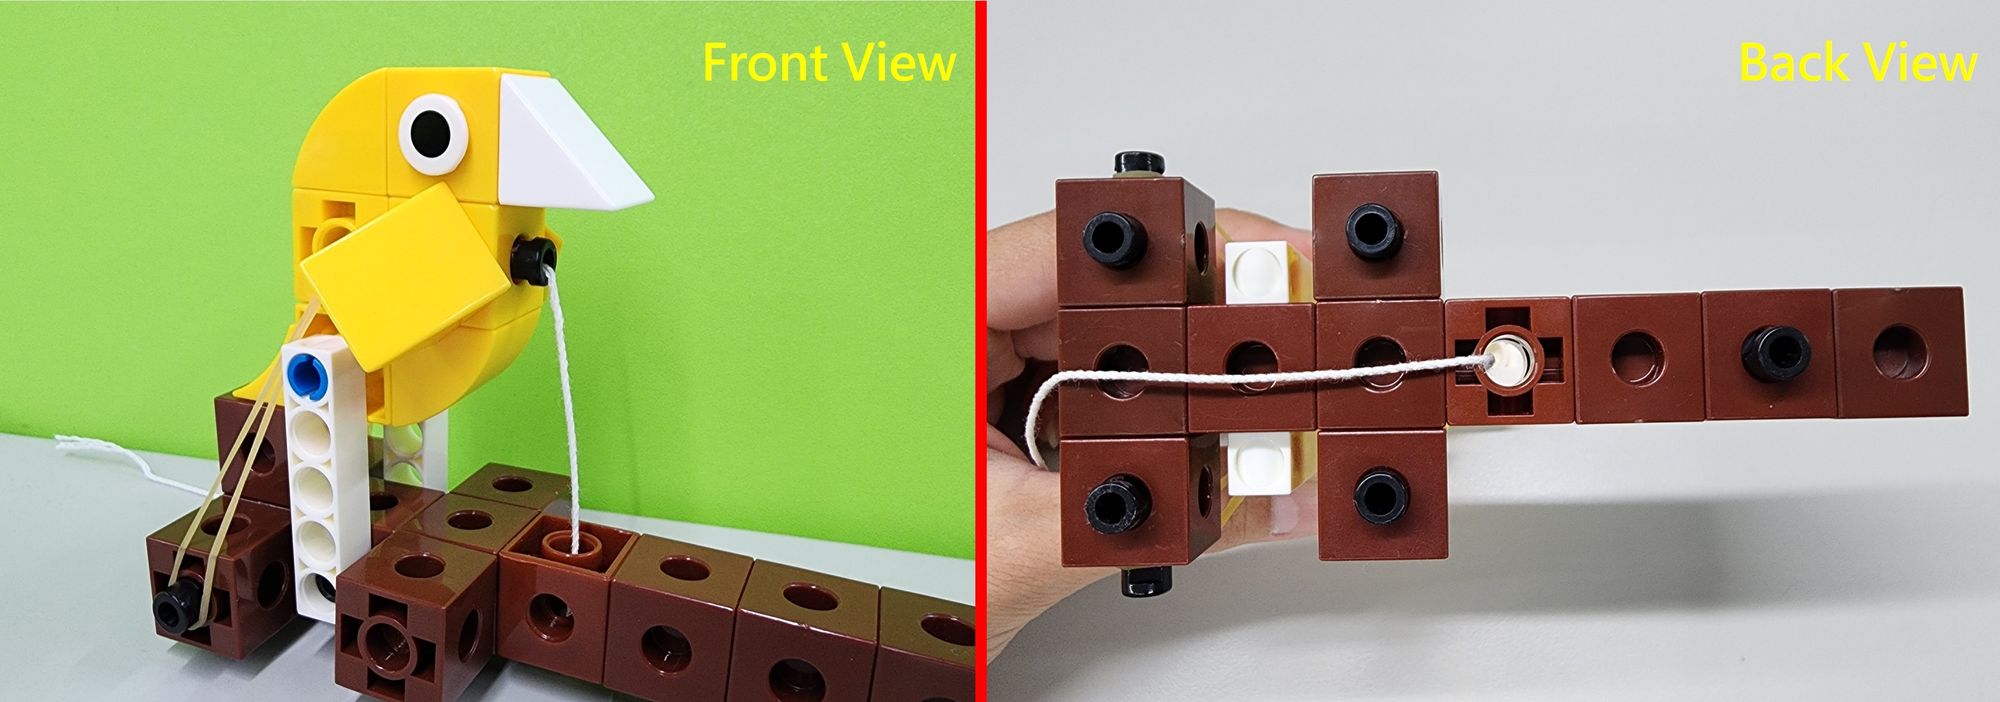
Next, attach the B-SHORT PEG to the front of the woodpecker's body. Then, thread the other end of the STRINGthrough the hole of the B-6 HOLE CUBE in the middle of the tree trunk (Figure 20). The string installation is now complete!
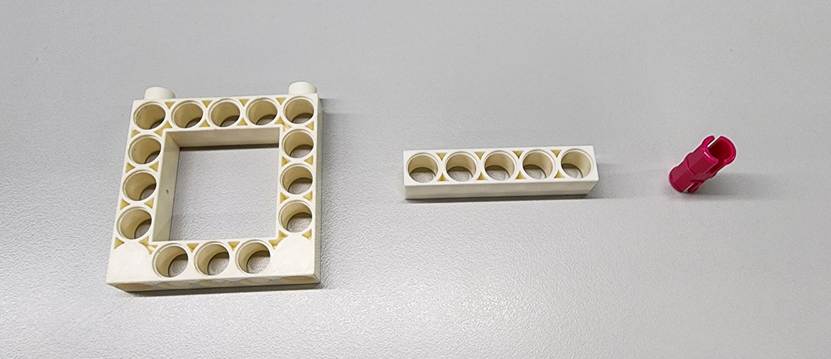
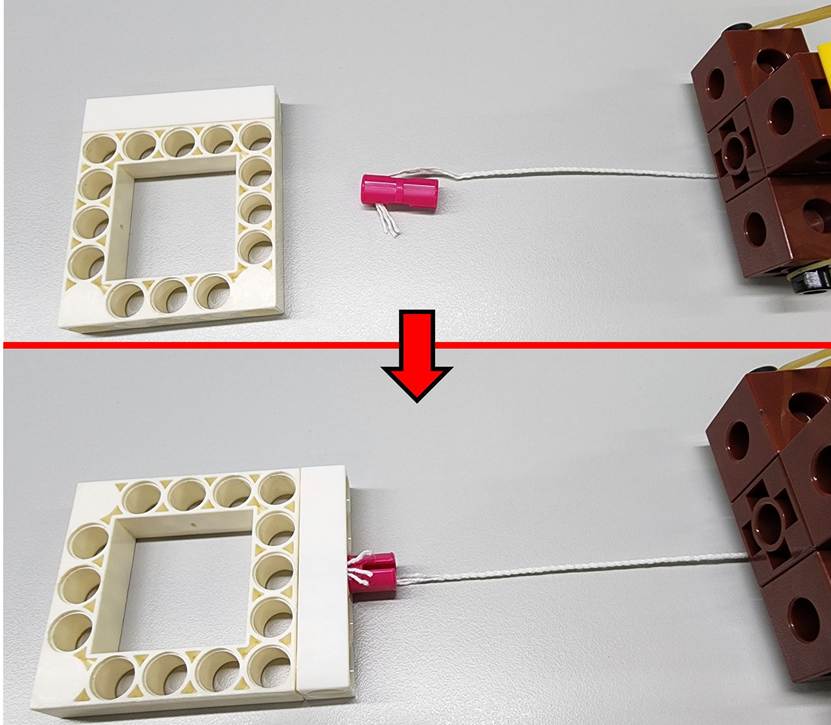
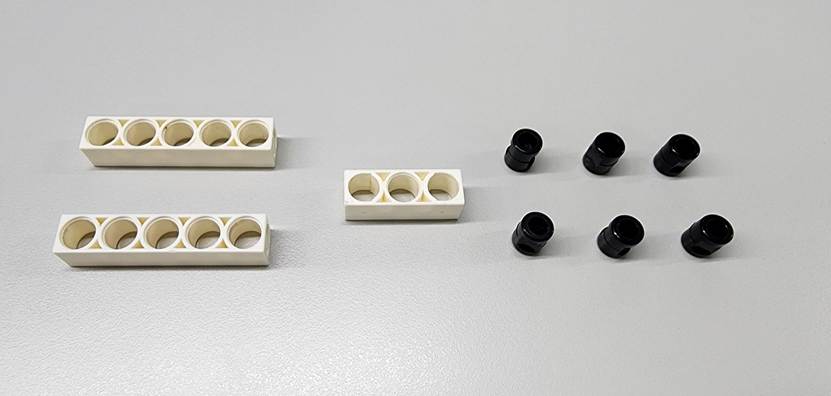
Step 9:Let's make the handle! You will need the C-5×5 FRAME, C-5 HOLE ROD, and the C-STATIC AXLE CONNECTOR (Figure 21). First, combine the C-5×5 FRAME and the C-5 HOLE ROD as shown in the diagram. Next, thread the STRING through the hole of the C-STATIC AXLE CONNECTOR, leaving a small amount of string at the end. Finally, attach the C-STATIC AXLE CONNECTOR to the C-5 HOLE ROD (Figure 22). The string is now fully installed!
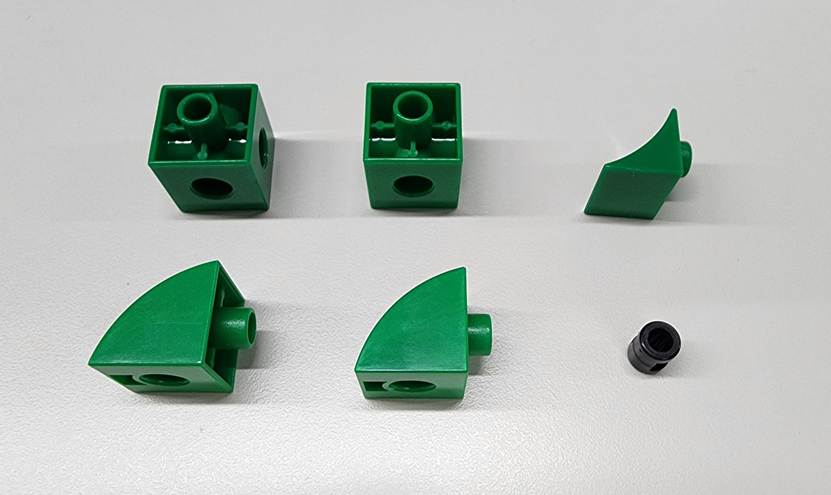
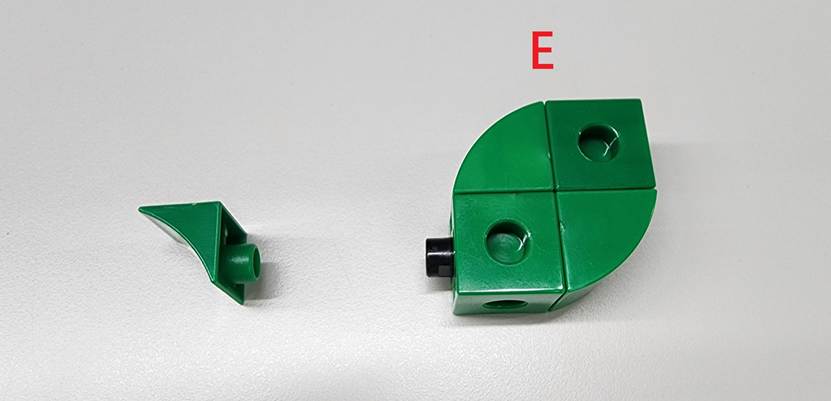
Step 10: Now let's make the leaves for the tree trunk. You will need the B-CUBE (GREEN), B-CONVEX (GREEN), B-CONCAVE (GREEN), and the B-SHORT PEG(Figure 23). Follow the diagram to assemble the parts (excluding the B-CONCAVE) into Part E (Figure 24). This completes the making of the big and small leaves.
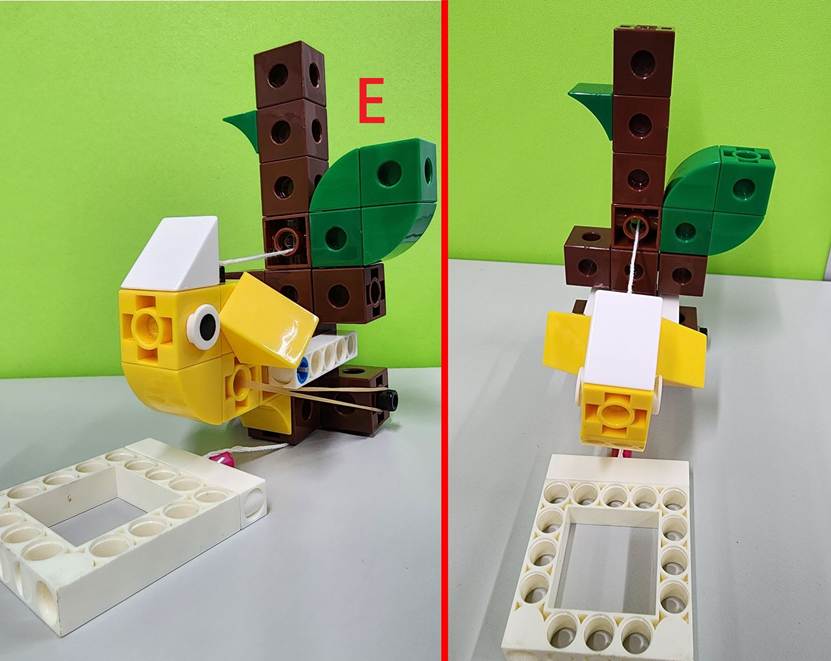
Next, attach the B-CONCAVE and Part E to the tree trunk as shown in the diagram (Figure 25). Feel free to design your own leaf styles or add more parts to make the tree look even bushier!
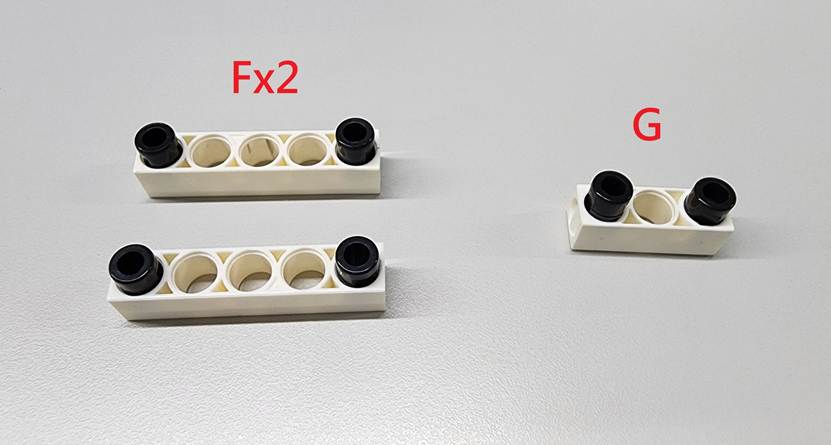
Step 11:Now, let's make the parts to connect the tree trunk to the C-JUMBO BASE GRID. You will need the C-5 HOLE ROD, C-3 HOLE ROD, and the B-SHORT PEG (Figure 26). Follow the diagram to assemble them into two "Part F" units and one "Part G" unit (Figure 27).
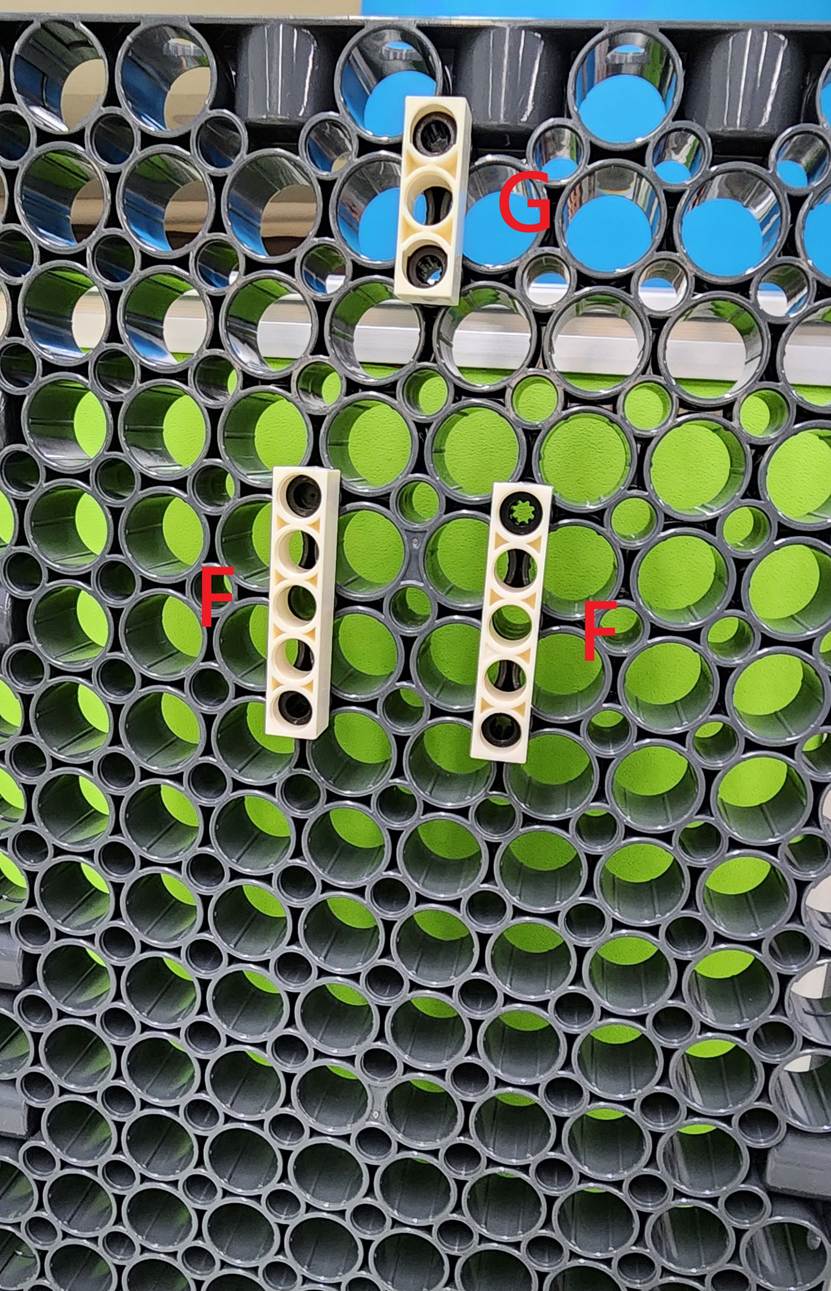
Next, follow the diagram to install Part F and Part G onto the C-JUMBO BASE GRID (Figure 28).
Finally, connect the five B-SHORT PEG on the tree trunk to Part F and Part G as shown in the diagram (Figure 29). This will securely attach the tree trunk to the C-JUMBO BASE GRID. After installation, make sure the STRING is positioned between the two Part F units. This ensures you can pull the string smoothly (Figure 30).

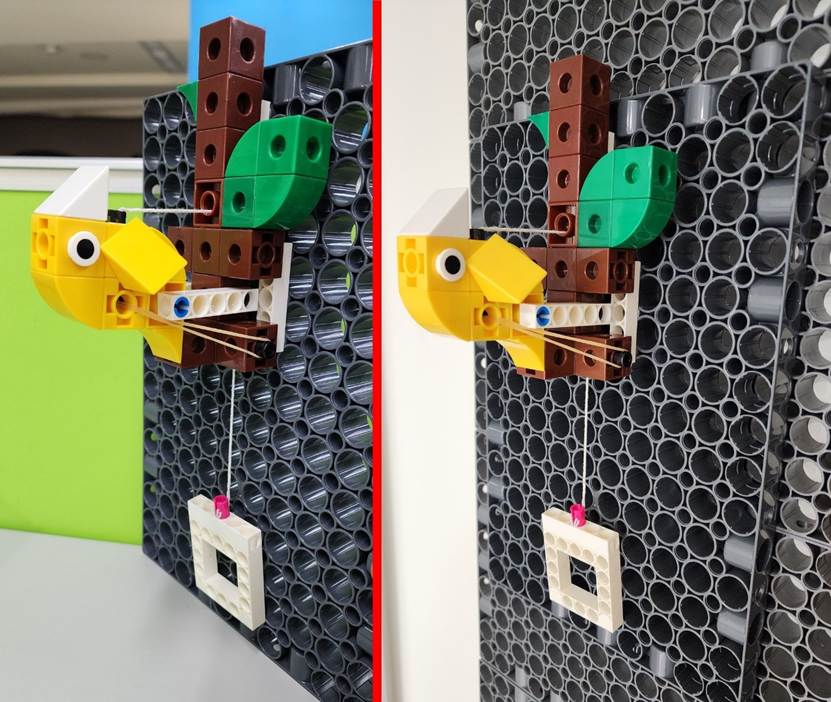
We have finished building the Woodpecker Doorbell! You can use PEGS or ROUND CONNECTORS to mount the entire model, along with the C-JUMBO BASE GRID, onto a Base Plate Wall (Figure 31). Now, let's see how it works!
◆ Model Operation
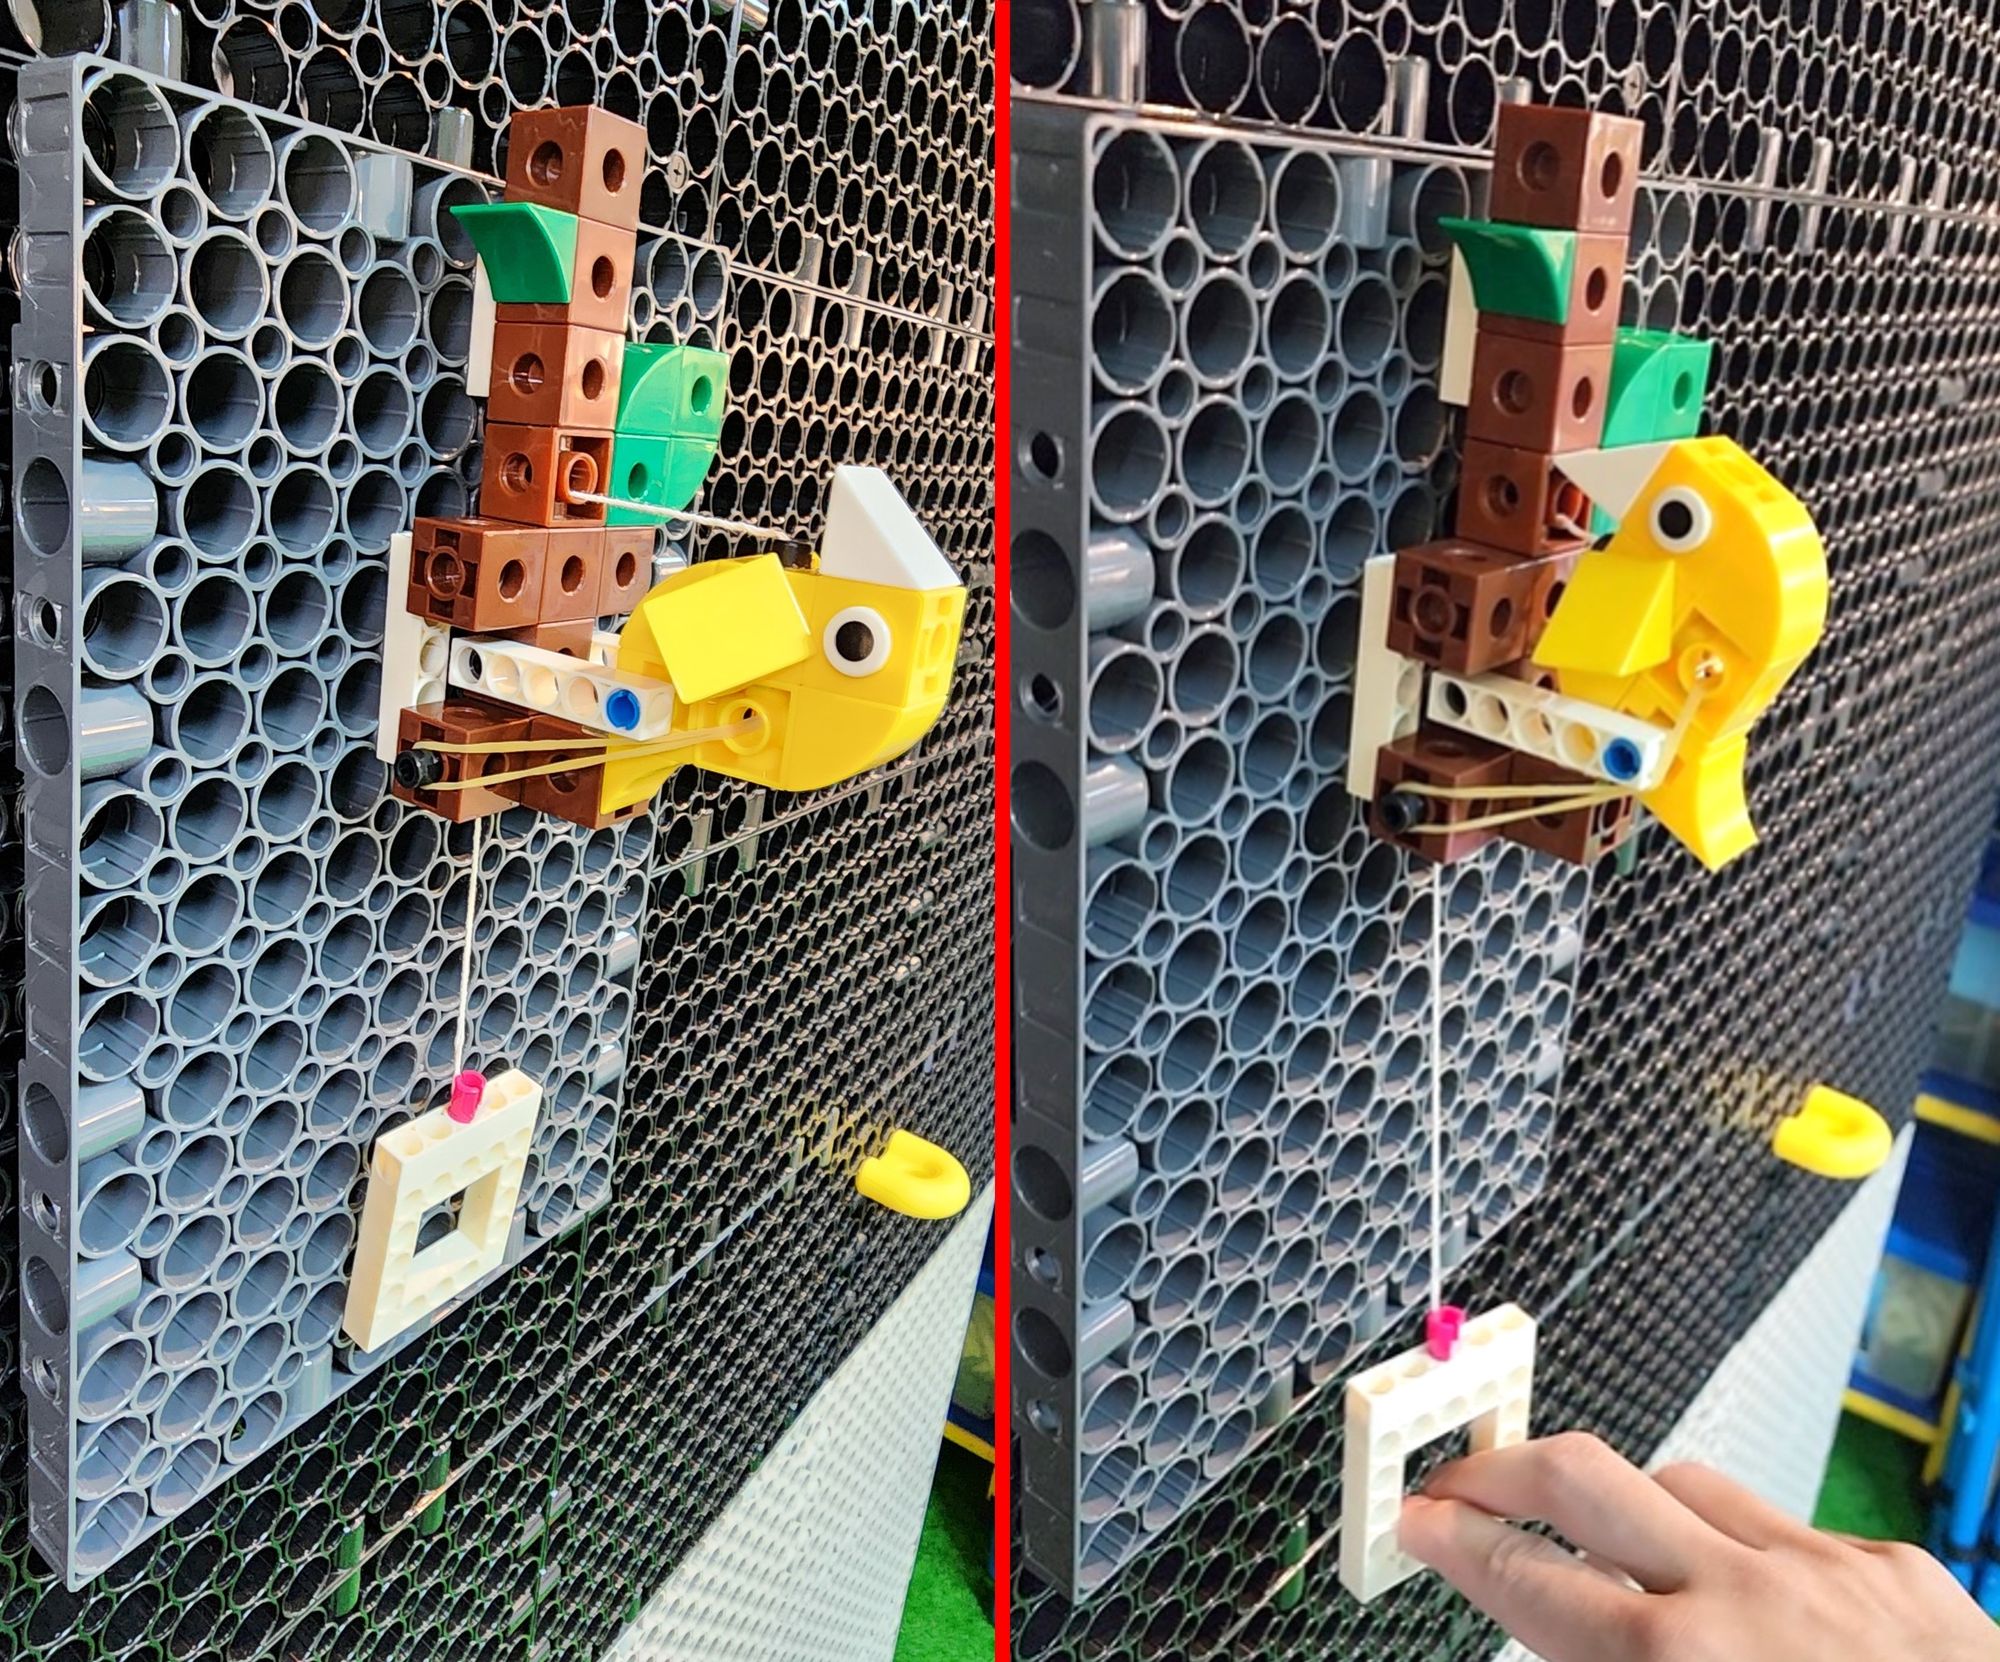
You can pull the handle down repeatedly to make the woodpecker peck the tree trunk. It makes a sound just like a real doorbell! The faster you pull the handle, the faster the knocking sound will be! (Videos 3 & 4).
◆ Conclusion
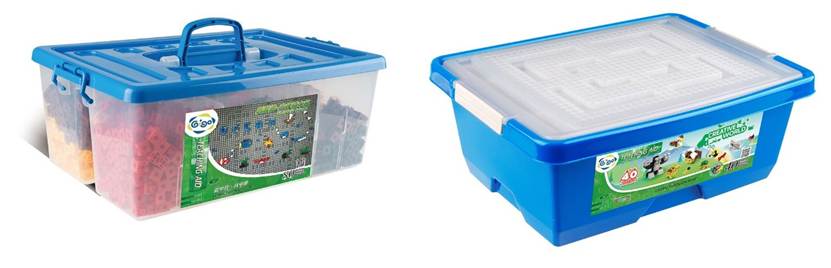
In this episode, Teacher Raccoonused 2cm blocks to build the Woodpecker Doorbell model. These 2cm blocks come in different shapes, such as the B-CONVEX, B-CONCAVE, and B-TRIANGLE. By combining these shapes, you can create all kinds of different works! If you are interested in 2cm blocks, why not check out the #1411 Creative World and #1403 Maker Wall? Both sets are packed with 2cm blocks that allow you to build colorful models like numbers, letters, and animals. Let's get creative together!
That’s all for today! If you enjoyed this article, please don't forget to share it for Teacher Raccoon. See you next time! Bye!
◆Scientific Principle:
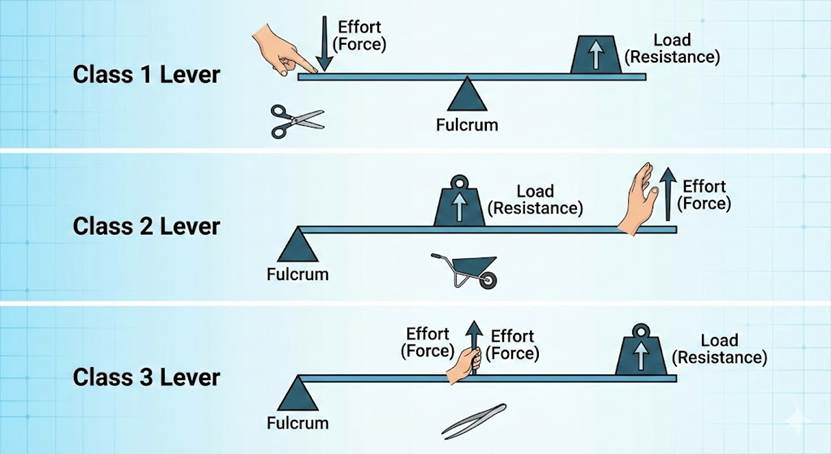
The Woodpecker Doorbell mainly uses the principles of Levers and Elasticity. Levers can be divided into three types (Figure 32):
- Class 1 Lever: The fulcrum is located between the effort (force) and the load. This type changes the direction of the force.
- Class 2 Lever: The load is located between the effort and the fulcrum. This type allows you to use less force (saves effort) but requires moving a longer distance.
- Class 3 Lever: The effort is located between the load and the fulcrum. This type requires more force but moves the load faster (saves time).
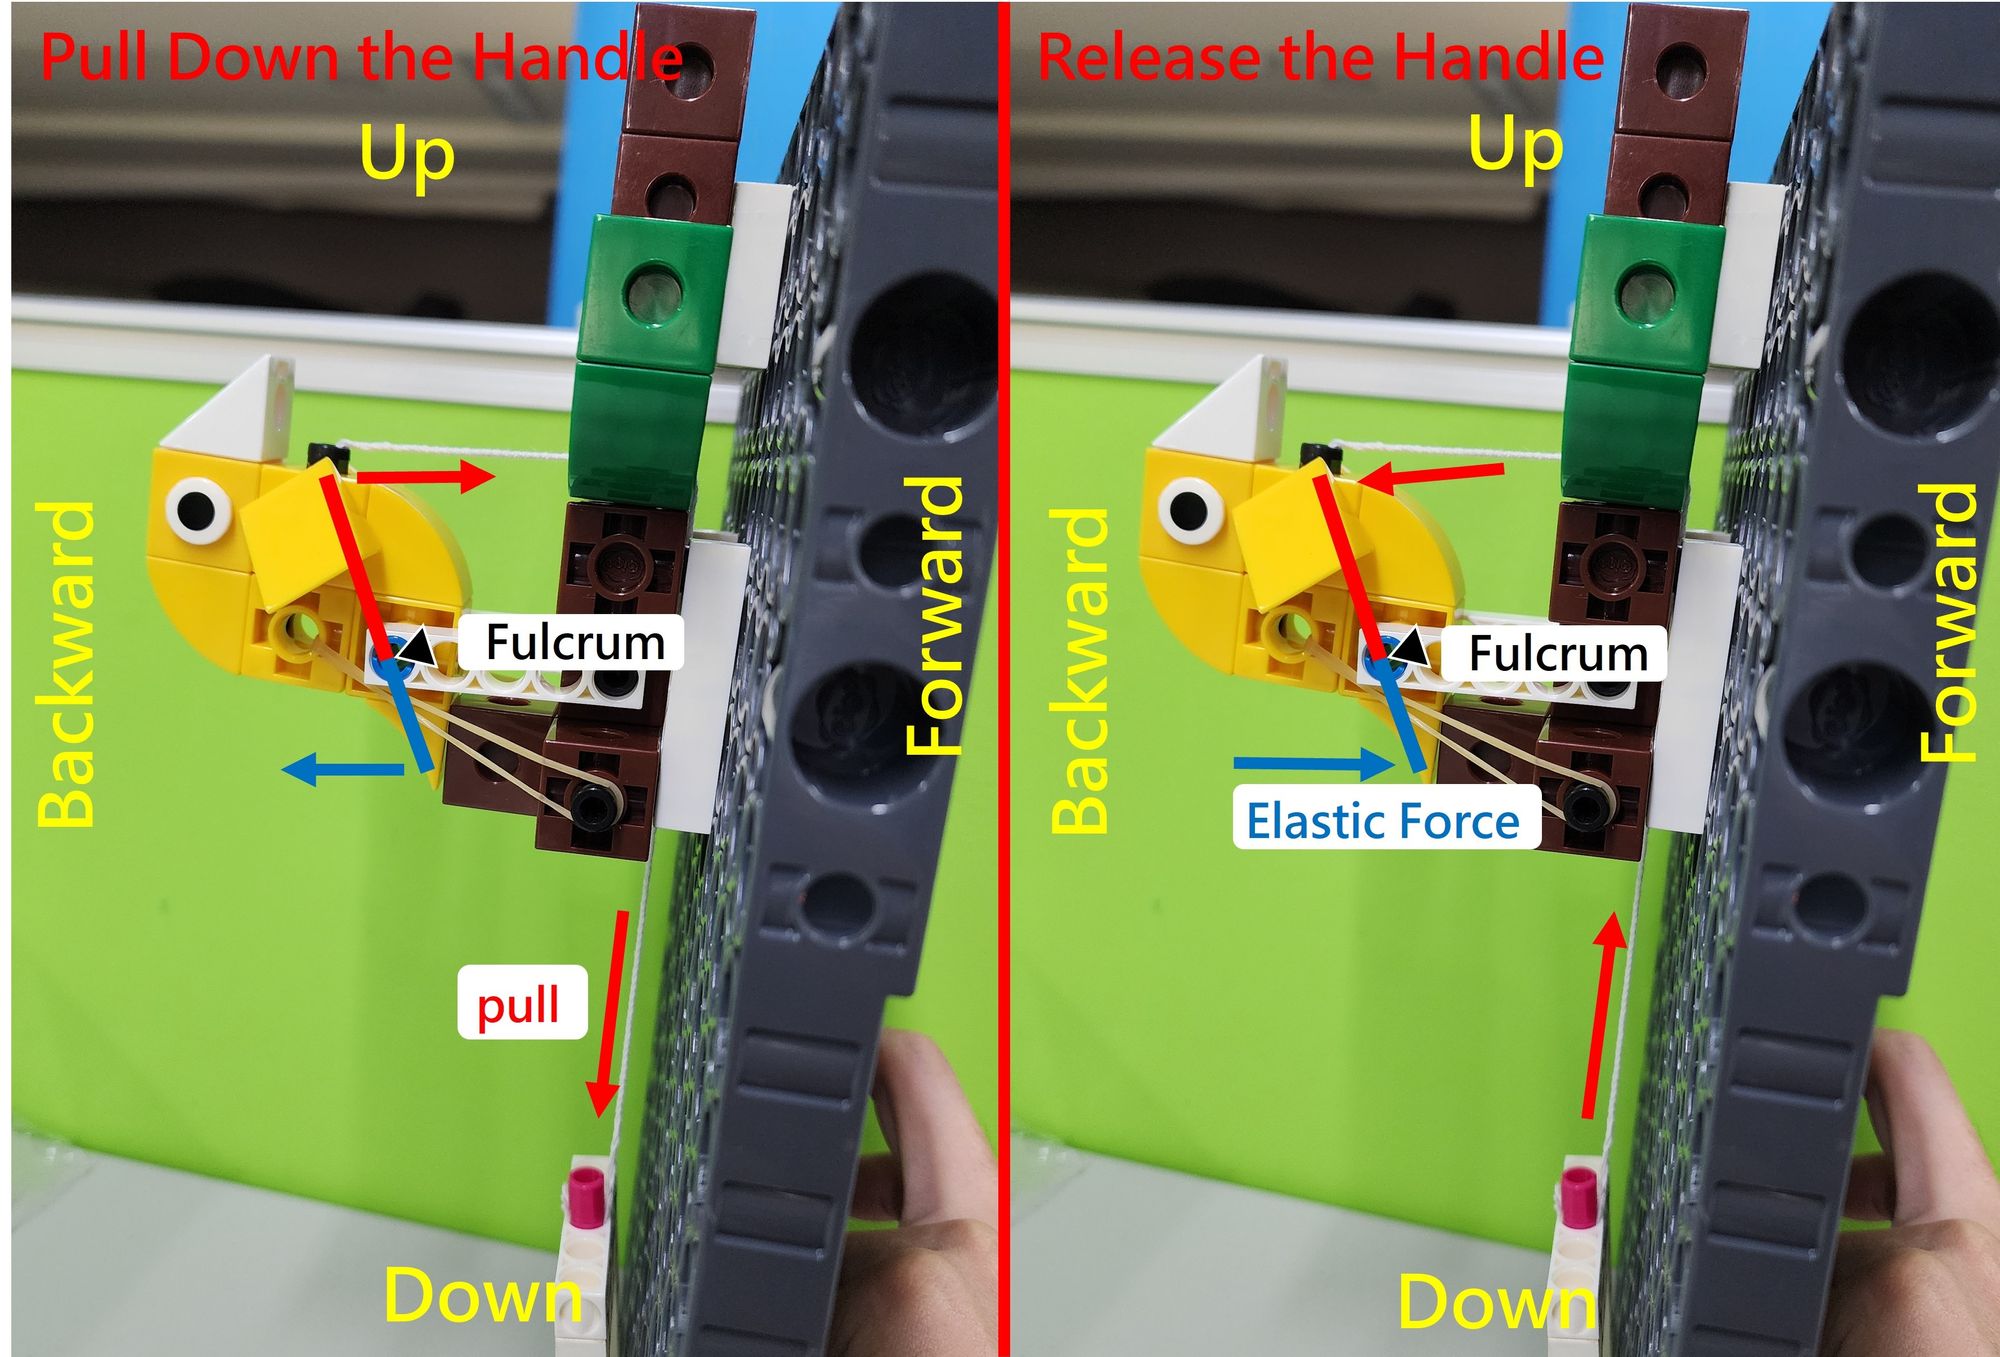
The Woodpecker Doorbell works as a Class 1 Lever (where the fulcrum is between the effort and the load, allowing it to change the direction of movement).
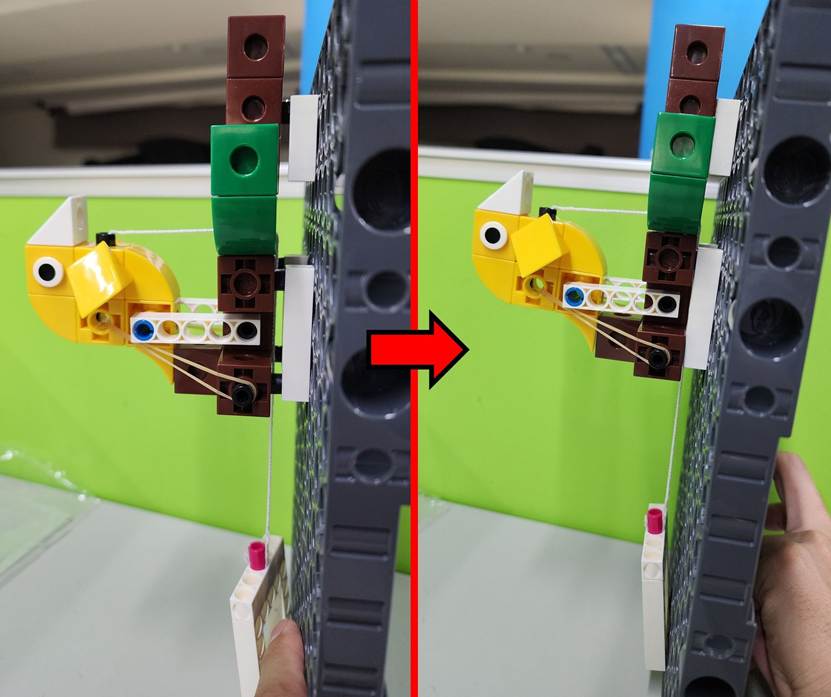
When we pull down on the STRING, it creates a forward force that pulls the lever. The effort arm (Red Line) moves forward, causing the beak to strike the tree trunk and make a sound. At the same time, the load arm (Blue Line) moves backward, stretching the RUBBER BAND to store elastic energy.
When we let go of the STRING, the stretched RUBBER BAND releases its elastic force to pull the lever back. The effort arm (Red Line) moves backward, and the load arm (Blue Line) moves forward, returning the woodpecker to its original position (Figure 33).
◆ Curriculum:
HS-PS3-1 Energy: Create a computational model to calculate the change in the energy of one component in a system (e.g., Elastic Potential Energy from the rubber band).
MS-PS2-2 Motion and Stability: Forces and Interactions: Plan an investigation to provide evidence that the change in an object’s motion depends on the sum of the forces on the object and the mass of the object.
HS-PS2-1 Motion and Stability: Analyze data to support the claim that Newton’s second law of motion describes the relationship among the net force, mass, and acceleration (including rotational acceleration).
MS-ETS1-4 Engineering Design: Develop a model to generate data for iterative testing and modification of a proposed object, tool, or process (using Simple Machines like levers and gears to optimize a design).
◆ References:
 Contributors to Wikimedia projects
 Contributors to Wikimedia projects
 Contributors to Wikimedia projects
Please sign in to vote.