Science in daily life: EP3- Money Blaster

Hello everyone, I'm Teacher Raccoon, we celebrate the Lunar New Year, also known as the Spring Festival. During this time, families celebrate the start of a new year on the traditional Chinese calendar. Activities during the festival are diverse and include posting couplets, eating rice cakes, setting off firecrackers, and giving out lucky red envelopes. Today, I'll teach you how to make a money blaster so we can experience the fun of spraying money like local tycoons! (*゚∀゚*)
Don't you just love the festive feeling of seeing a shower of banknotes spraying out?
But before we start making the money blaster, I want to remind everyone to use toy banknotes from stationery or bookstores to avoid accidentally using real banknotes and losing money.
Now, let's follow along as I teach you how to make a money spray blaster step by step!
◆Assembly Steps
To begin making the money blaster, we need to use building blocks to create a space where toy banknotes can be placed. Toy banknotes on the market are usually the same size as real banknotes, which are 7x16 cm.
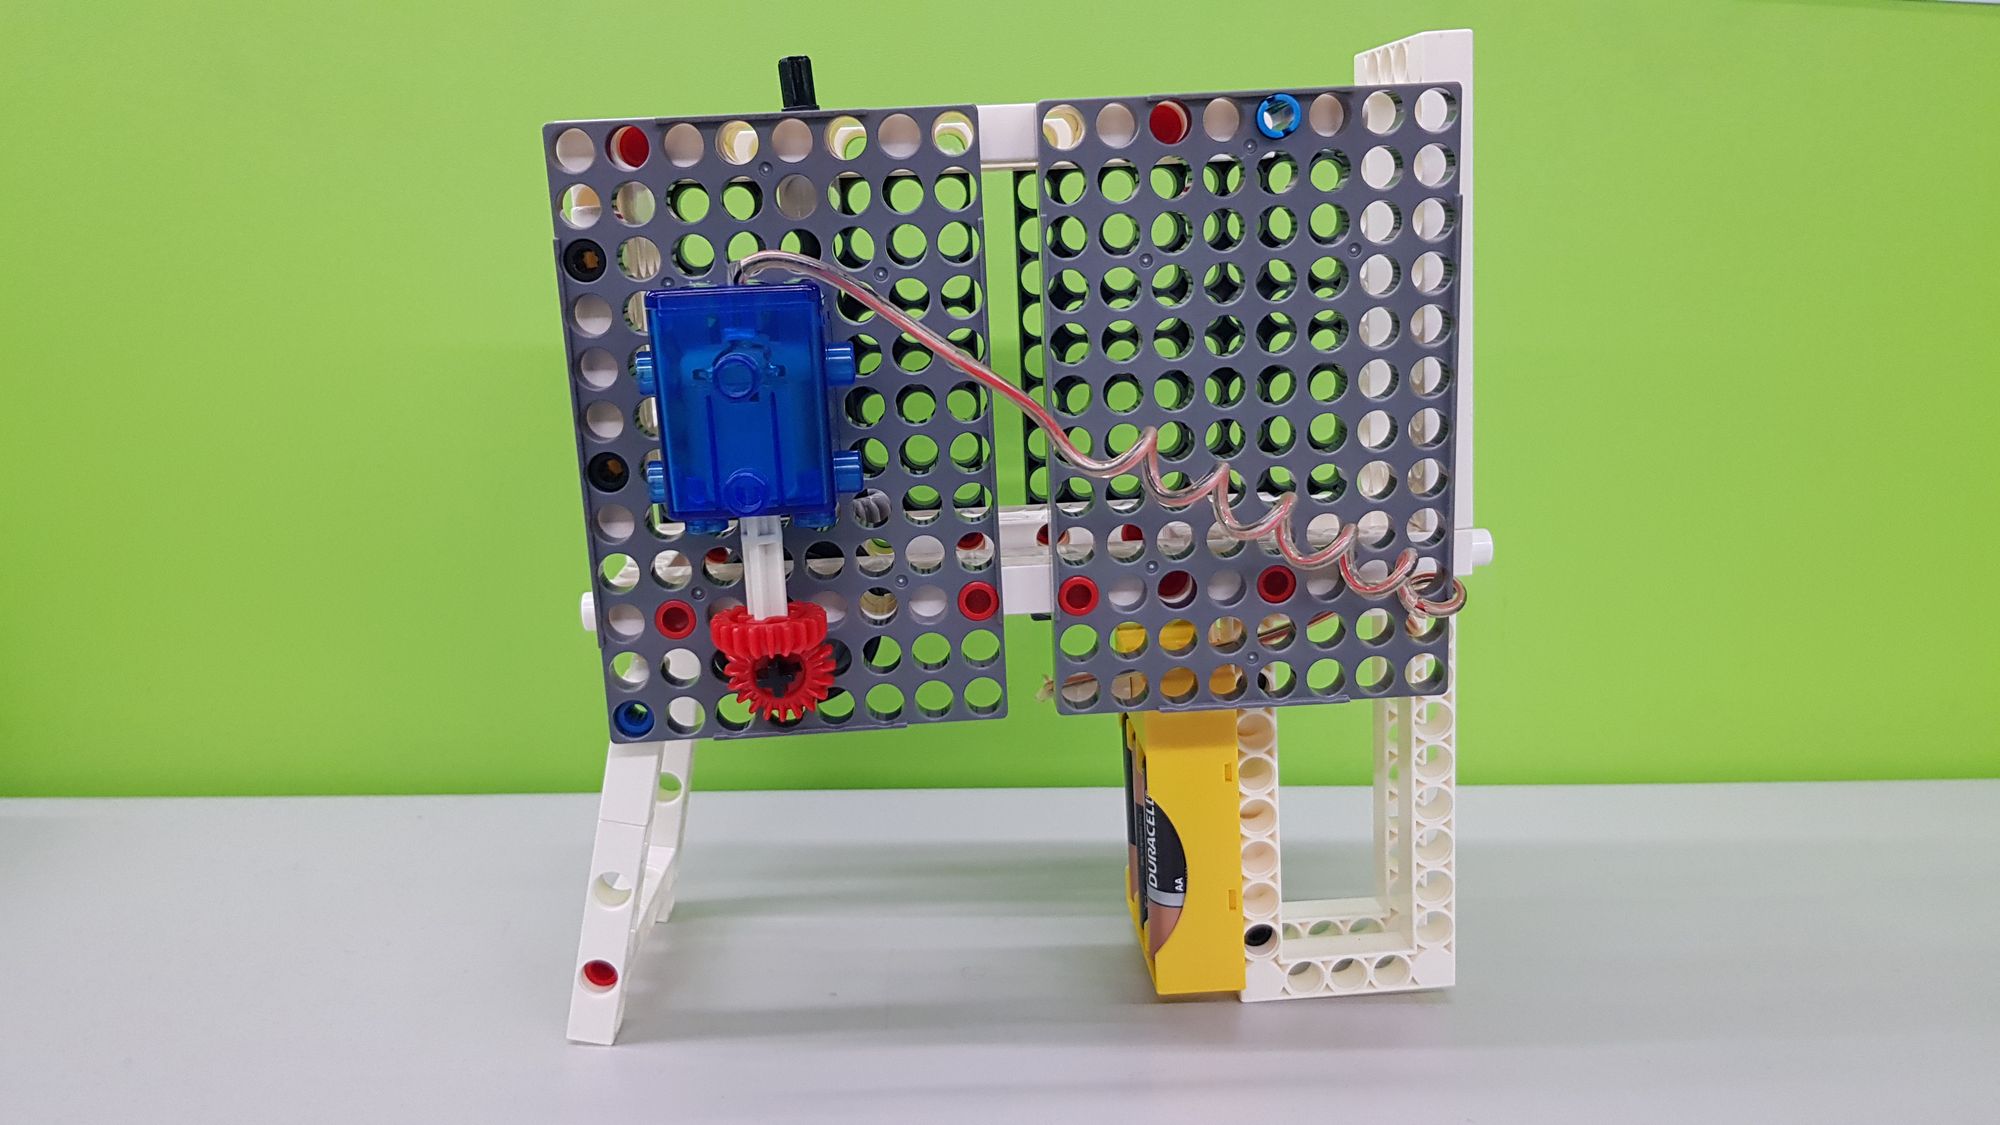
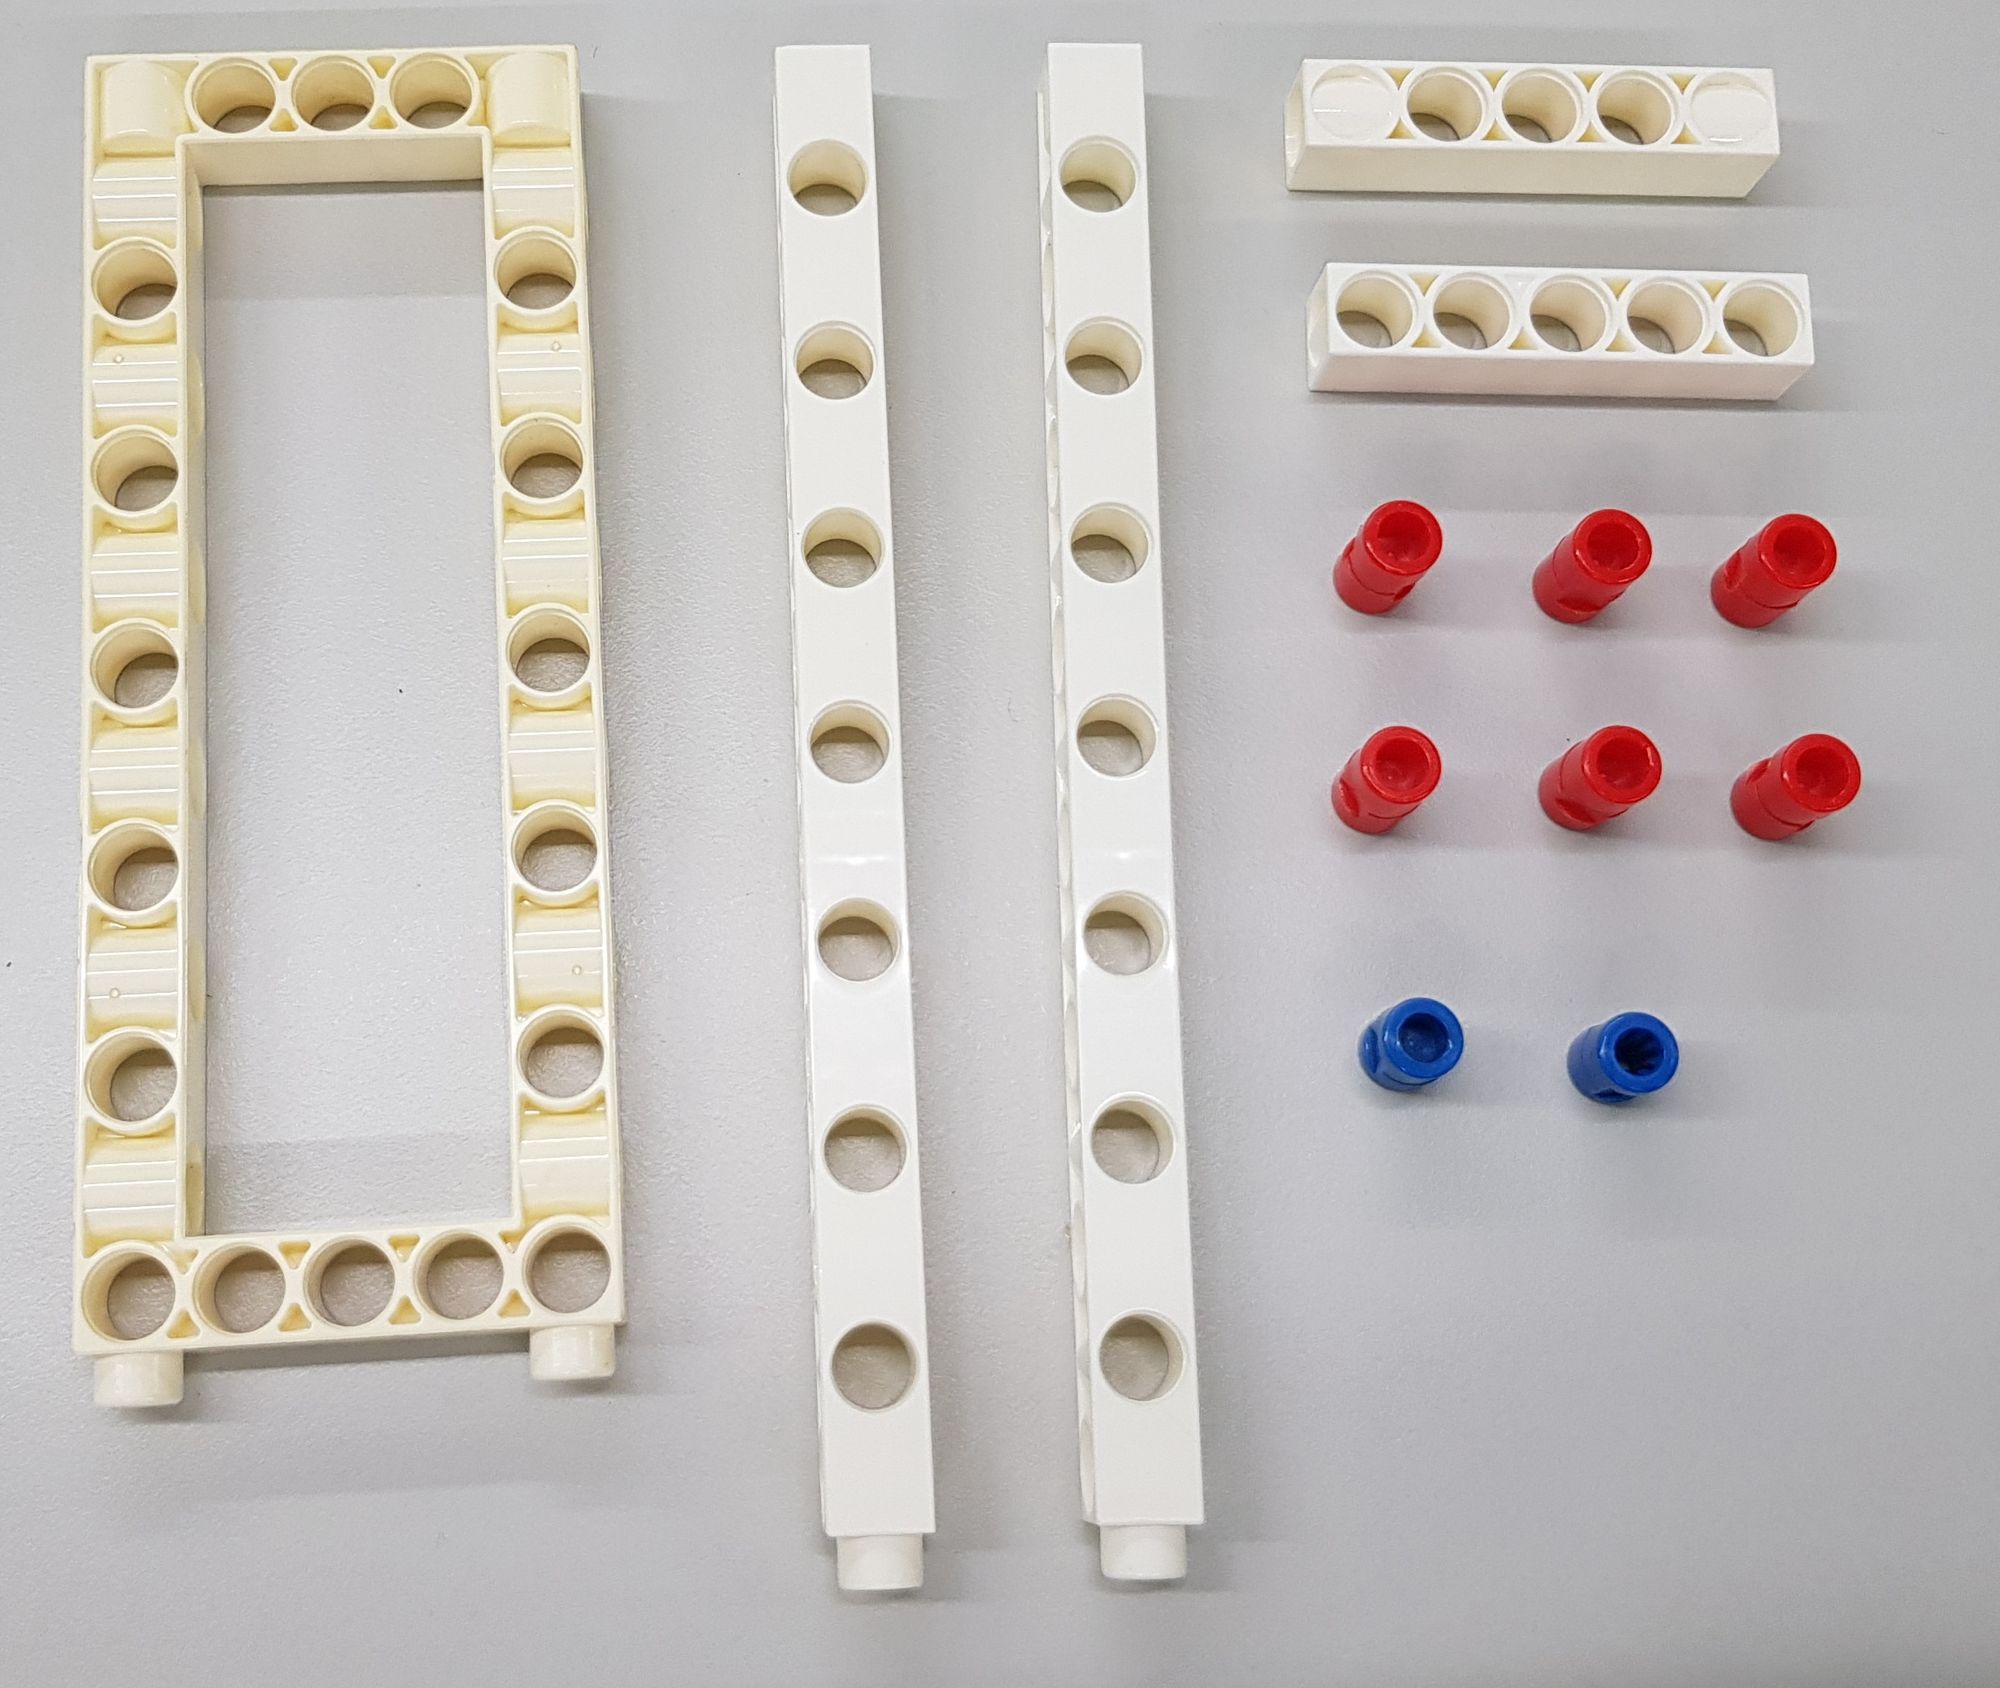
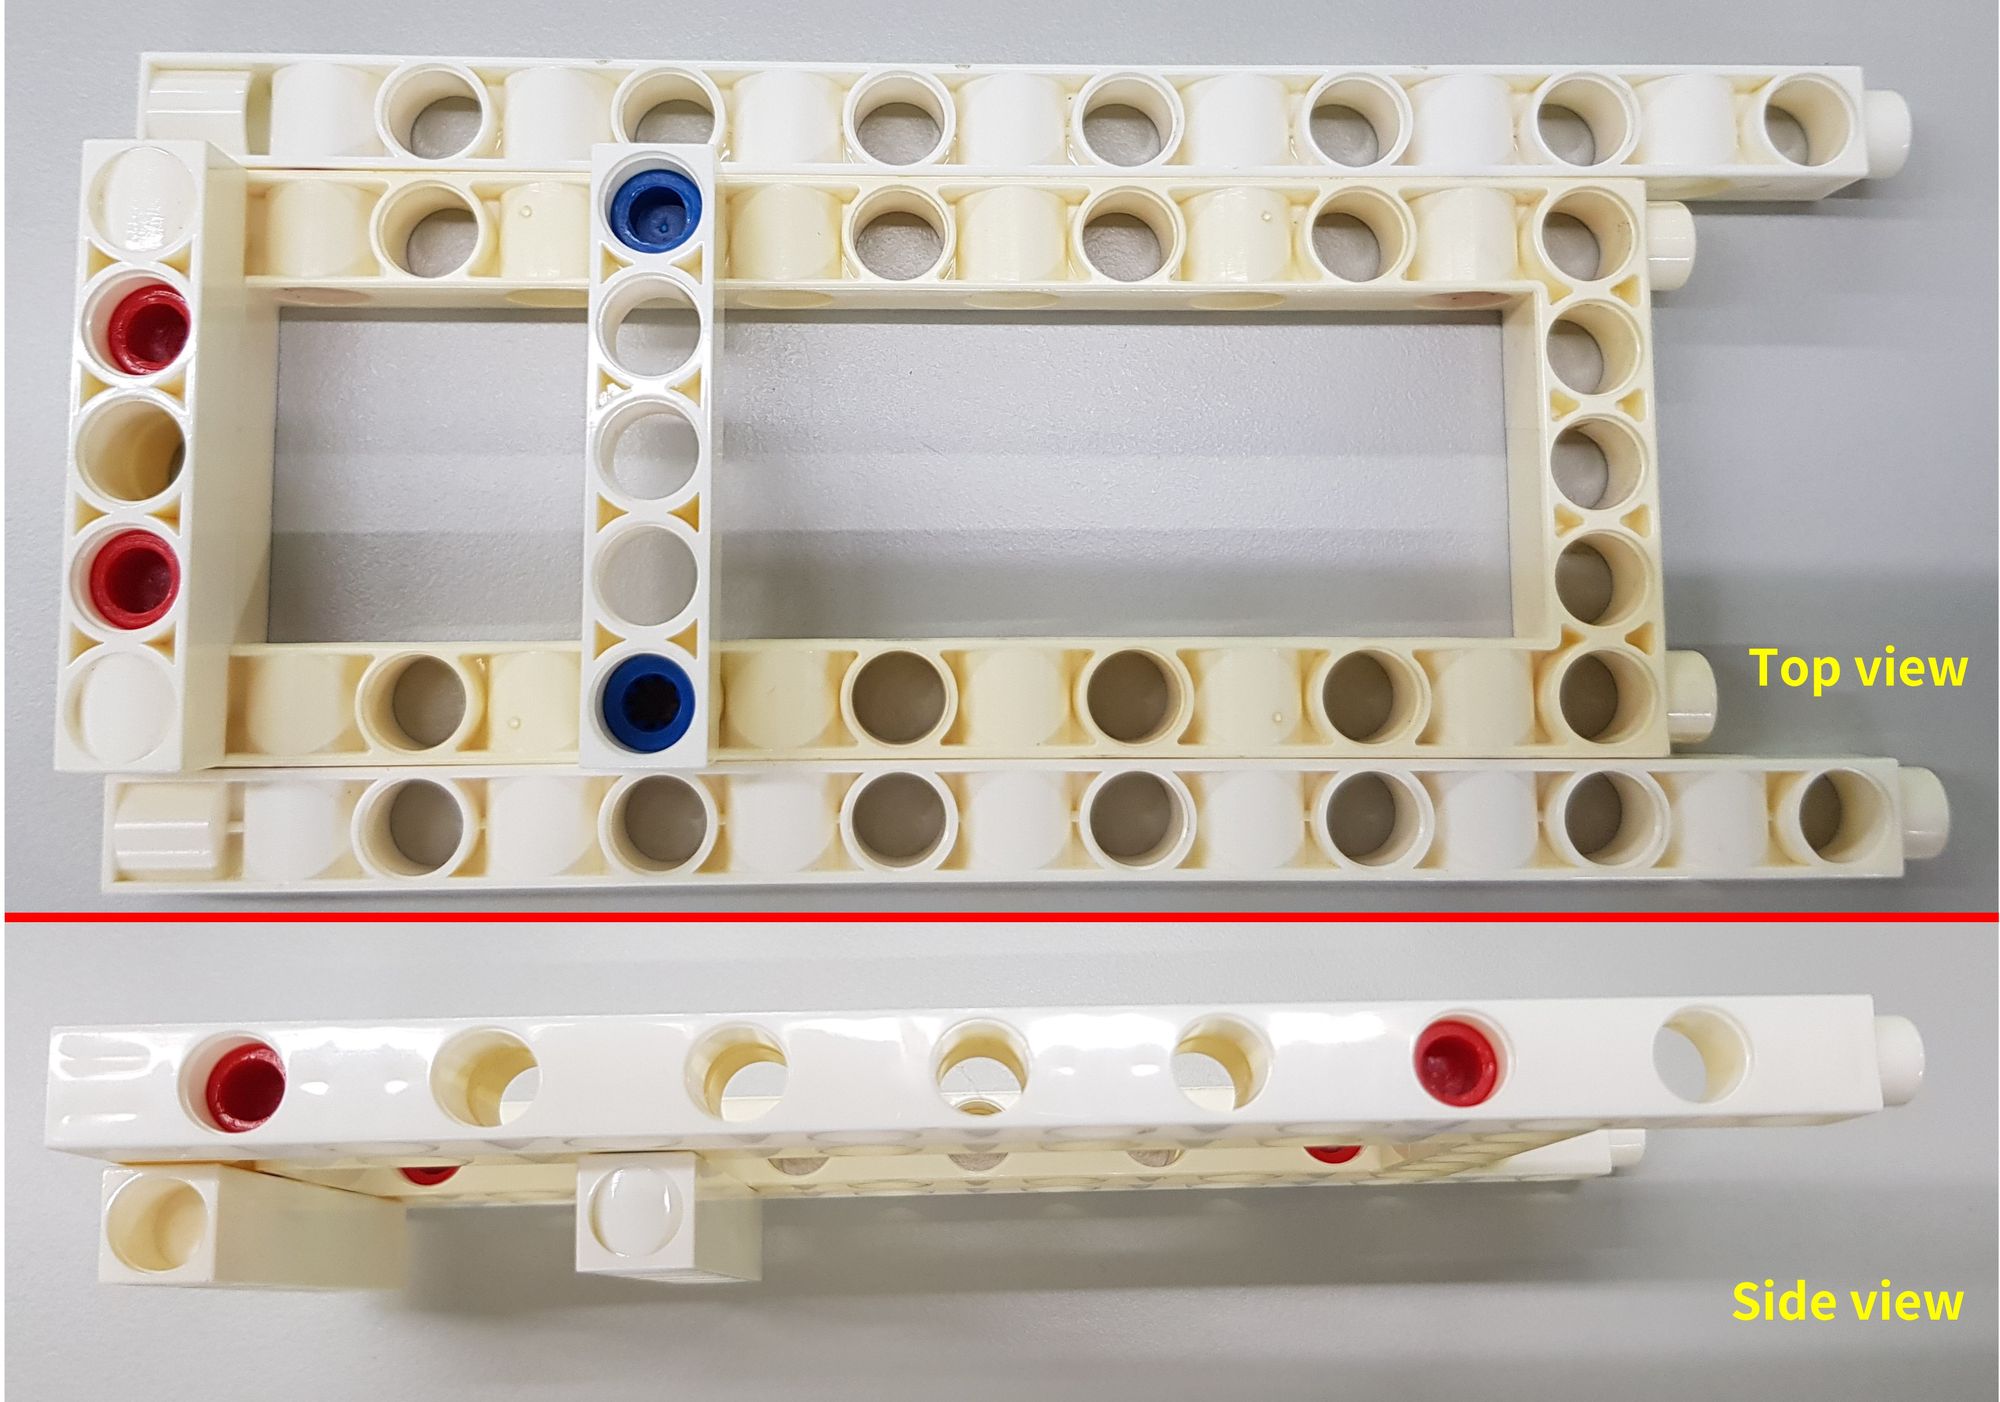
The first step is to connect different frames and rods using LONG PEG (Figure 1) to complete the basic structure of the money blaster (Figure 2).
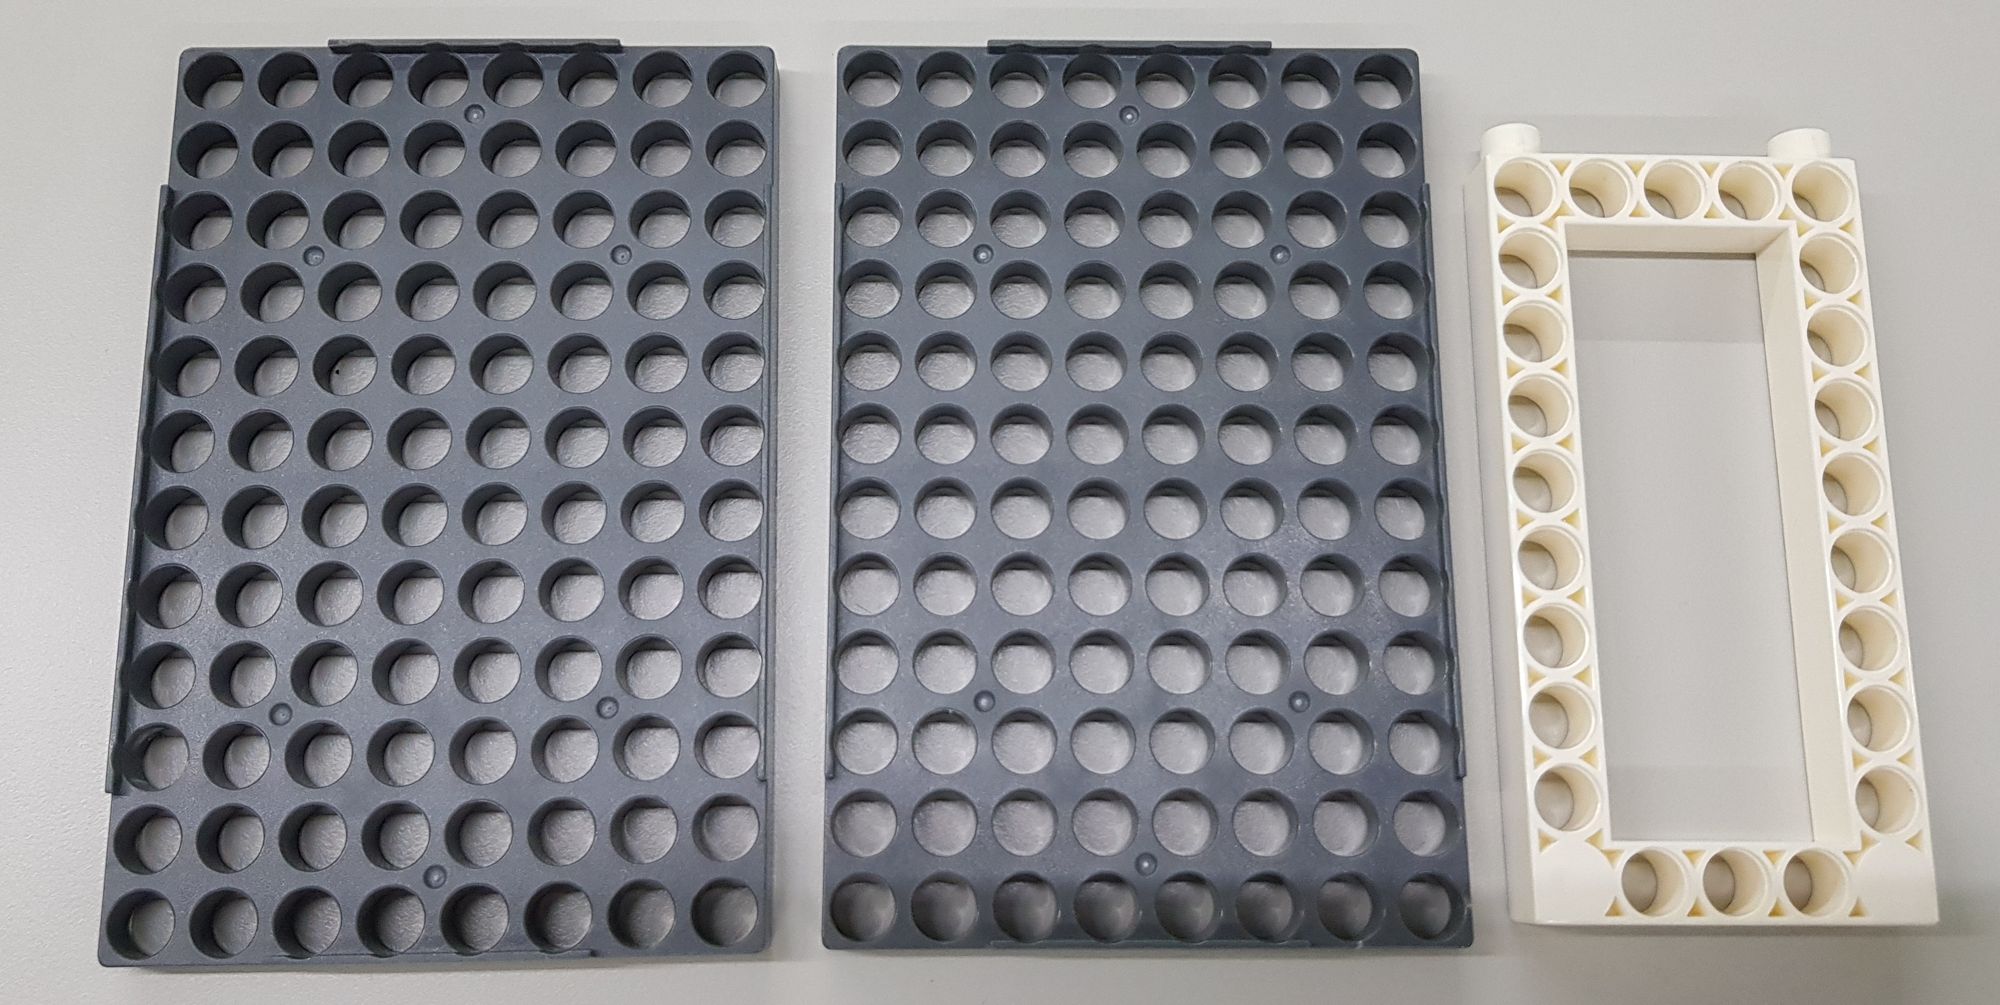
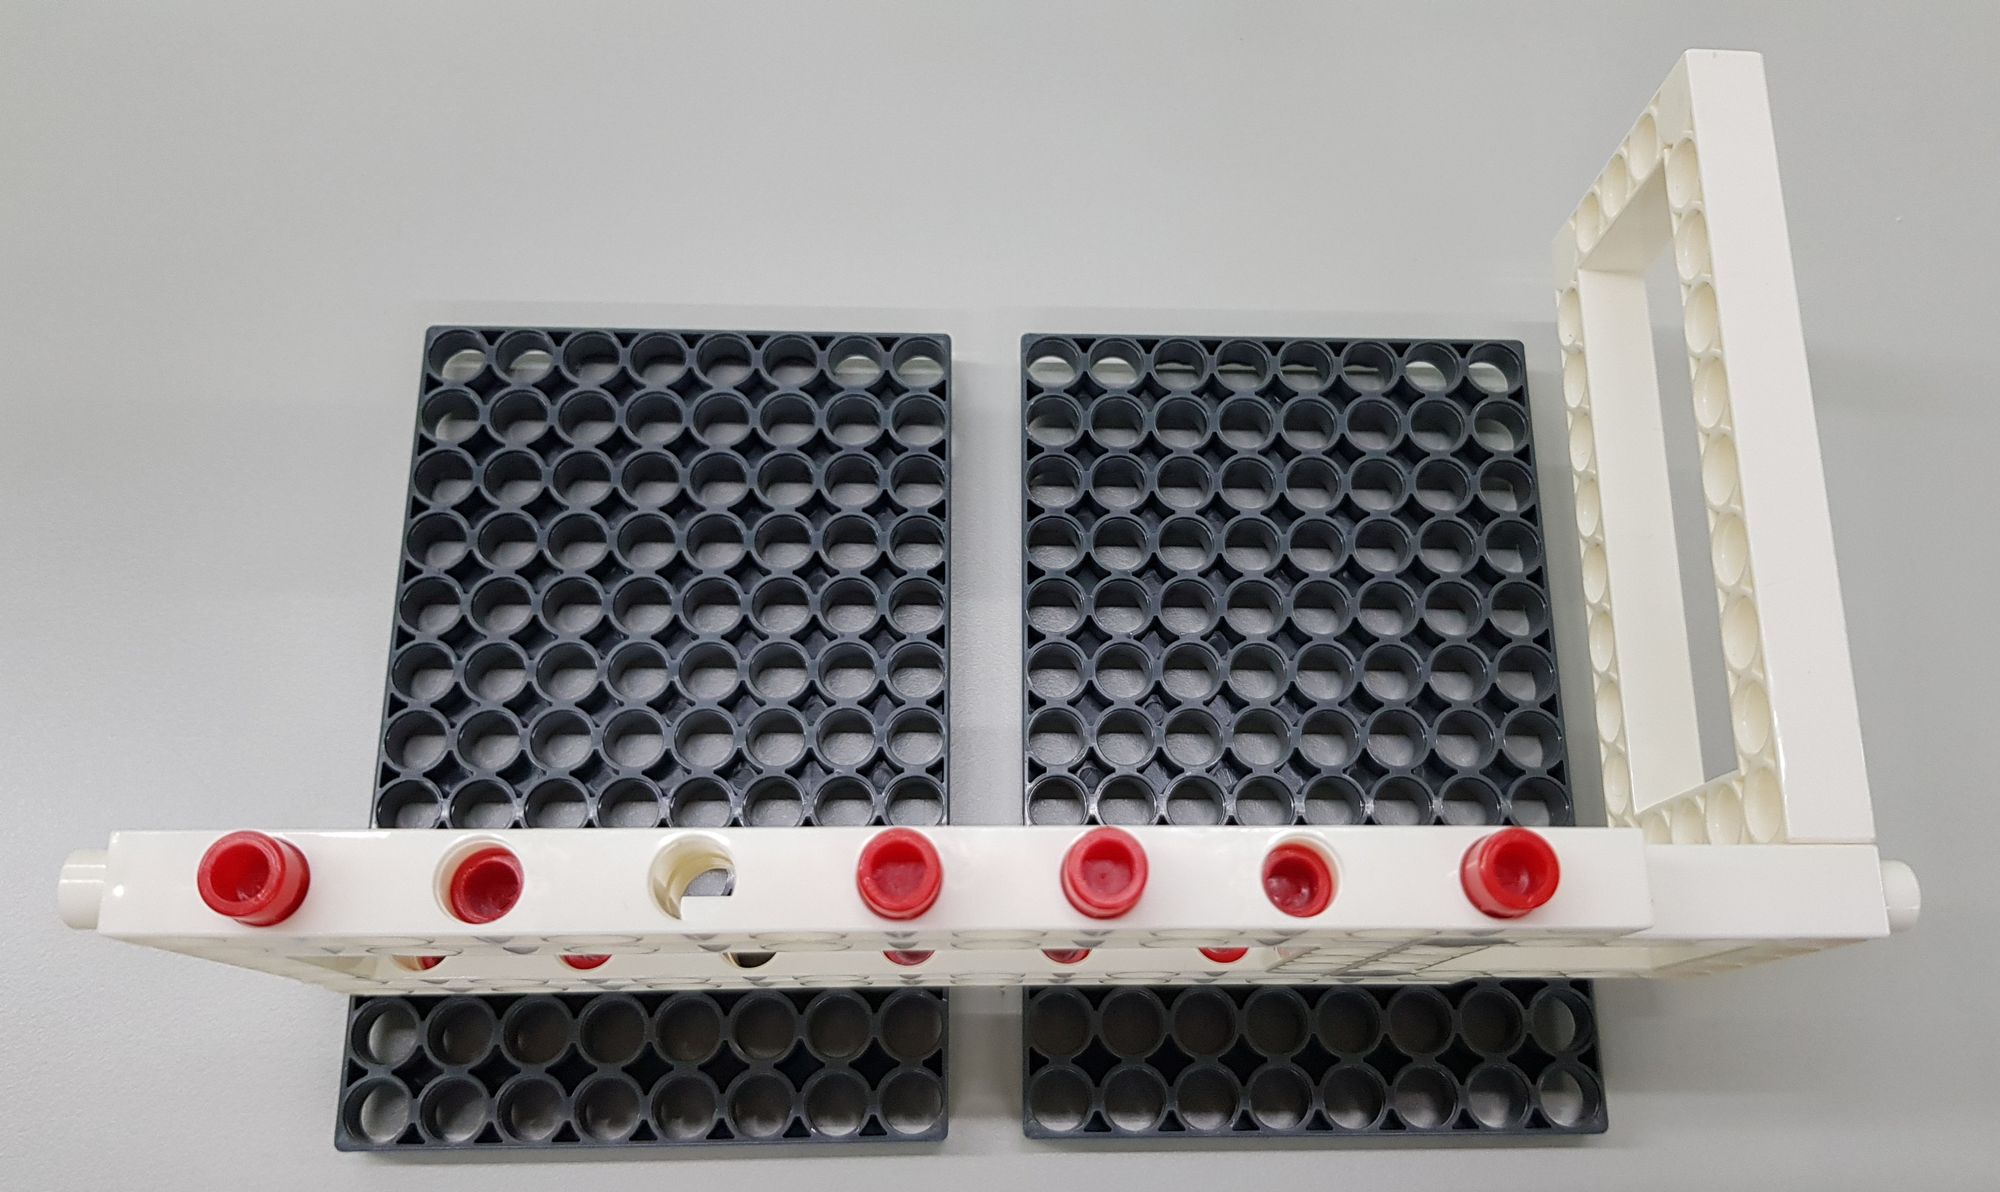
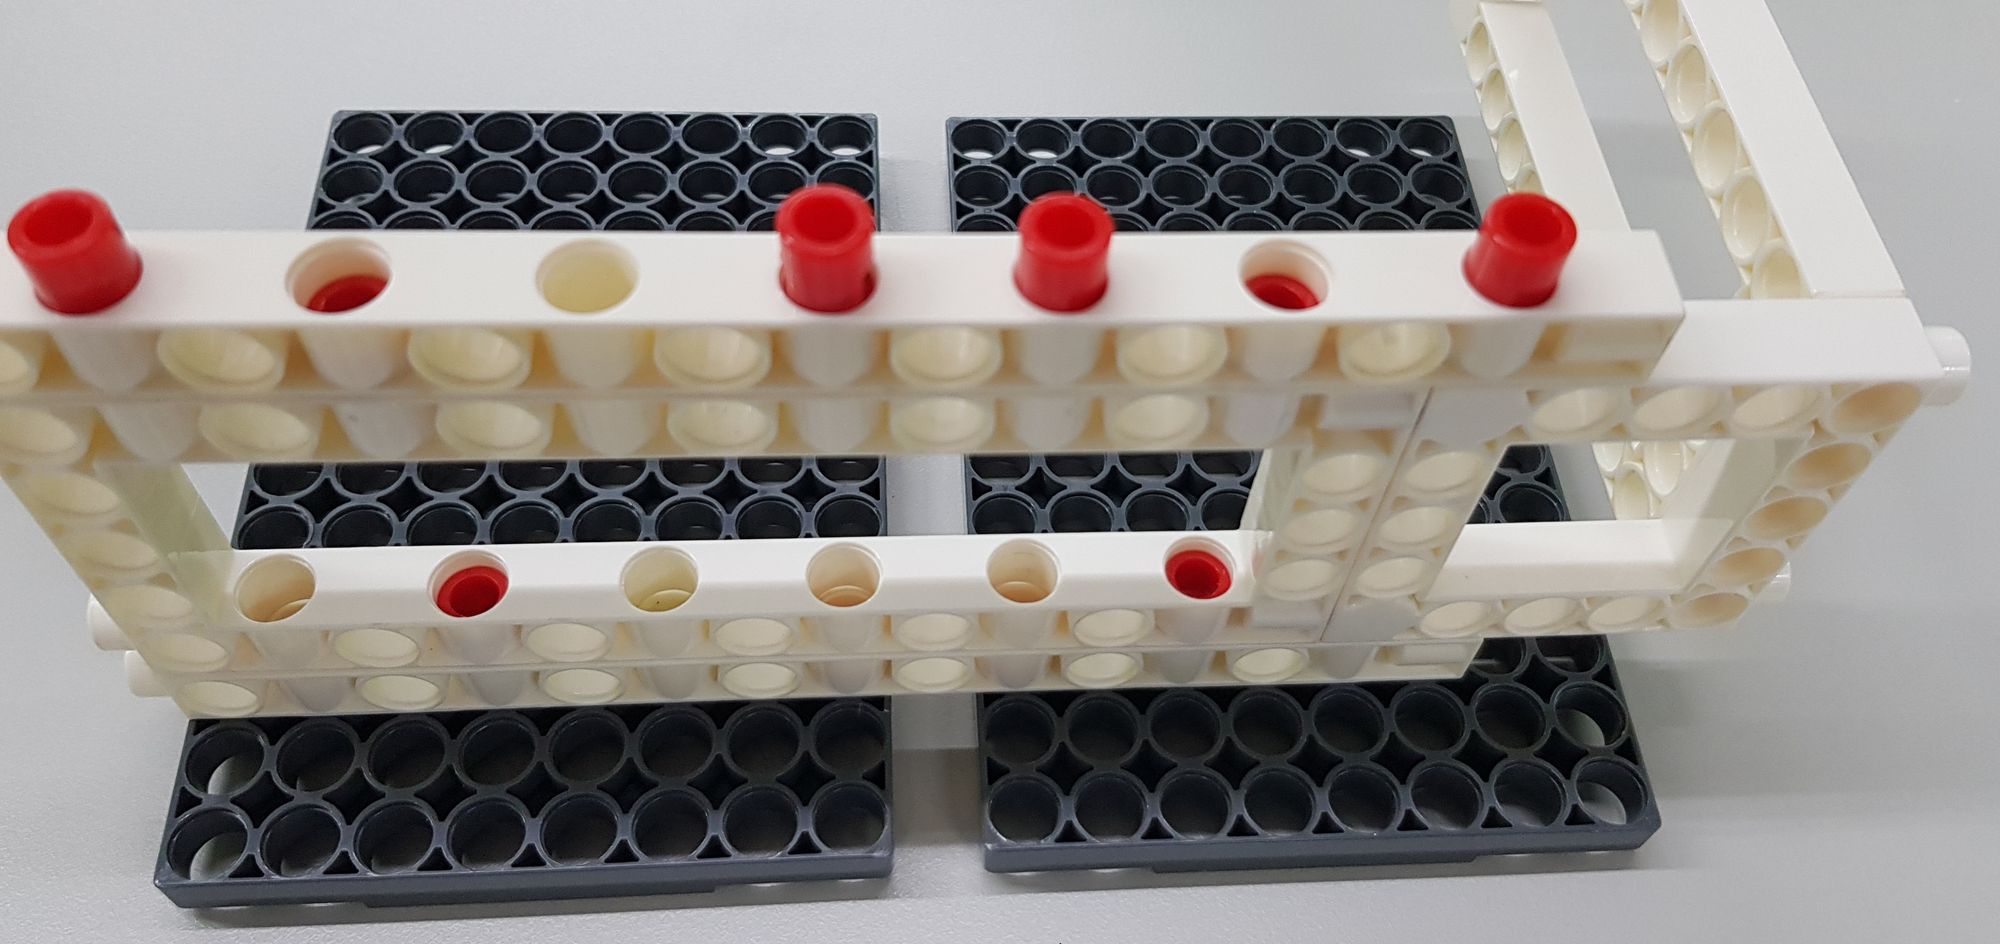
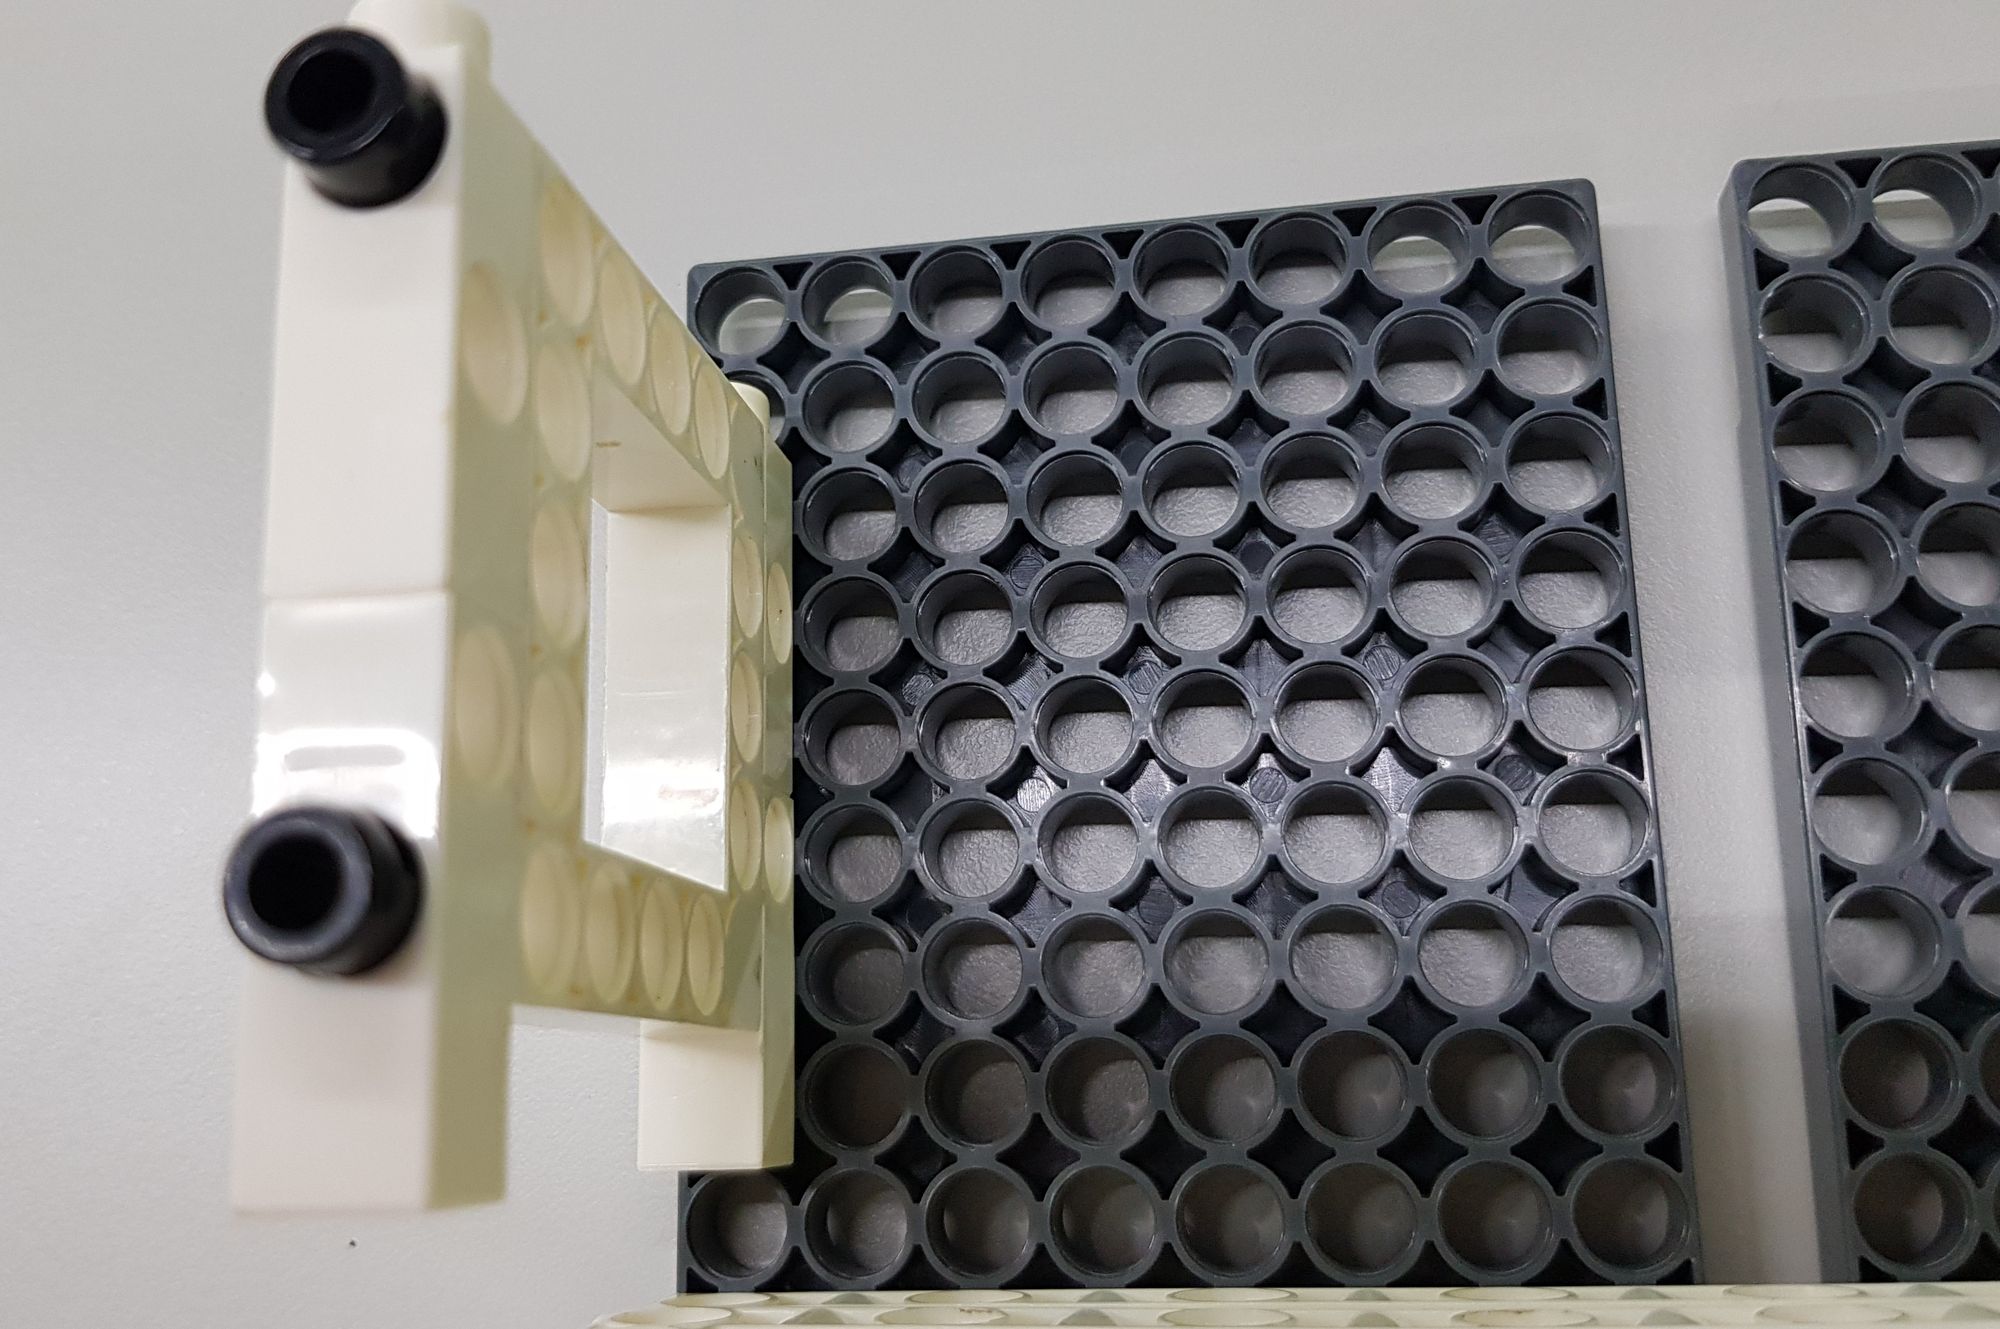
For the second step, we mainly use the 8x12 BASE GRID and the 5x10 FRAME (Figure 3) to create baffles on the right side and the rear of the money blaster to prevent the toy money from falling out (Figures 4 and 5).
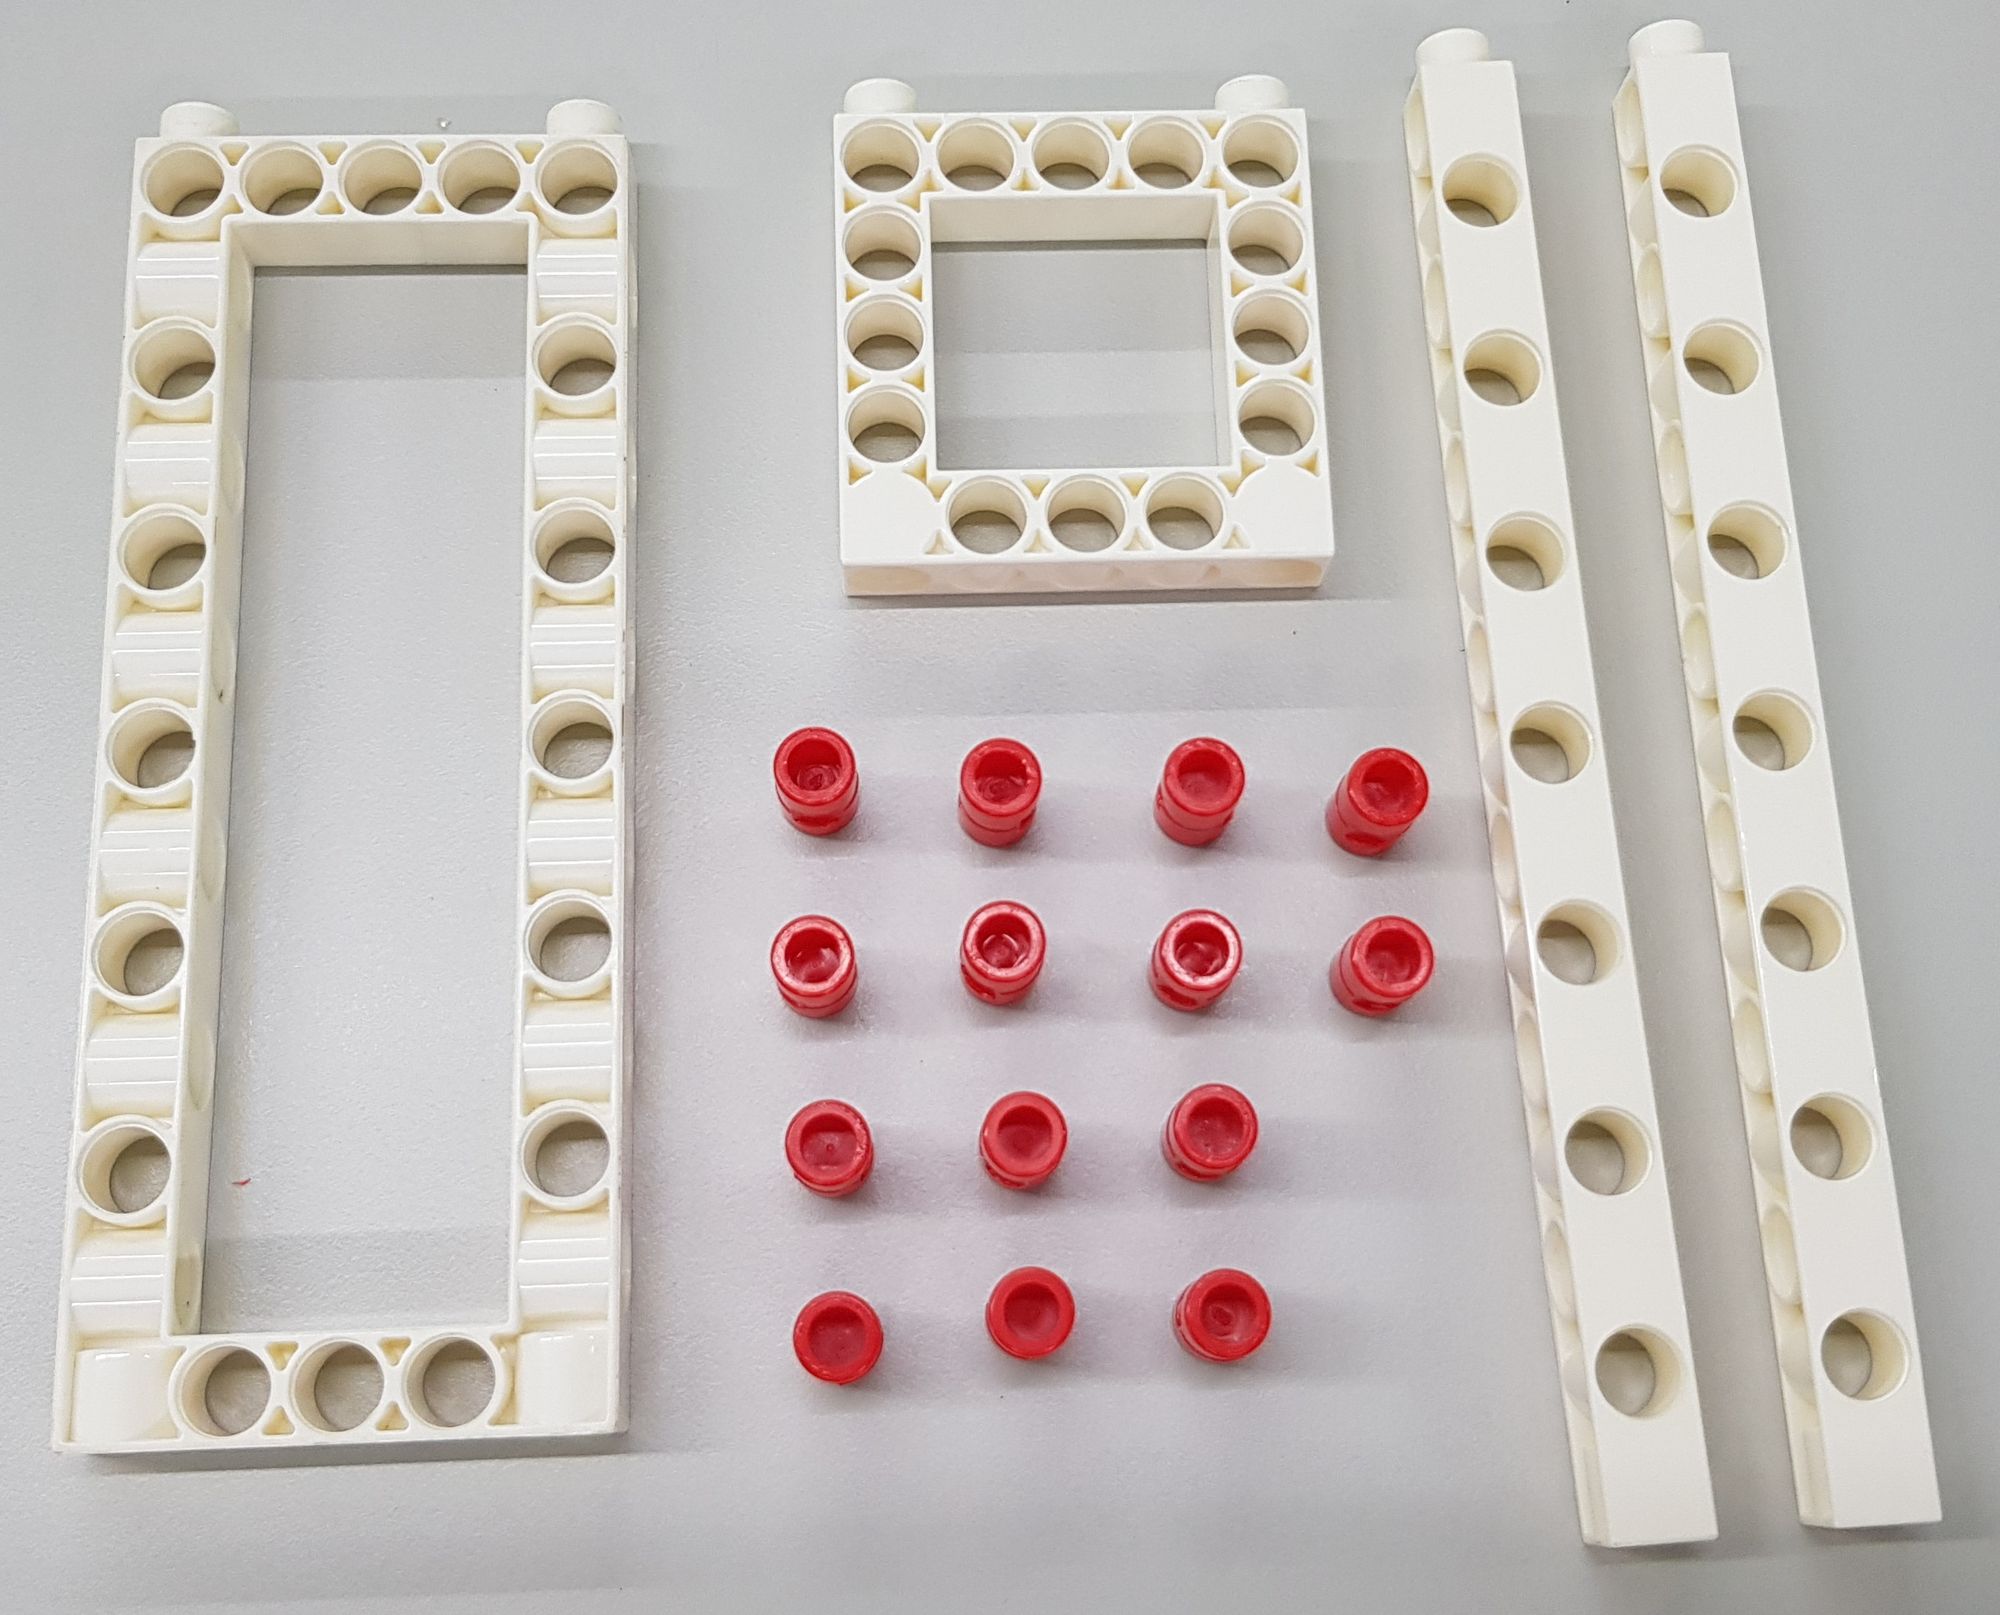
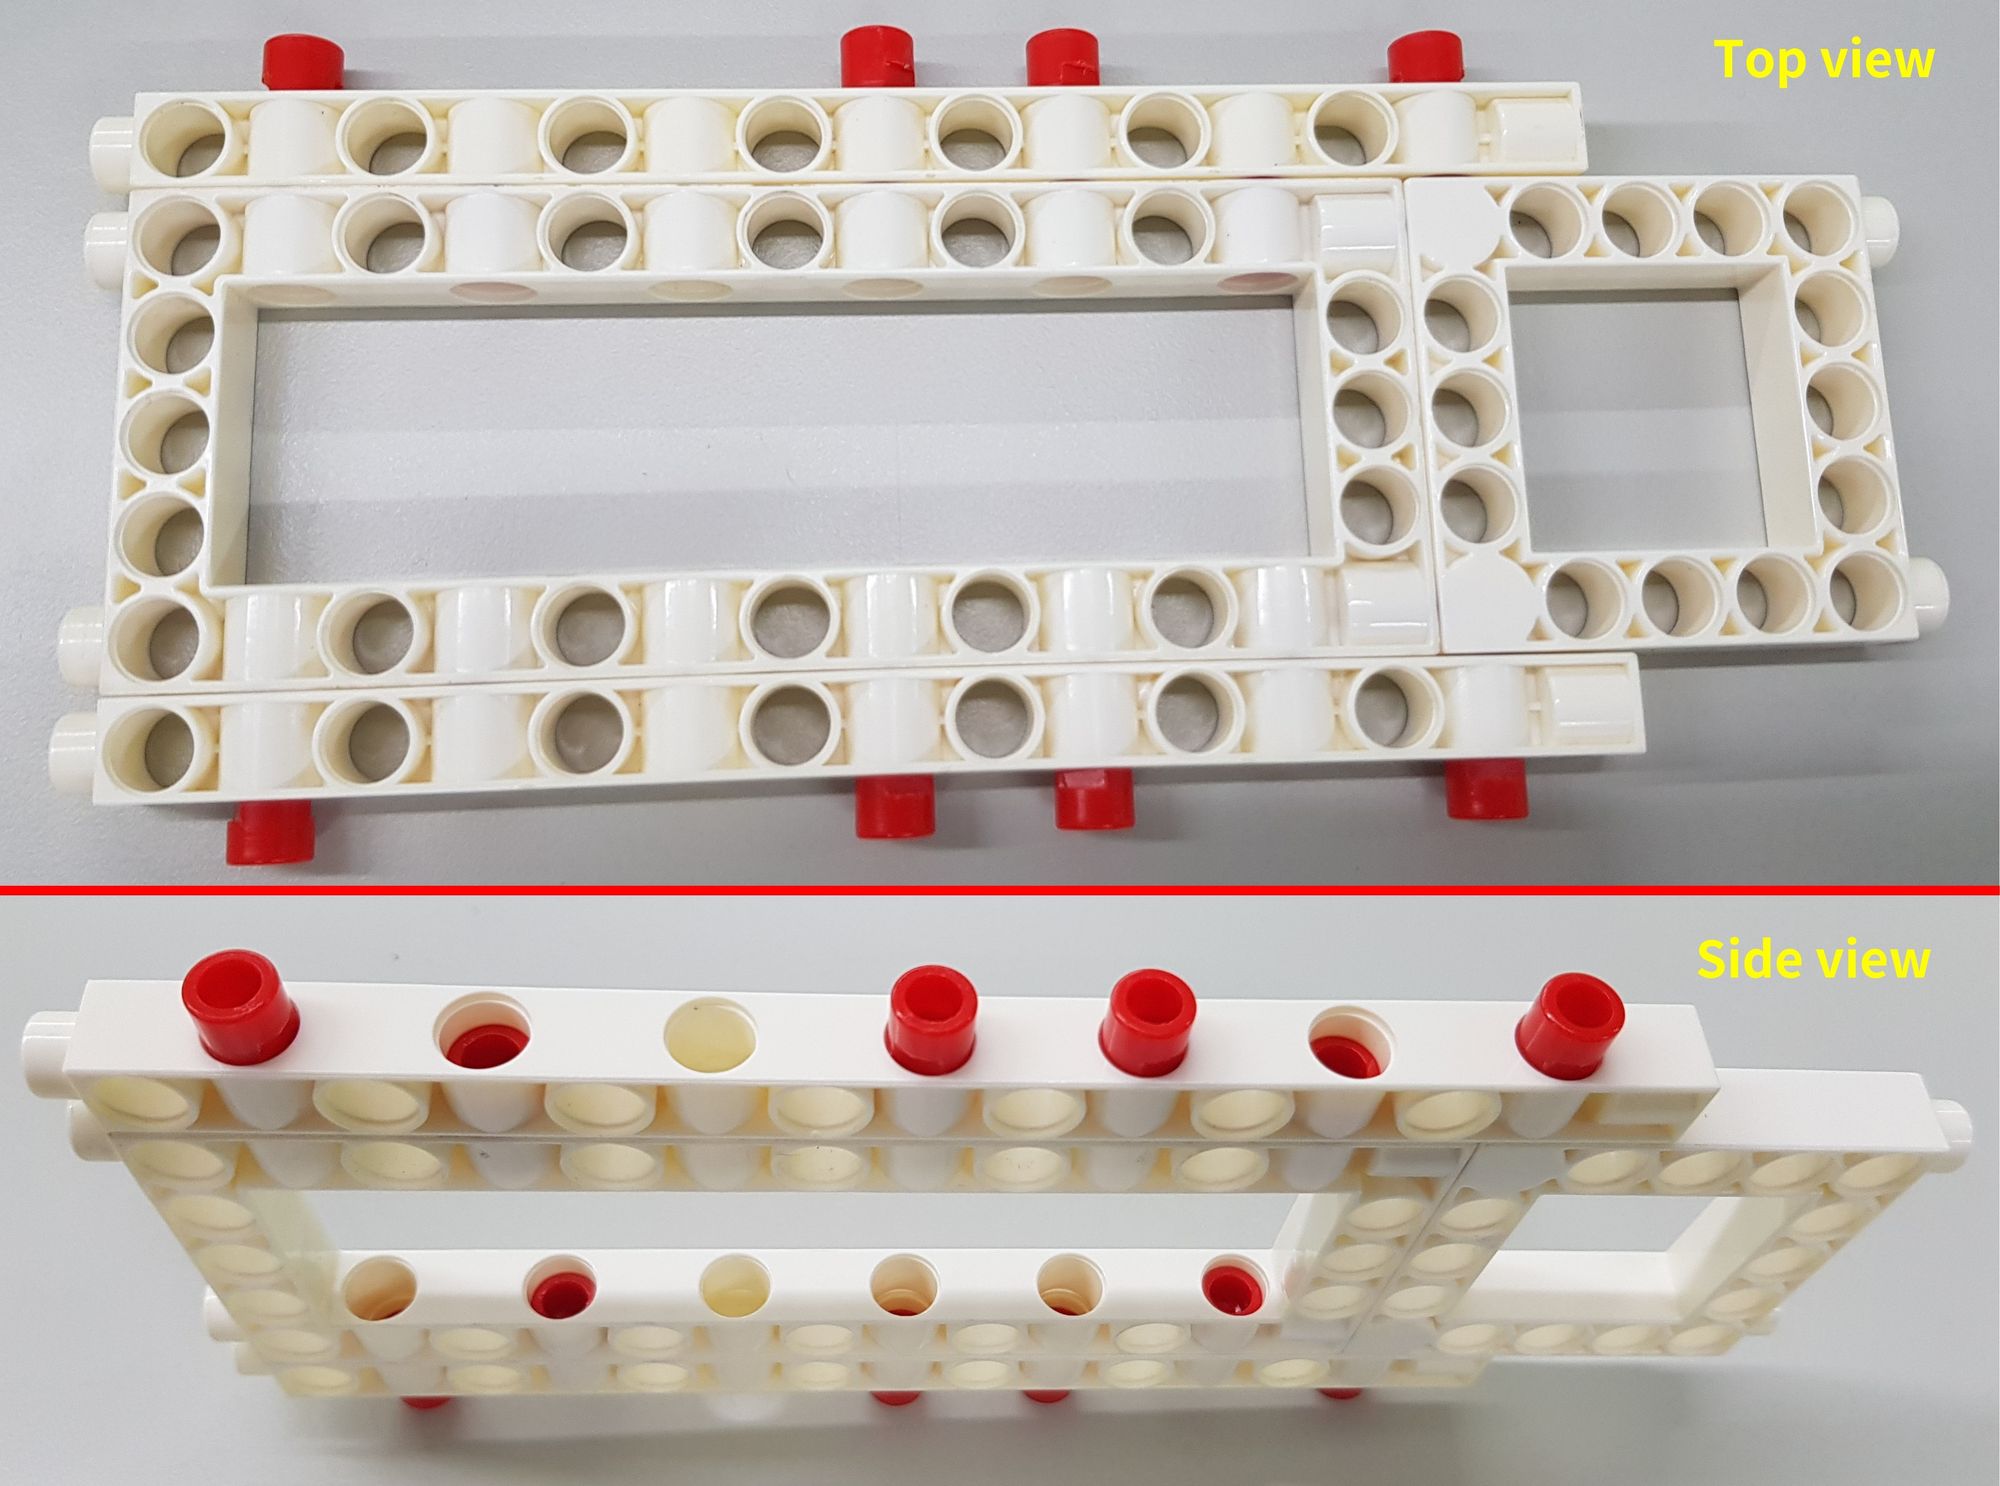
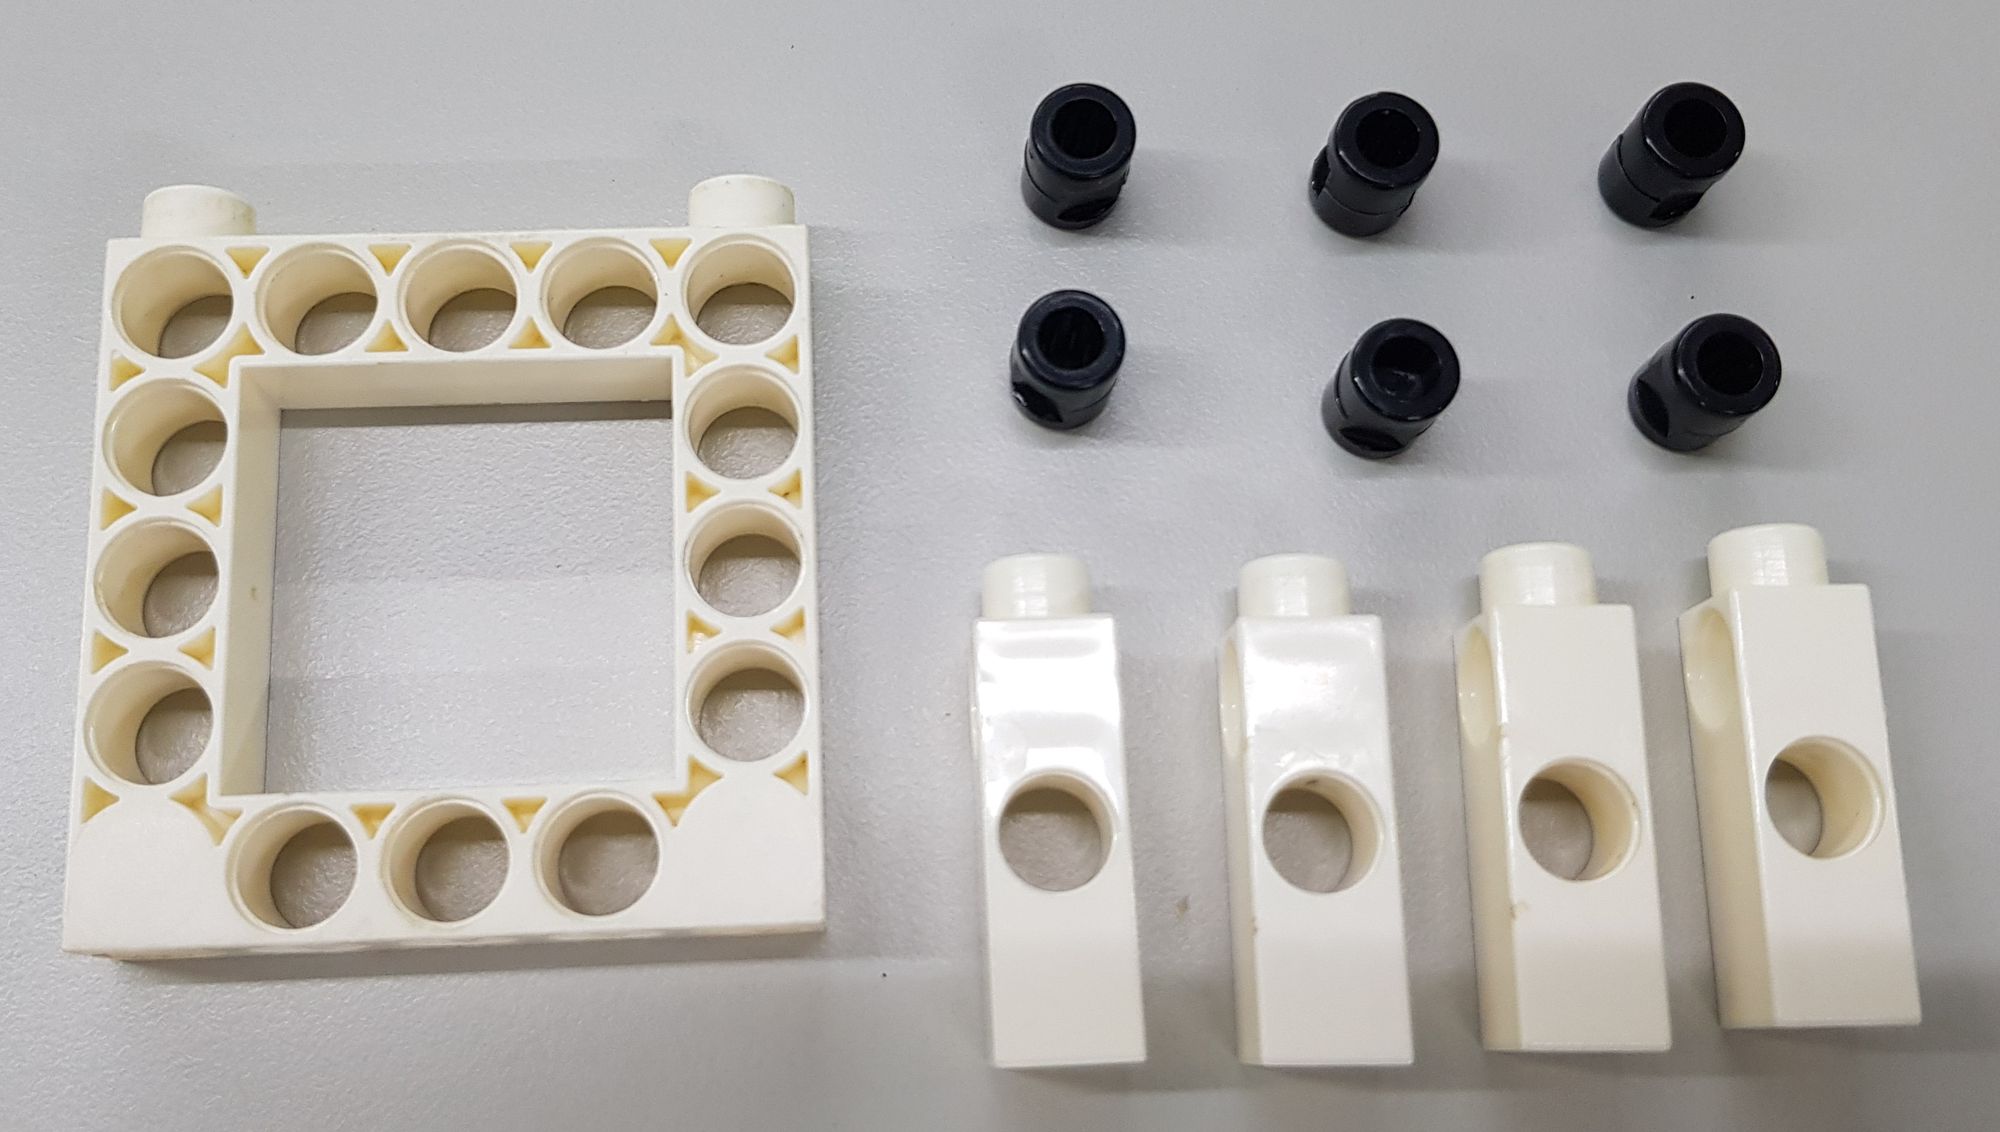
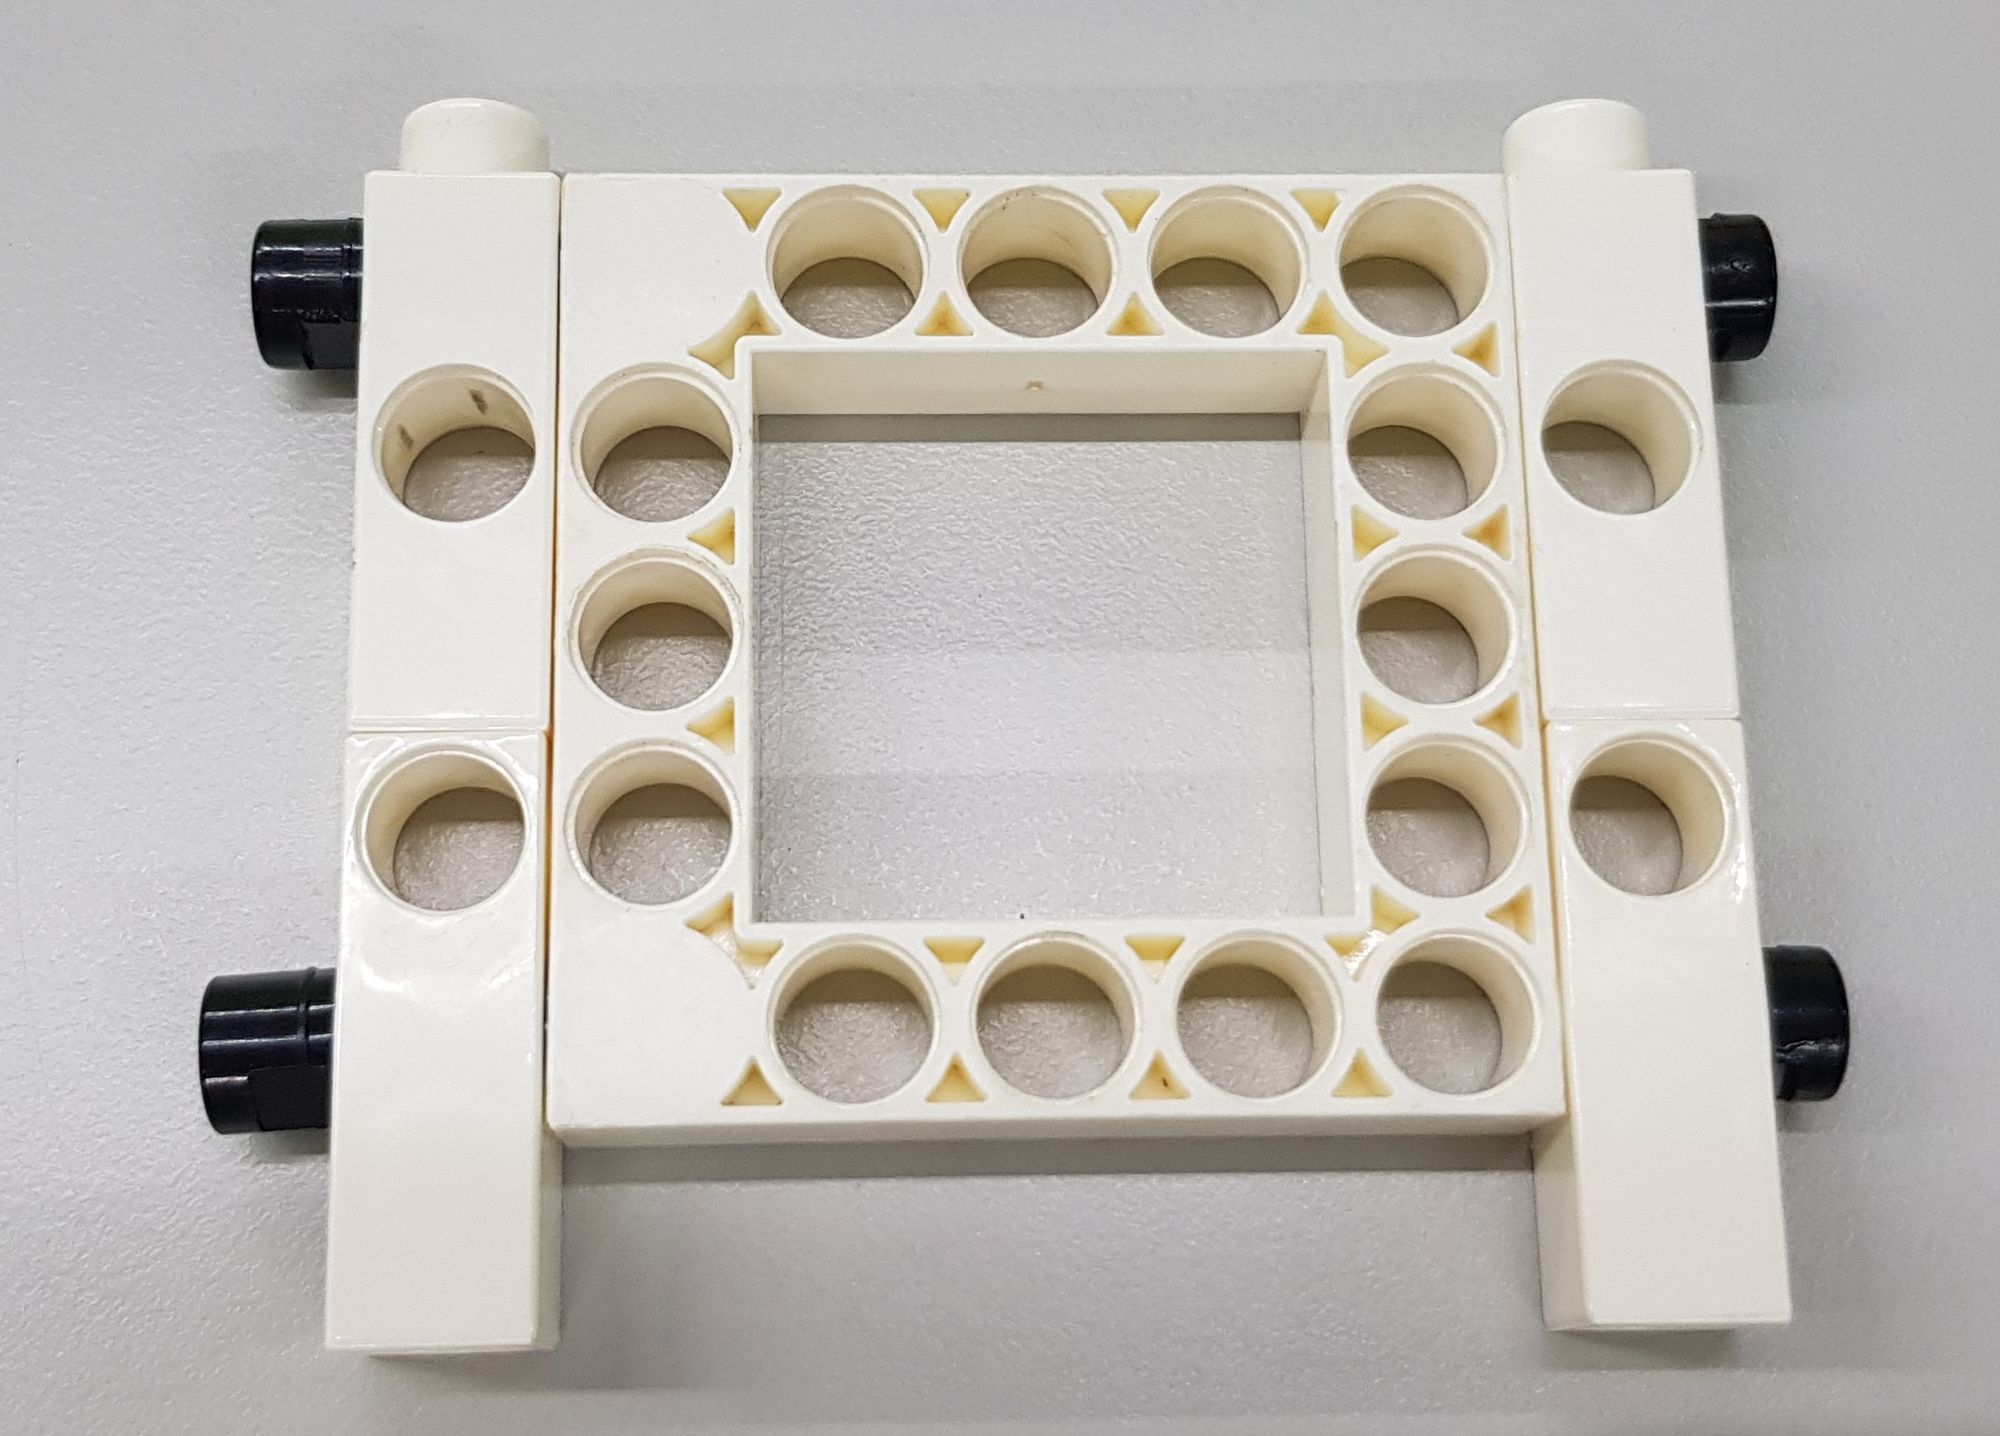
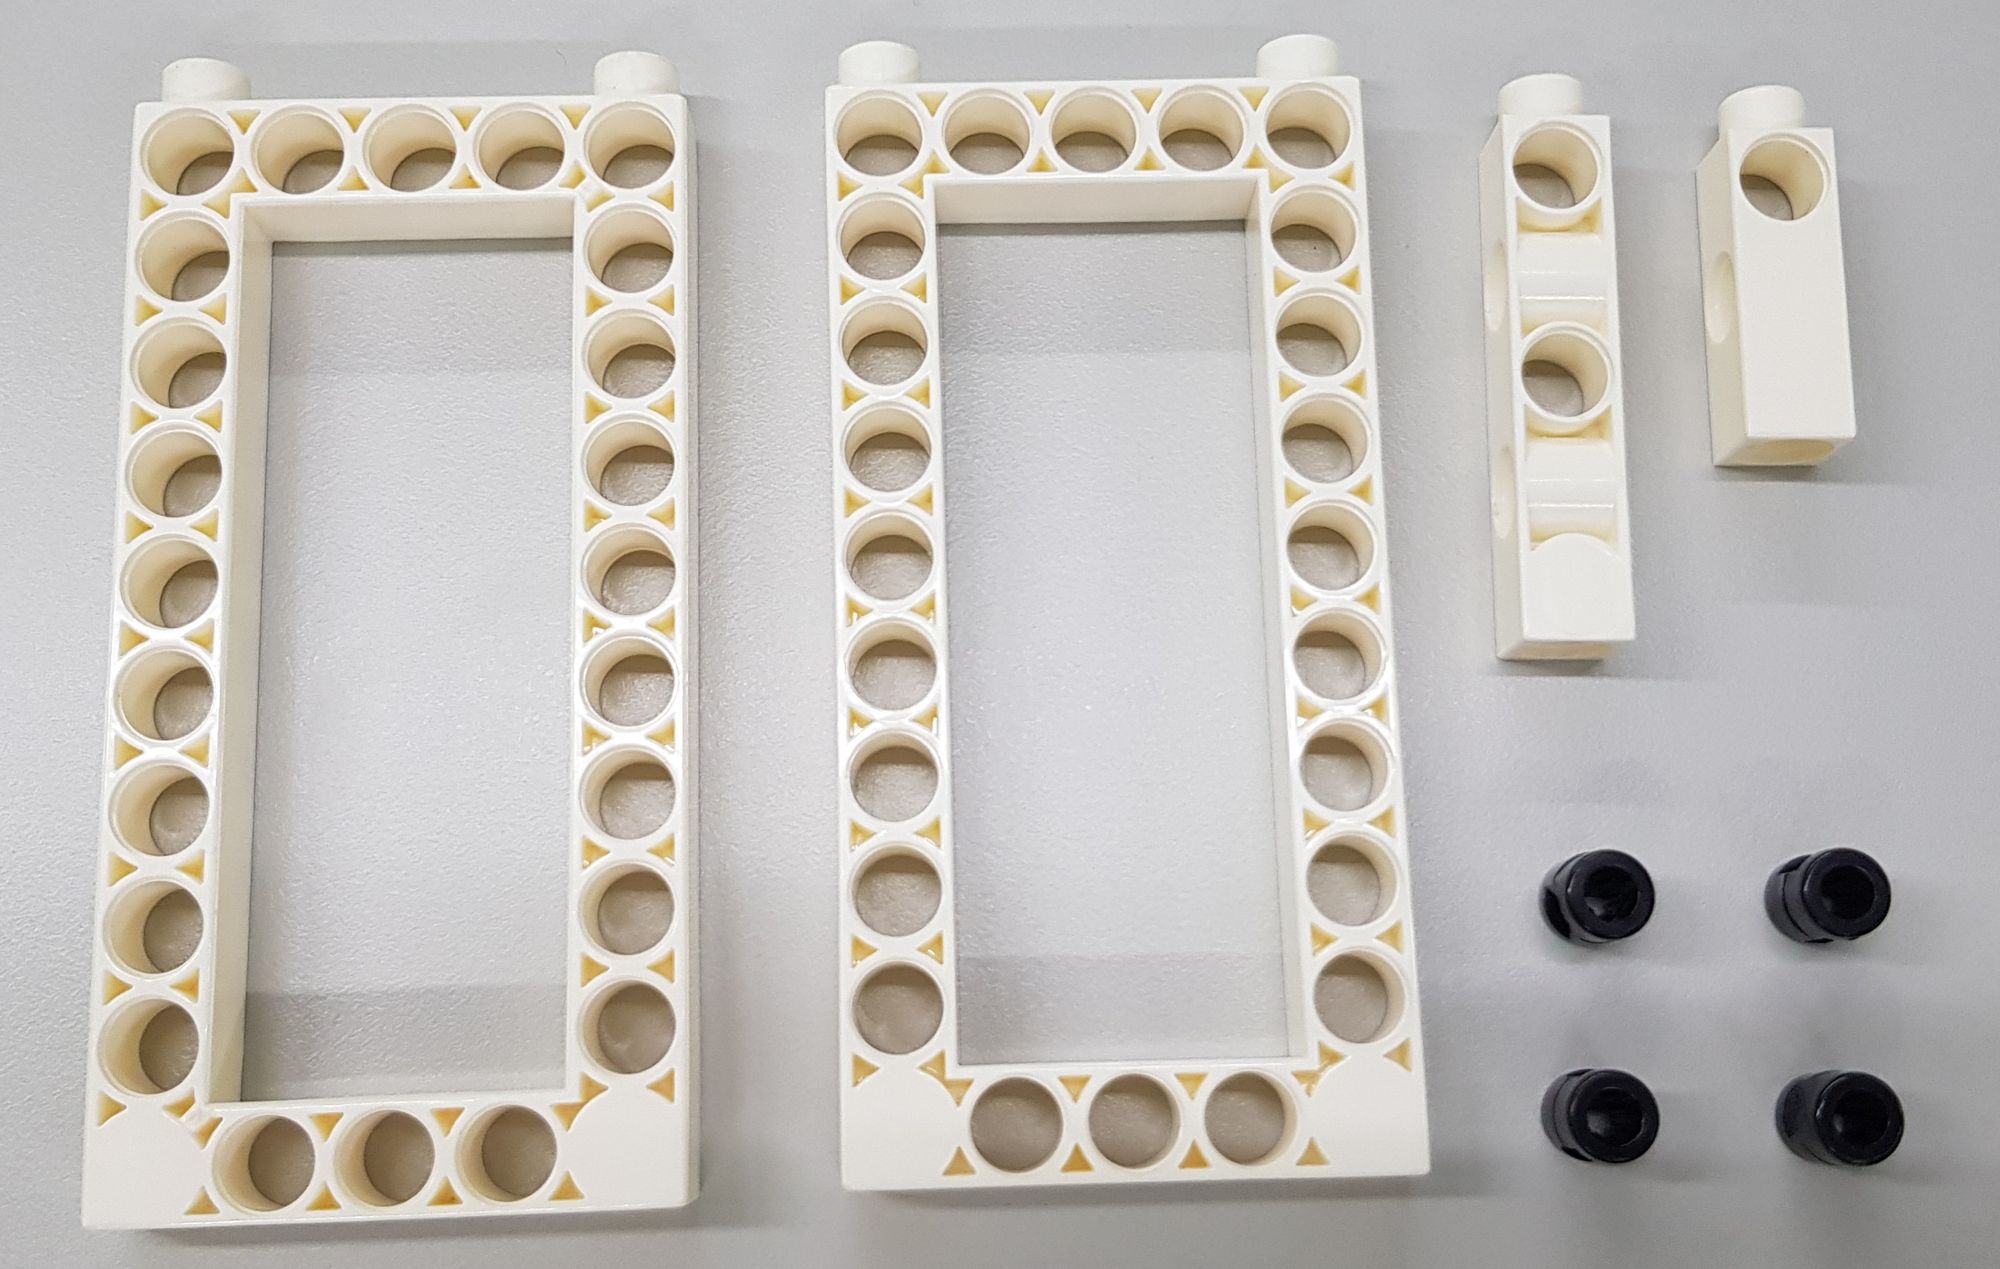
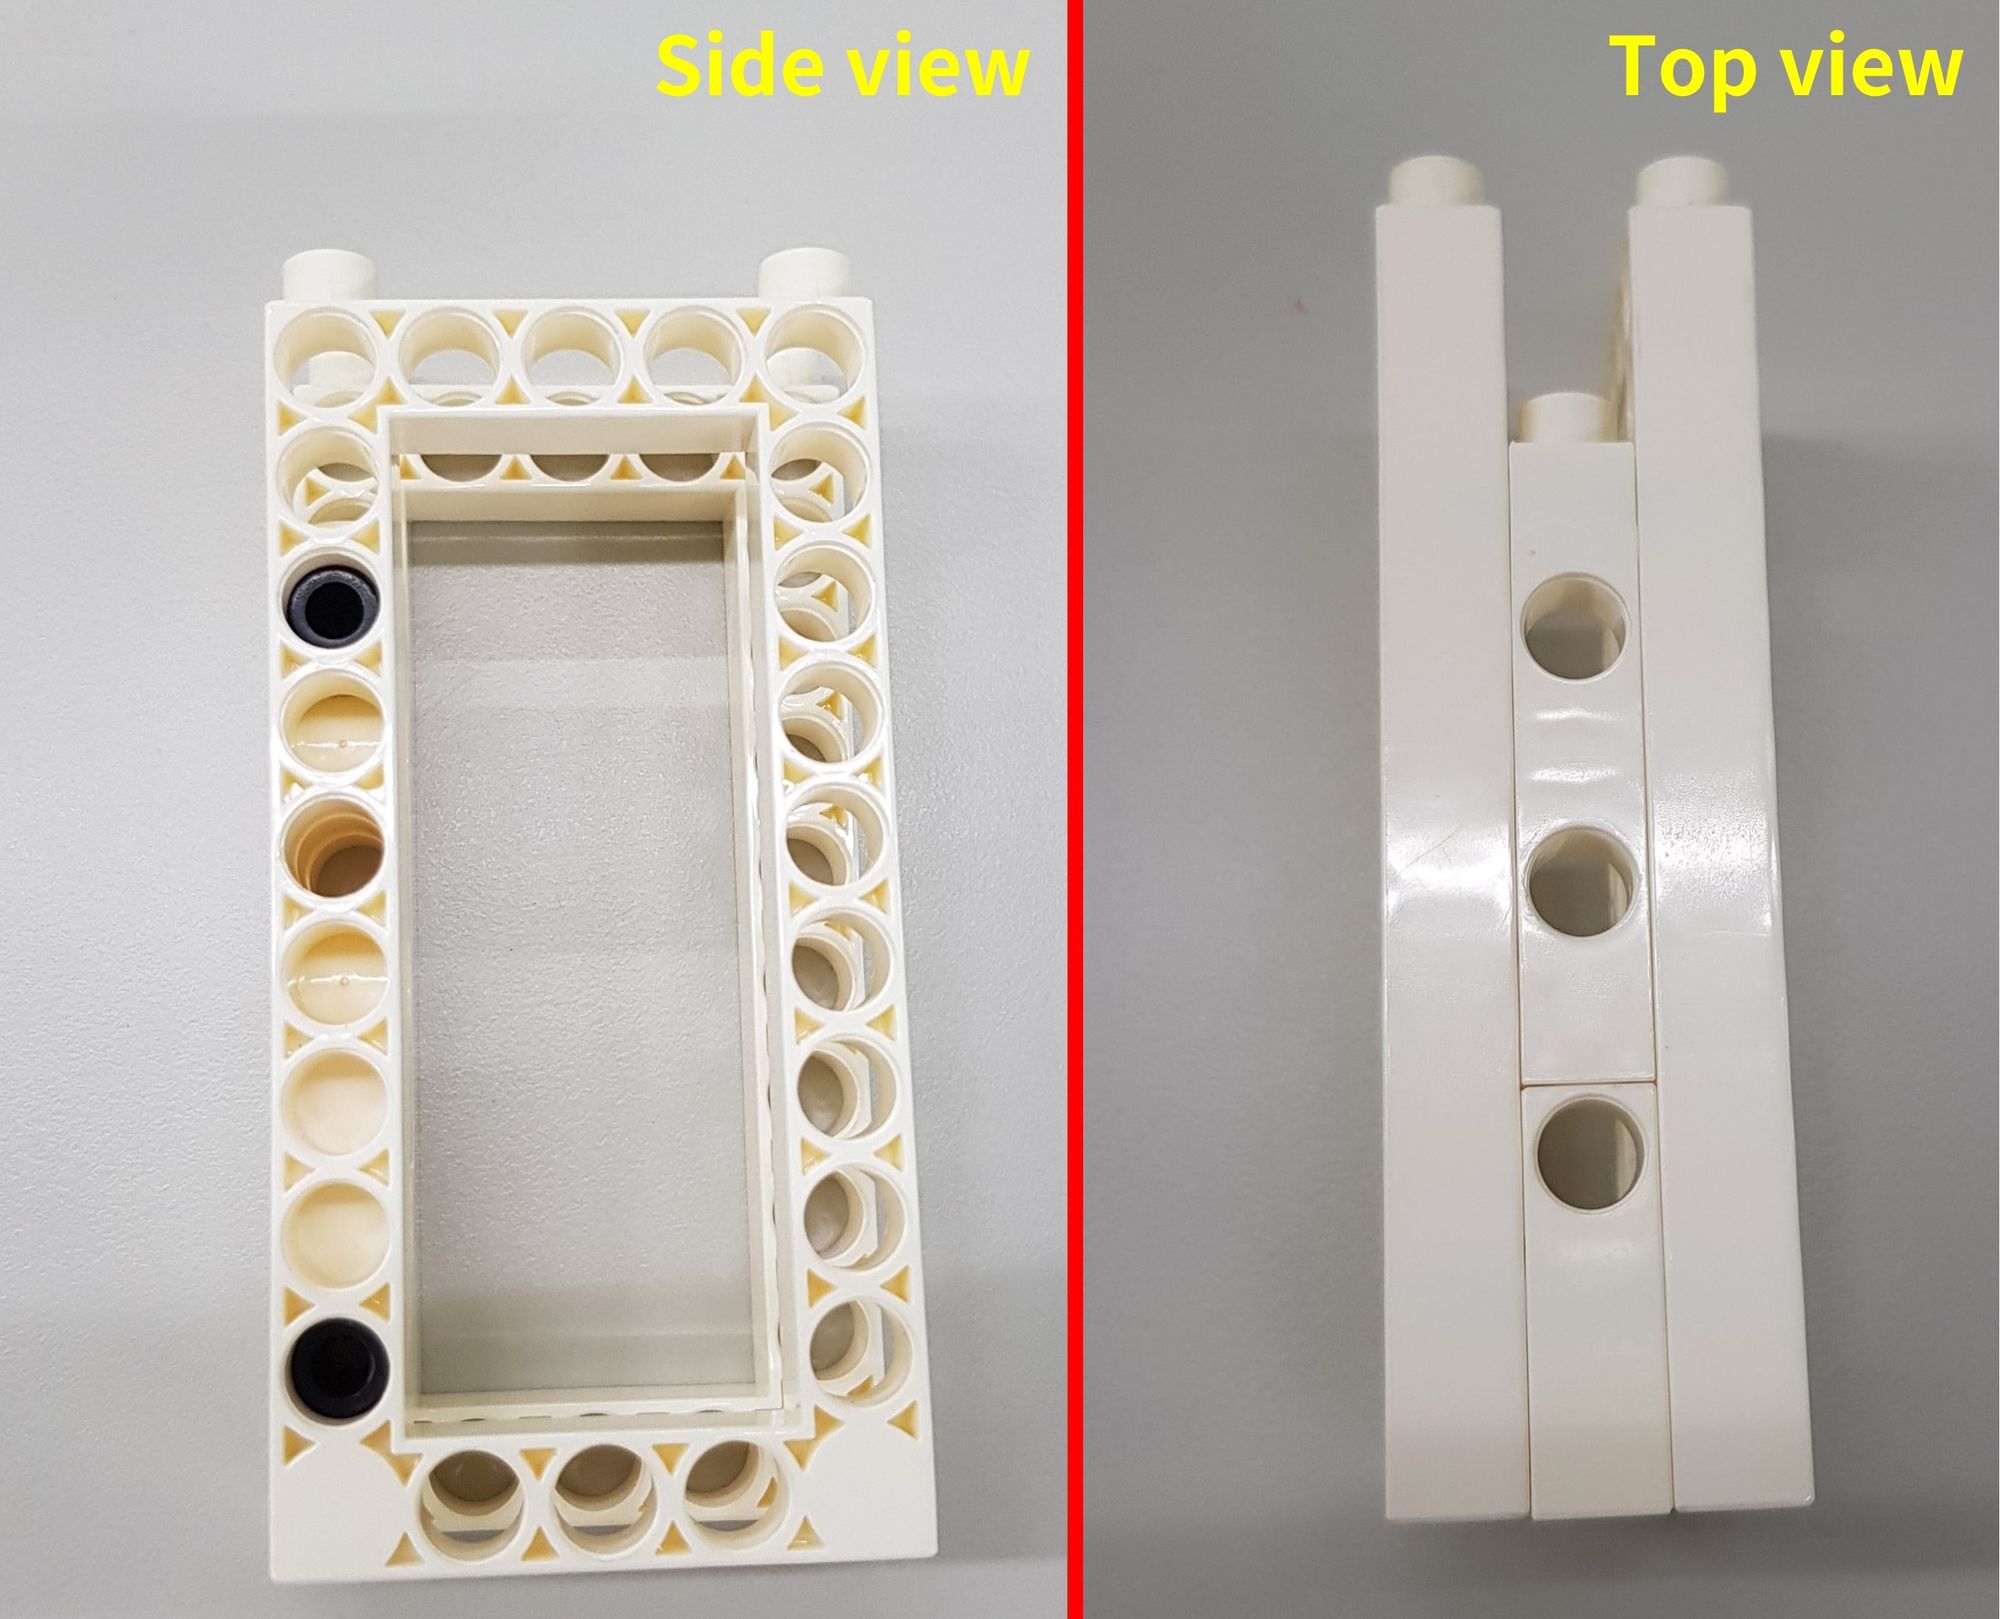
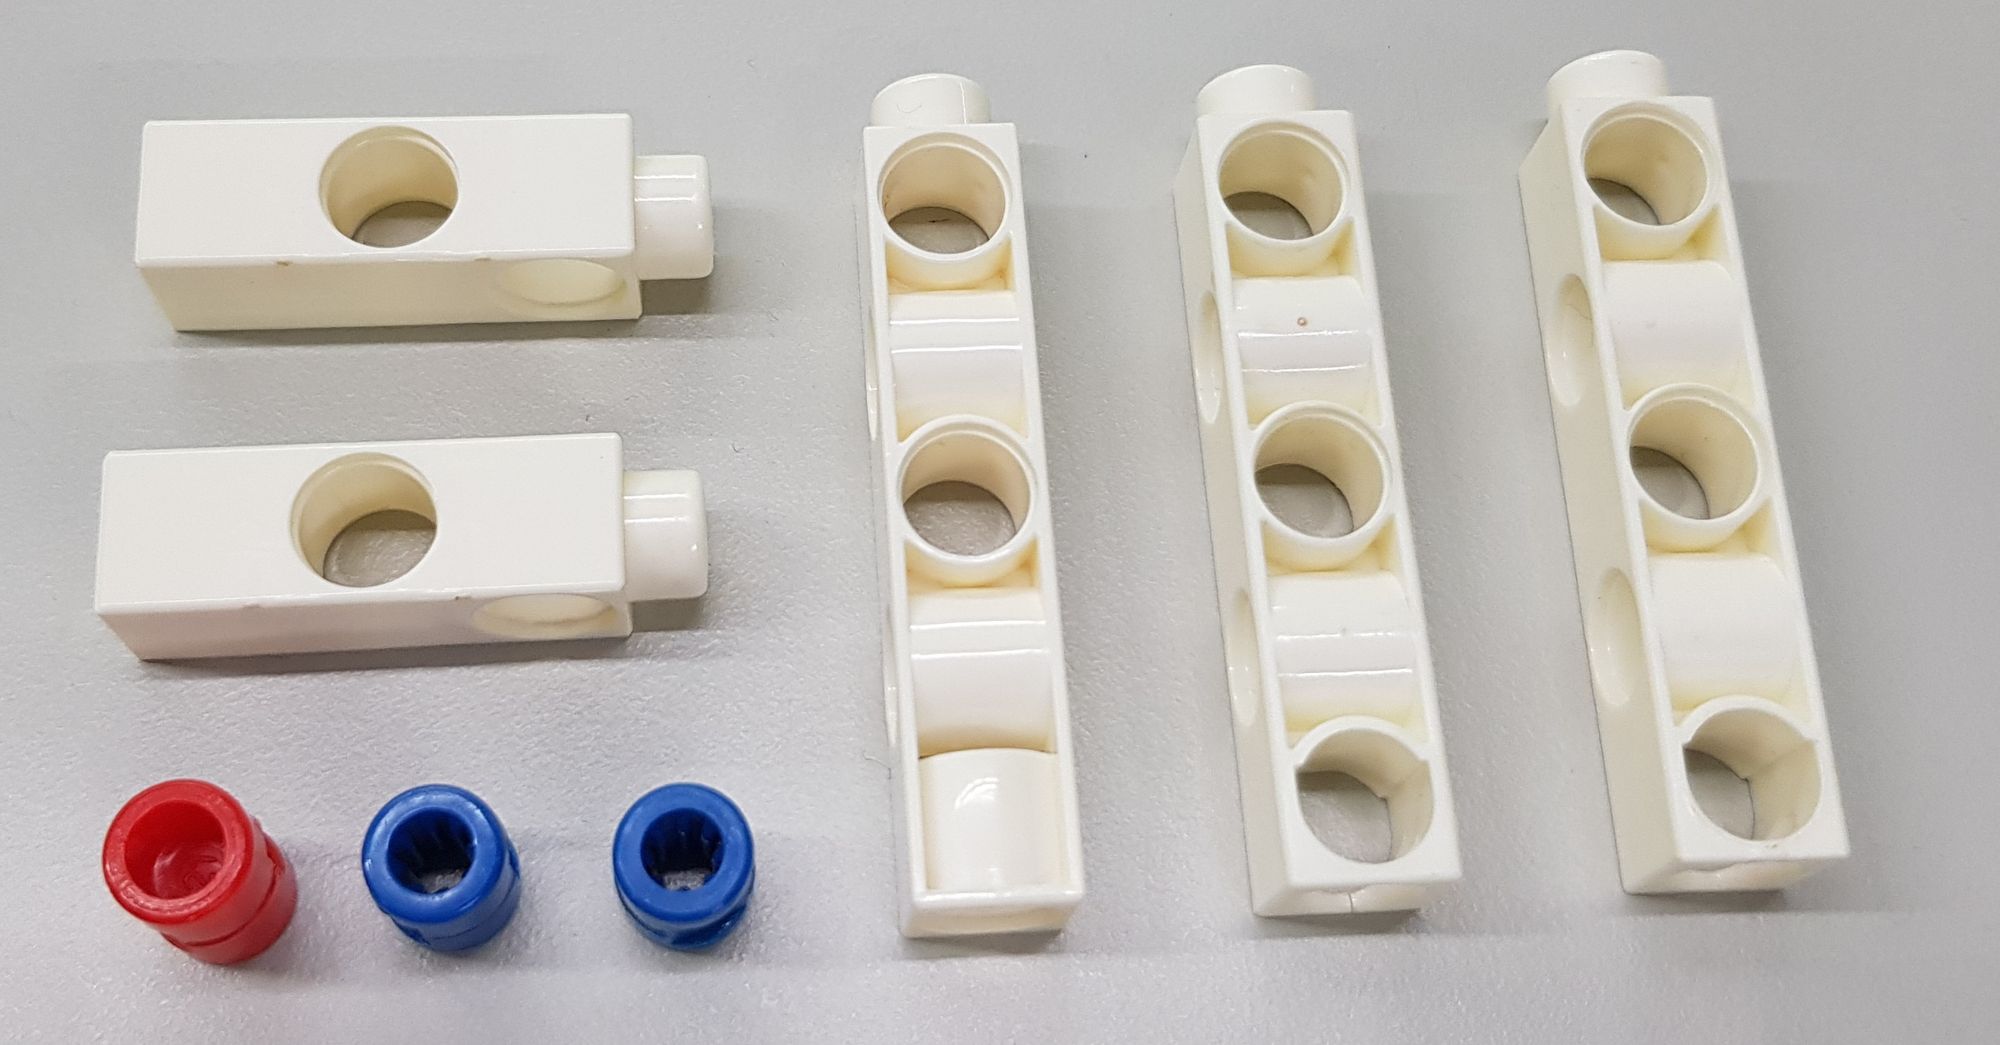
The third step involves using the 5x5 FRAME, SHORT PEG, and some 3 HOLE DUAL ROD (Figure 6). After combining these parts, we can create a baffle on the front side of the money blaster (Figure 7) and then install it onto the 8x12 BASE GRID (shown in Figure 8).
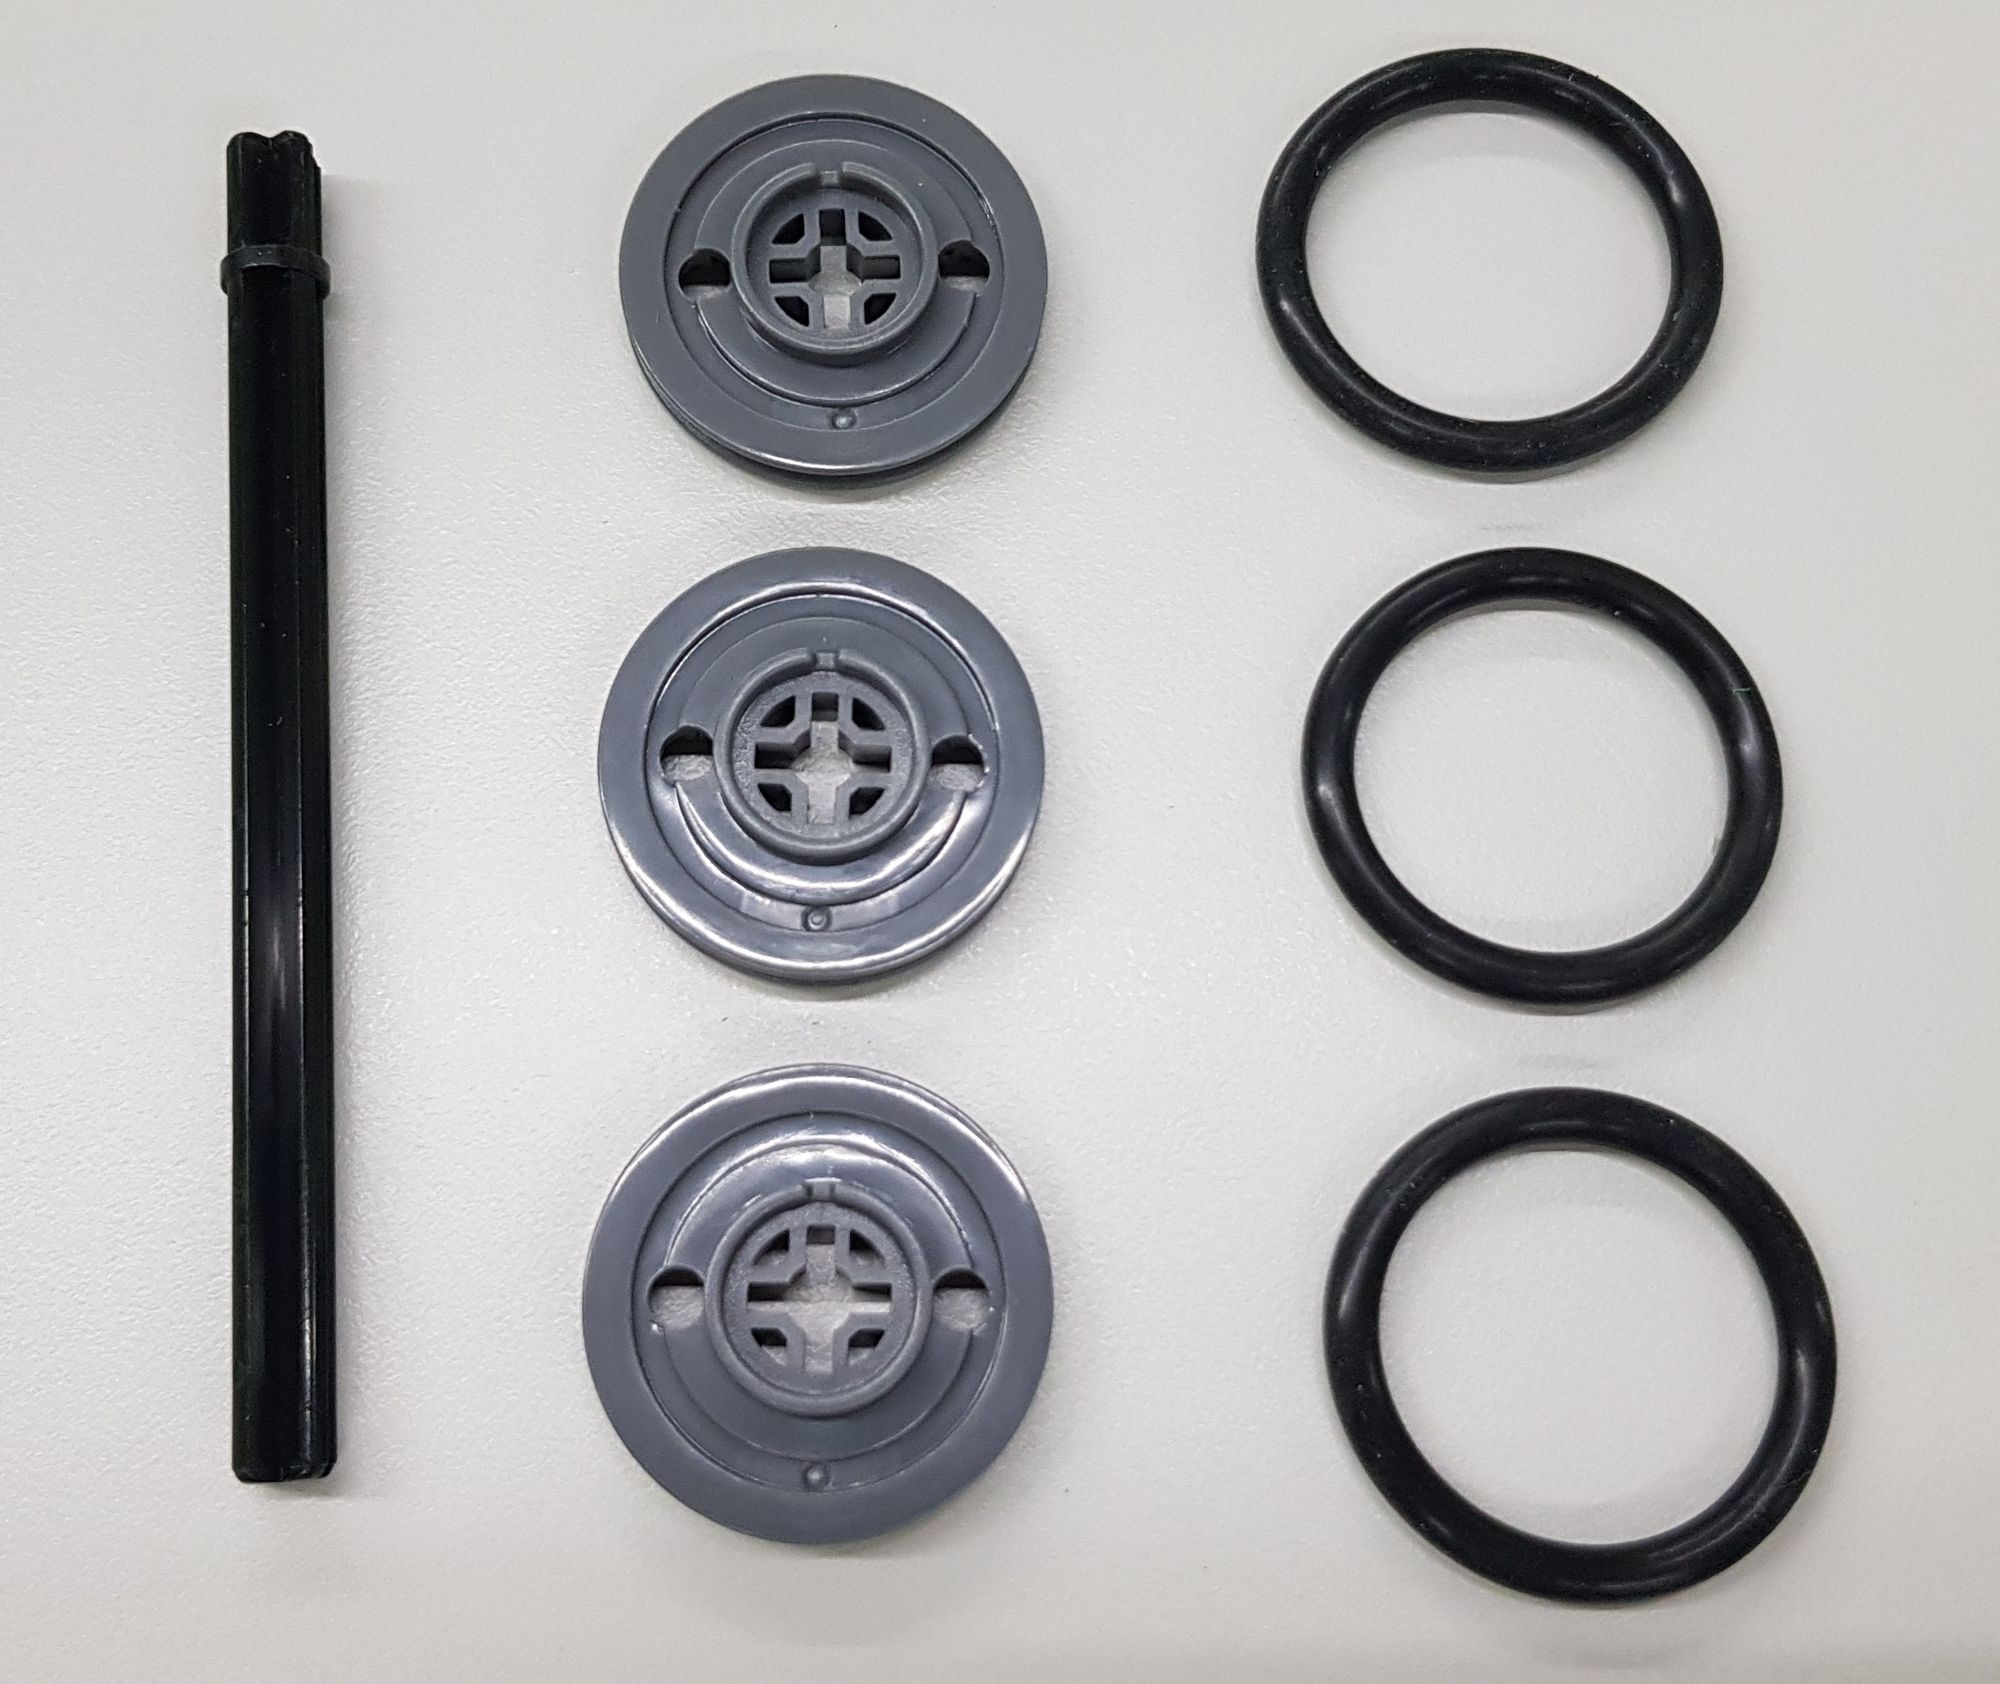
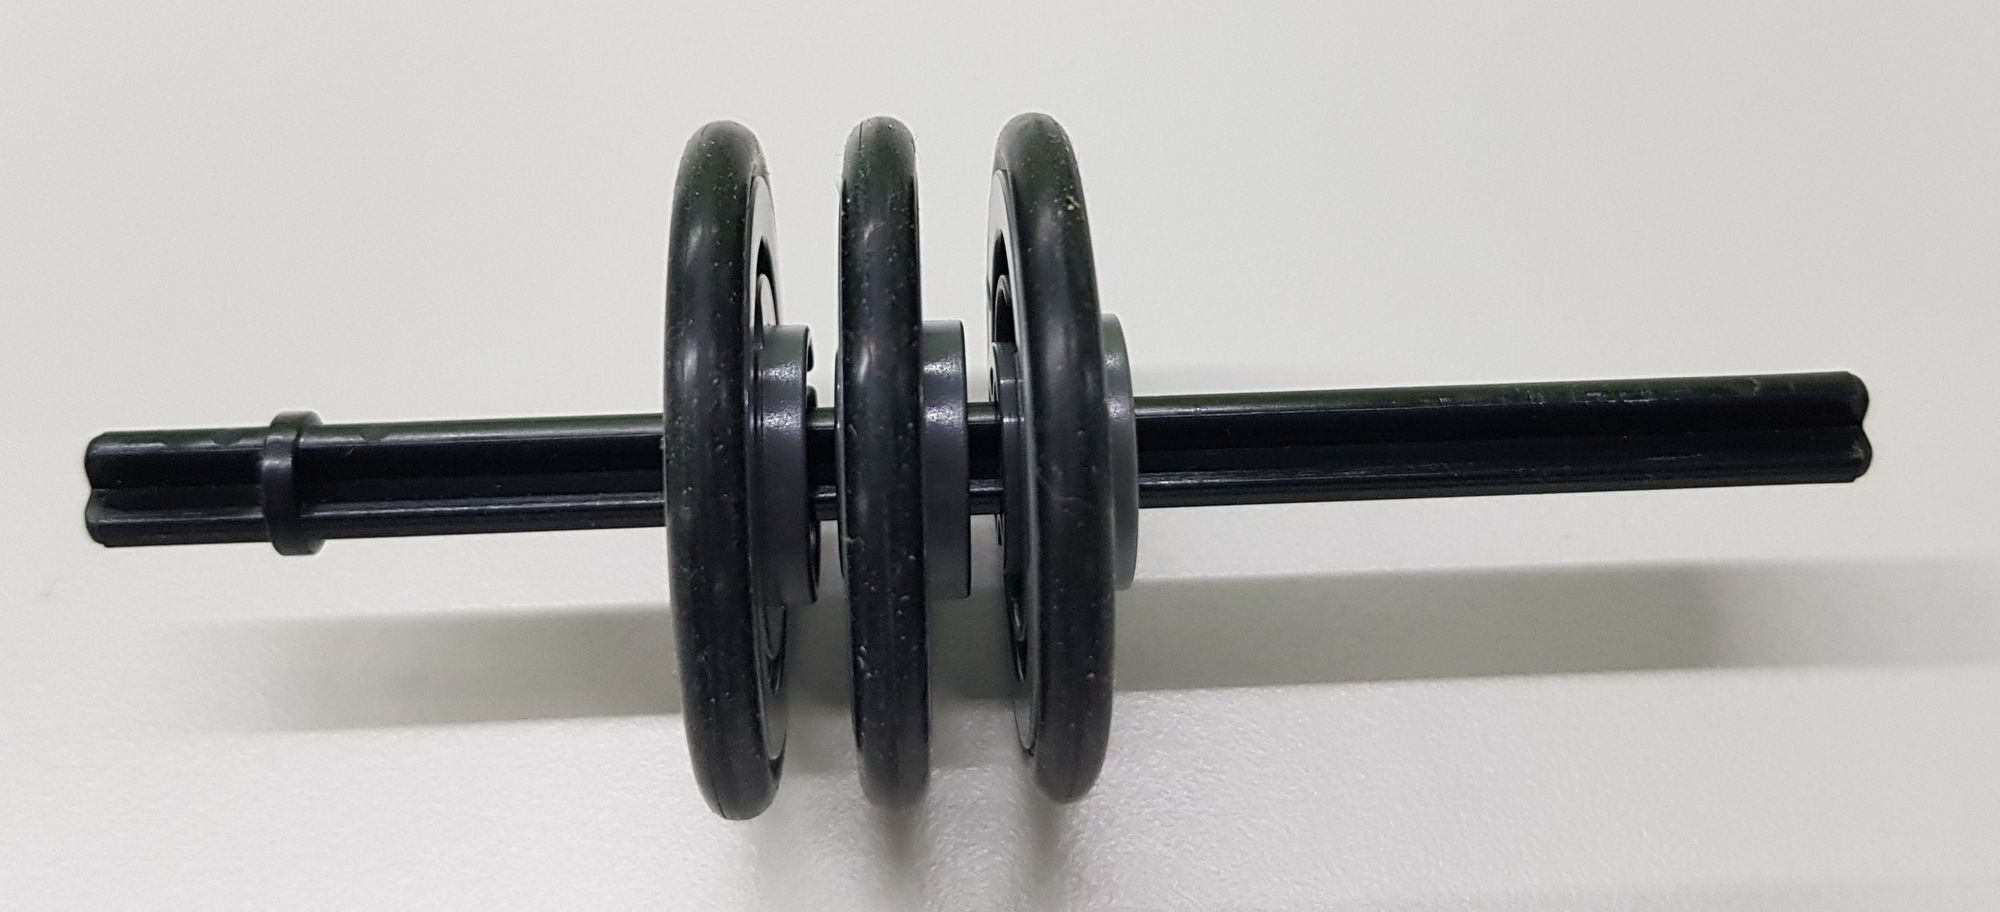
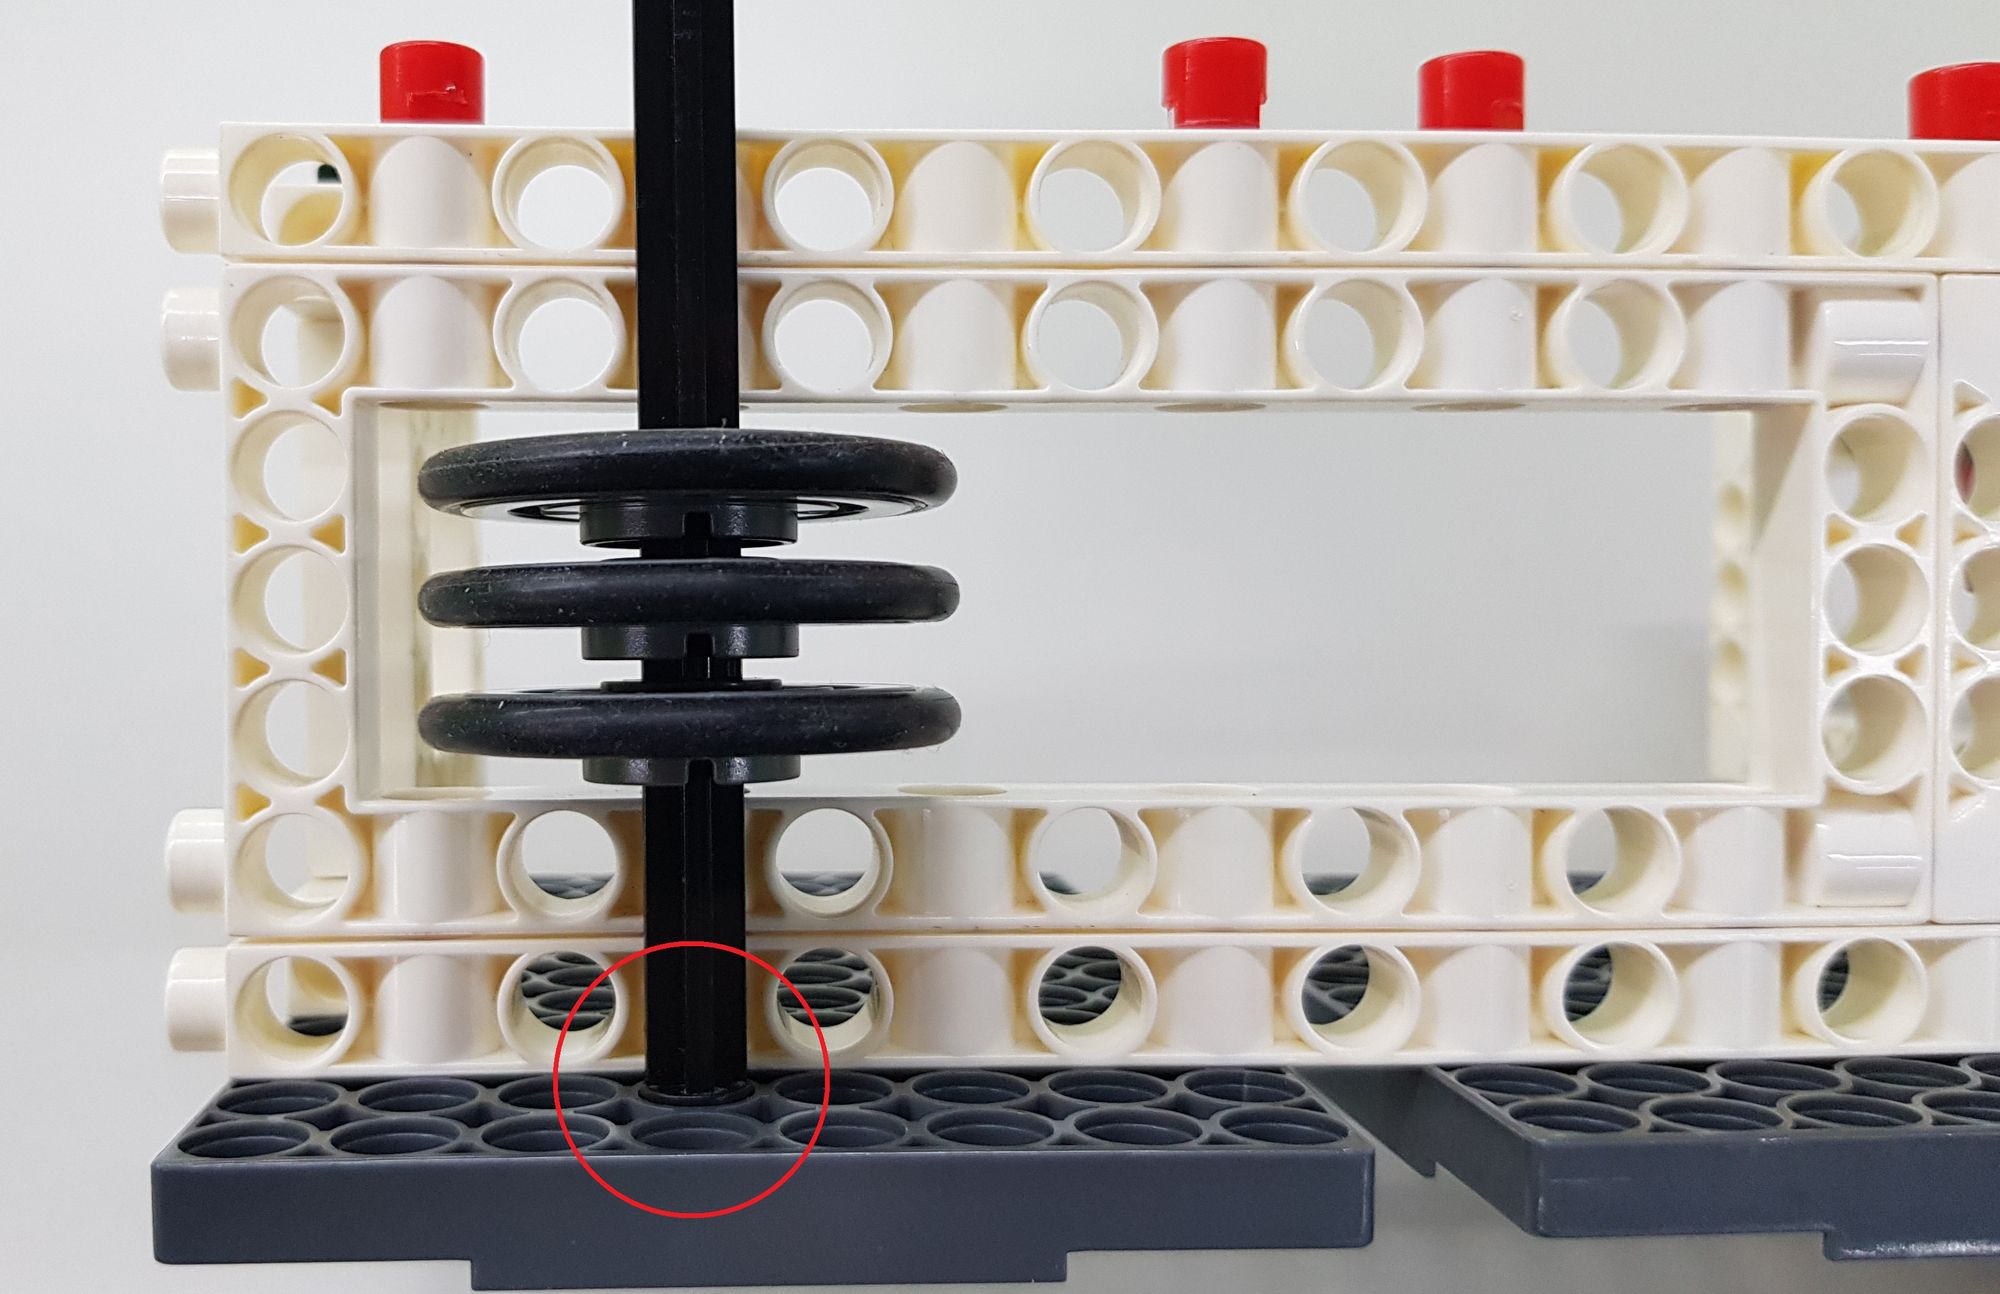
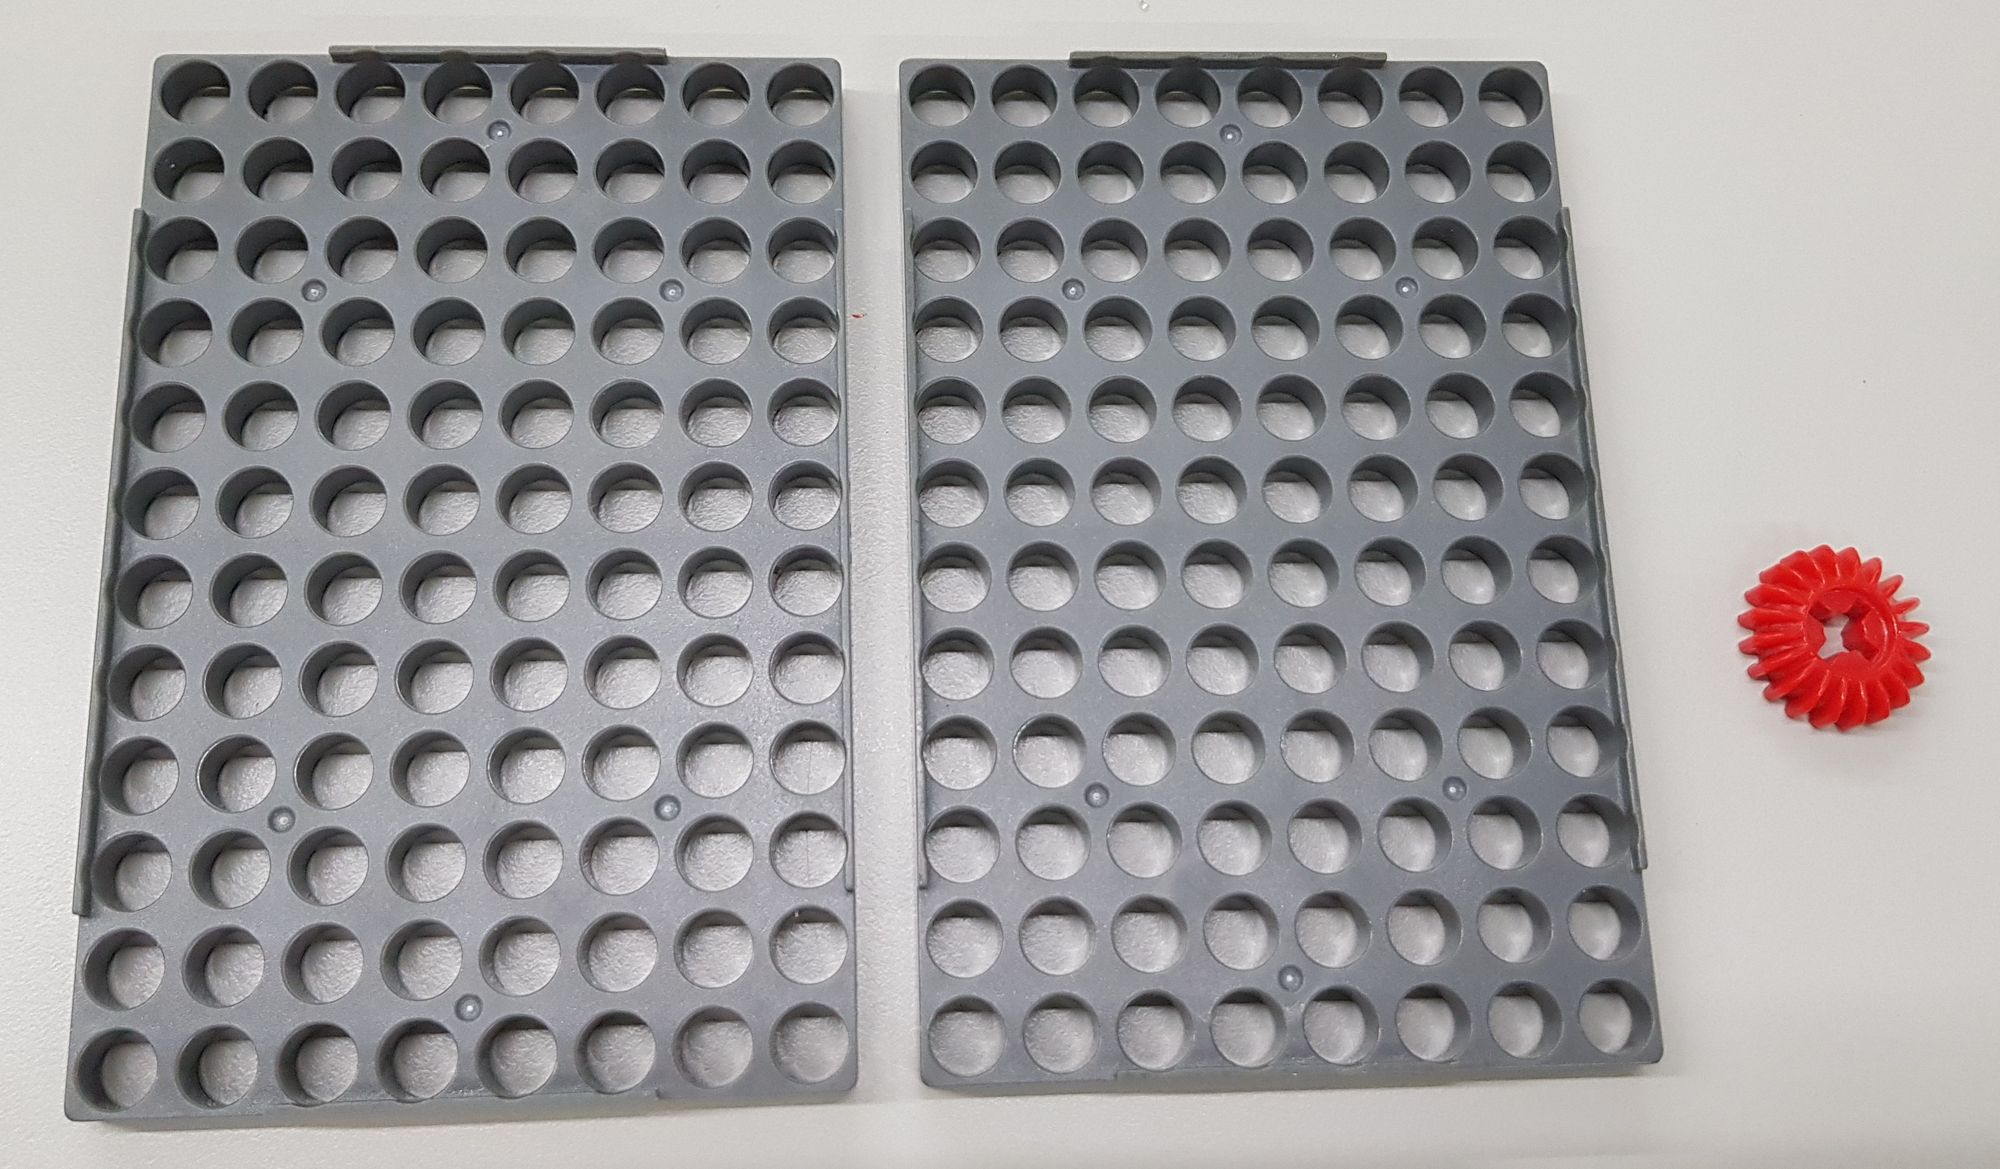
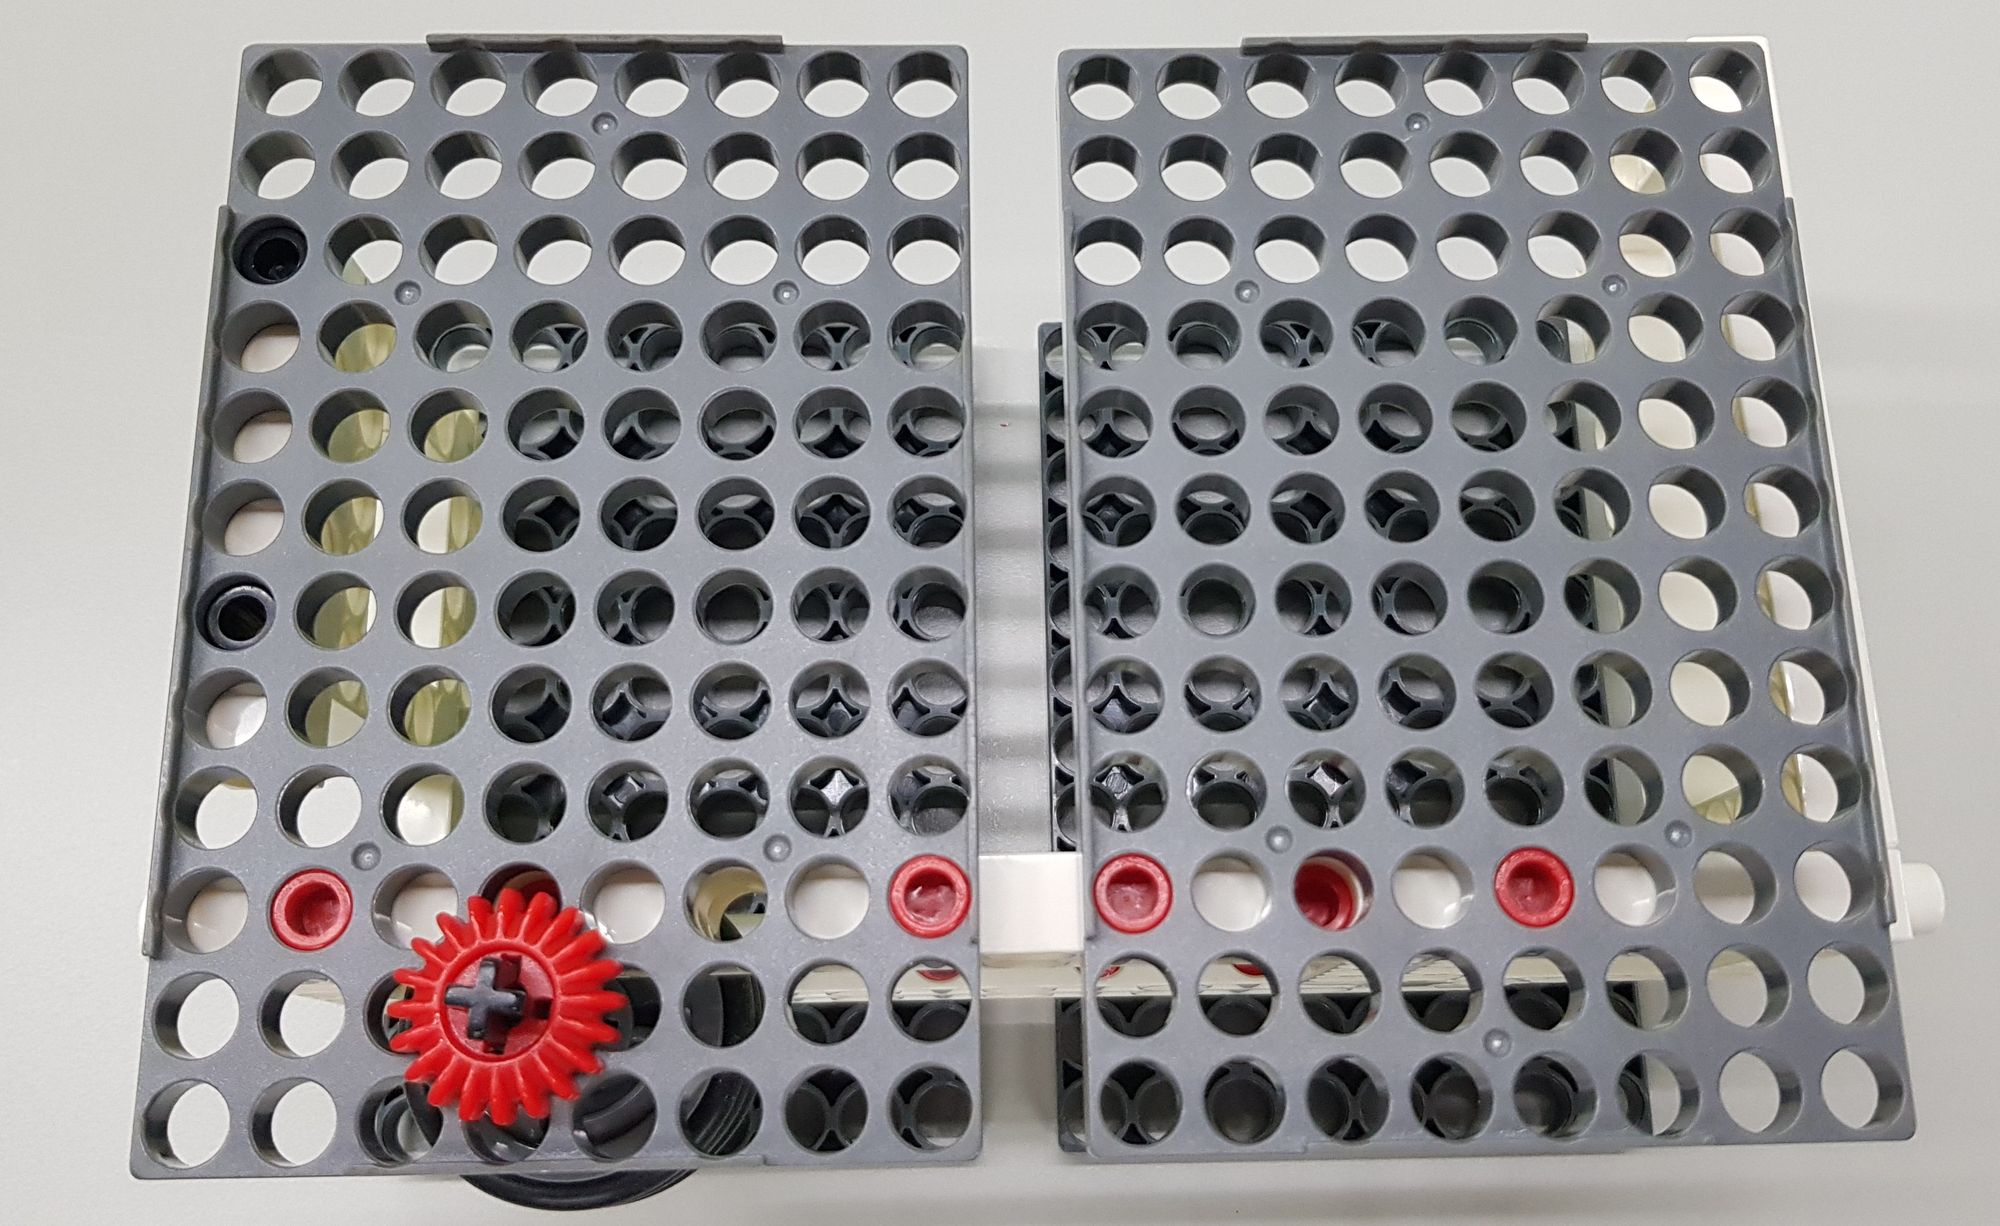
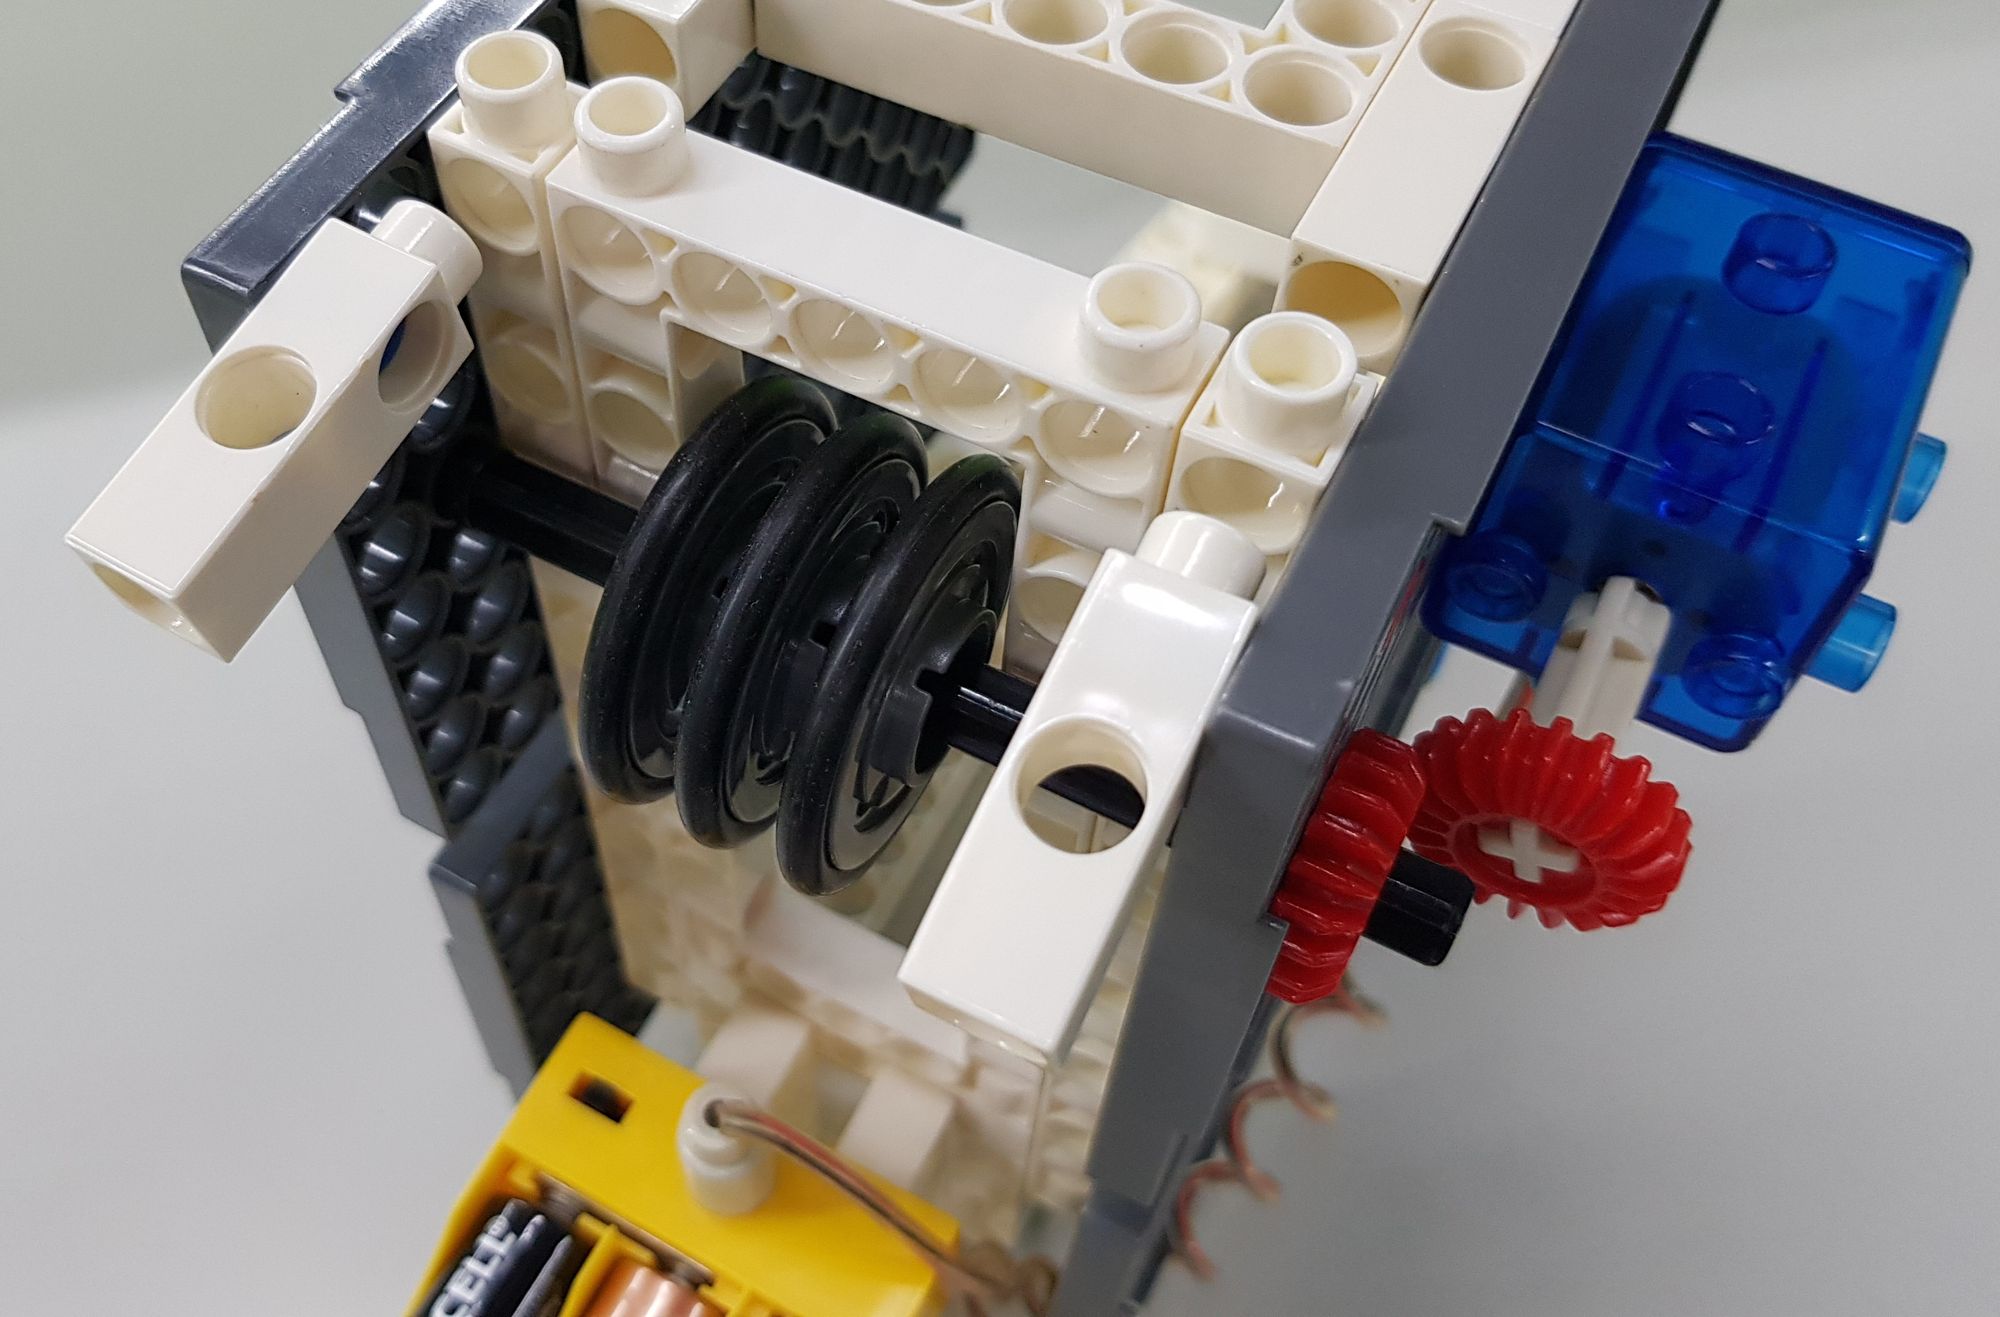
In the fourth step, we will need to use one 100mm AXLE Ⅱ, three OD33mm PULLEY and three OD36 O-RING (Figure 9). Assemble the three pulleys with the rubber rings and insert them into the 100mm axle, and put the 100mm axle into the 8x12 BASE GRID with the step point facing down , Adjust the position of the OD33mm PULLEY after completion (Figure 10, Figure 11).
The fifth step is to use one 5x13 FRAME, various rods, and long pegs and short pegs (Figure 12) to make the upper cover of the money blaster (Figure 13).
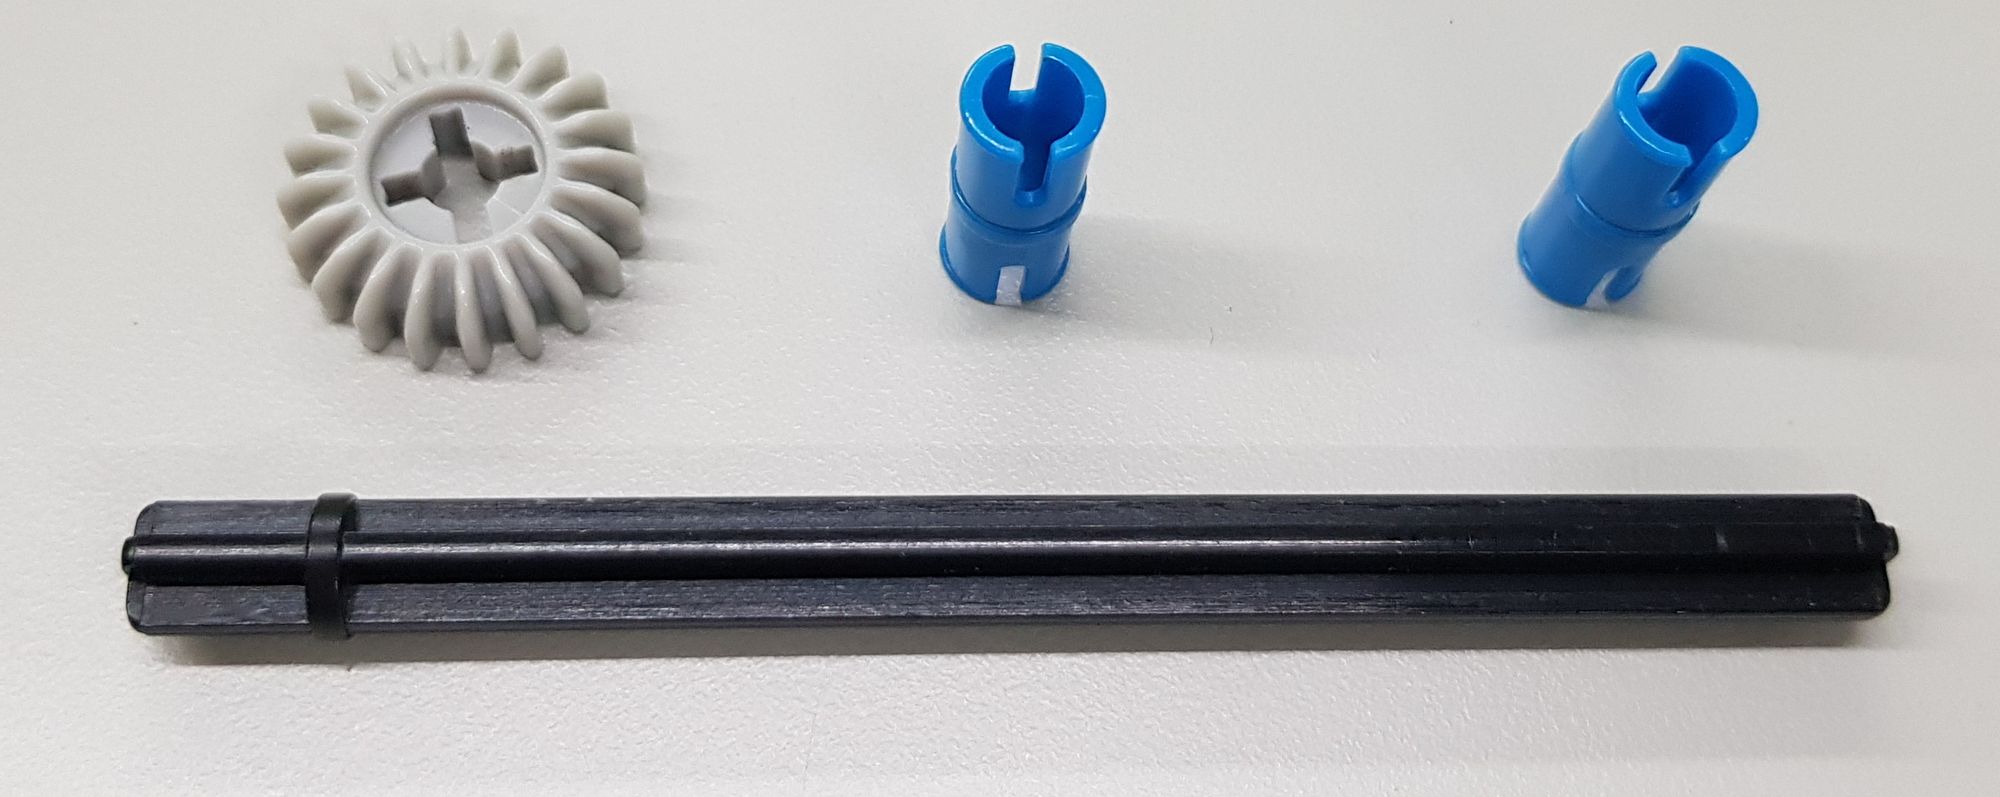
The sixth step is to use the 100mm AXLE Ⅱ, 20T GEAR and AXLE CONNECTOR (Figure 14). Use the AXLE CONNECTOR to combine the upper cover with the 8x12 BASE GRID, and insert the 100mm AXLE Ⅱ and 20T GEAR into the 5 HOLE ROD of the upper cover to complete the counterweight part (Figure 15).
How do counterweights help?
Counterweights push the toy banknote down so it can stick to the OD36 O-RING and spray out through the friction between the two. The counterweight has to change depending on the battery power, the toy banknote type and amount. For example, the 20T GEAR counterweight can spray about 30 toy banknotes.
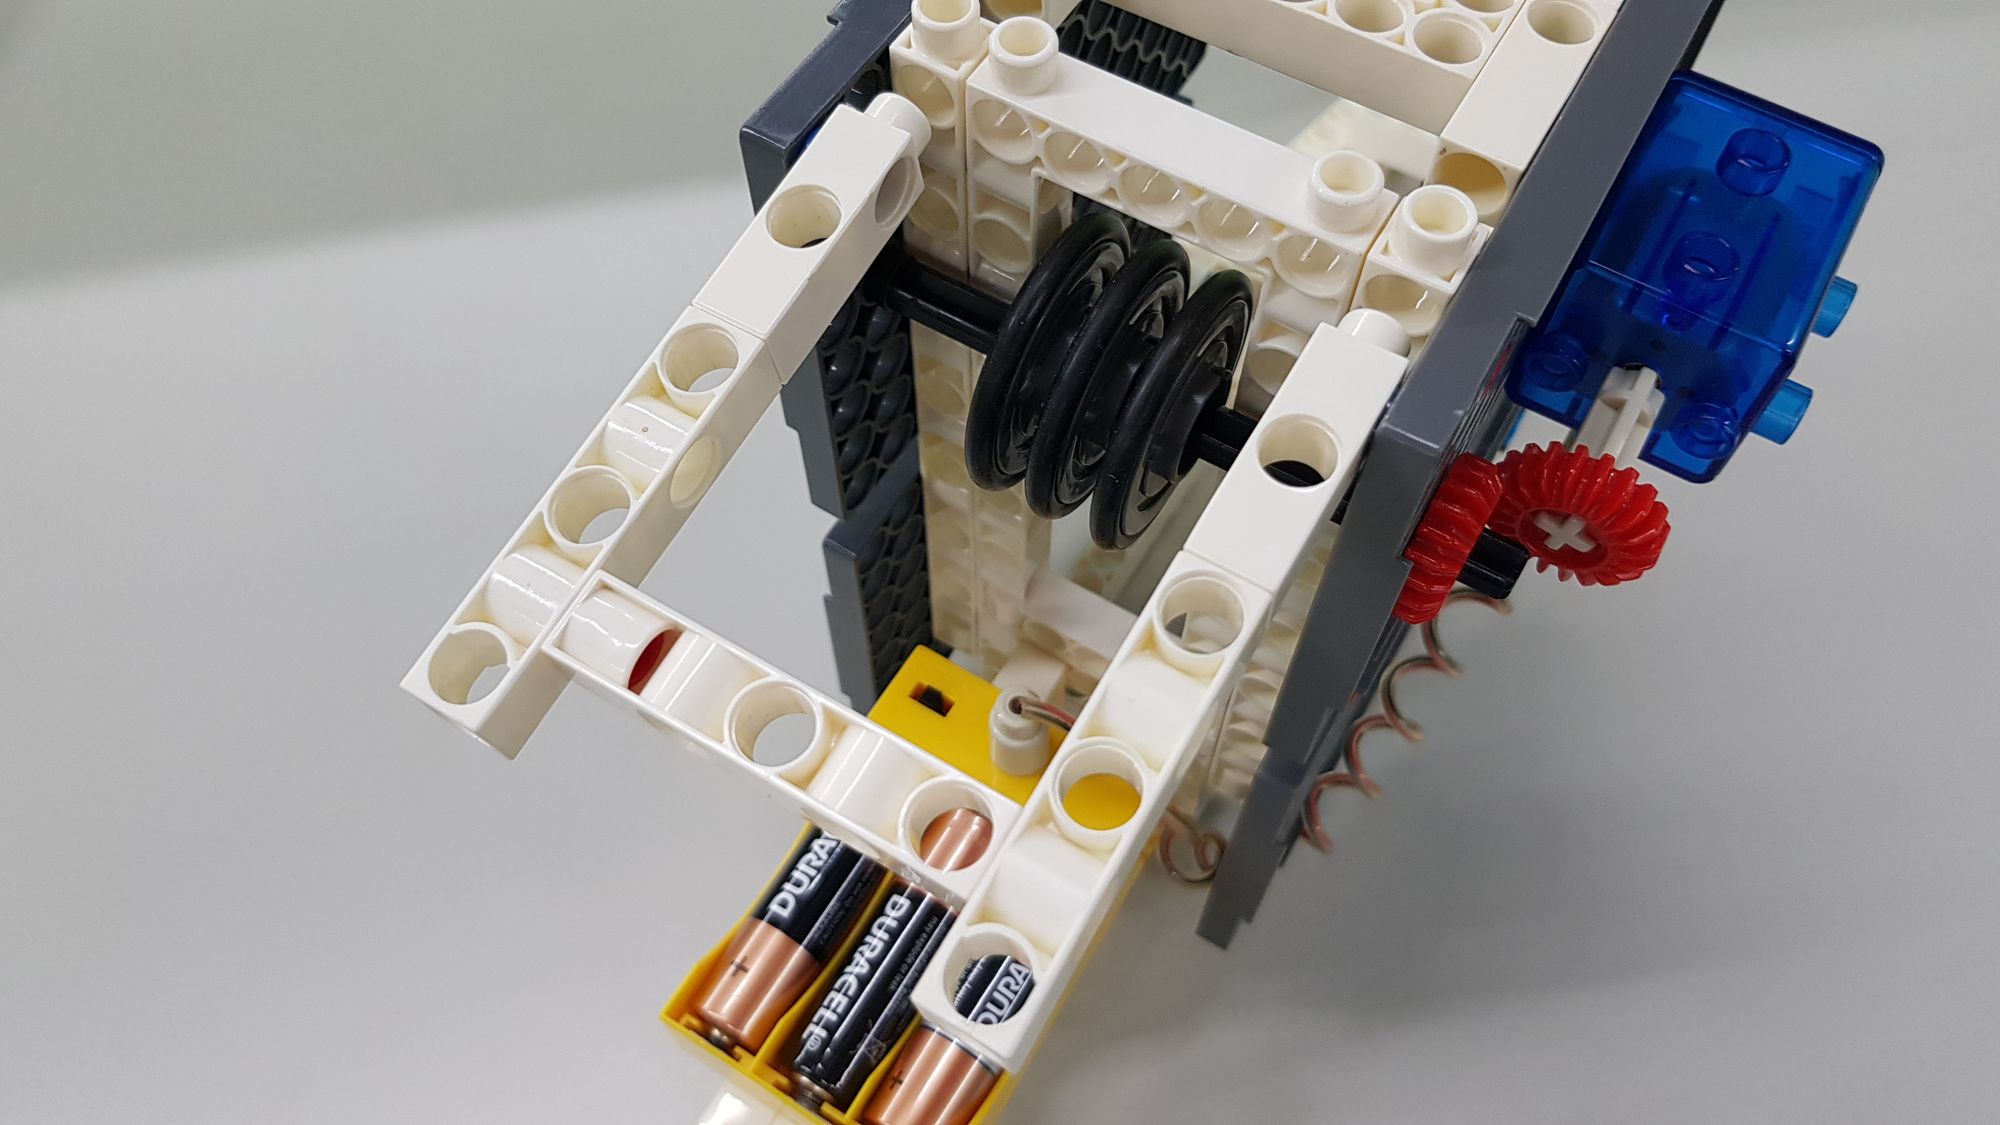
In the seventh step, we use the 8x12 BASE GRID and 20T GEAR (Figure 16). Combine the 8x12 BASE GRID with the money blaster to complete the left baffle, and insert the 20T GEAR into the 100mm AXLE Ⅱ(Figure 17).
The eighth step is to use various frames, rods and short pegs (Figure 18), combine them to complete the structure of the handle (Figure 19), and then combine it with the money blaster (Figure 20).
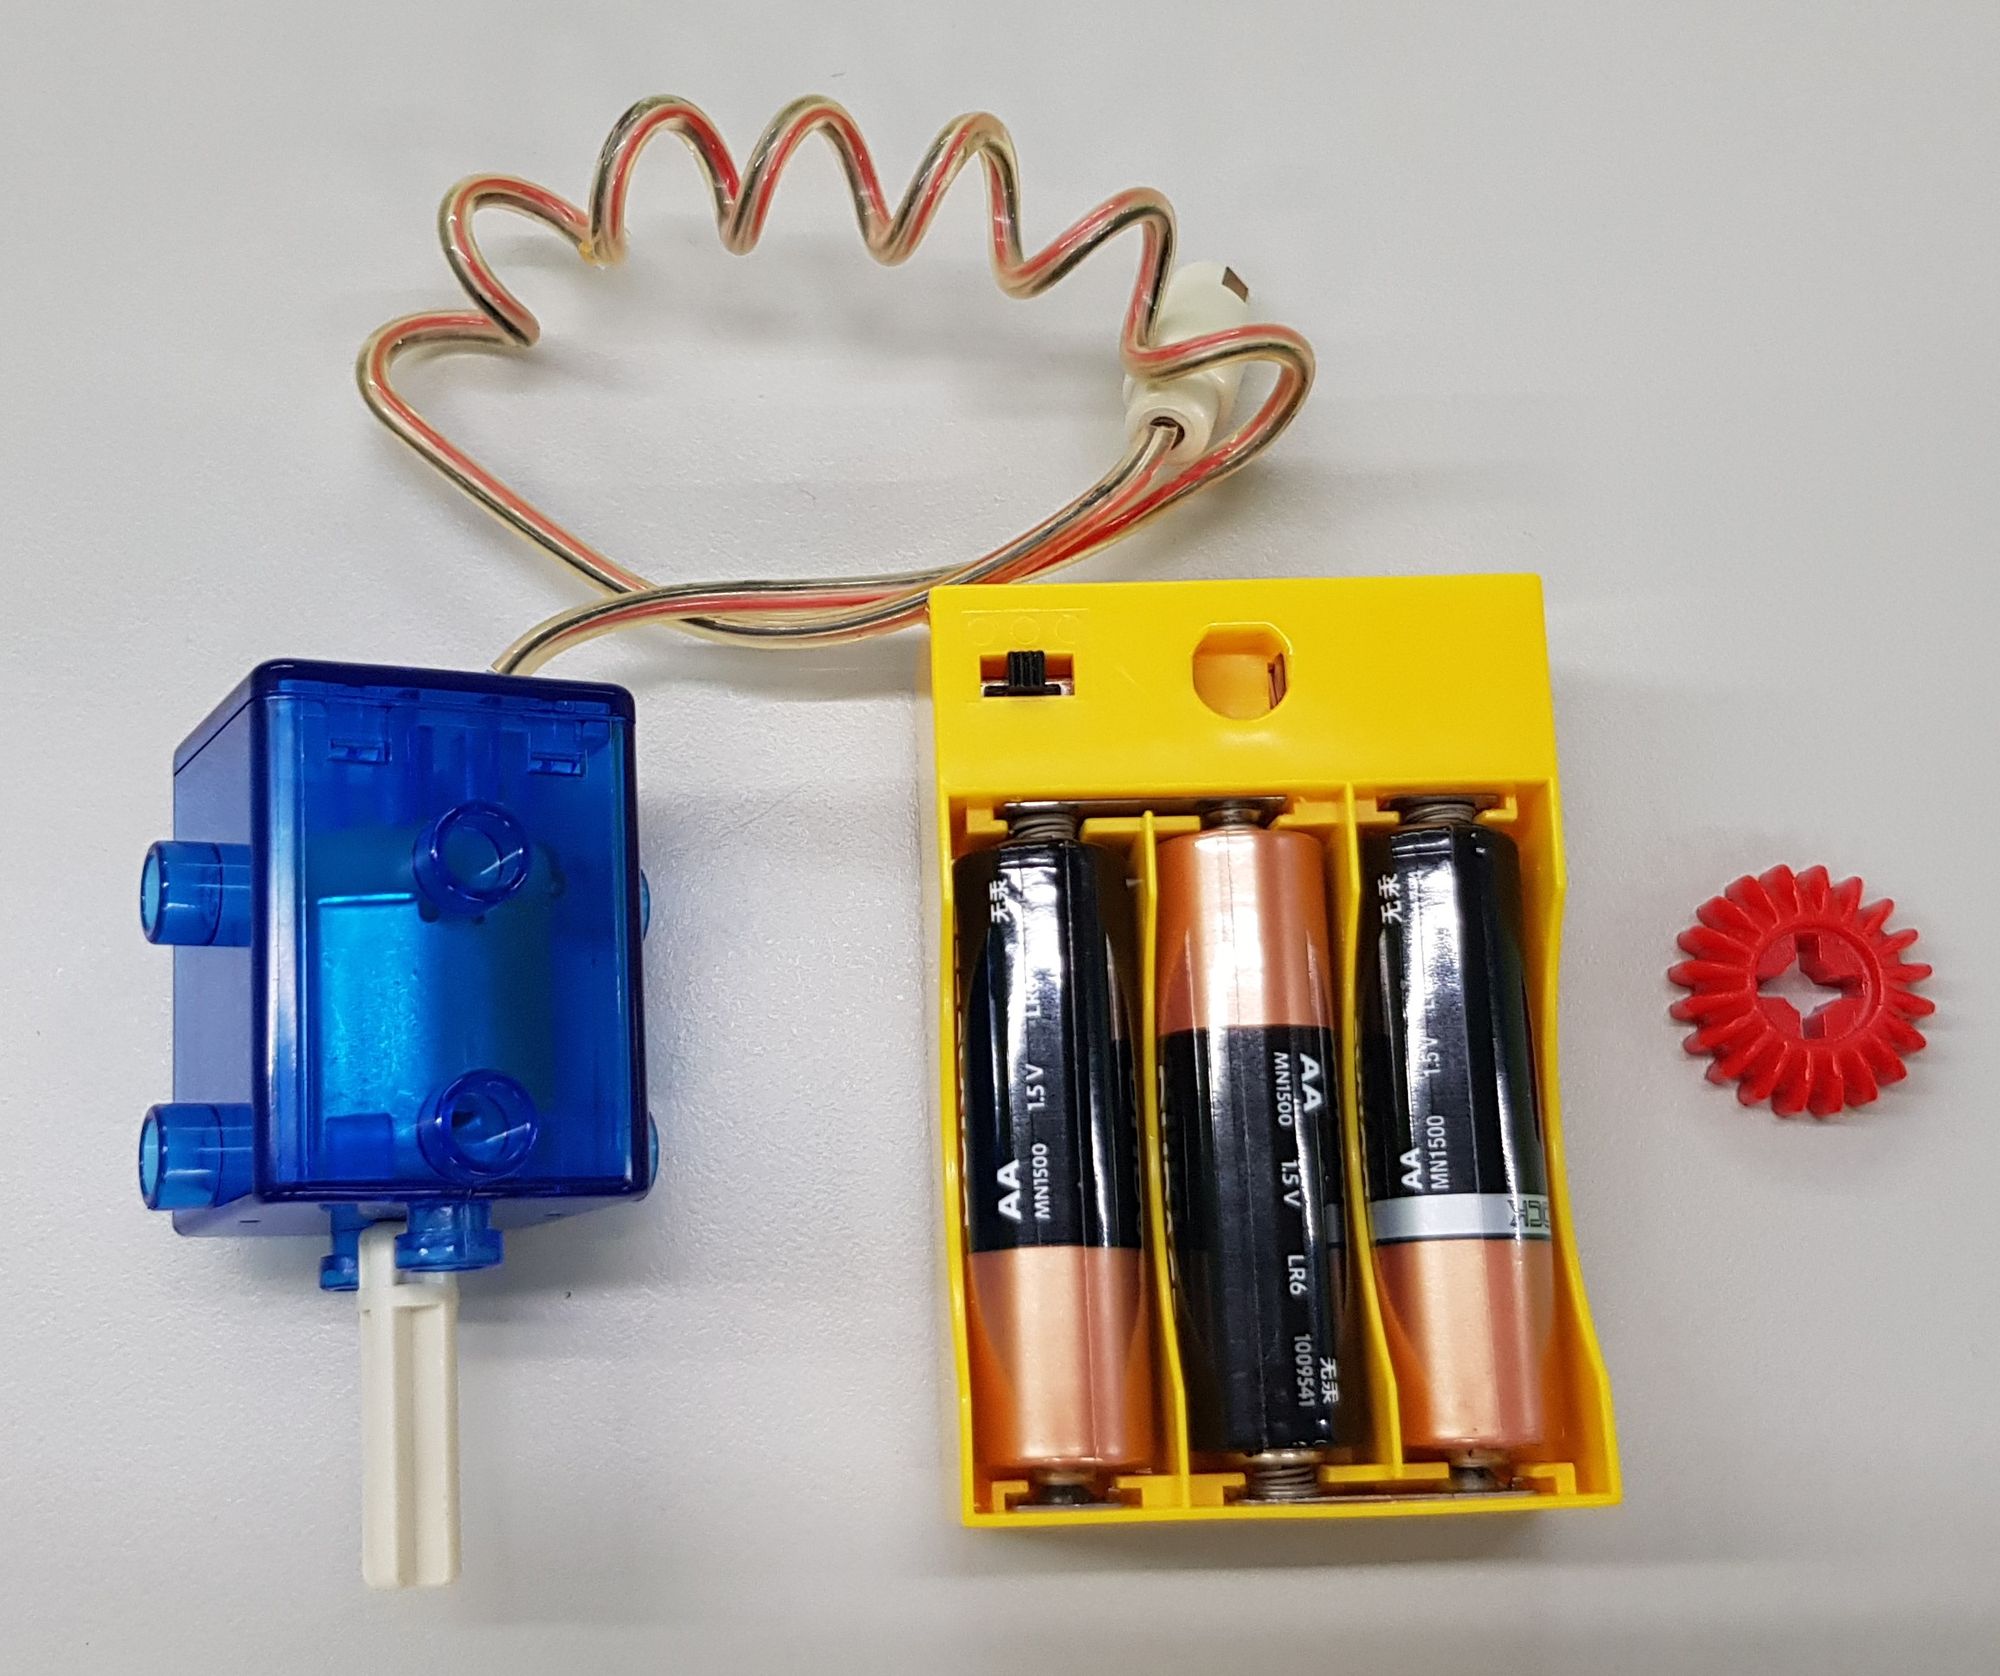
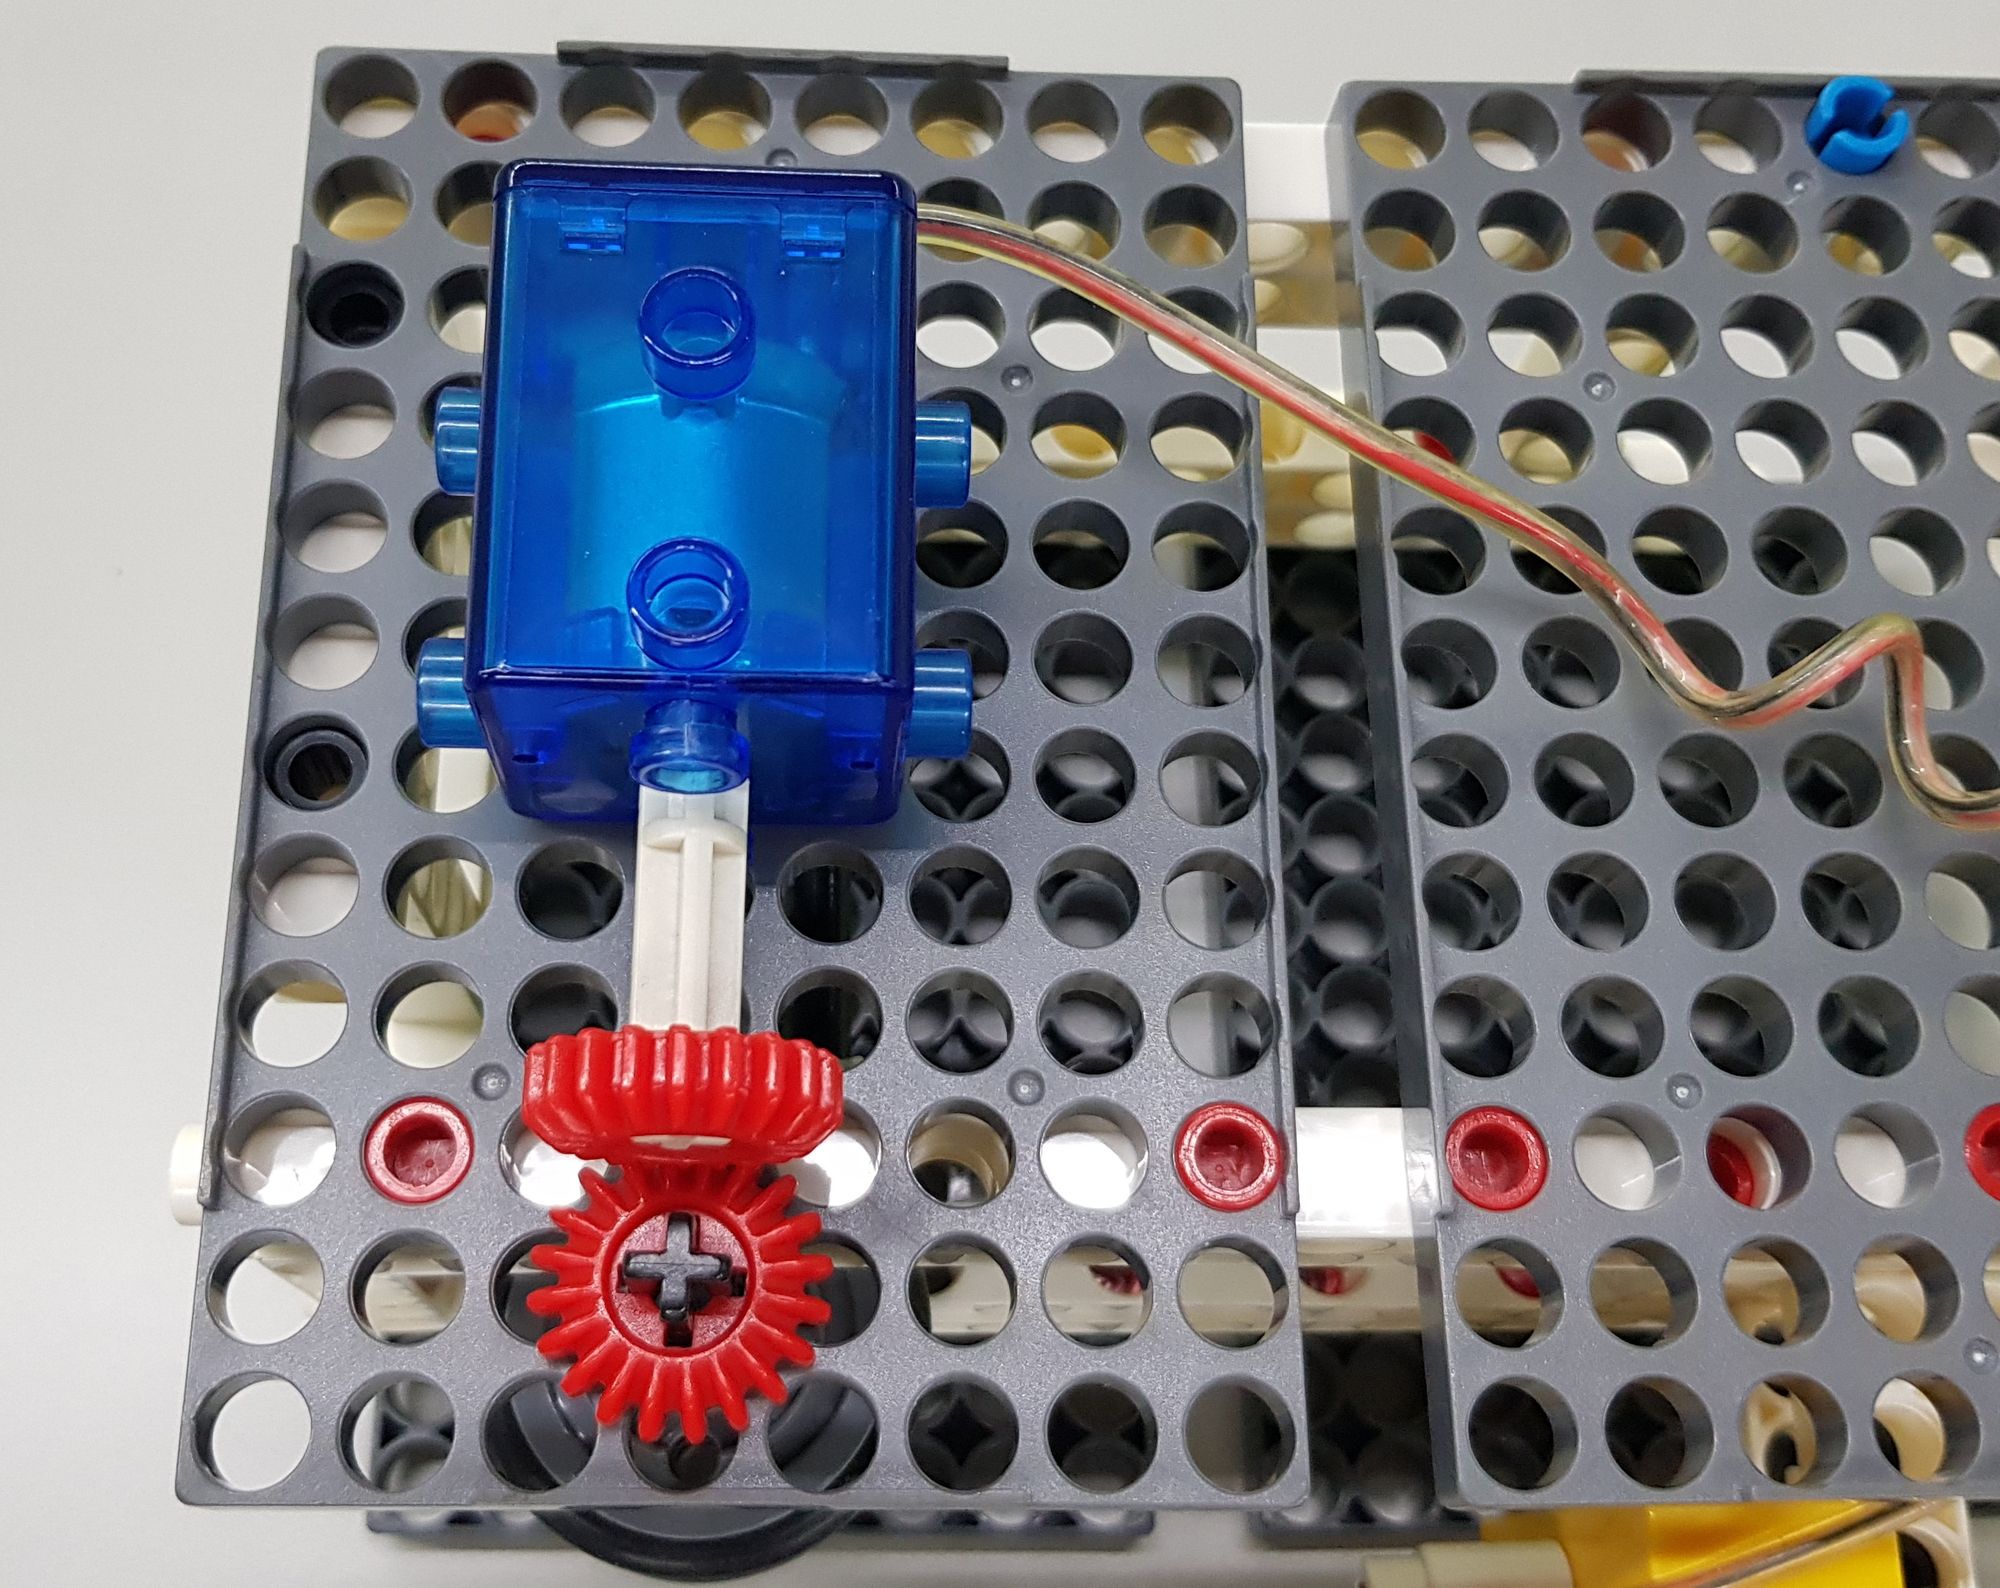
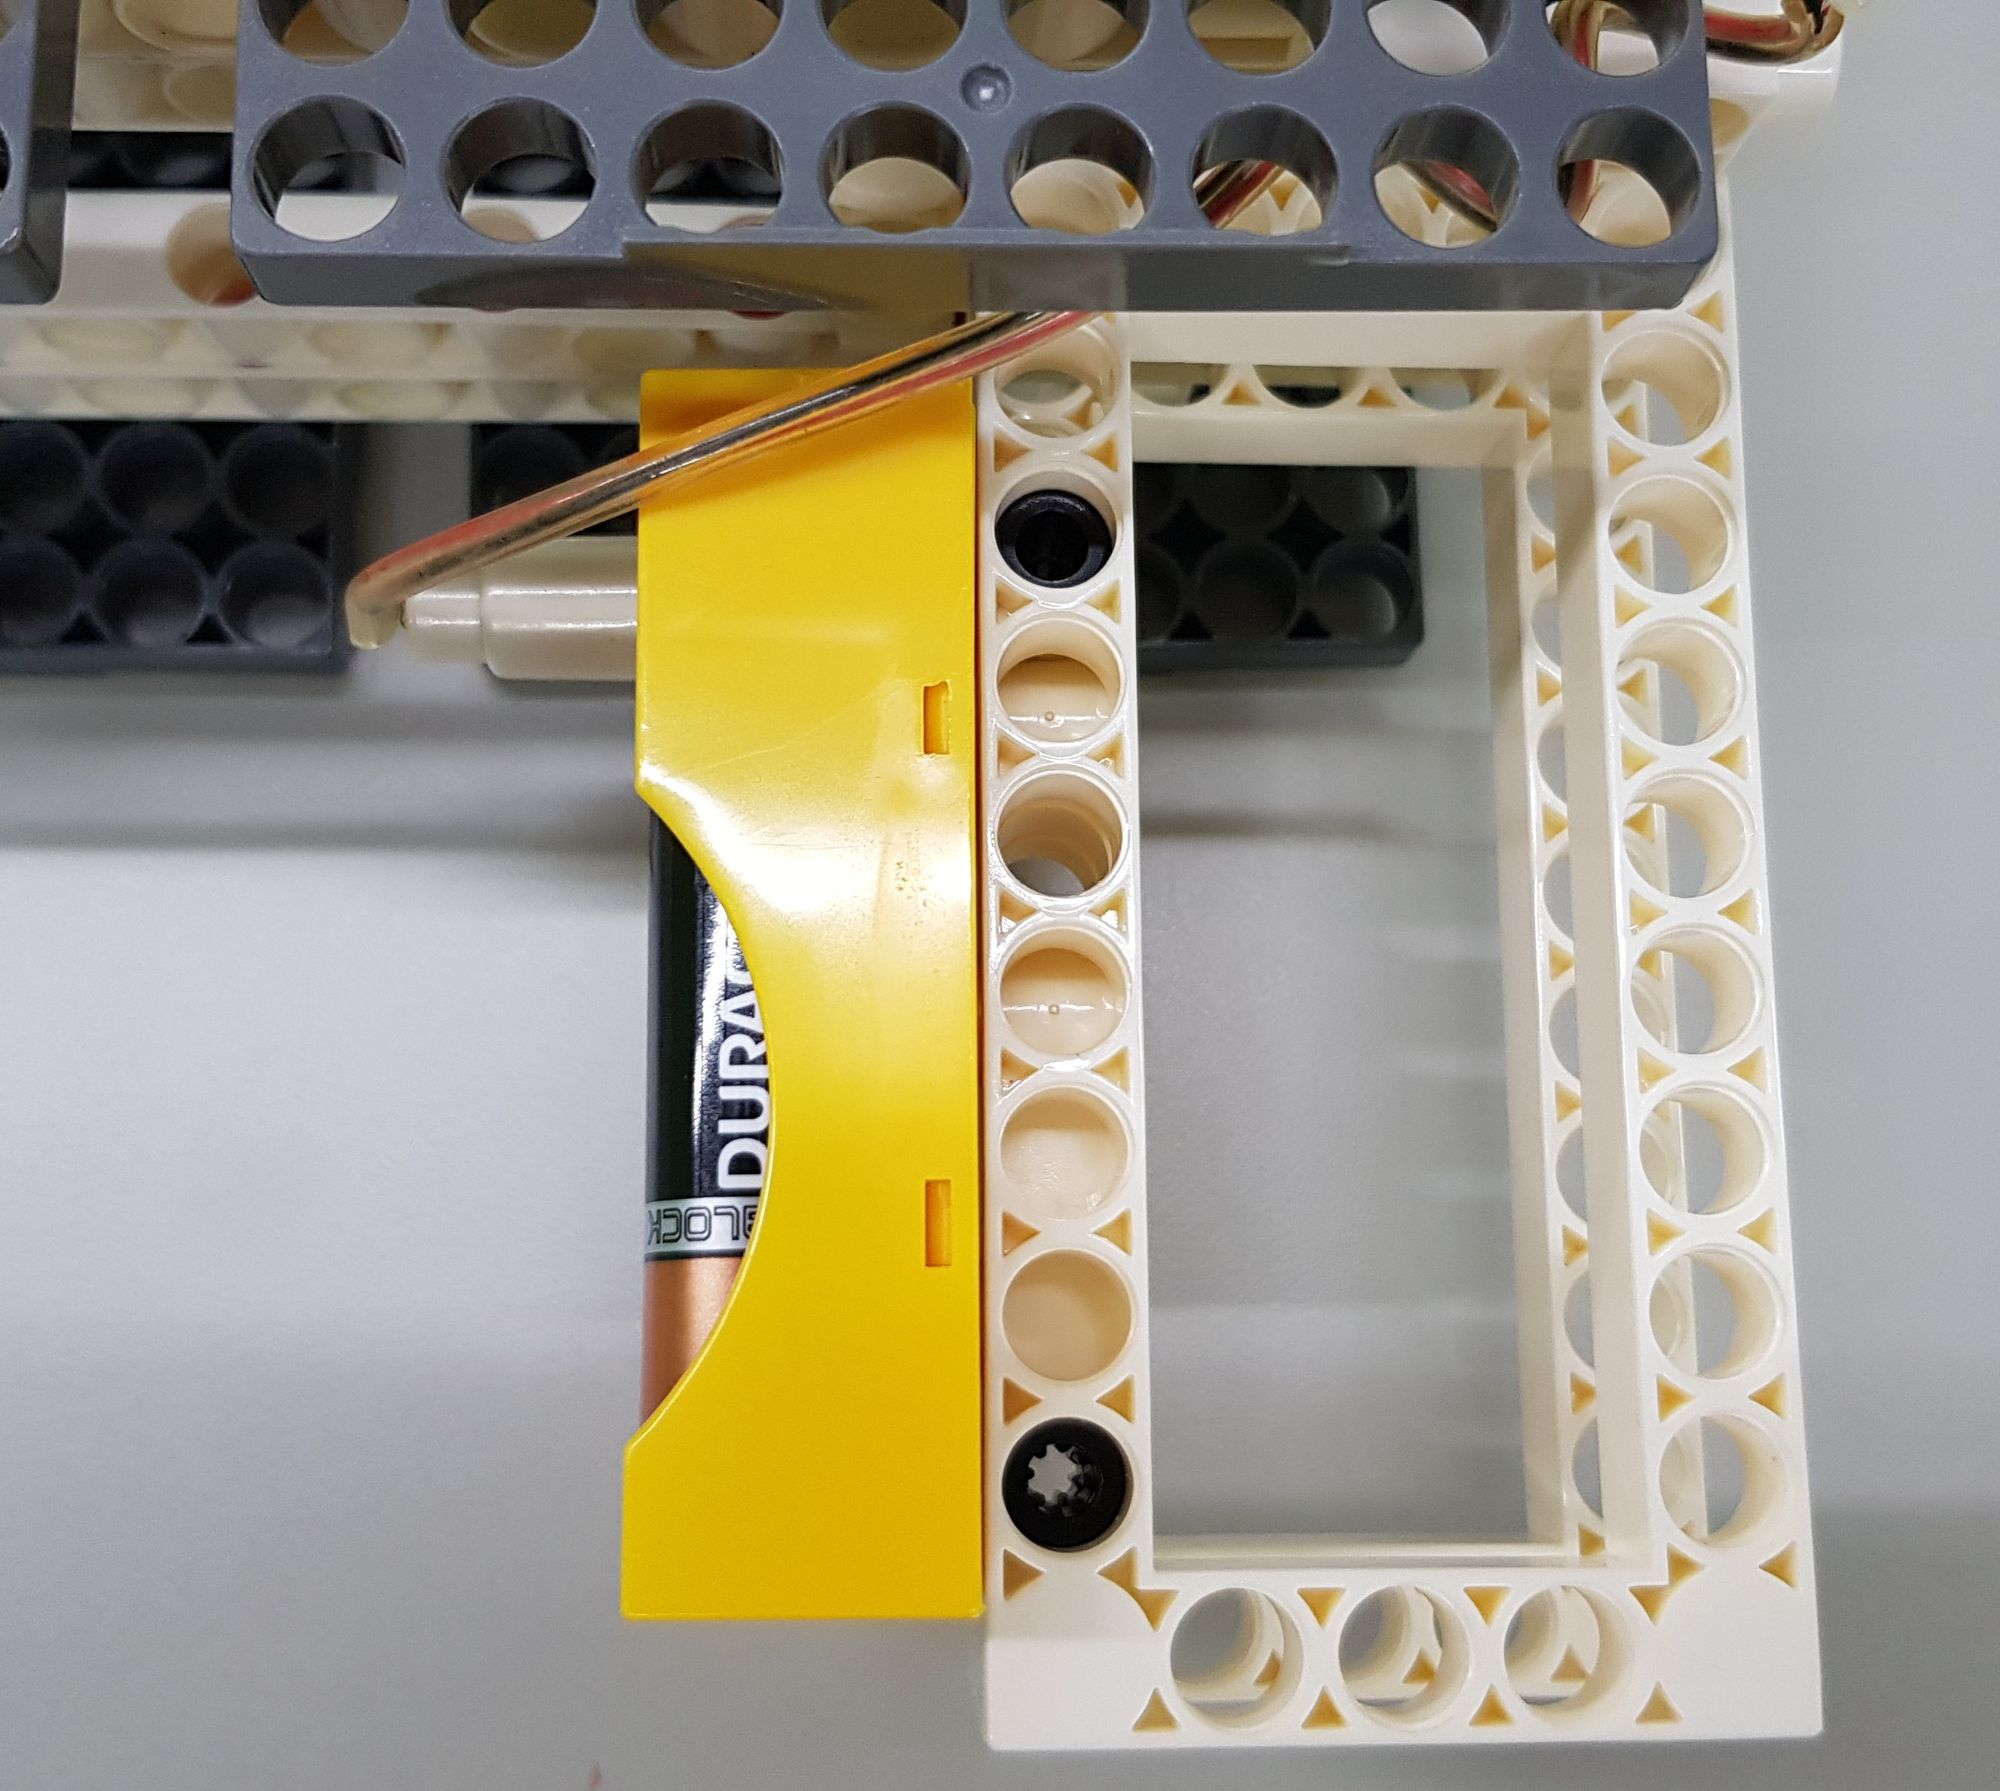
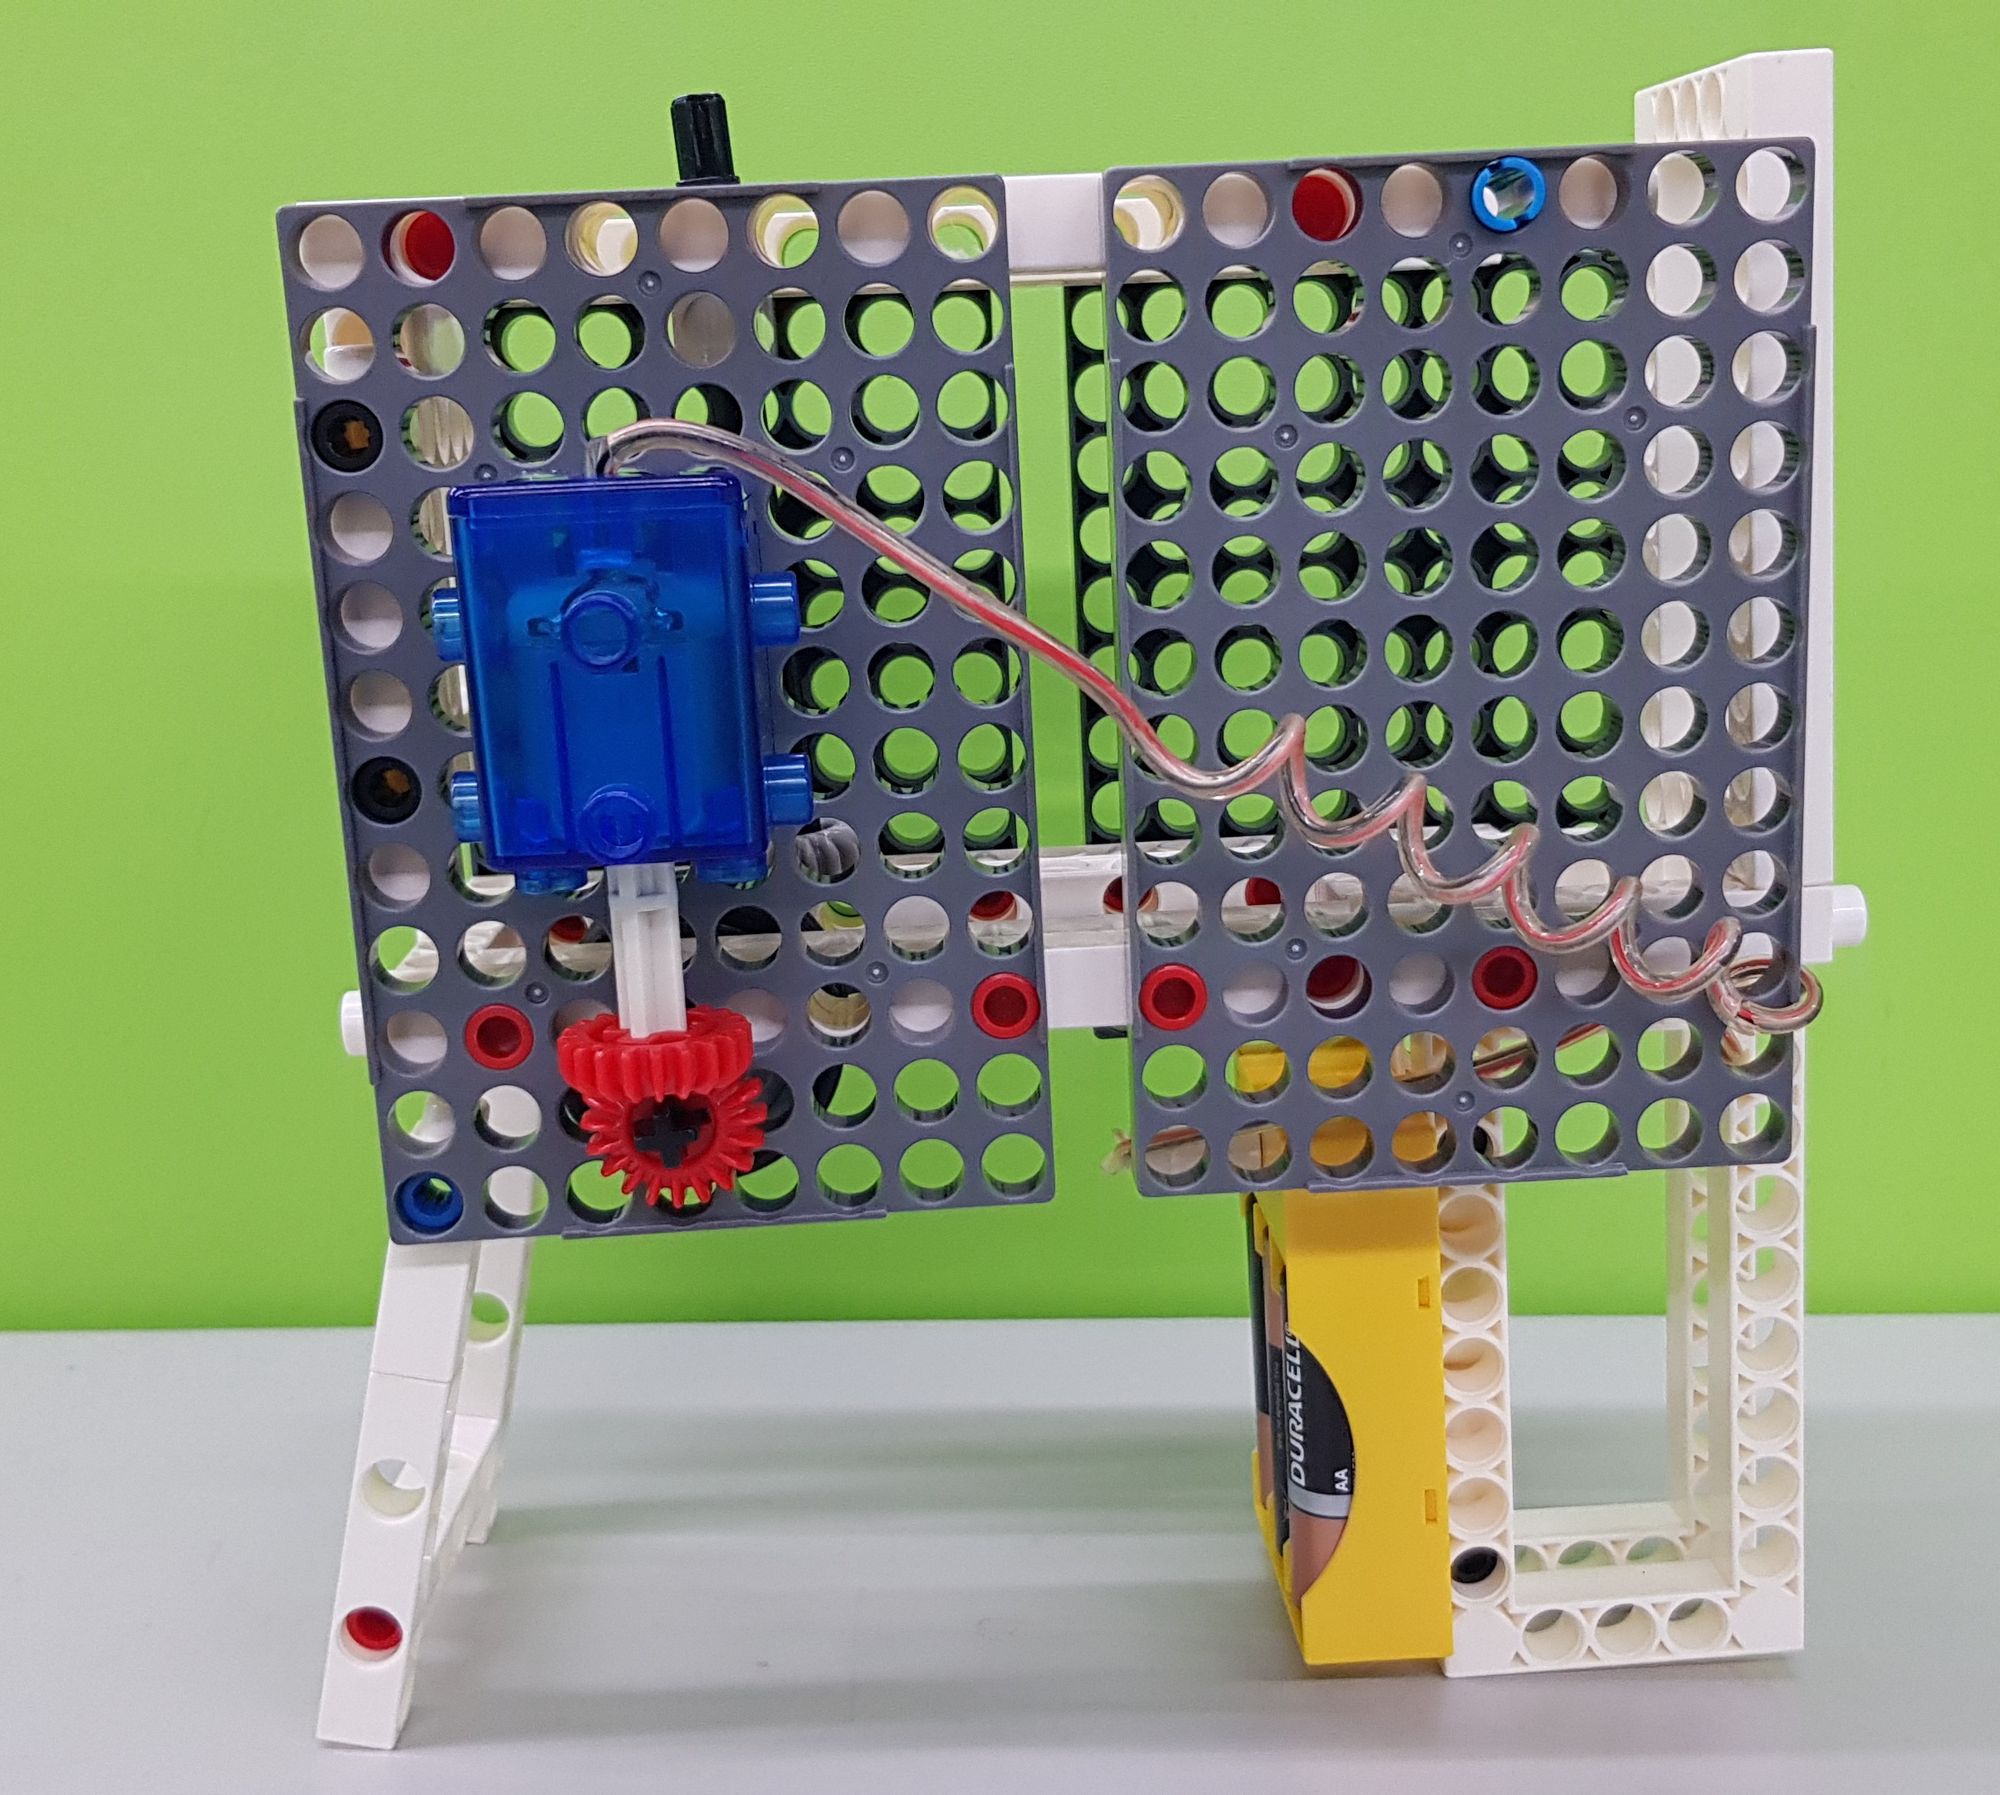
The ninth step is to use the 20T GEAR and the parts in the GAS AND PNEUMATICS kit (#1238RR), which are the C-MOTOR WITH WIRE CONNECTOR and the C-4.5V BATTERY HOLDER WITH SWITCH (Figure 21), insert the 20T GEAR into the C-MOTOR WITH WIRE CONNECTOR, and follow the figure to combine with the money blaster, ensure that the two 20T GEARS are meshing with each other (Figure 22), and then insert the C-4.5V BATTERY HOLDER WITH SWITCH with the connector into the hole in the center of the handle to fix the battery holder onto the frame (Figure 23) .
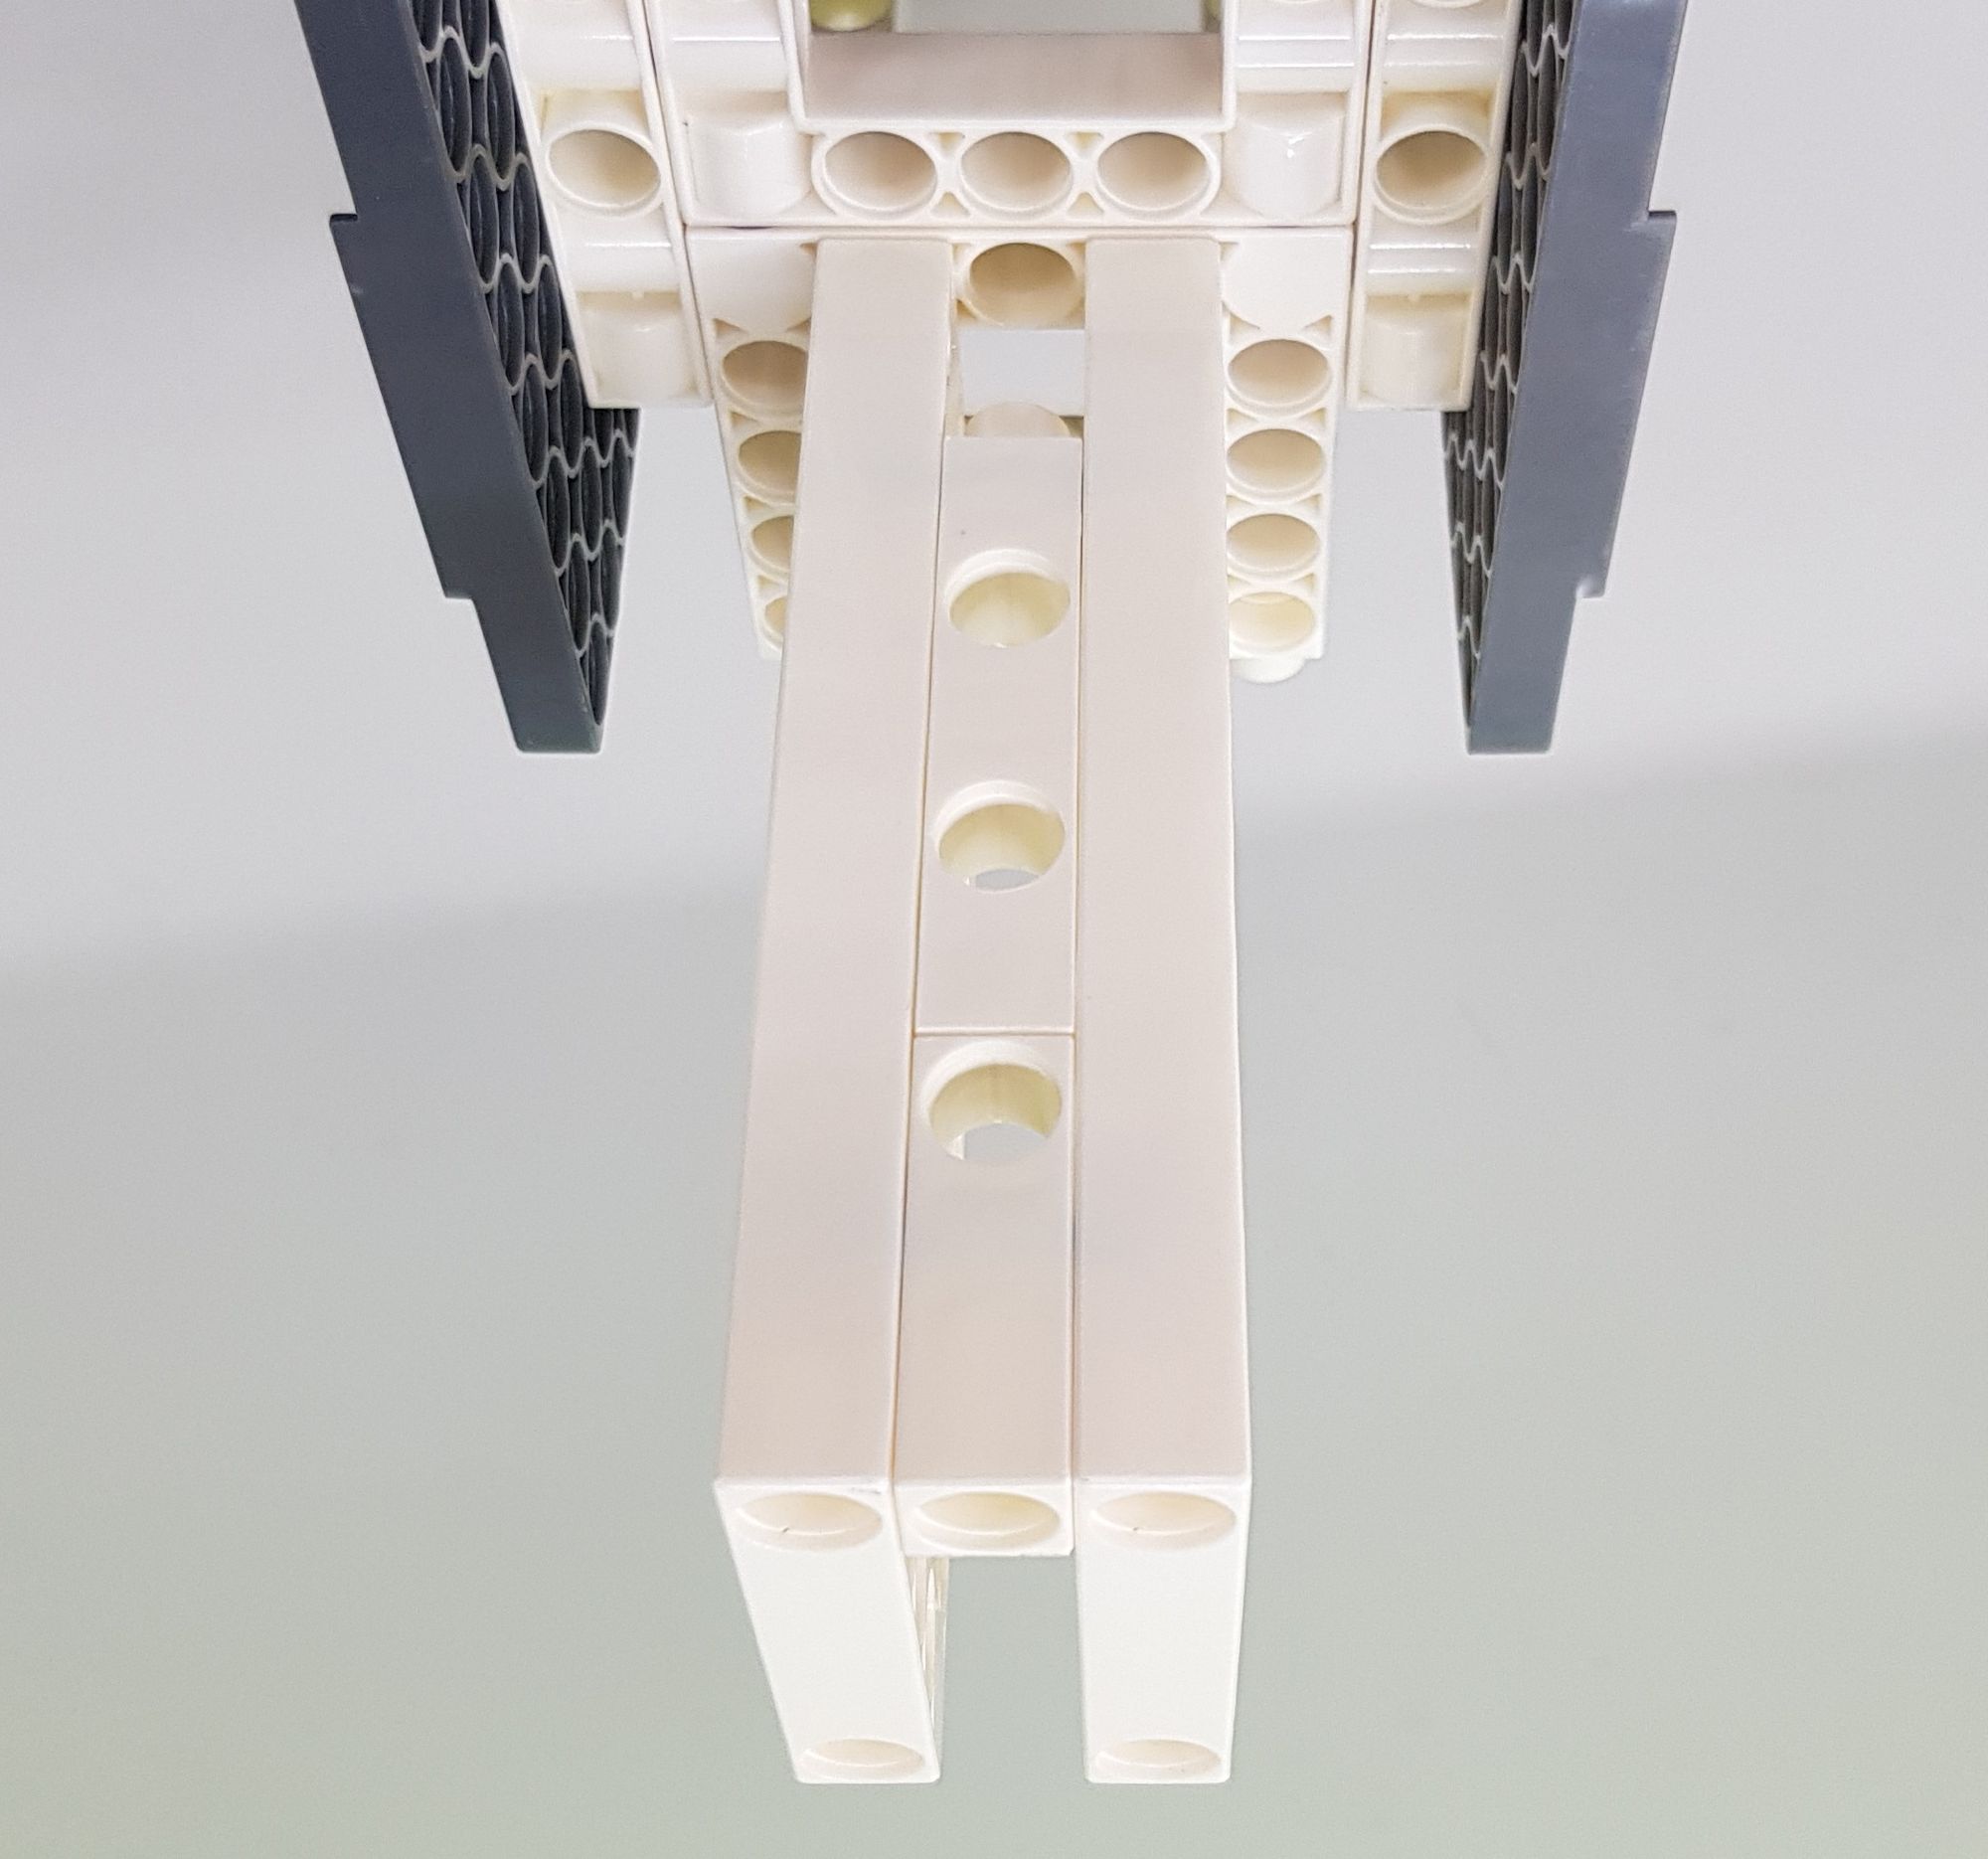
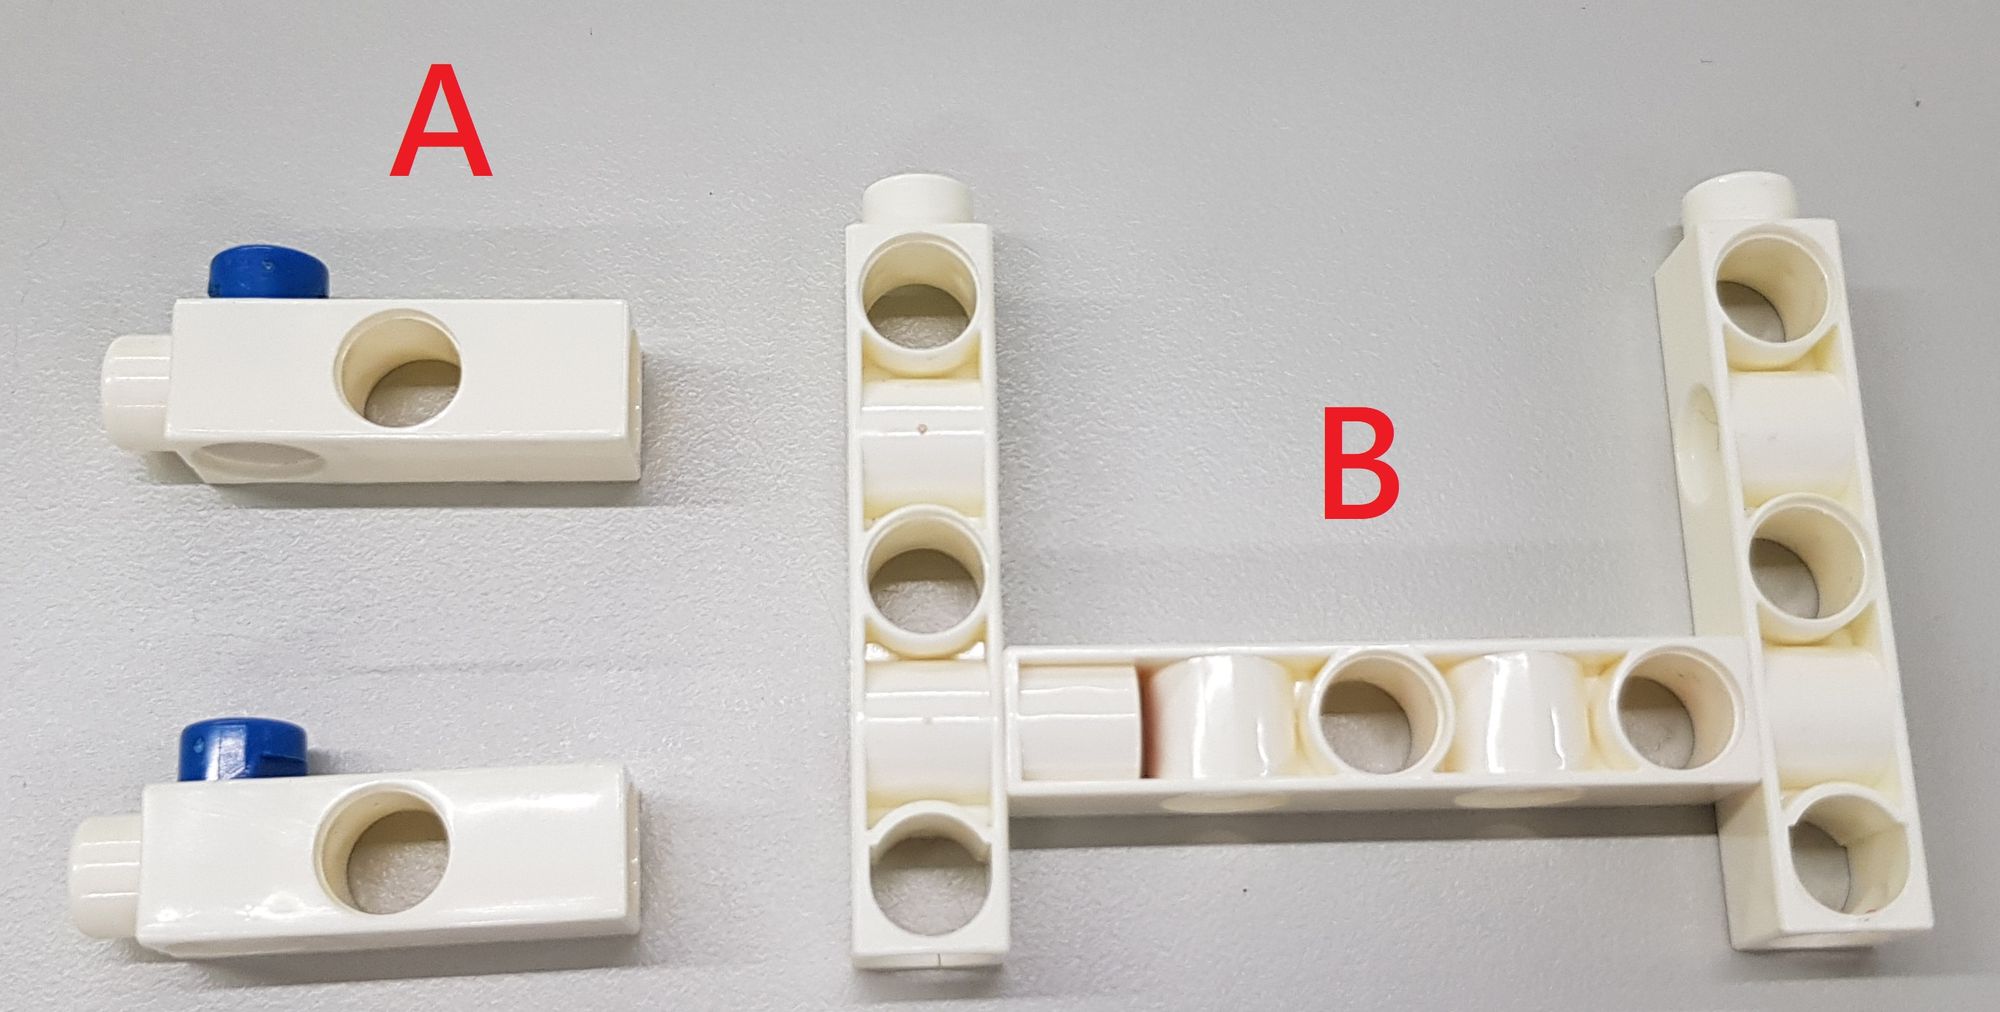
The tenth step is to make the tripod of the money blaster, use various long rods, long pegs and short pegs (Figure 24) to combine them into two parts A and B (Figure 25).
First, combine the two parts A on the inside of the 8x12 BASE GRID (Figure 26), and then insert part B (Figure 27) to complete the tripod, which can prevent the toy banknotes from falling out from the muzzle in front of the money blaster.
Do~ Re~ Mi~ Sol~ A dazzling money blaster is completed (Figure 28)!
Then Teacher Raccoon will show you how to put in the toy banknotes. First, pull up the 100mm AXLE Ⅱ to open the upper cover, and then put the toy banknotes into the money blaster. It has been tested that this model can launch about 25~30 toy banknotes at a time. And then close the upper cover after toy banknotes are put. (Video 1)
Check the battery switch of C-4.5V BATTERY HOLDER WITH SWITCH before you spray. If we turn it in the wrong direction, the pulley will rotate backwards, and the toy banknotes will not come out. Them just tilt the muzzle slightly upwards by 10~20 degrees. Now we can spray the money. (Video 2).
◆ Troubleshooting
If the money blaster does not work, try these steps:
1. Put new AA alkaline batteries.
2. Make sure nothing is blocking the long axle that spins inside.
3. Check how two gears mesh. One gear should not be too tight or too loose with the other gear.
4. Use less toy banknotes or change the weight of the counterweight.
◆ Conclusion
During making the money blaster, we will find that its structure and power system are simple; we just place the roller with the motor under the toy banknotes to make it work. See! We can do amazing things with simple things if we use our imagination and creativity. Let’s have fun with this money blaster and feel rich!
You can also make your own paper money with prizes or wishes on it. It can then be a lucky blaster or a wish blaster. That’s all for today. I’m Teacher Raccoon and I hope you have a happy new year. Bye for now.
◆ Scientific principles
The money blaster works because of friction and gravity. The rubbing makes the toy banknotes go forward; the falling makes the weight go down to keep the toy banknotes close to the OD36 O-RING.
The rubber ring(OD36 O-RING) has a lot of “kinetic friction”. When it spins forward, it can push the toy banknotes out. You can try different kinds of paper for fun, such as: brown paper, shiny paper, wrapping paper, etc. Cut them into 7*16 cm and put them into the money blaster one by one, and see how they work. If the friction between the paper is greater than the friction between the paper and the rubber ring, the money blaster will not work. We can find the best way to spray by changing the material of the paper and the weight of the counterweight.”
◆Curriculum:
K-PS2-1. Plan and conduct an investigation to compare the effects of different strengths or different directions of pushes and pulls on the motion of an object.
MS-PS2-2. Plan an investigation to provide evidence that the change in an object’s motion depends on the sum of the forces on the object and the mass of the object.
HS-PS3-3. Design, build, and refine a device that works within given constraints to convert one form of energy into another form of energy.
#Gigo #Gigo Lab #Fun Lab #Learning Lab
◆參考資料:
 Contributors to Wikimedia projects
 Contributors to Wikimedia projects
 Contributors to Wikimedia projects
Please sign in to vote.