[Educational Time Machine EP6] micro:bit x Battle Robots

![[Educational Time Machine EP6] micro:bit x Battle Robots](/content/images/size/w2000/2023/06/307339.jpg)
When it comes to programming education, we can't overlook the classic remote control robot. Robots are incredible creations made by humans. They not only spark children's interest in programming but also unleash their boundless imagination once they're built, providing a satisfying sense of accomplishment. Today, let's use the Gigo #1269 - micro:bit COMPATIBLE ROBOTS kit to build battle robots with friends and experience medieval jousting!
In our previous episode of 'Educational Time Machine' (EP5), we introduced the micro:bit. However, when it comes to programming education, we cannot overlook the timeless classic of remote control robots. Robots are marvelous machines created by humans, fulfilling the dream of having a versatile partner that can be controlled, customized, and assist with daily tasks. Engaging with robots can ignite children's interest in programming education and unlock the vast realms of their imagination, providing them with a profound sense of accomplishment.
Let us use Gigo #1269 - micro:bit COMPATIBLE ROBOTS today, invite friends to make a battle robot together, and experience the jousting of the middle age.
◆Preparation (10 minutes)
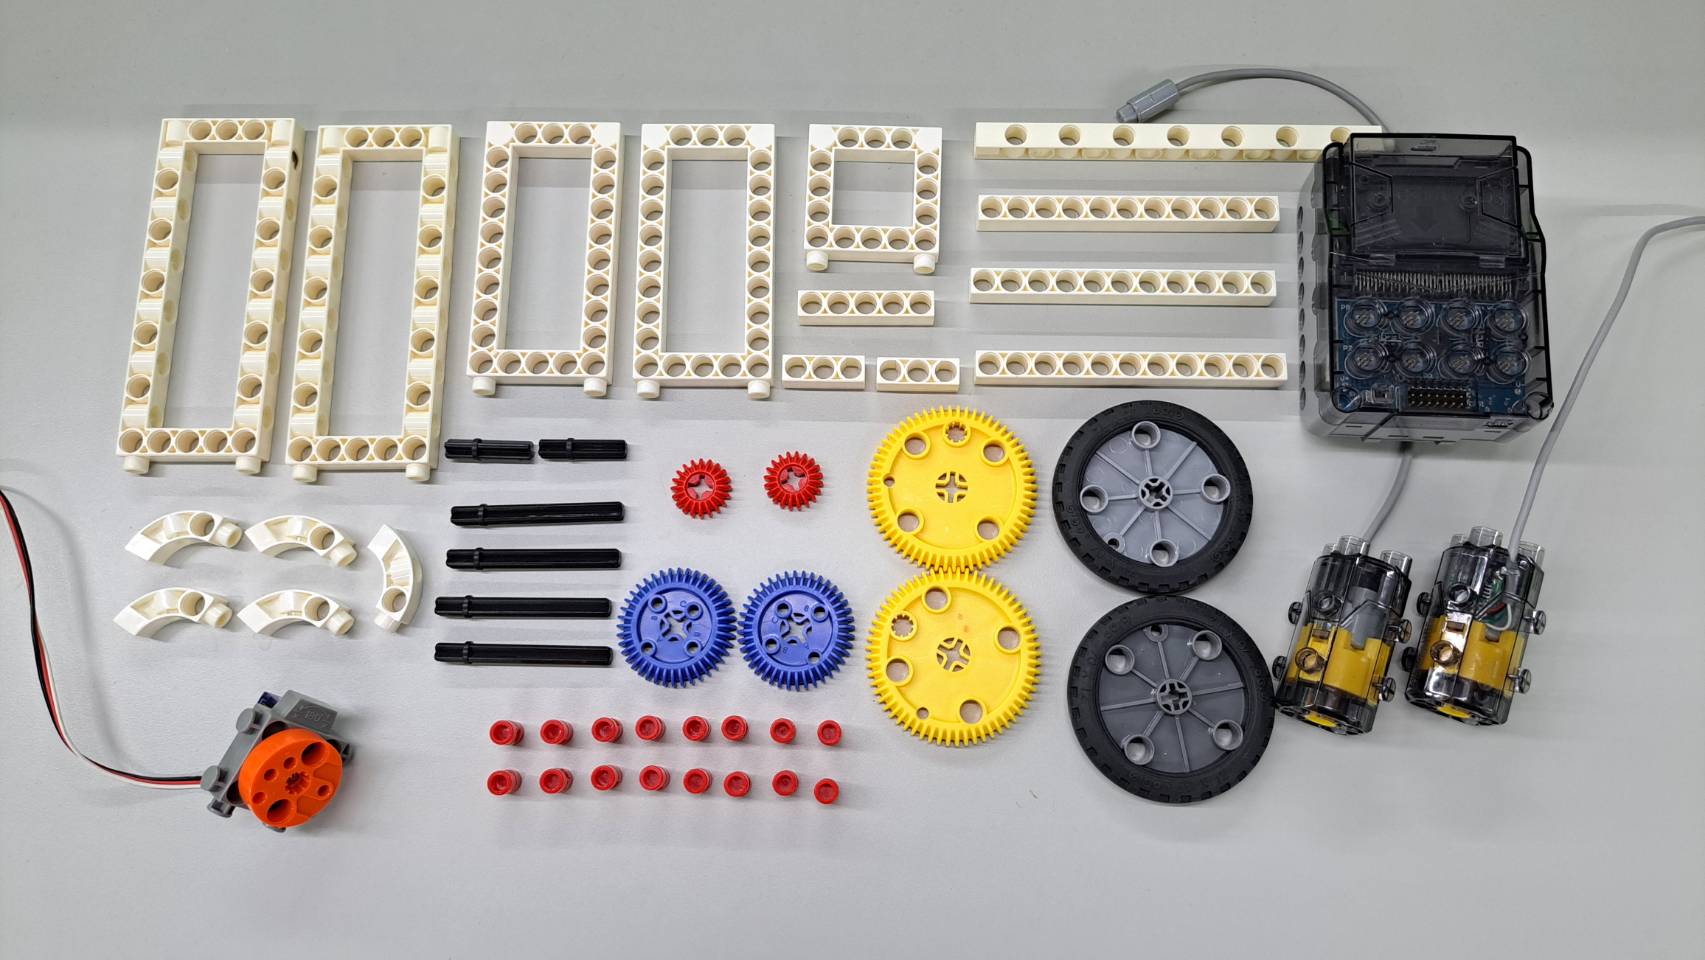
Prepare the parts required for the model. The main control box needs to use 3 AA batteries.
◆Demonstration of model making (40 minutes)
You can follow the assembly steps to build the model.
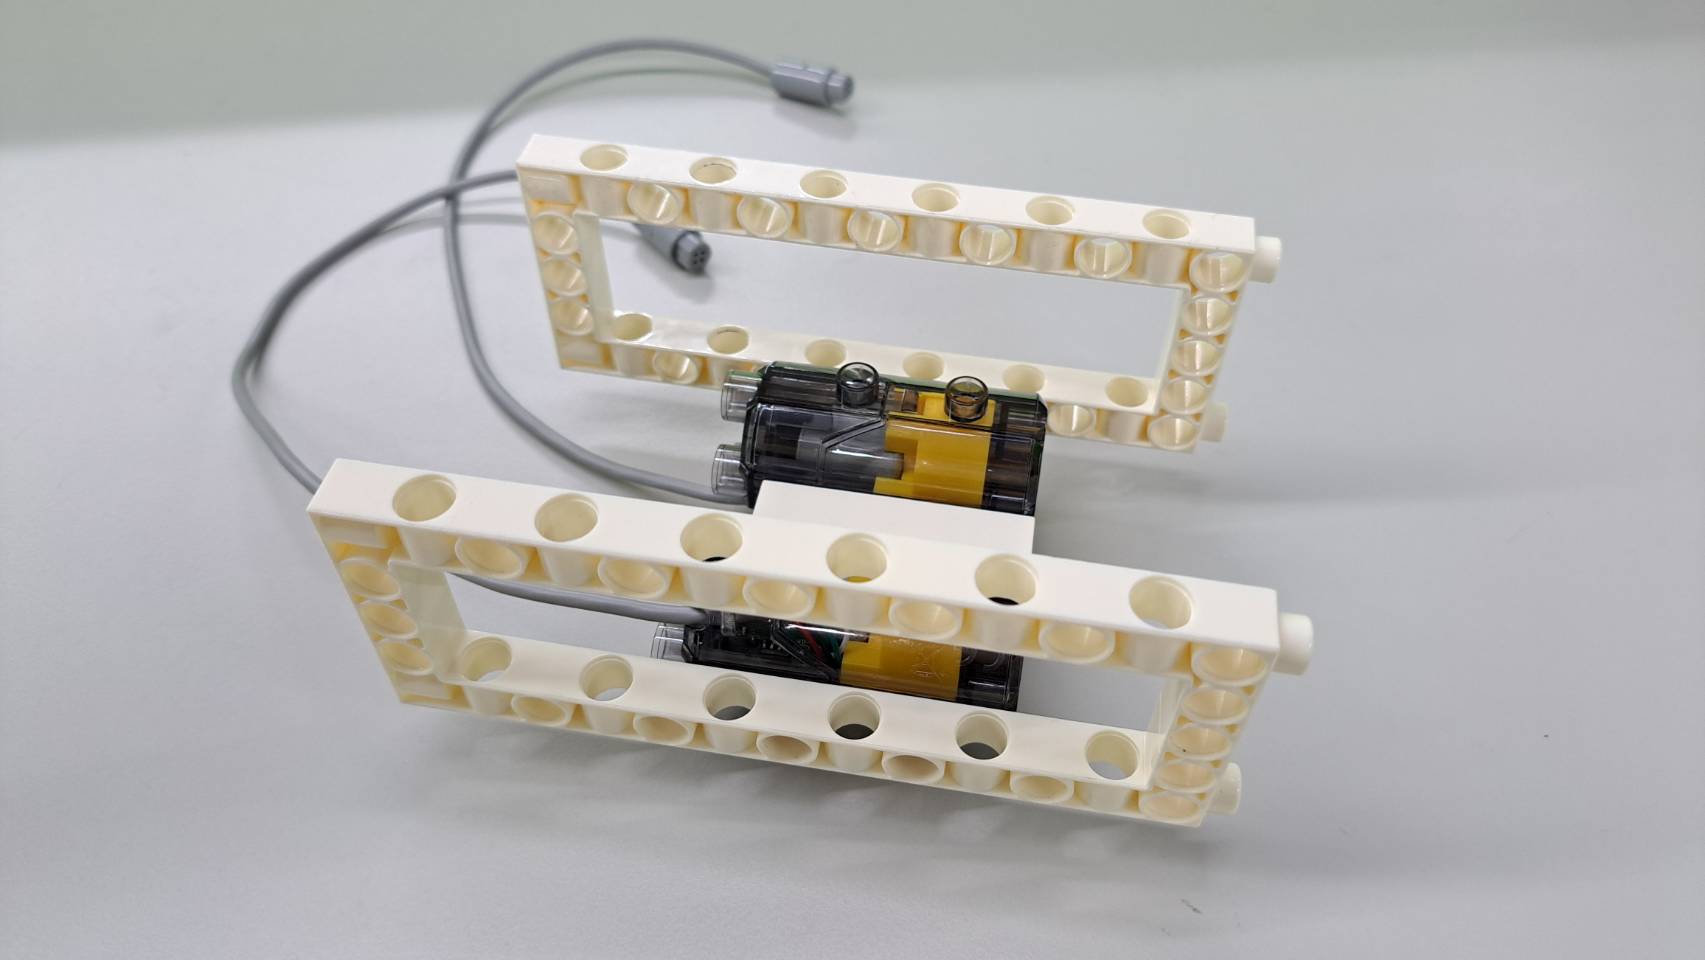
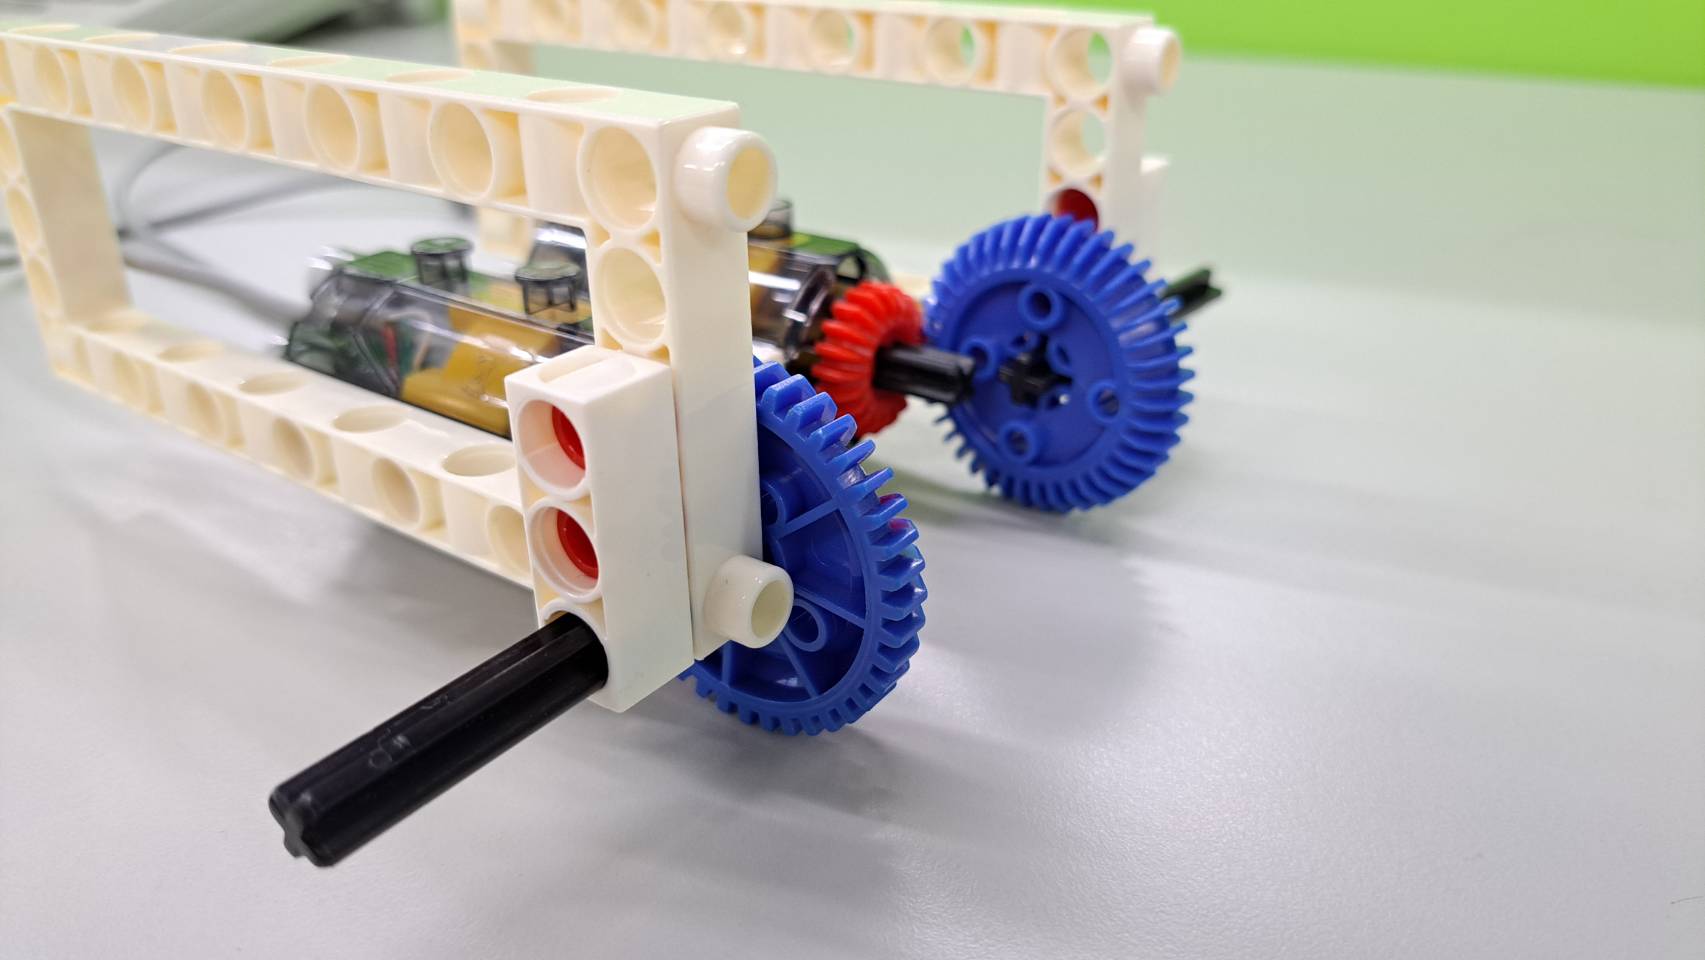
Step 1: Combine two C-50X PLANETARY GEARBOX with C-5 HOLE ROD, and install it on the C-5x13 DUAL FRAME as shown.

Step 2: Put one C-20T GEAR on each C-50X PLANETARY GEARBOX, and place two C-40T GEAR on two sides as shown.
Be sure to make sure the gears are meshed with each other and can be driven by motors, otherwise the model will not work!
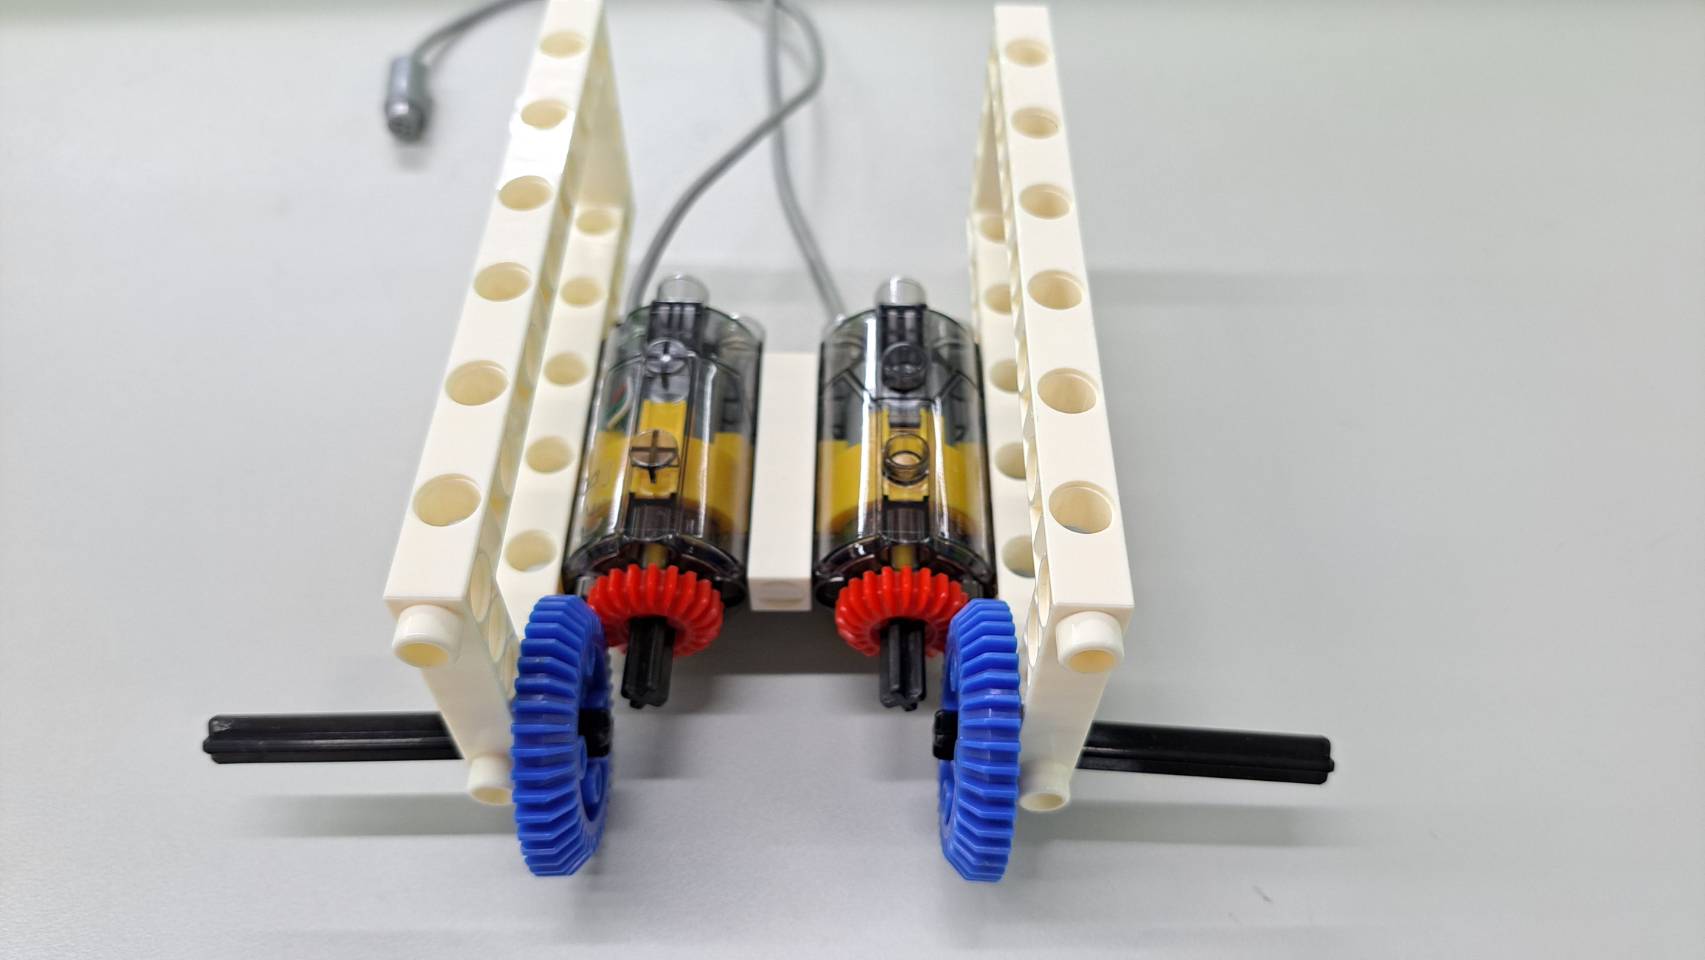
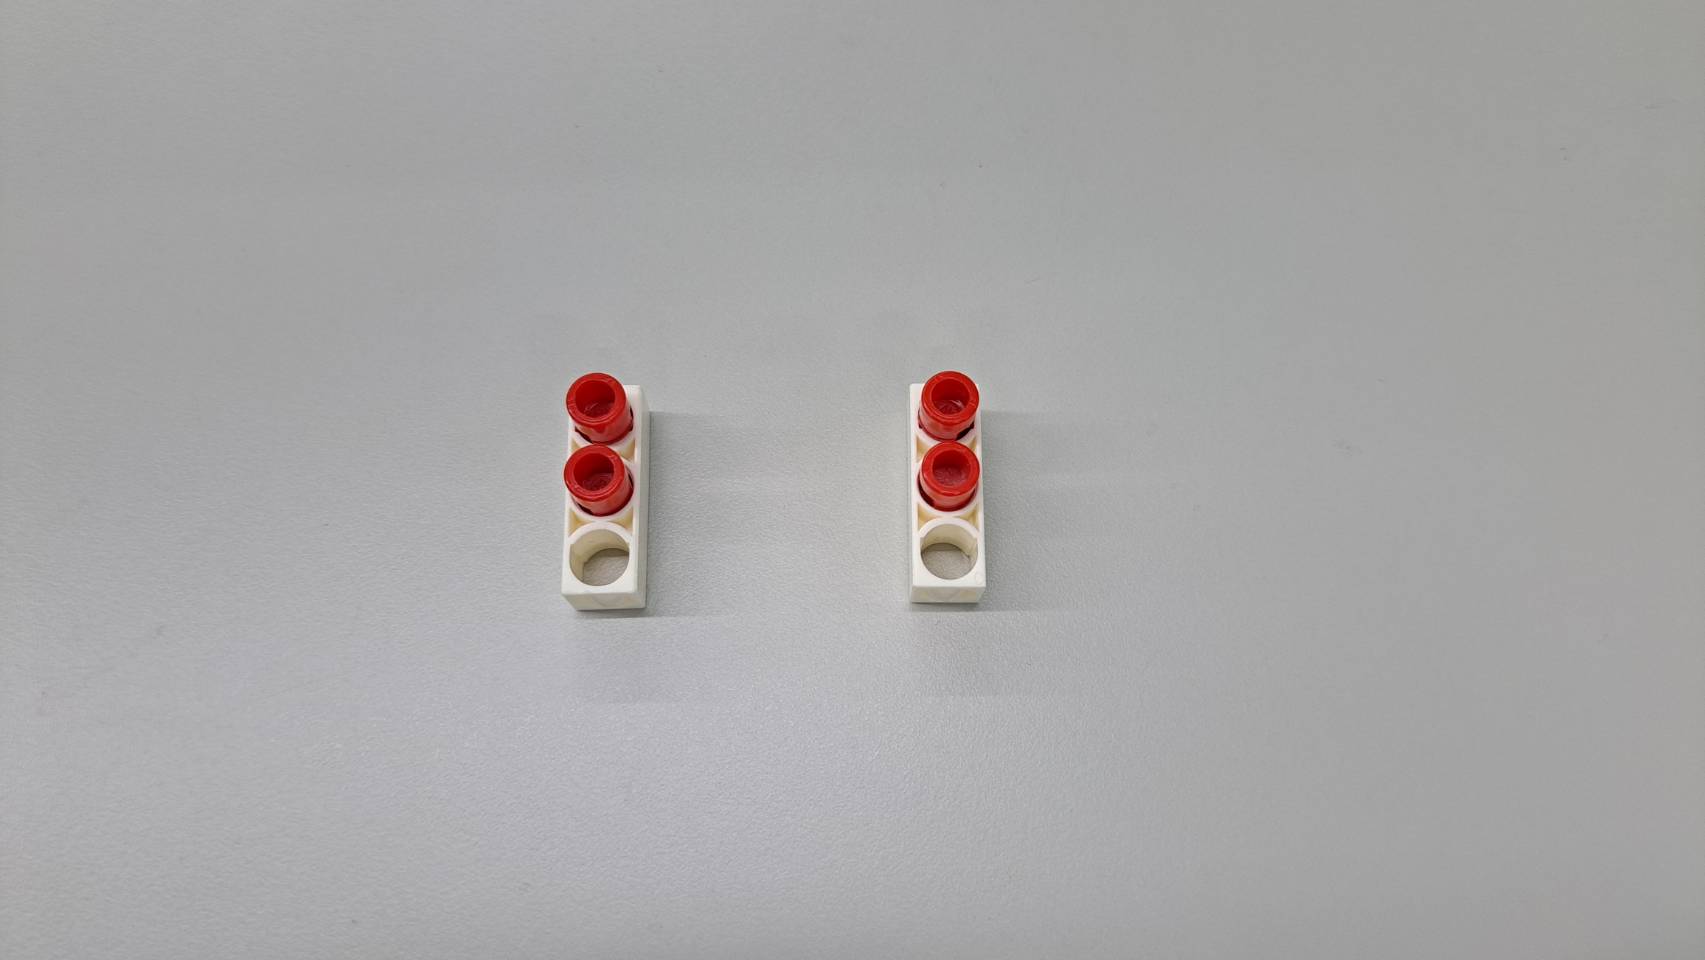
Step 3: Put two C-LONG PEG on each one C-3 HOLE ROD to fix the axles of both sides as shown.
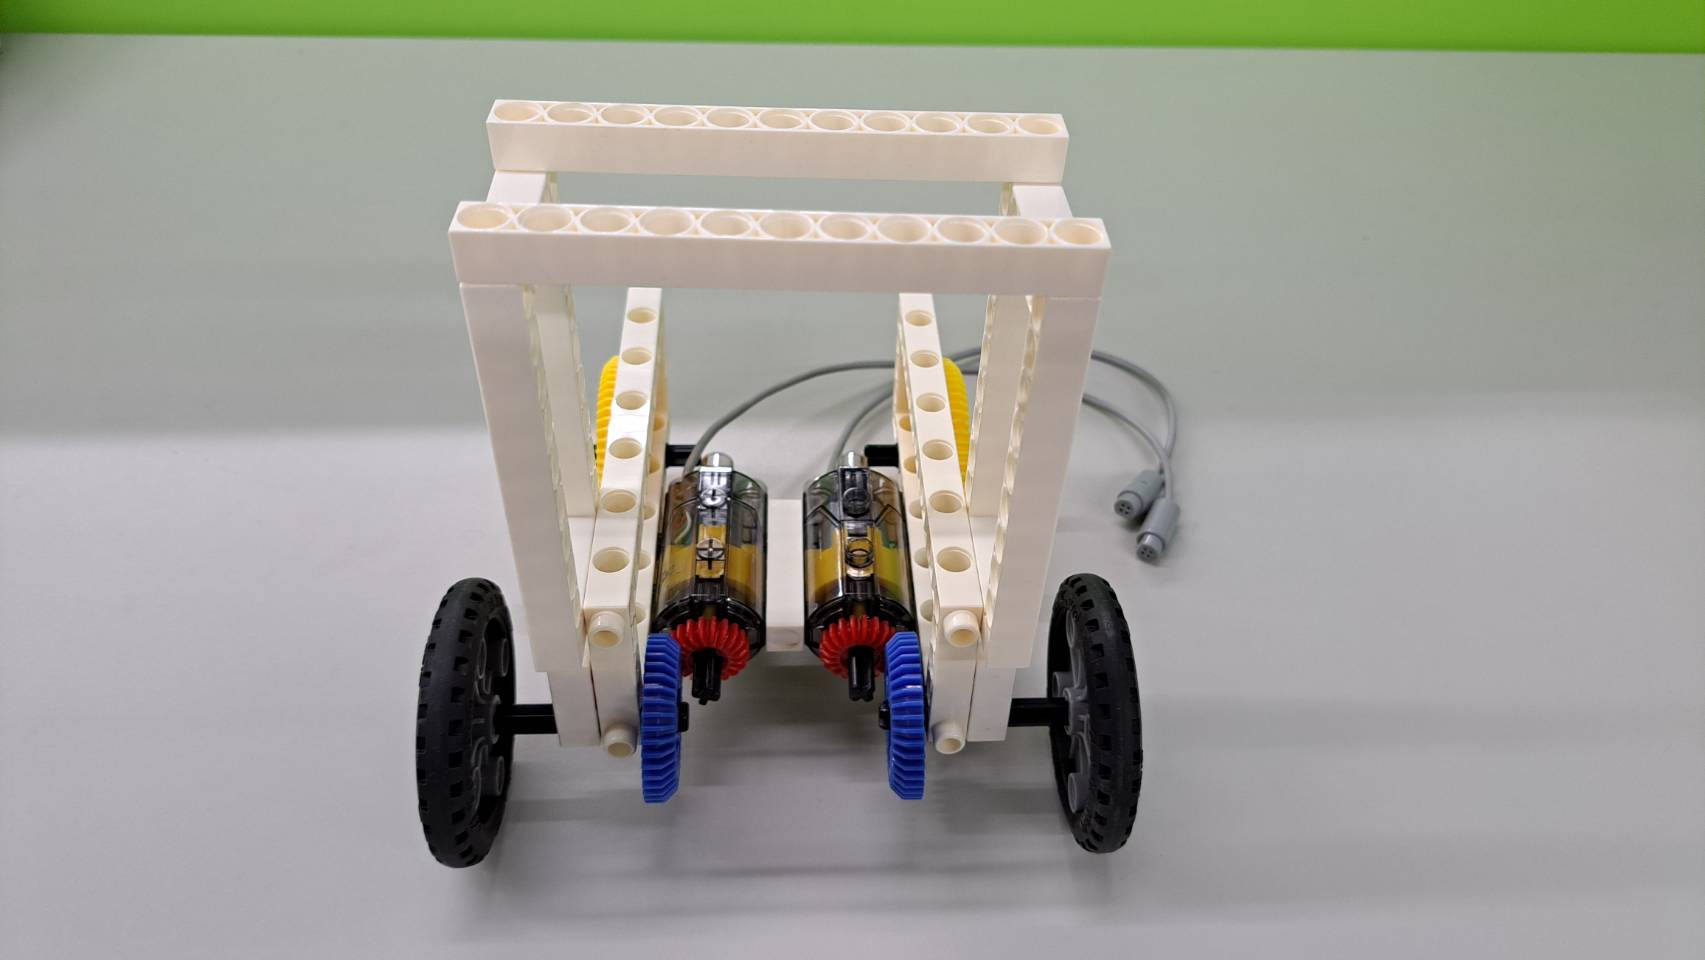
Step 4: Install tires on the front and rear sides of the car body. You can choose different parts as tires according to your preferences.

Step 5: Connect the two C-11 HOLE ROD with the C-5x10 FRAME, install two C-LONG PEG, and fix them on the left and right sides of the car body, as shown.

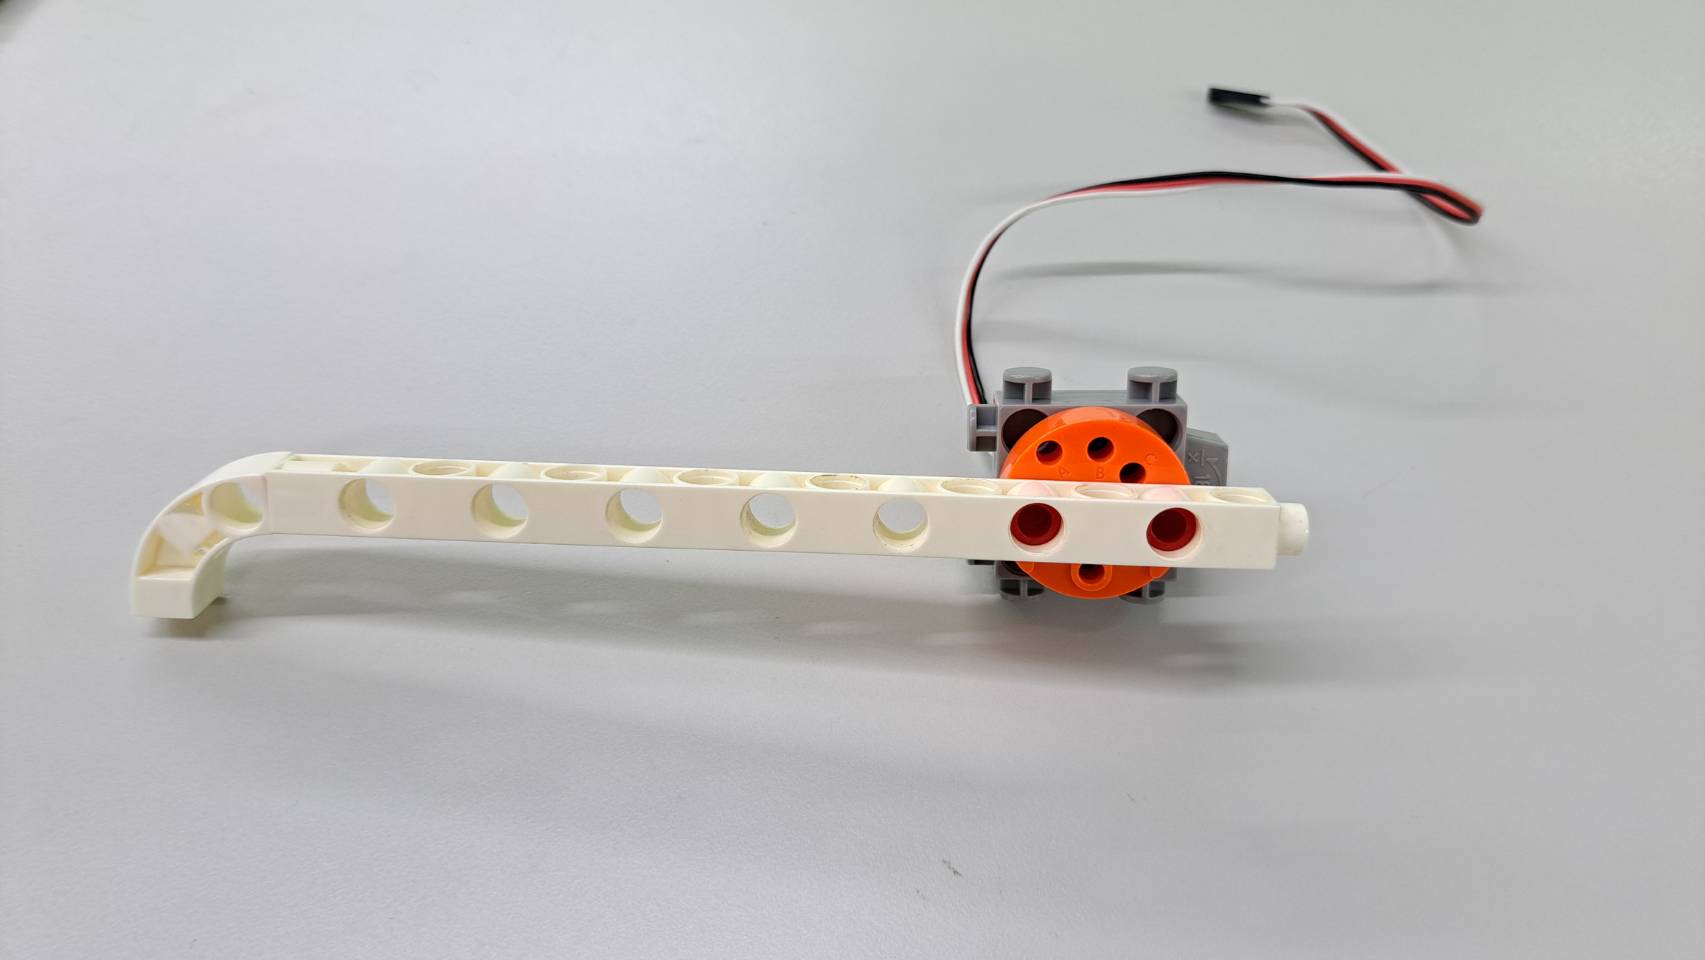
Step 6: Turn the C-180° SERVO MOTOR to 90 degrees, and install the C-15 HOLE DUAL ROD and C-BENDED ROD, and install them in front of the car body.
Do not manually turn the C-180° SERVO MOTOR to avoid damage to the motor.
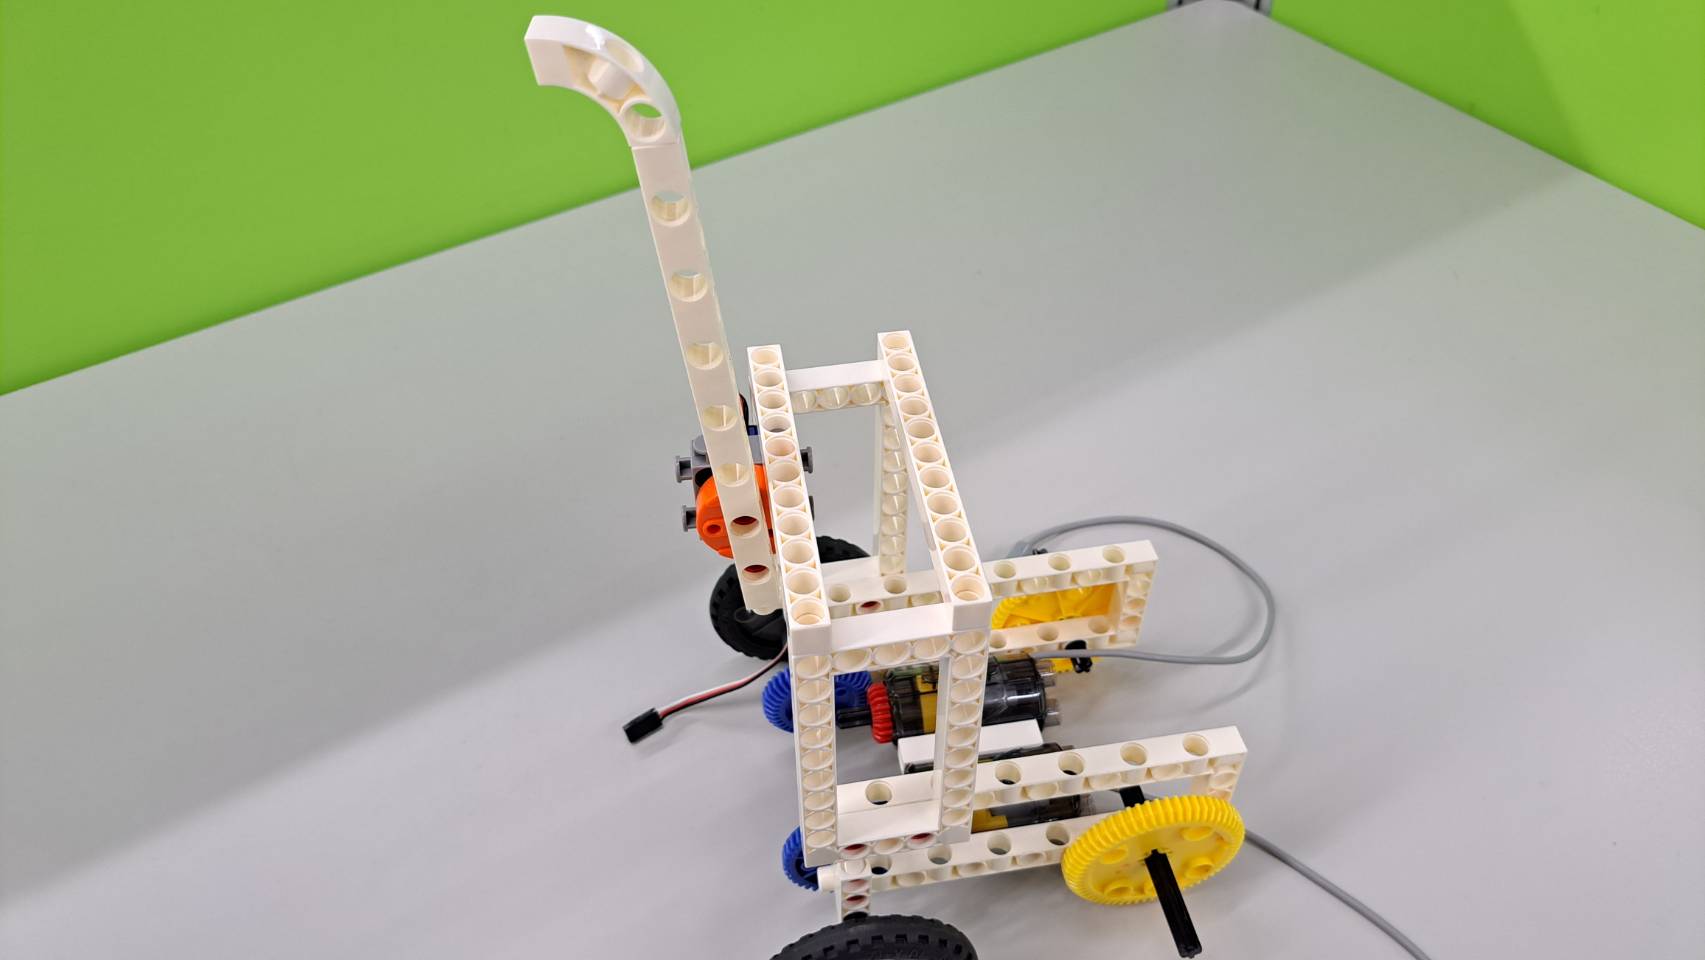
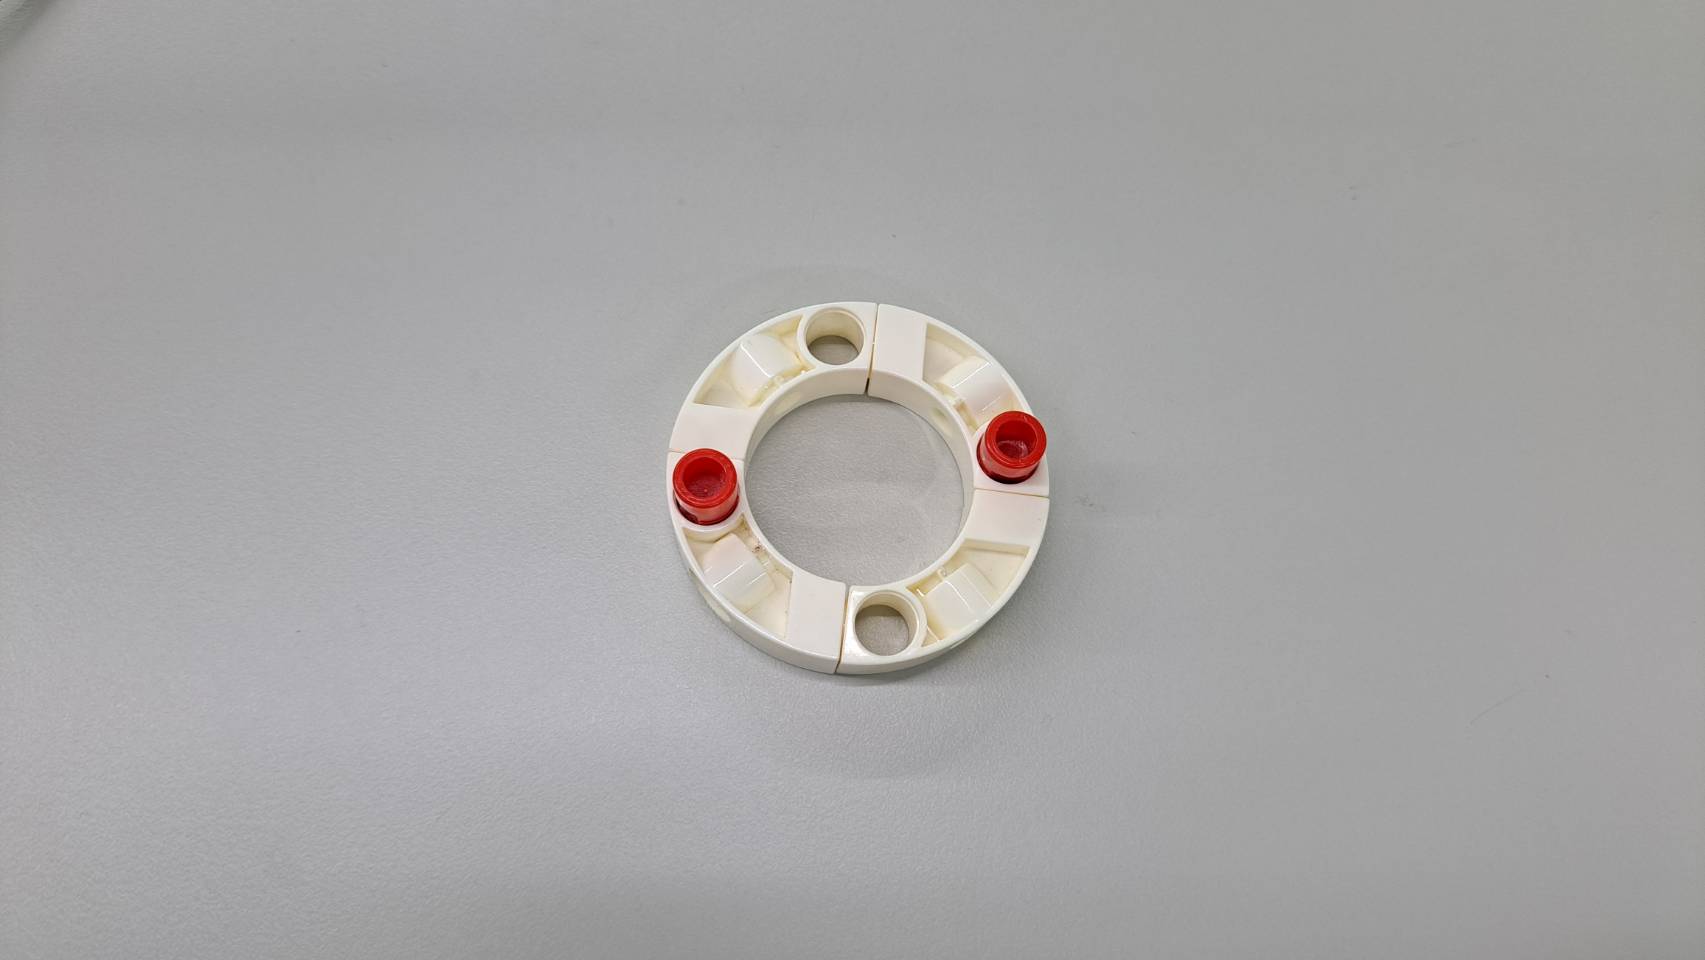
Step 7: Connect four C-BENDED ROD to form a circle and install it on the top of the car body.
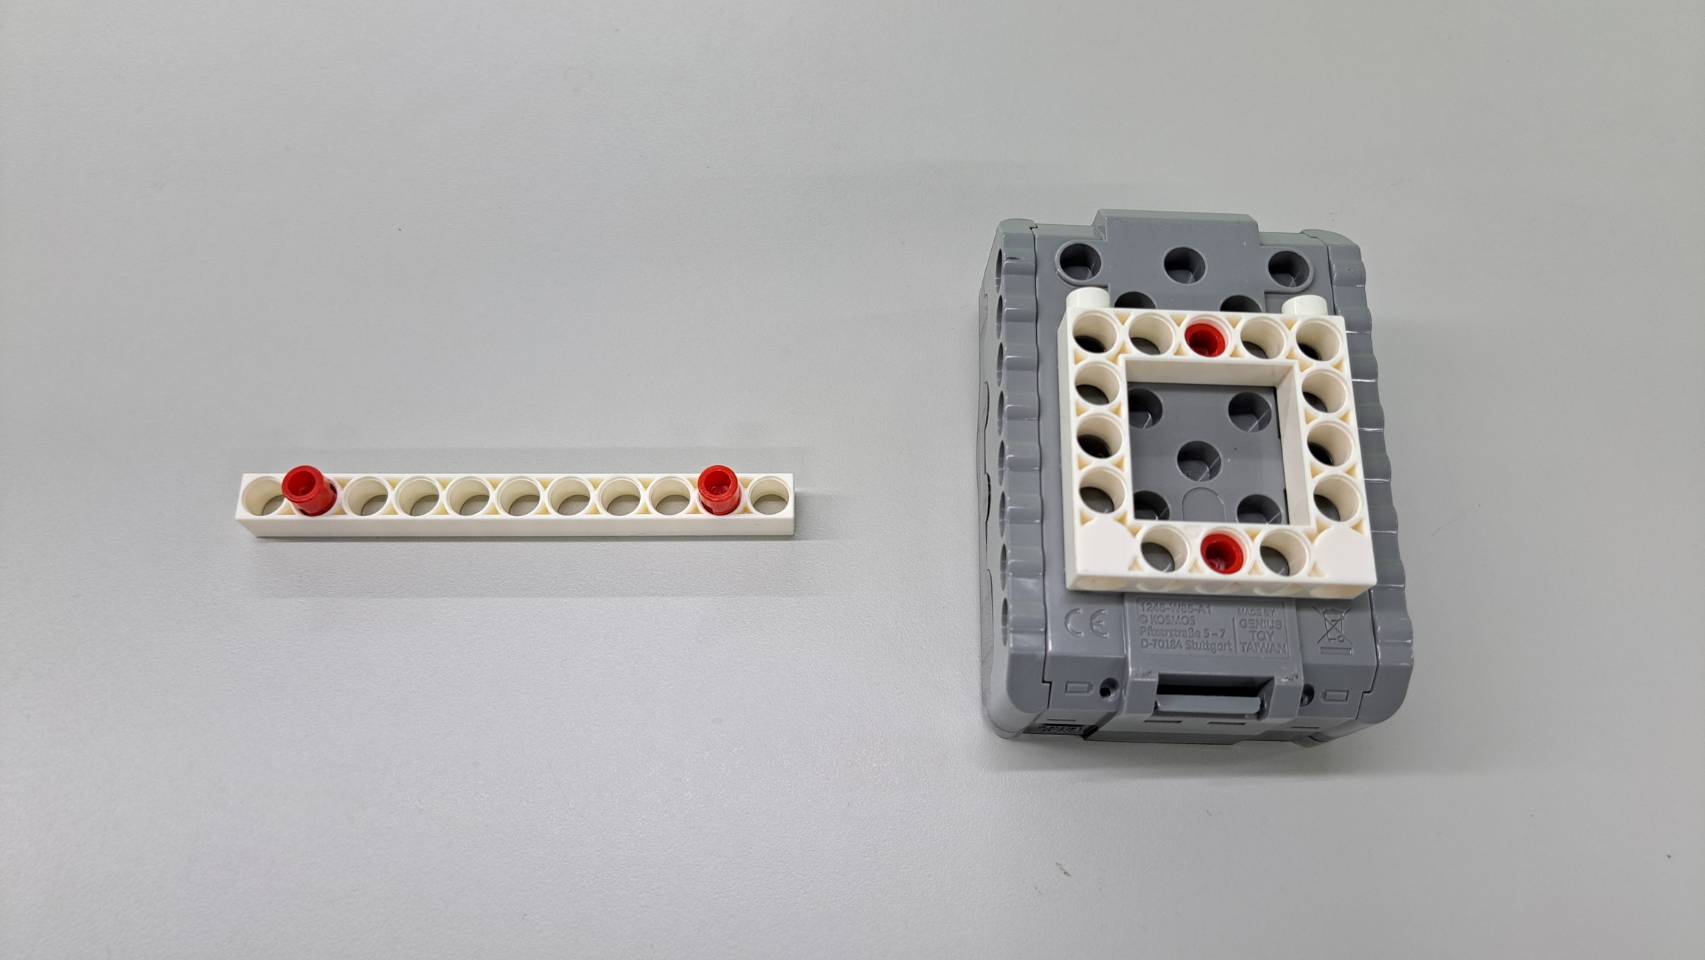
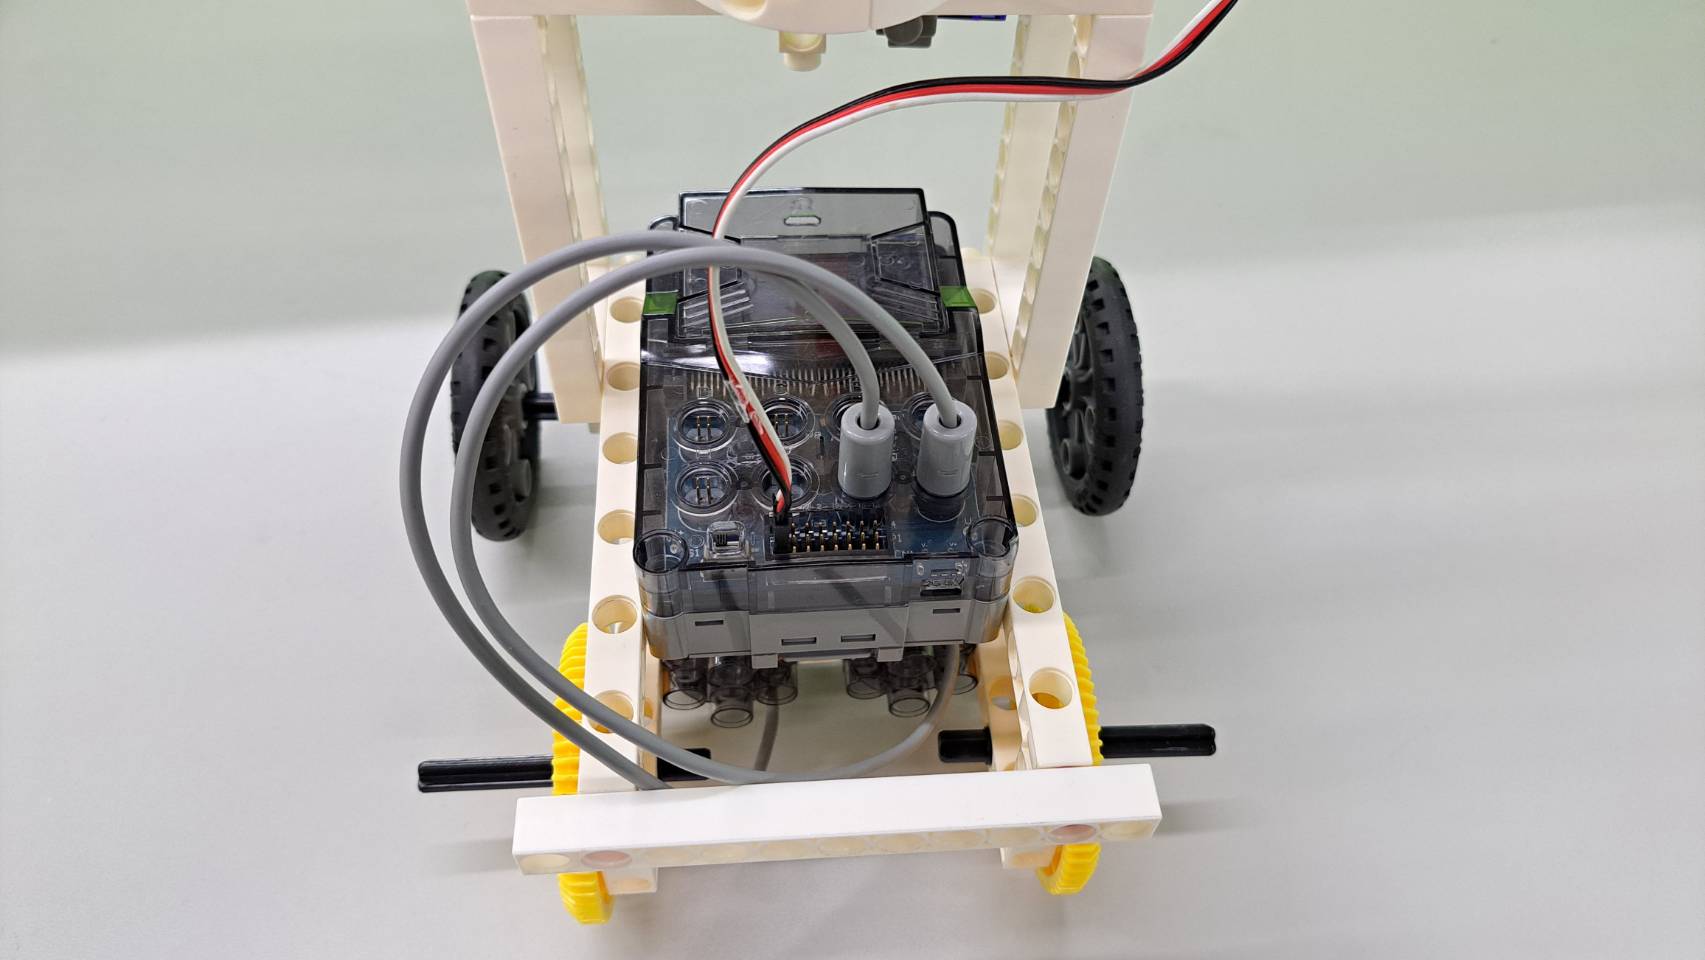
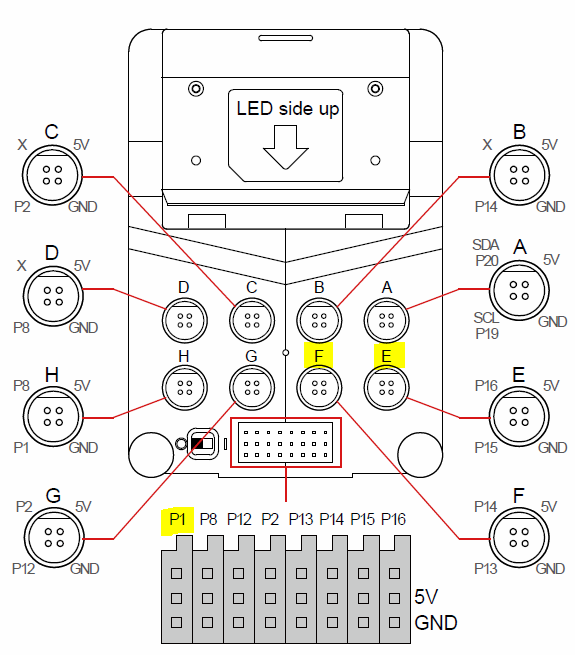
Step 8: Assemble the C-11 HOLE ROD and the C-Gigo micro:bit CONTROL BOX to fix the car body. The motor connection holes are shown in the figure below.
Make sure to install to the correct numbered connector, so that the model can work!
Step 9: Got to the webpage to write the following program.
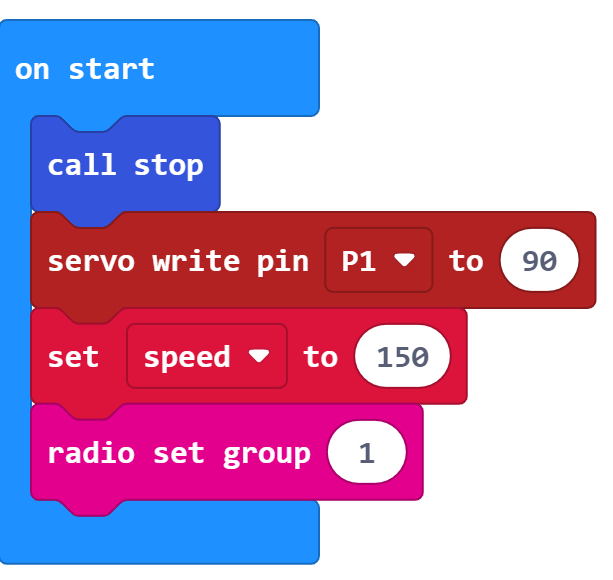
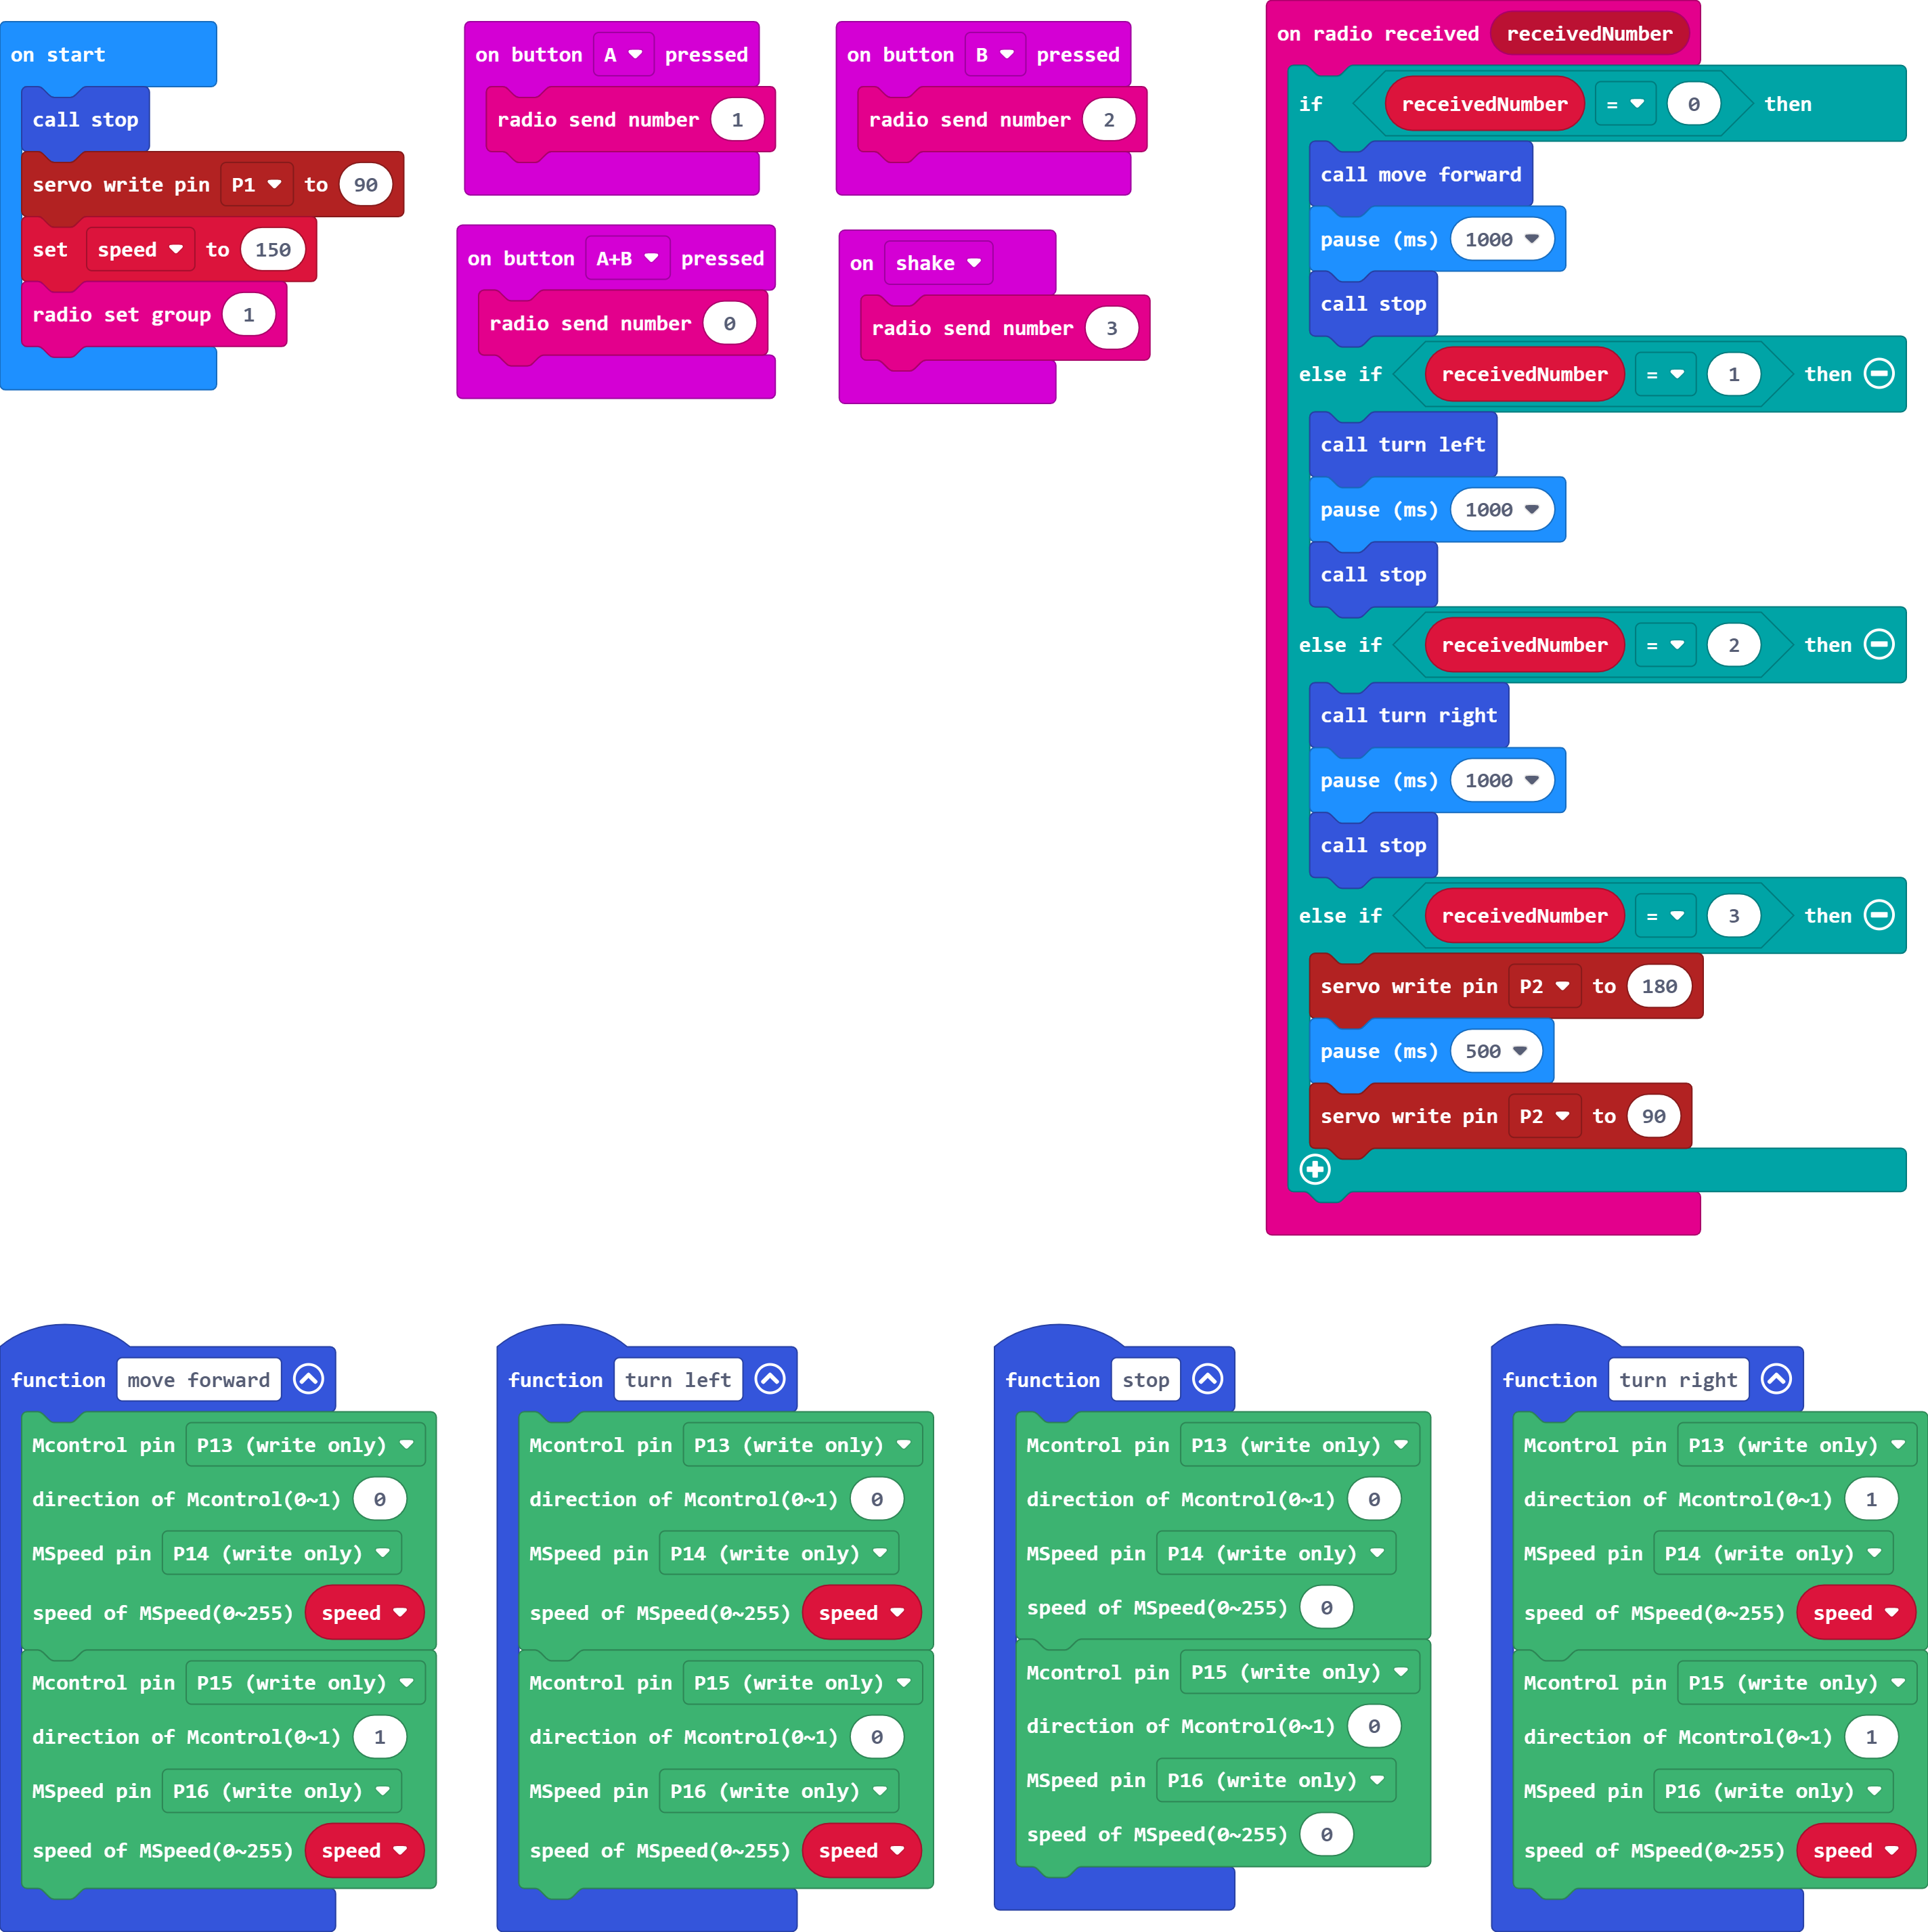
1. When the program is started, we first stop all motors and reset the position of the servo motor, set the speed to 150, and set the broadcast group to 1.
※The broadcasting groups of two micro:bits must be set to the same number so that they can receive signals from each other.
※Please set different broadcast groups for different robots, for example, set 1 for A robot, and set 2 for B robot.
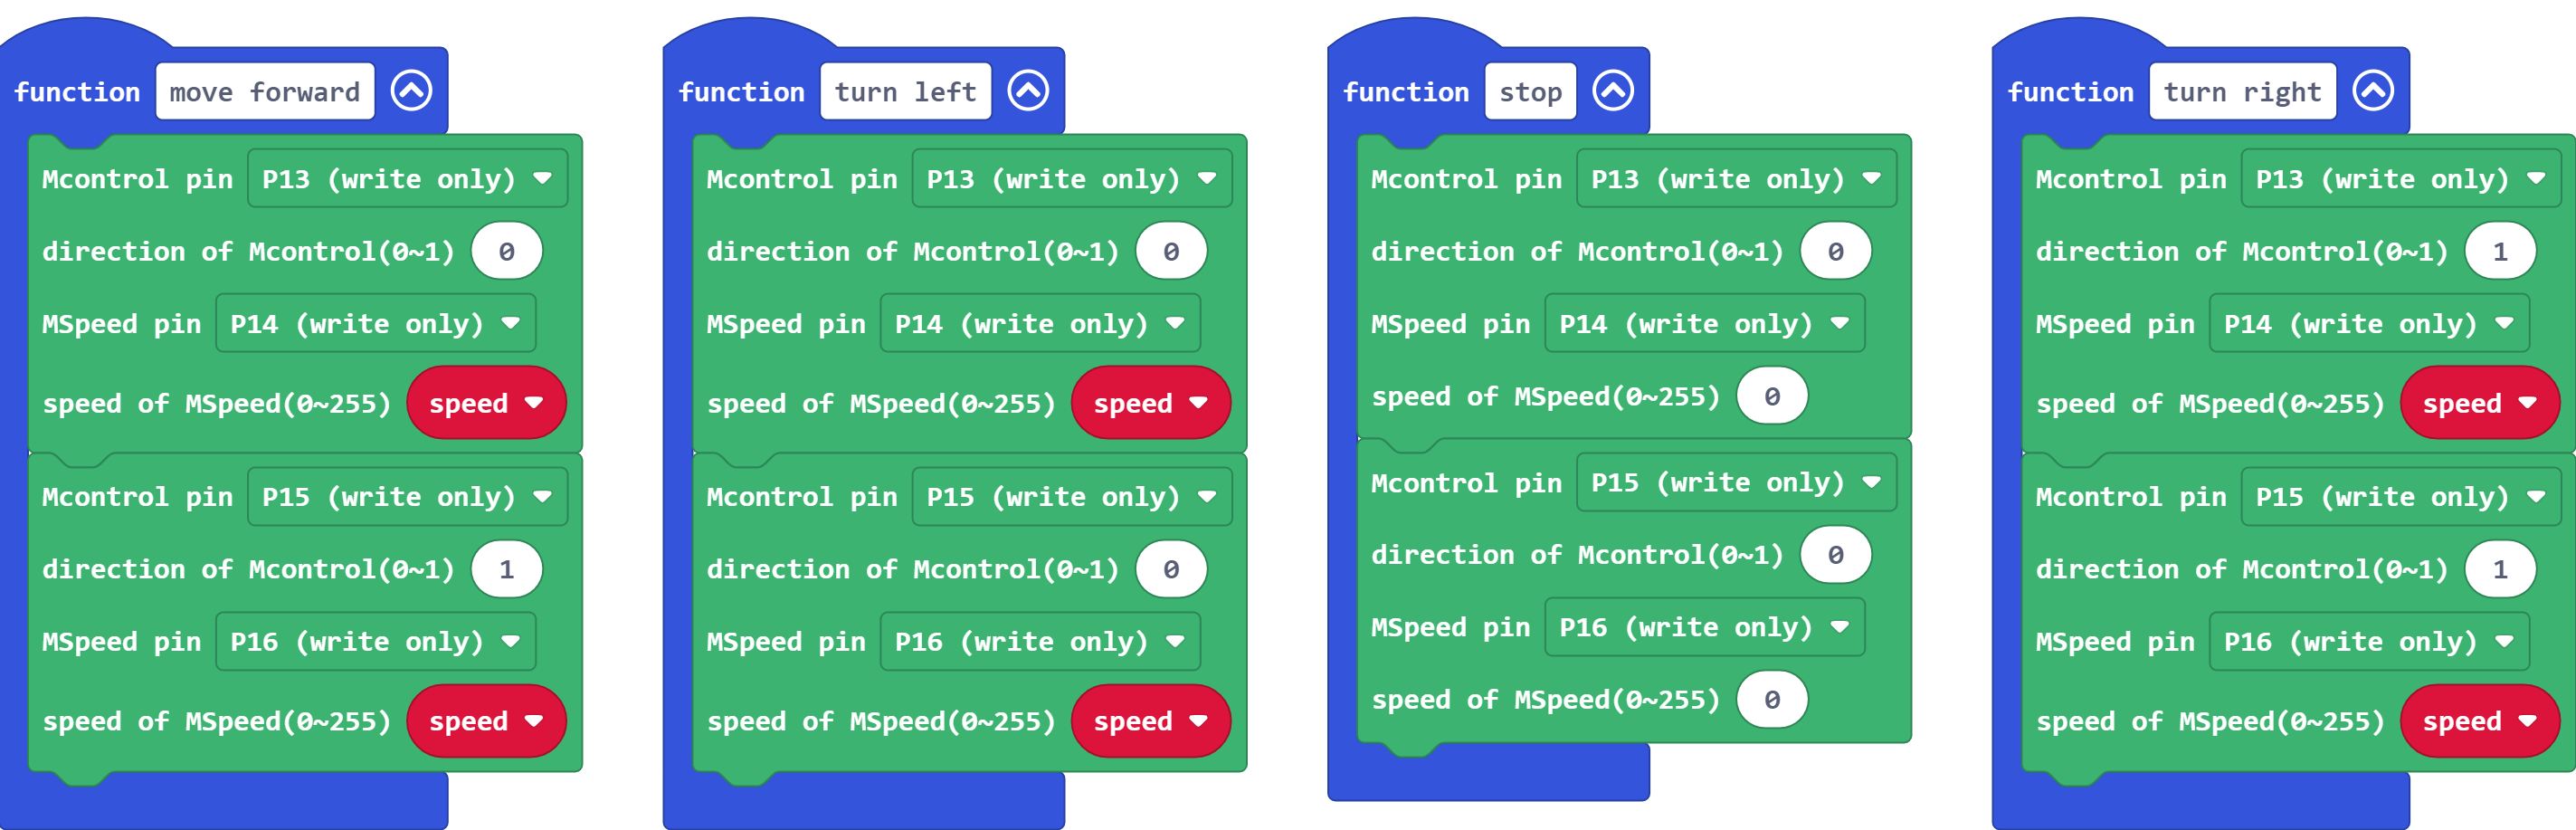
2. Create four functions – move forward, stop, turn left, turn right.
※Be sure to add the extension of the Gigo motor program block.
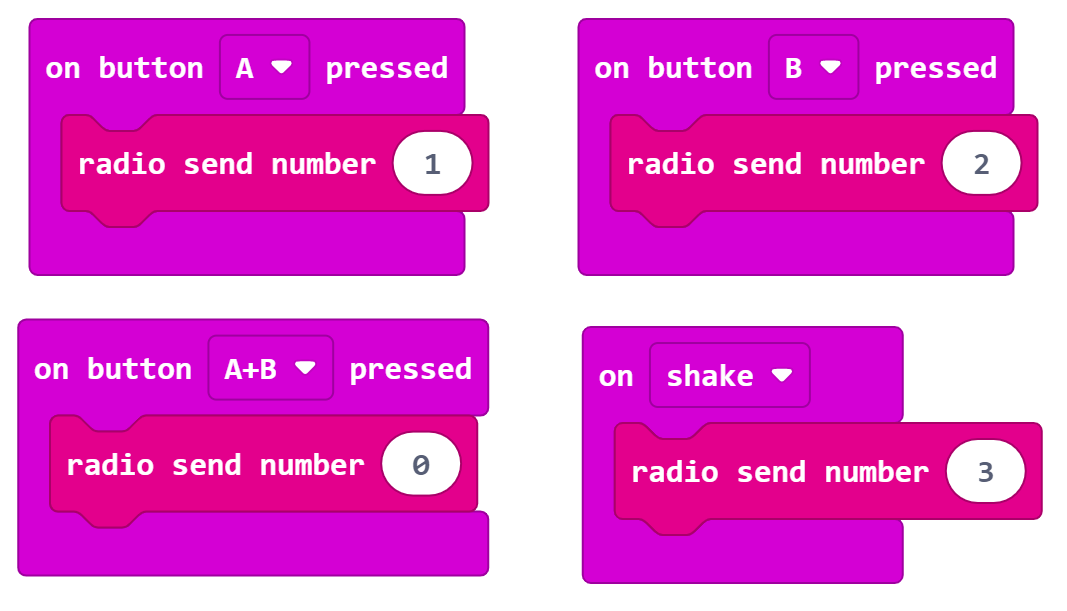
3. When the button A is pressed, send number 1. When the button B is pressed, send number 2. When both buttons A and B are pressed, send number 0. When it feel shaking, send number 3.
4. When the number 0 is received, the car will move forward for 1 second and stop; when the number 1 is received, the car will turn left for 1 second and stop; when the number 2 is received, the car will turn right for 1 second and stop; when the number 3 is received, the motor will spin down for 0.5 seconds and stop.
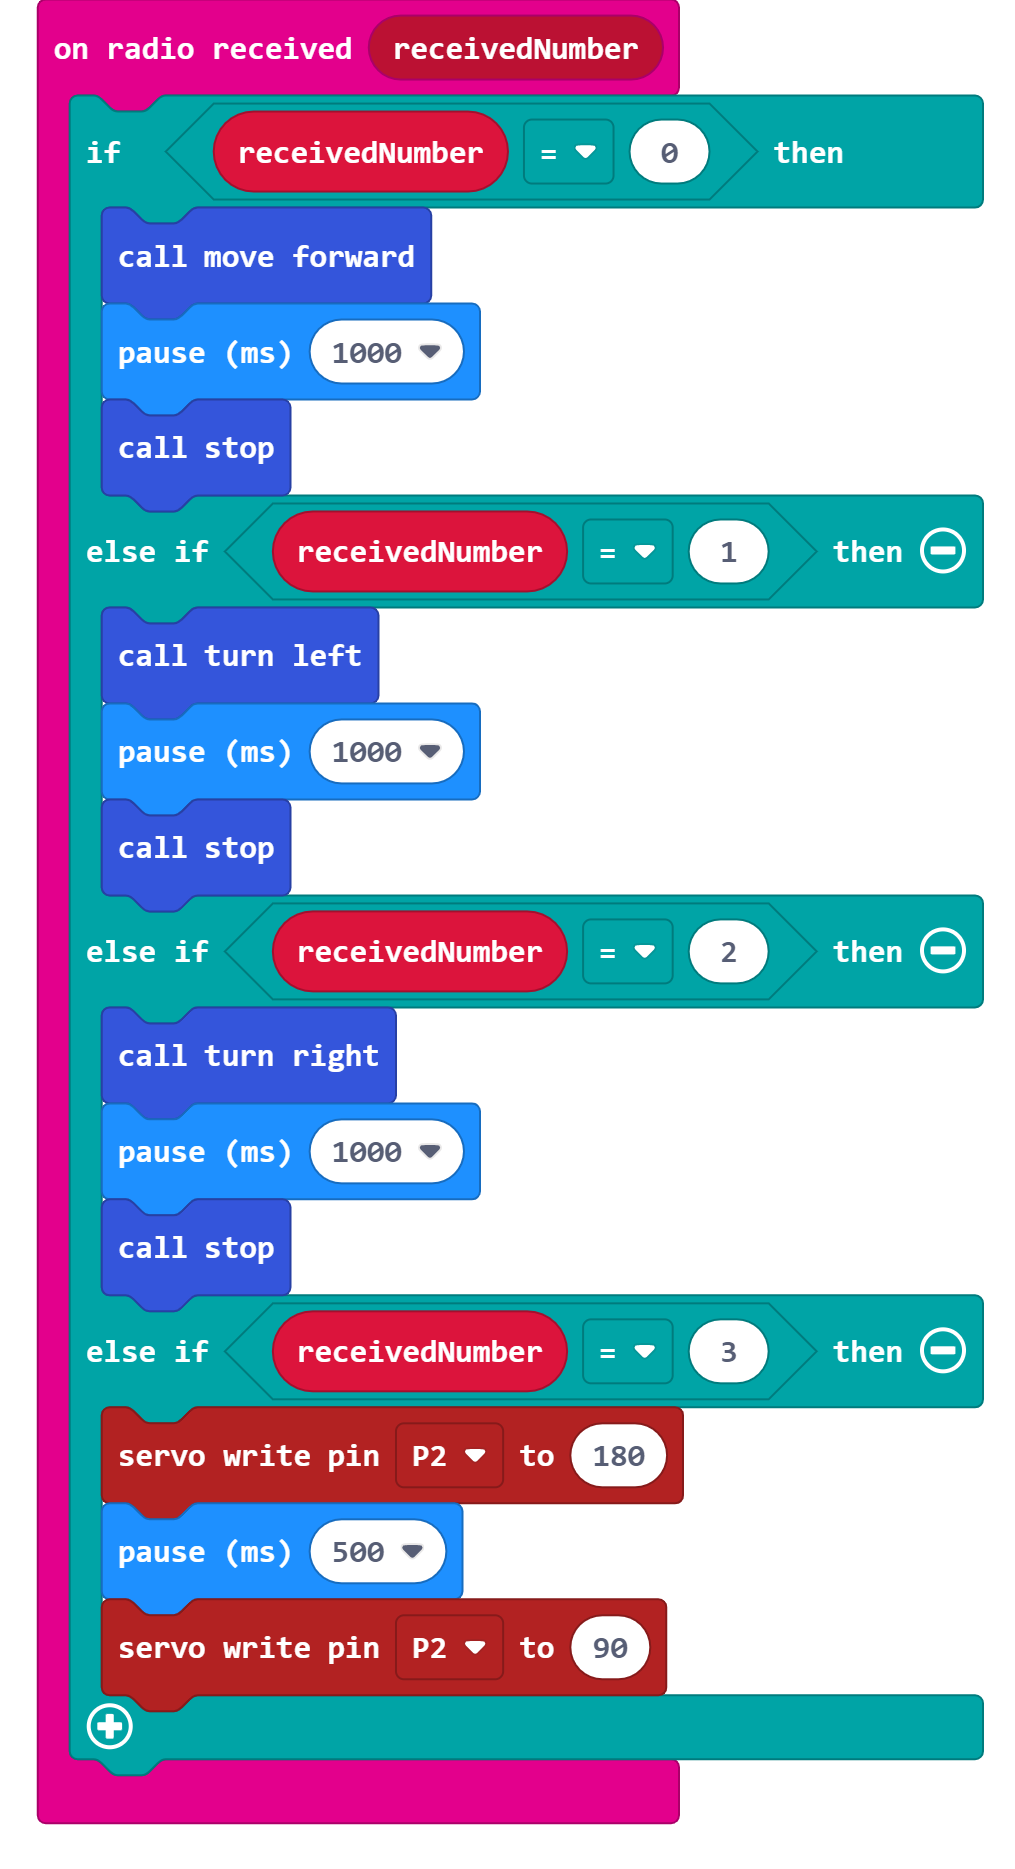
5. The complete program is as follows:
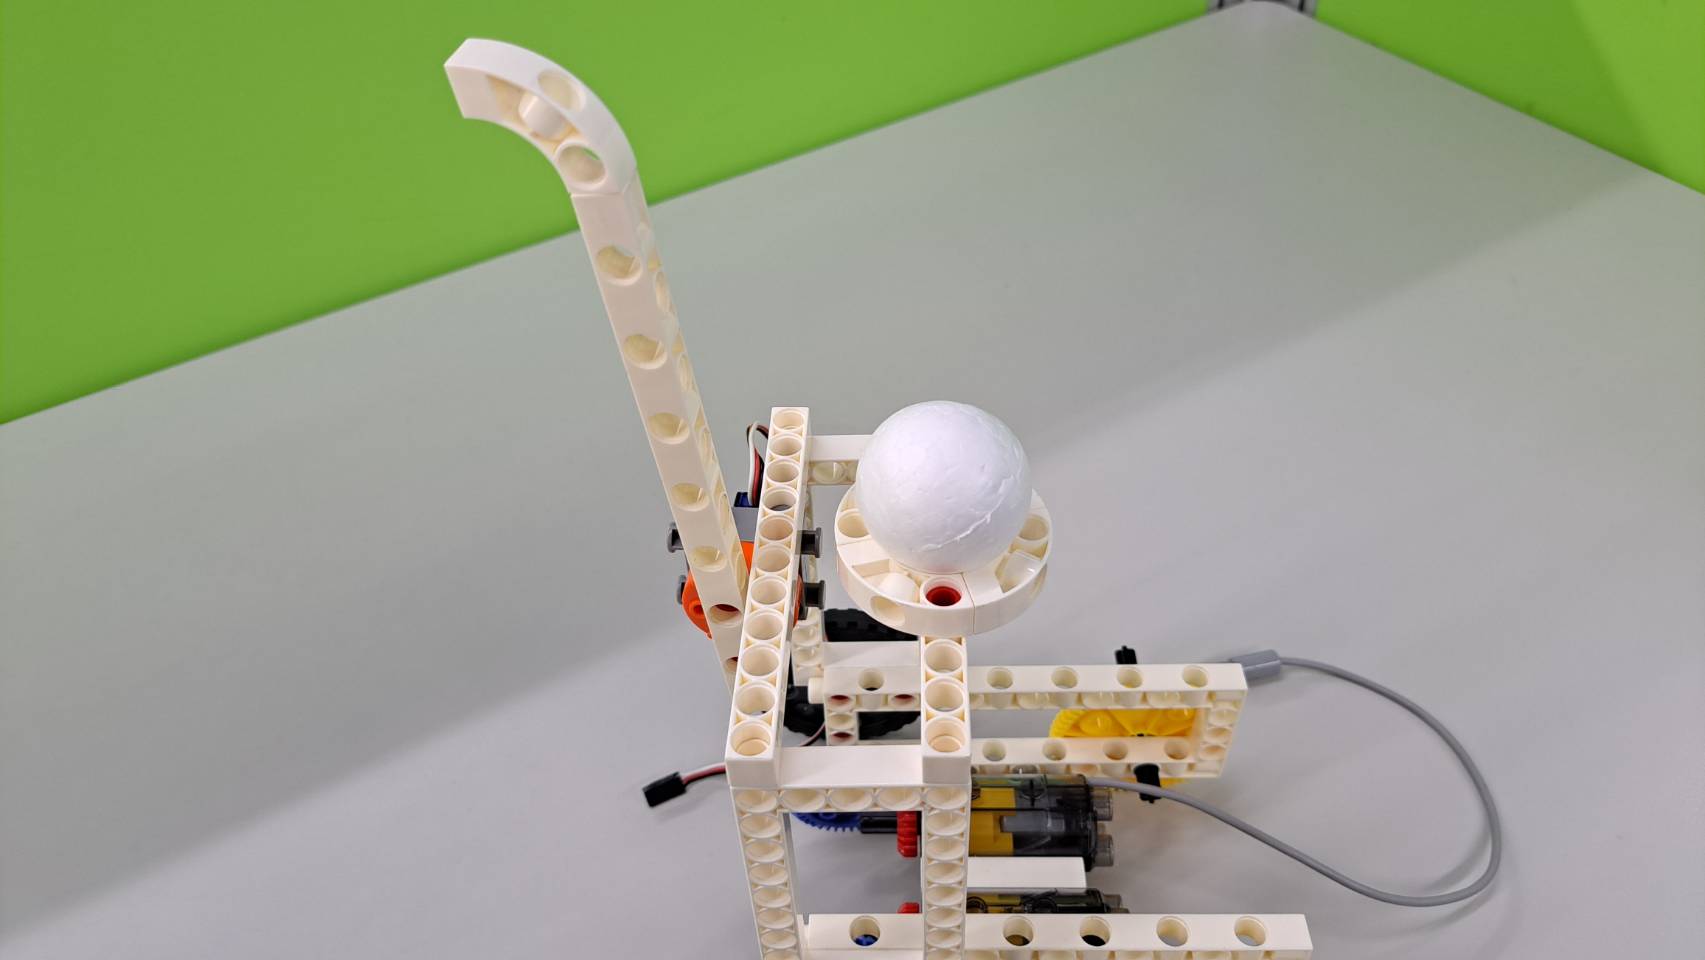
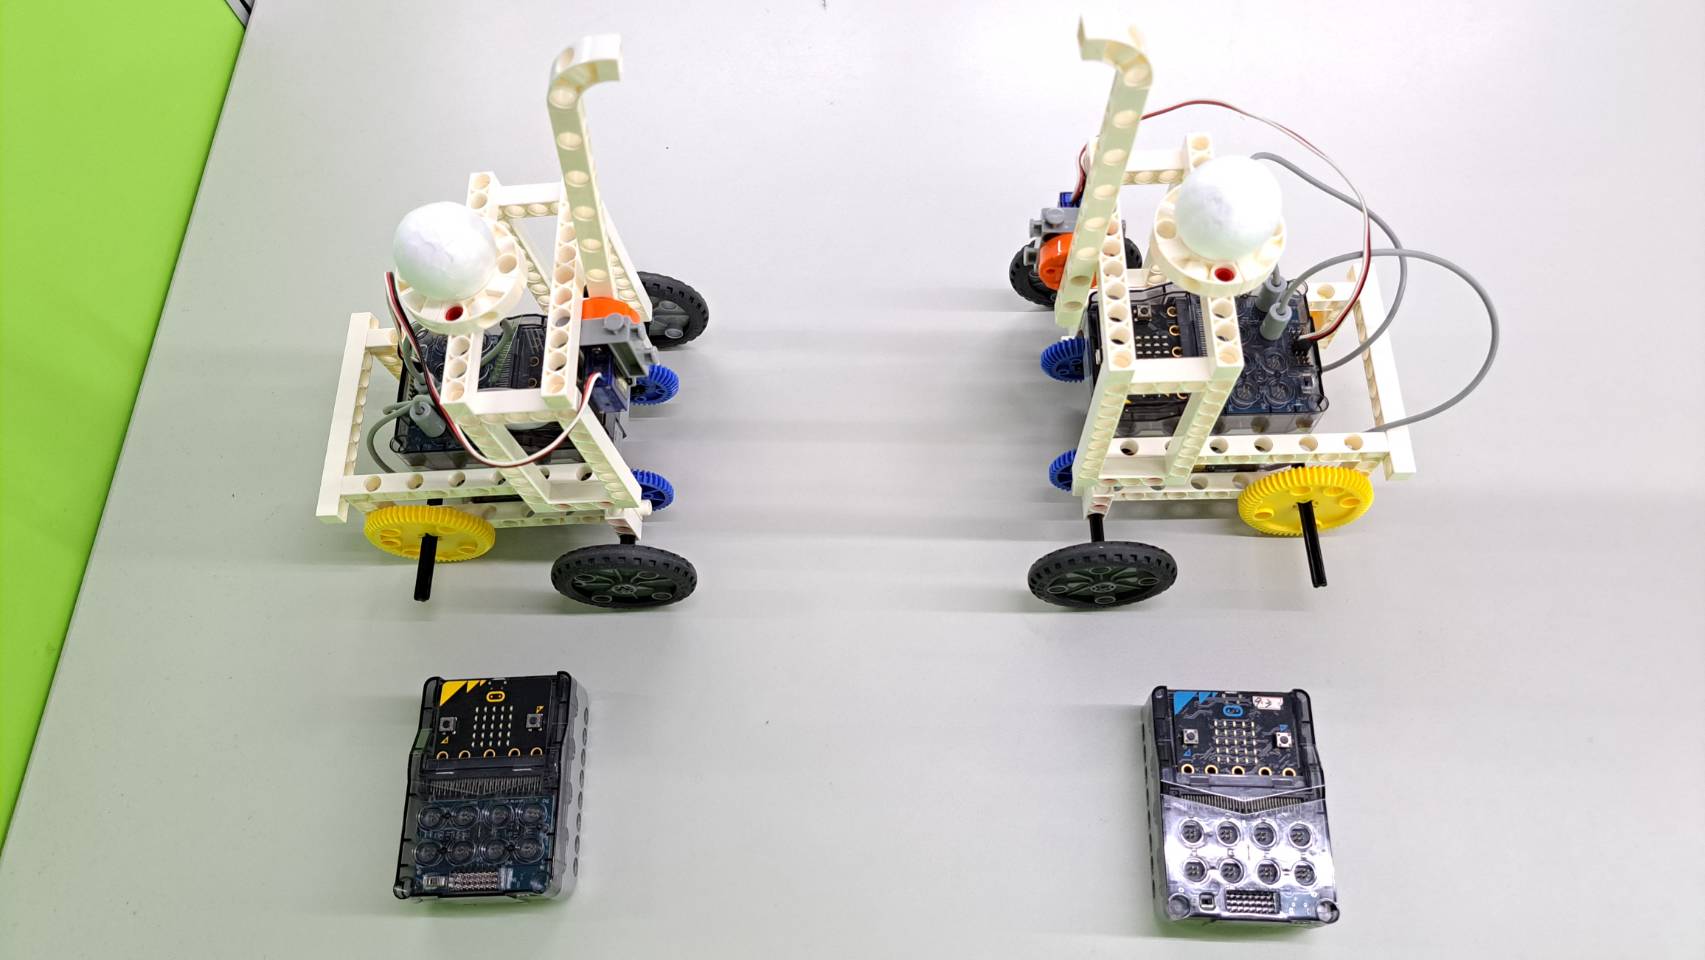
Step 10: Find a good friend, and then assemble another battle robot. Winner is the one who first beat the opponent's Styrofoam ball. Let's fight!
※Be sure to confirm that the remote control and the robot both have the same program.
◆How to Play
Control your robot and beat down the opponent's Styrofoam ball.
Move forward: button A+B
Turn left: button A
Turn right: button B
Attack: Shake the main control box ups and downs
◆Production and Play (30 minutes)
1. Encourage students to complete the model and write the program on their own, and the teacher can help in a timely manner.
2. Students who’ve completed the models and program can find a friend to start the battle, or they can try to modify the model to increase the variability.
◆Summary and Tidy up (10 minutes)
1. Teachers can conclude the course by introducing the history and origin of jousting.
Jousting is a medieval martial arts competition among knights, which prevailed in Europe from the 14th to the 16th centuries. Each game has 8 rounds of duel. Riding on horses, the two players sprint face to face at a speed of 20 miles per hour on a runway of more than 120 feet in length, and stab the scoring steel plate on the left shoulder of the opponent with a spear. At the end of 8 full rounds, the player with the most points wins.
2. Ask the students to take apart the models, sort the pieces, and put them back in their proper places. Remind them to use a peg remover to take the parts apart instead of forcing them.
◆Programming concept
This model uses "functions" as programmatic instructions. When writing a program, functions allow you to group and reuse specific instructions or commonly used operations, reducing the need for repetitive code. It's a way to create independent small units of code with specific purposes or functionality, commonly referred to as functions in general programming languages.
In this model, we set four functions so that when we use move forward, stop, turn left and turn right, we don't need to paste repeated instructions, and it is also convenient for us to manage the program instructions of each action.
◆Postscript
Robots are favorite toys for children of all ages. After the children complete the robot model, let them adjust the program and model to see whose robot can hit the opponent's Styrofoam ball.
The micro:bit still has many functions waiting for us to explore. Let’s look forward to the next adventure!
Keywords:
Coding Education, micro:bit, Battle Robot, Jousting, Motors, Functions, Remote Control.
Curriculum(NGSS):
3-PS2-1 Plan and conduct an investigation to provide evidence of the effects of balanced and unbalanced forces on the motion of an object.
3-5-ETS1-1 Define a simple design problem reflecting a need or a want that includes specified criteria for success and constraints on materials, time, or cost.
3-5-ETS1-2 Generate and compare multiple possible solutions to a problem based on how well each is likely to meet the criteria and constraints of the problem.
Please sign in to vote.