[Educational Time Machine EP5] A Fresh Face in Programming Education: micro:bit x Vending Machine
![[Educational Time Machine EP5] A Fresh Face in Programming Education: micro:bit x Vending Machine](/content/images/size/w2000/2023/05/362254.jpg)
In the previous articles, EP1 to EP4, we explored the integration of traditional education and cutting-edge technologies. From projectors to electronic whiteboards and Scratch, these technologies were created to enhance the overall effectiveness of education.
In today's era, as the STEAM education concept gains momentum, programming education is evolving to meet the changing needs. The focus now lies on portability, versatility, and expandability in design. One notable programming teaching tool that has gained worldwide popularity is the micro:bit microcomputer development version, developed by the British Broadcasting Corporation (BBC)!
micro:bit is a compact microcomputer development board introduced by the British Broadcasting Corporation (BBC) specifically for youth programming education. Despite its small matchbox-like size, micro:bit packs an array of electronic modules: a 5x5 LED display screen, two programmable buttons, an accelerometer, an electronic compass, and more. This makes it capable of effortlessly handling various programming-related lessons. Moreover, micro:bit can interact with different electronic components using alligator clips, allowing for the reading of sensor data.

The micro:bit offers a user-friendly and straightforward program editing interface. Children can effortlessly write complex programs by simply dragging and dropping blocks using the mouse directly on the browser.
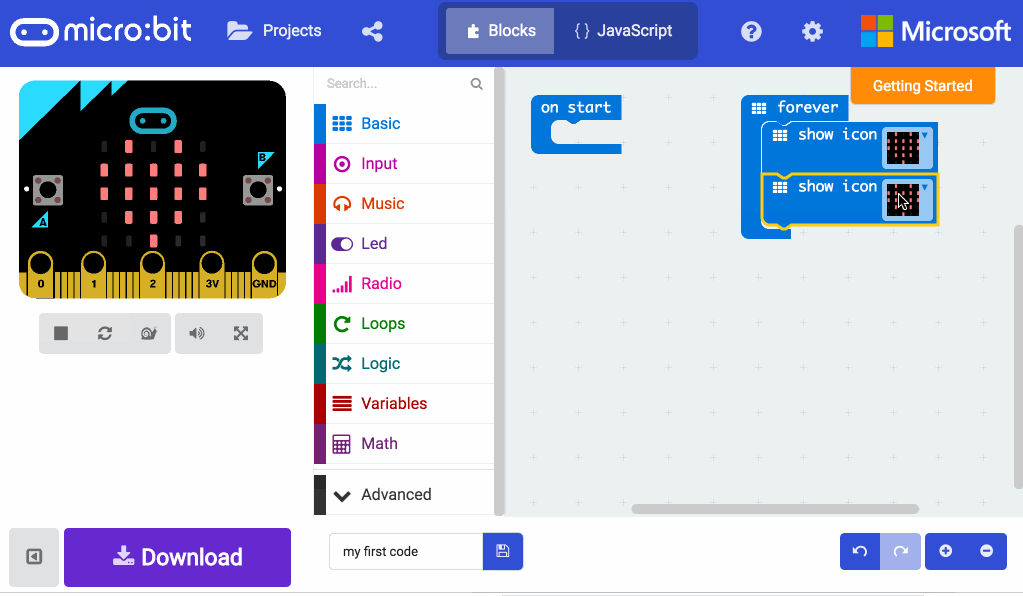
Let us use Gigo #1269 - micro:bit COMPATIBLE ROBOTS Kit today to make a simple vending machine and step into the world of micro:bit together!
◆Preparation (10 minutes)
1. Introduce the micro:bit and C-Gigo micro:bit CONTROL BOX to the learners, and let the learners experience the functions of the micro:bit programming webpage.
2. Prepare the parts required for the model. The main control box needs to use 3 AA batteries.
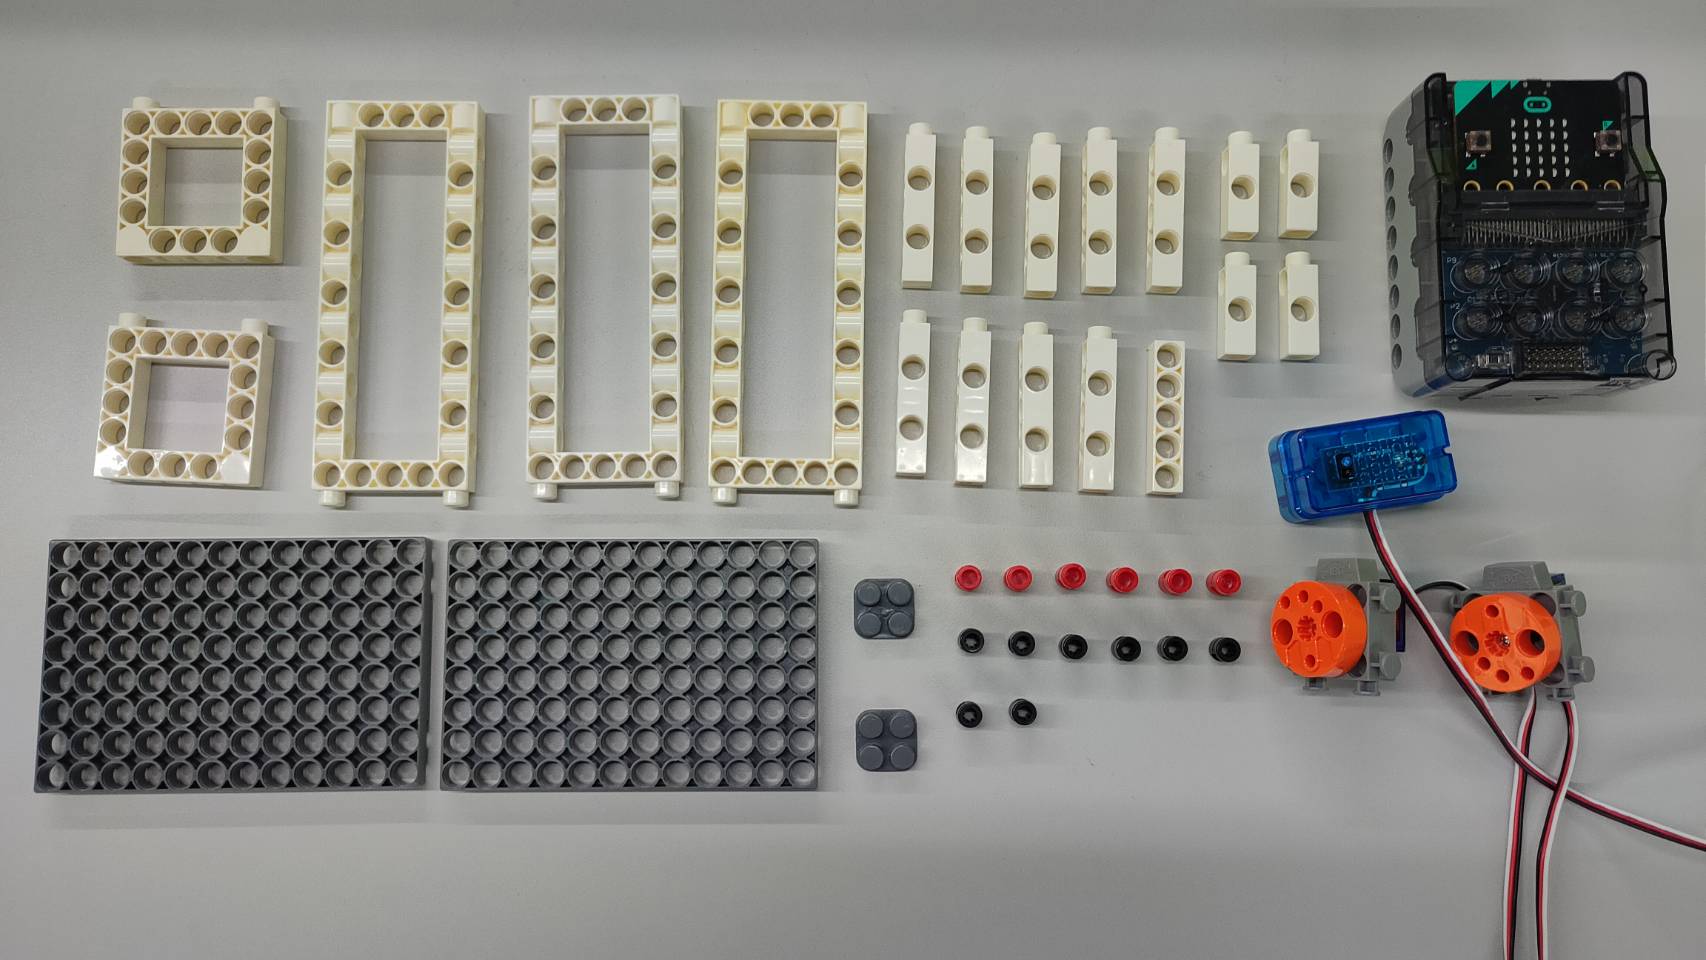
◆Demonstration of model making (20 minutes)
You can follow the assembly steps to build the model.
Step 1: Combine two C-3 HOLE ROD and two B-SHORT PEG and two C-5 HOLE DUAL ROD as shown.
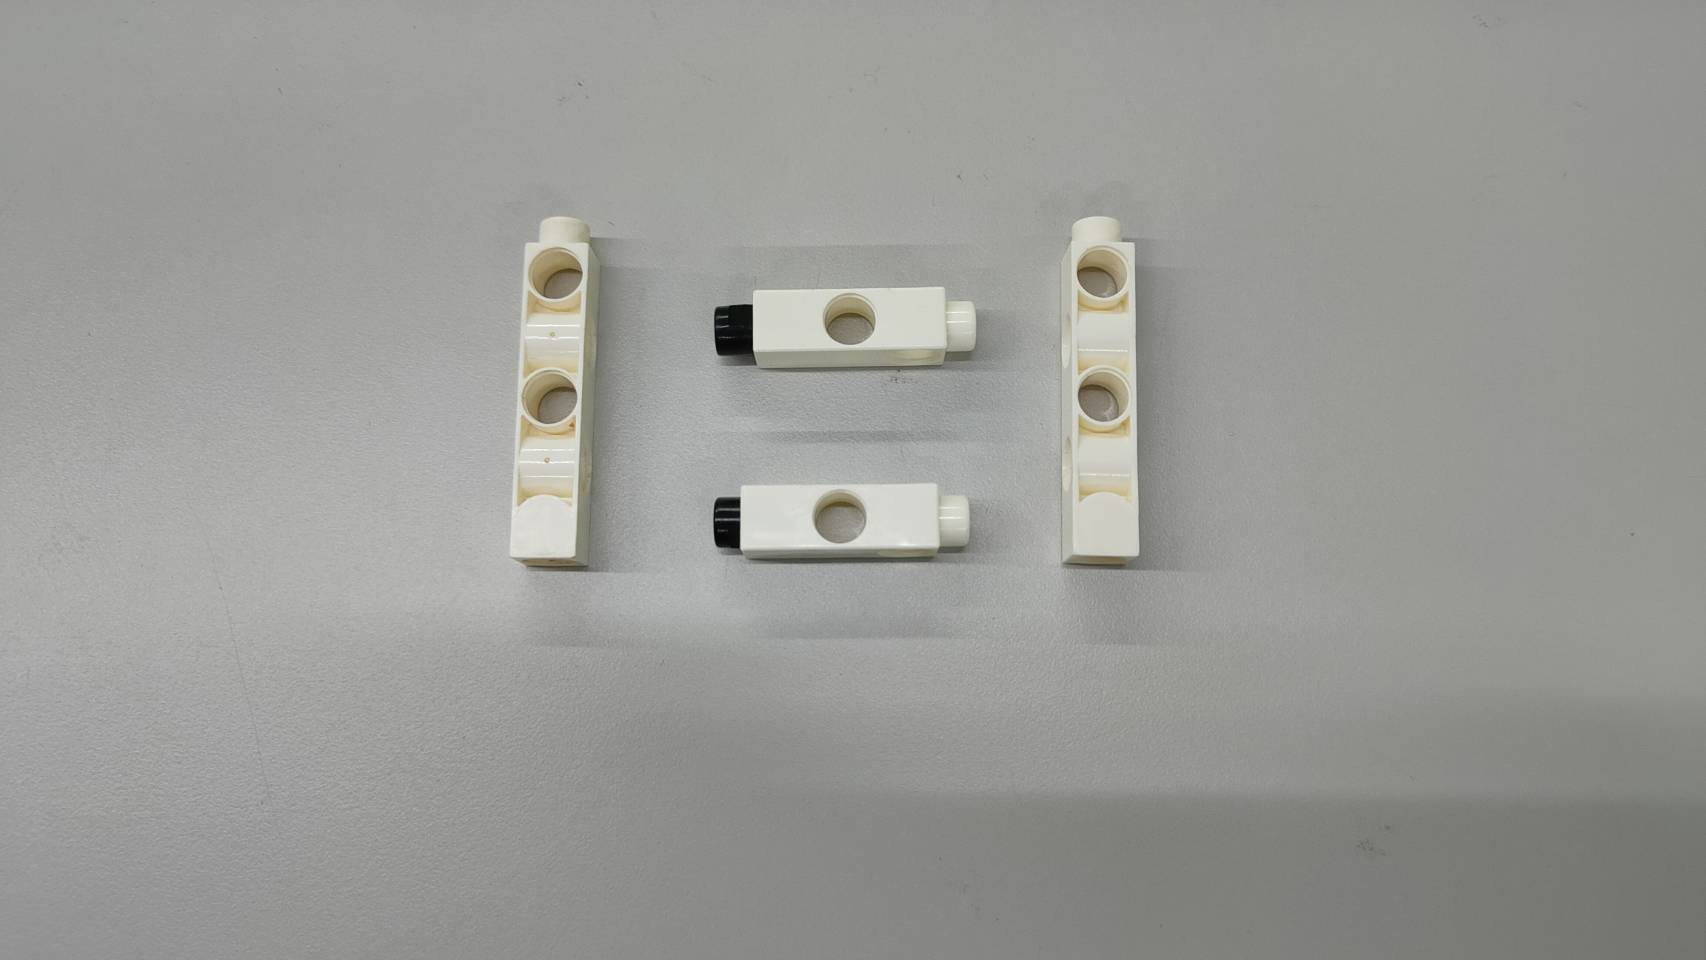
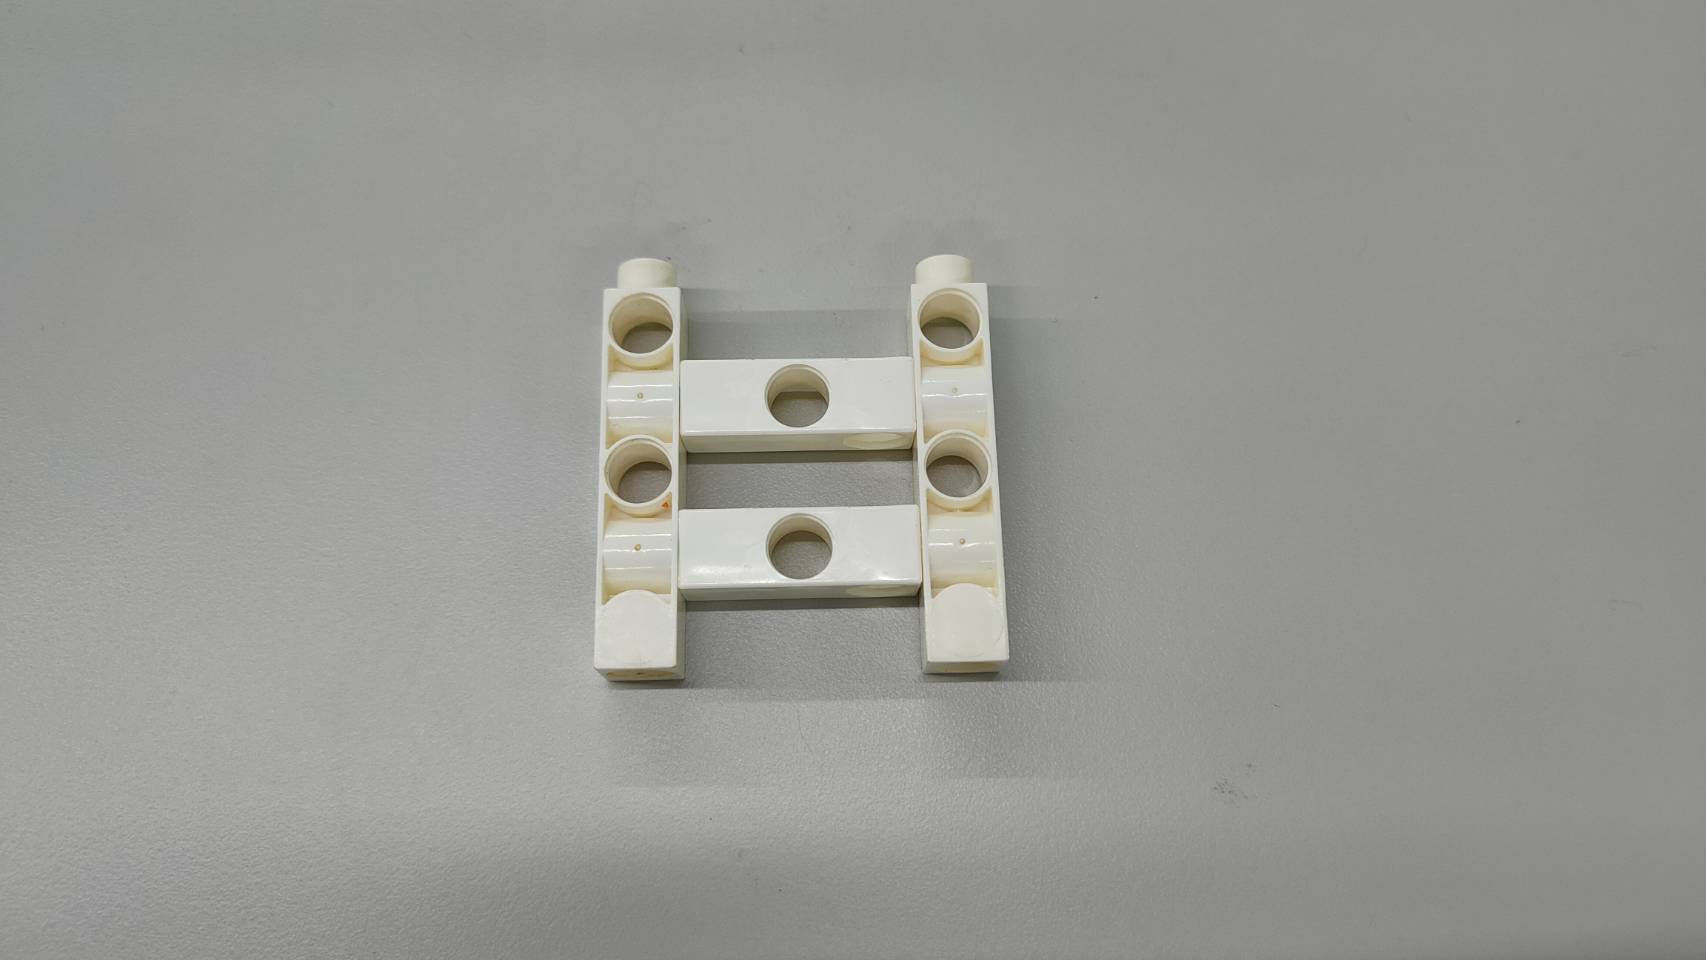
Step 2: Combine the part of Step 1 and one C-5X5 FRAME and two C-5 HOLE DUAL ROD as shown.
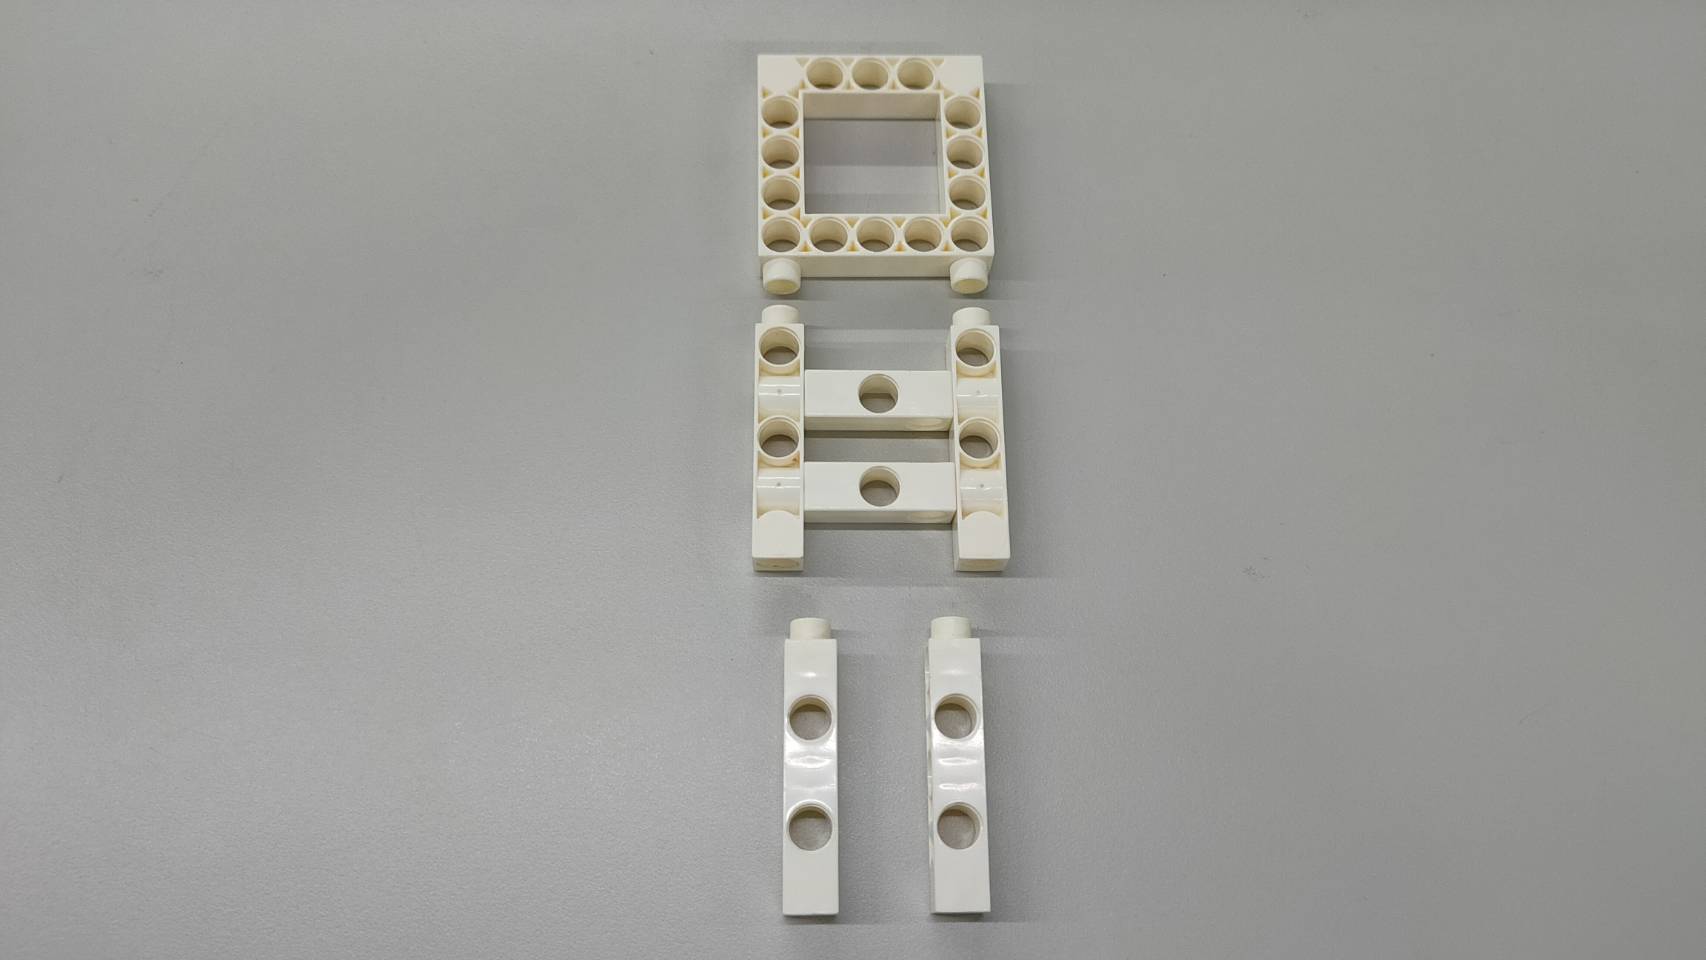
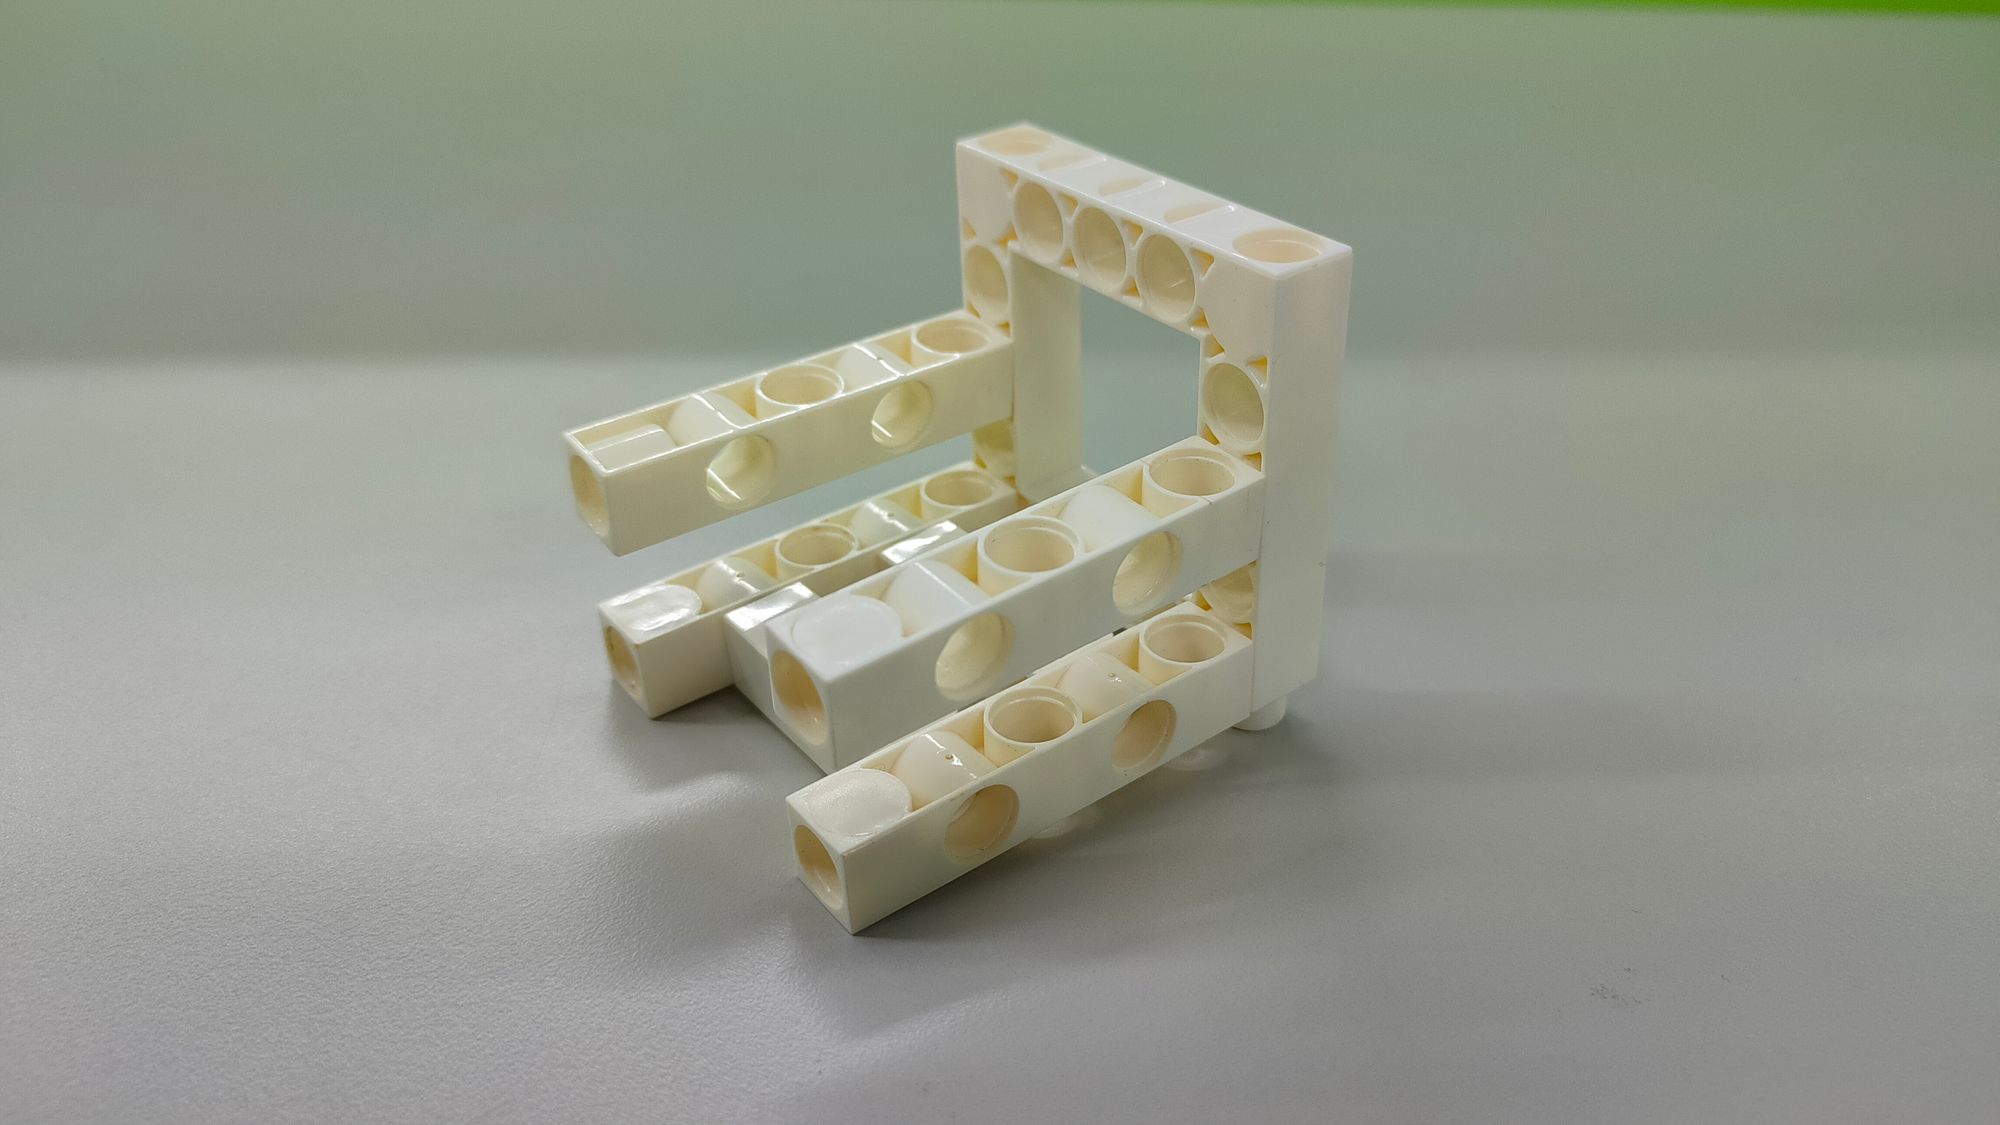
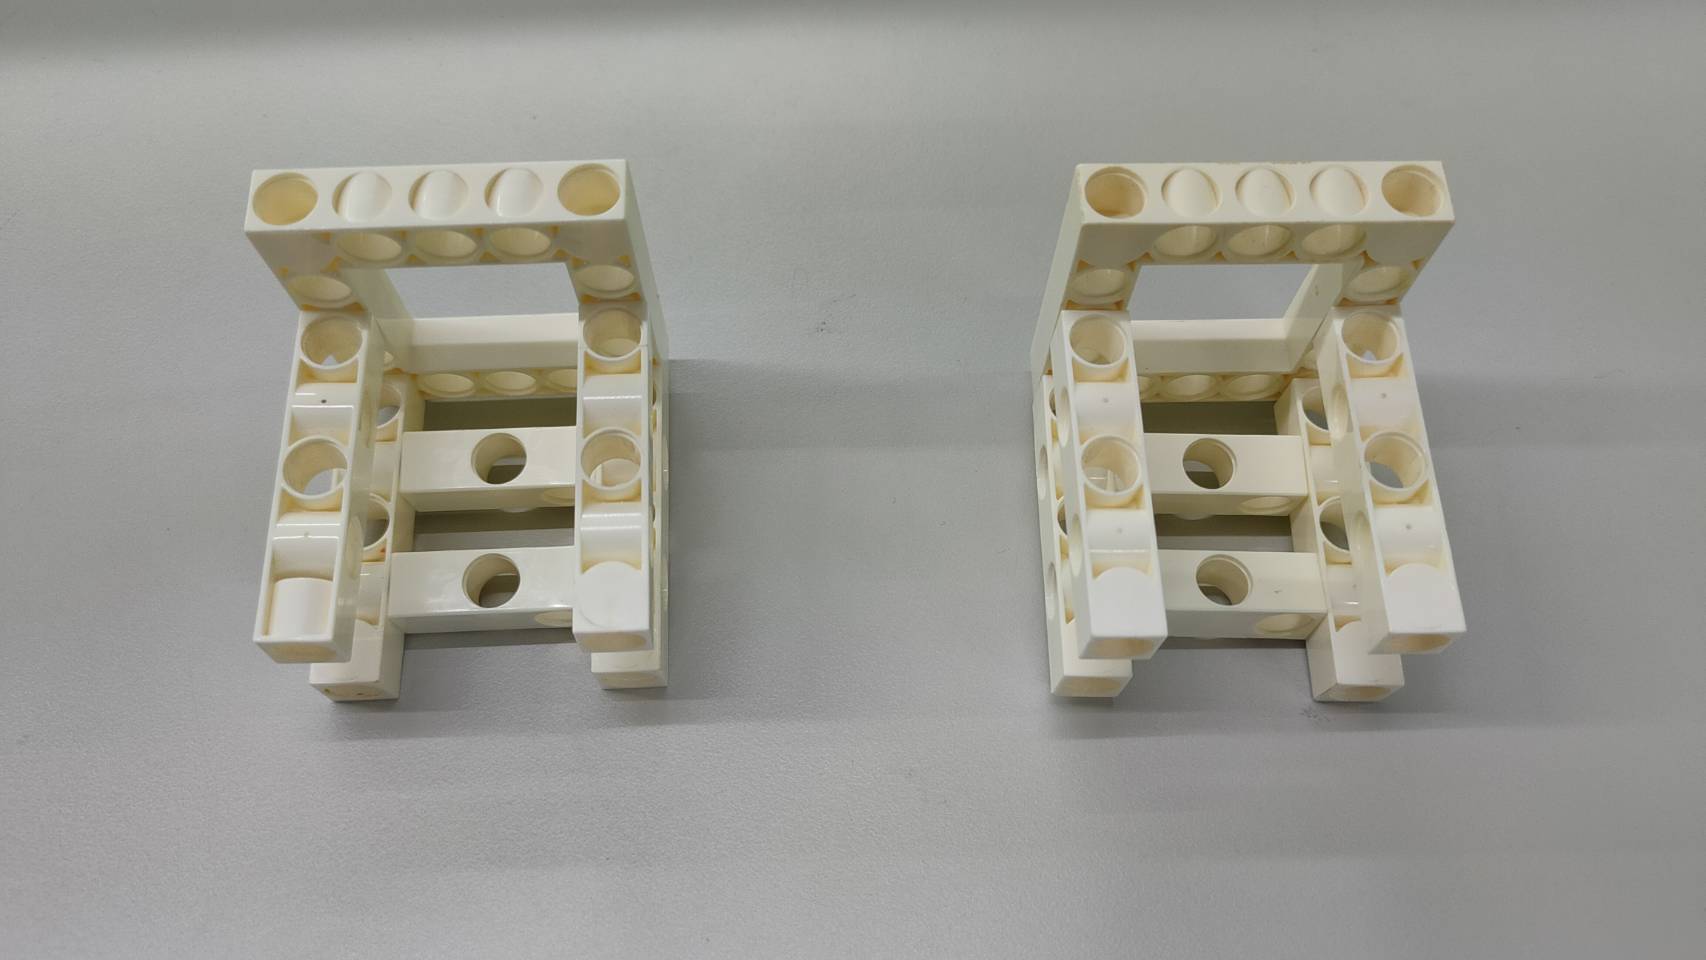
Step 3: Repeat the assembly of Step 1 and Step 2 to make two item racks.
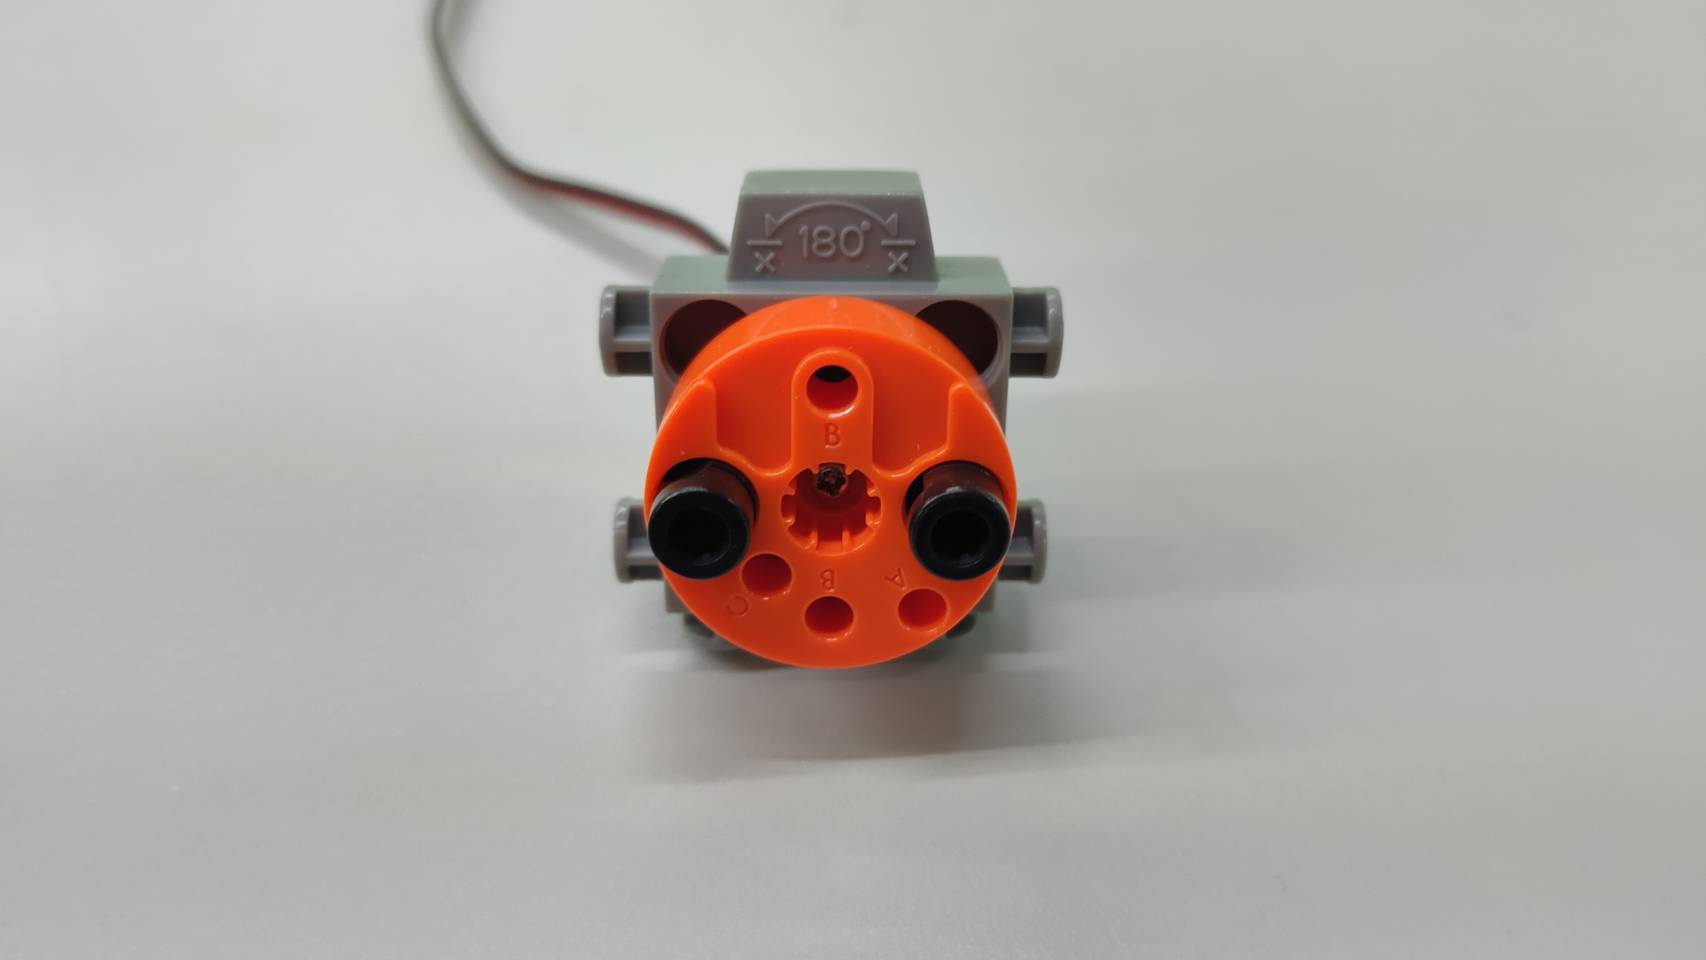
Step 4: Turn a C-180° SERVO MOTOR to 0 degrees and use the B-SHORT PEG to combine with the item rack. Do not manually turn the C-180° SERVO MOTOR as it could cause harm to the motor.
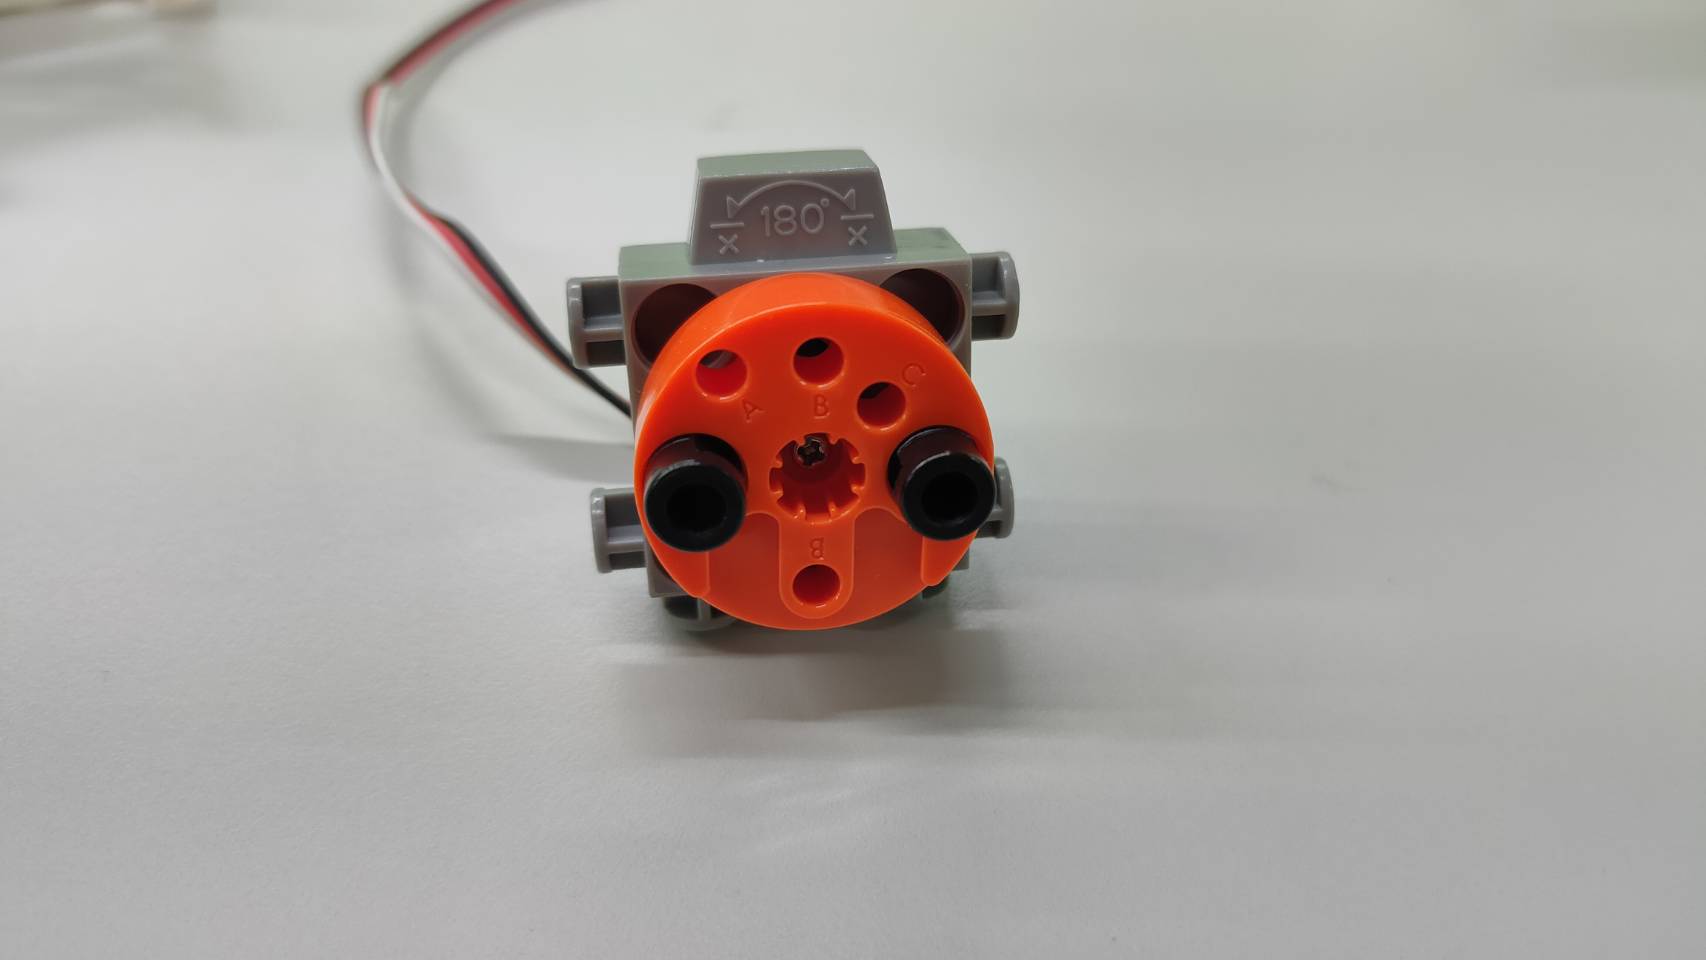
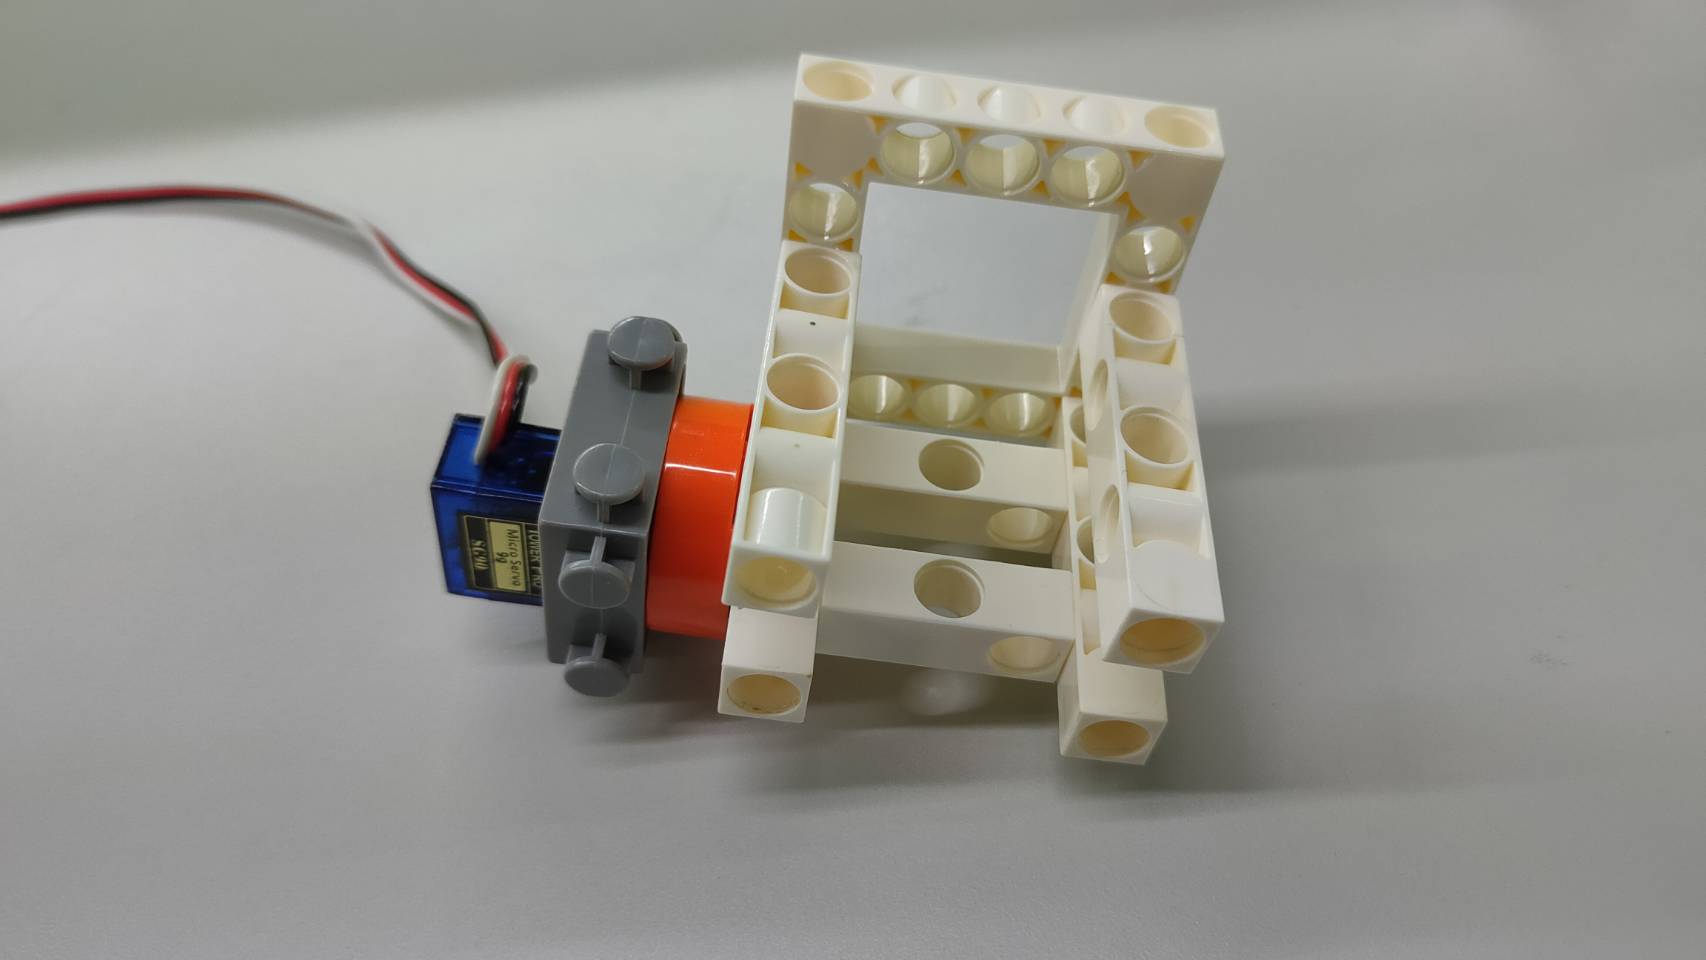
Step 5: Turn a C-180° SERVO MOTOR to 180 degrees and use the B-SHORT PEG to combine with the item rack. Do not manually turn the C-180° SERVO MOTOR as it could cause harm to the motor.
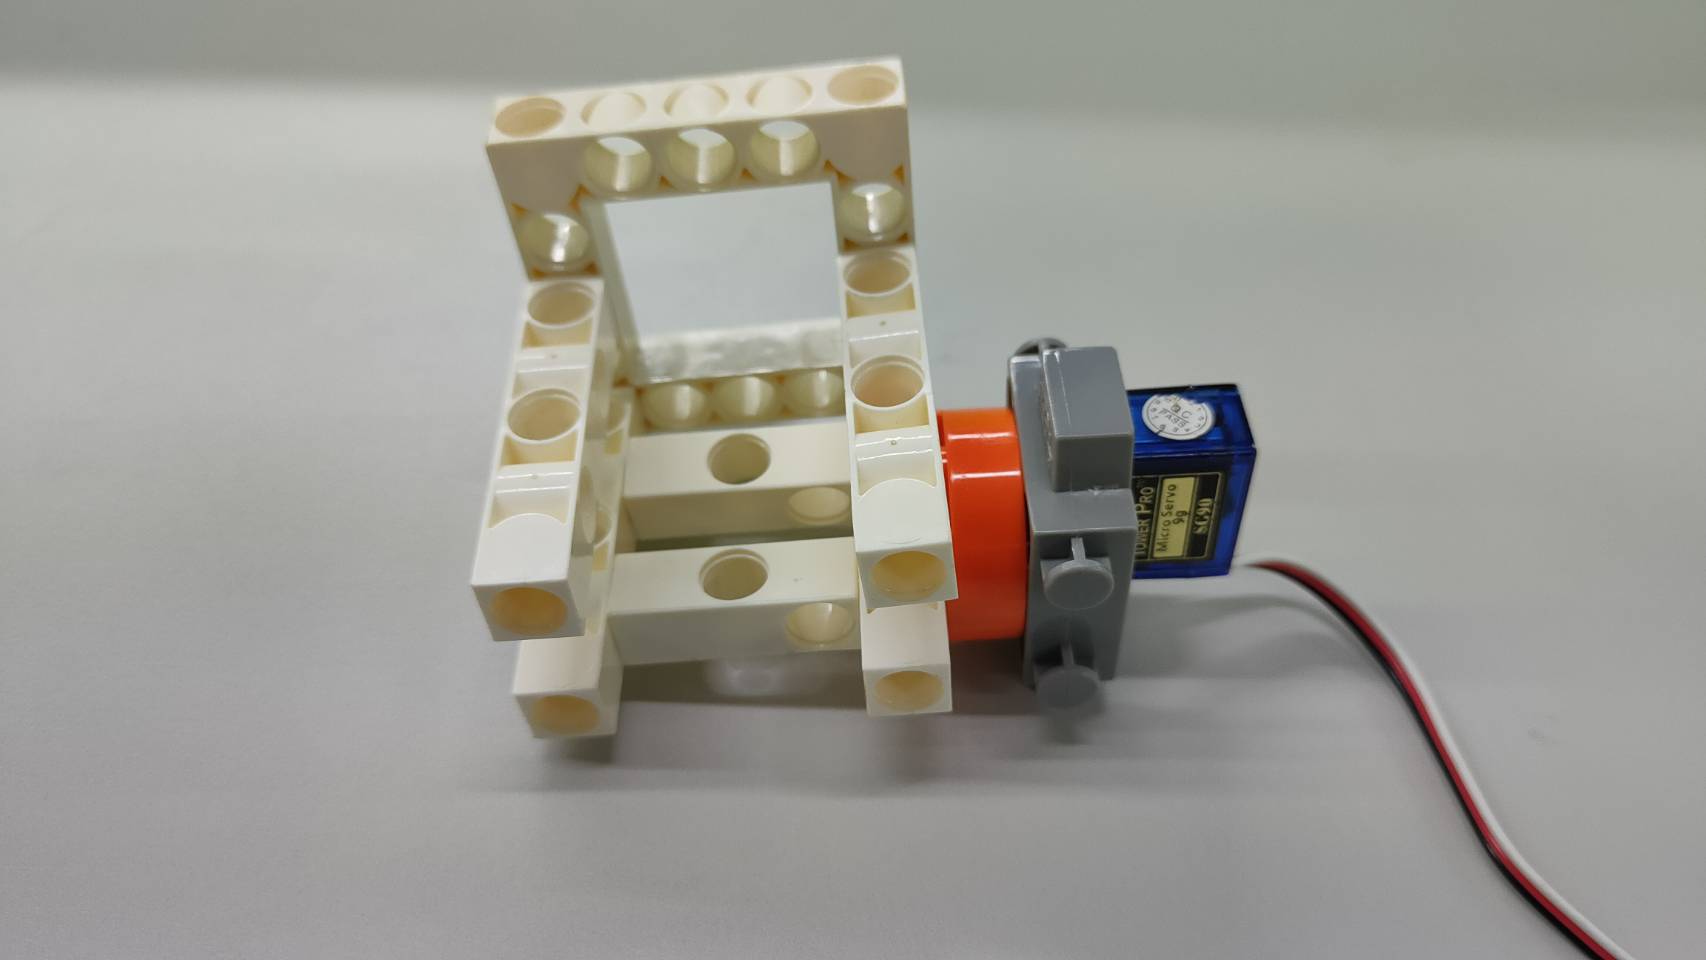
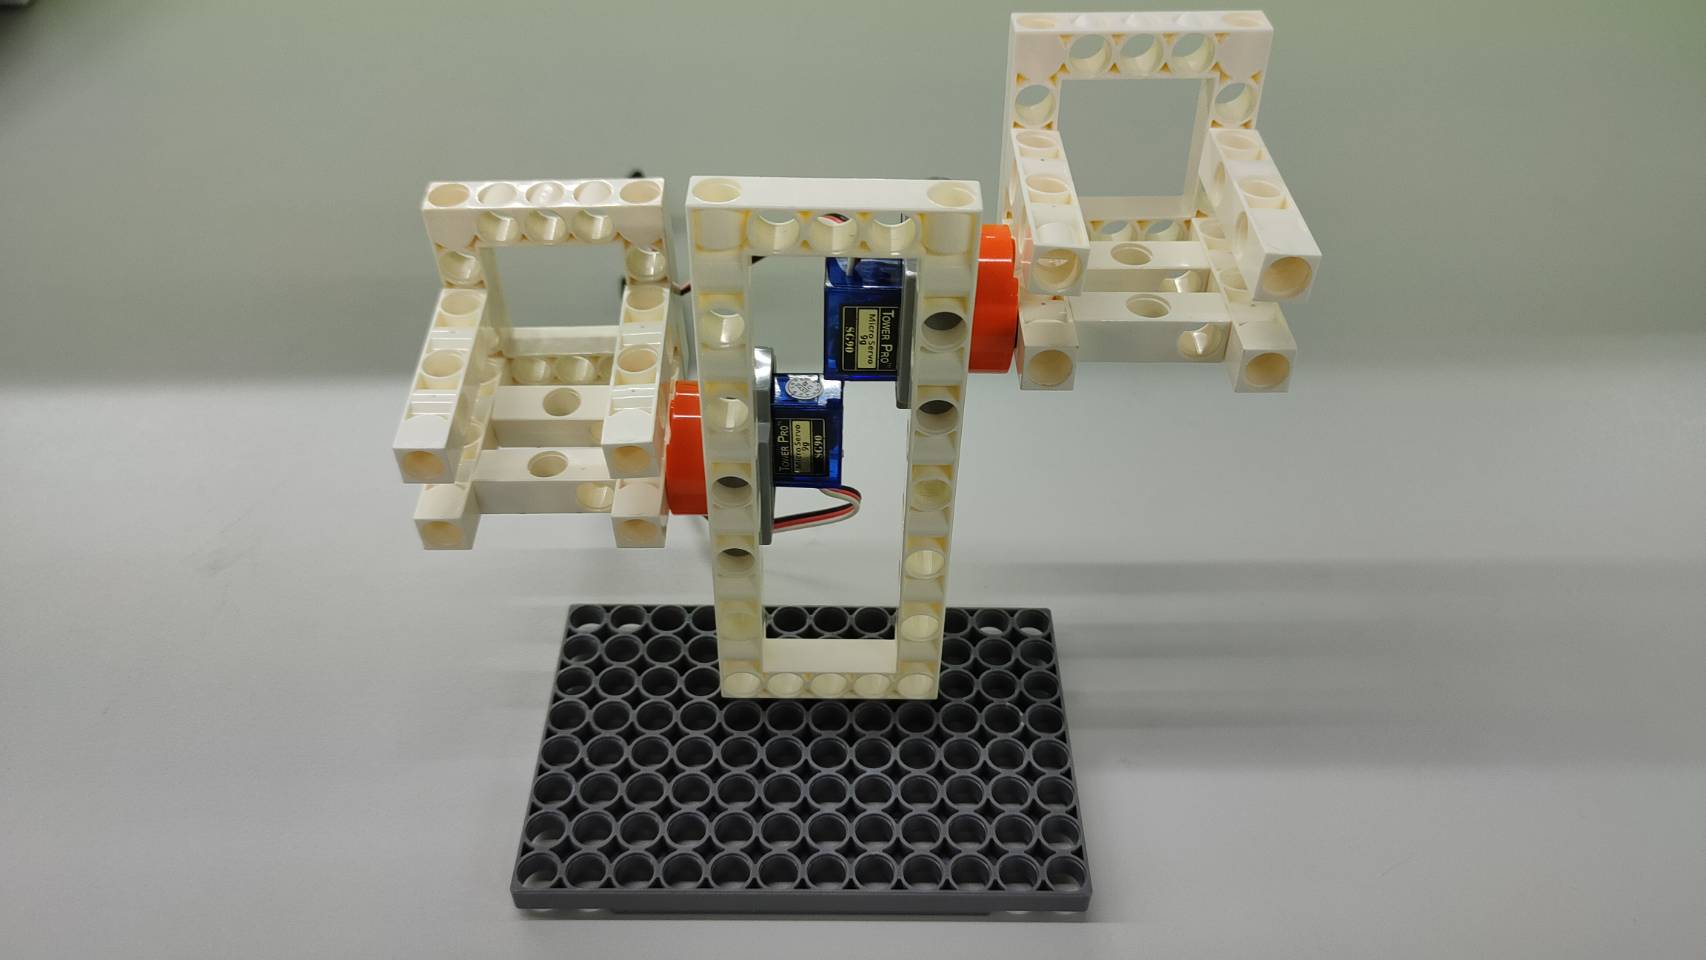
Step 6: Place the part of Step4 and Step 5 on the C-5x13 DUAL FRAME and install it on any position of the C-BASE GRID.
Step 7: Combine C-5x13 DUAL FRAME, C-5 HOLD DUAL ROD and C-IR SENSOR as shown.
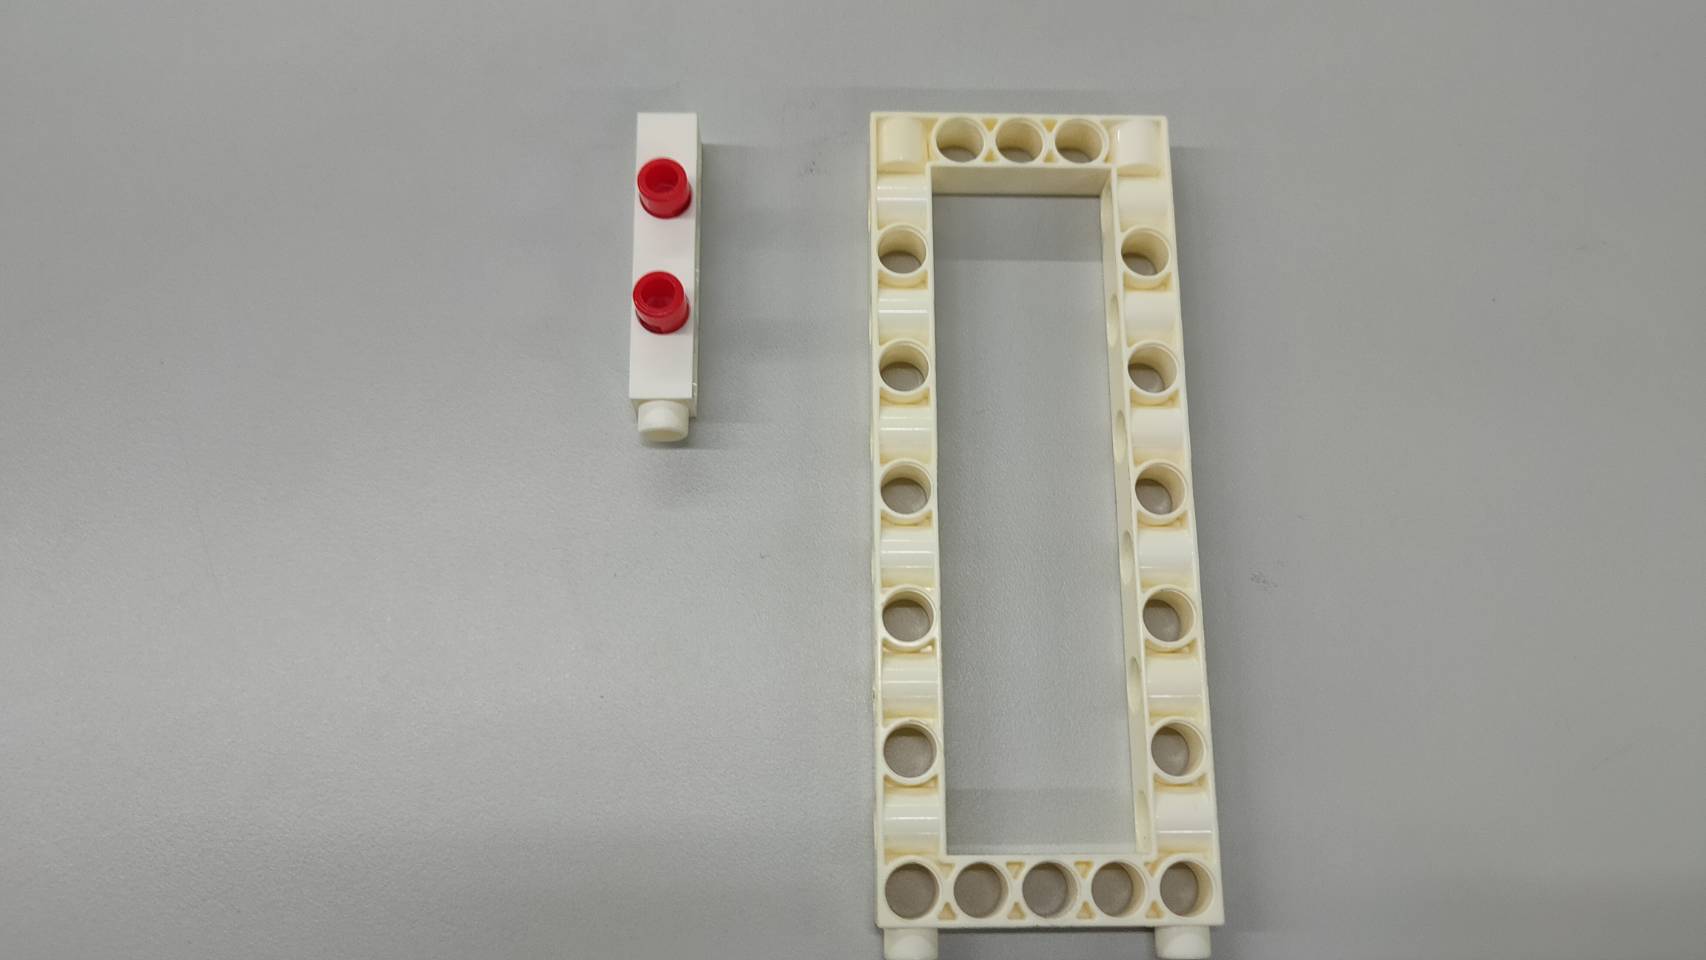
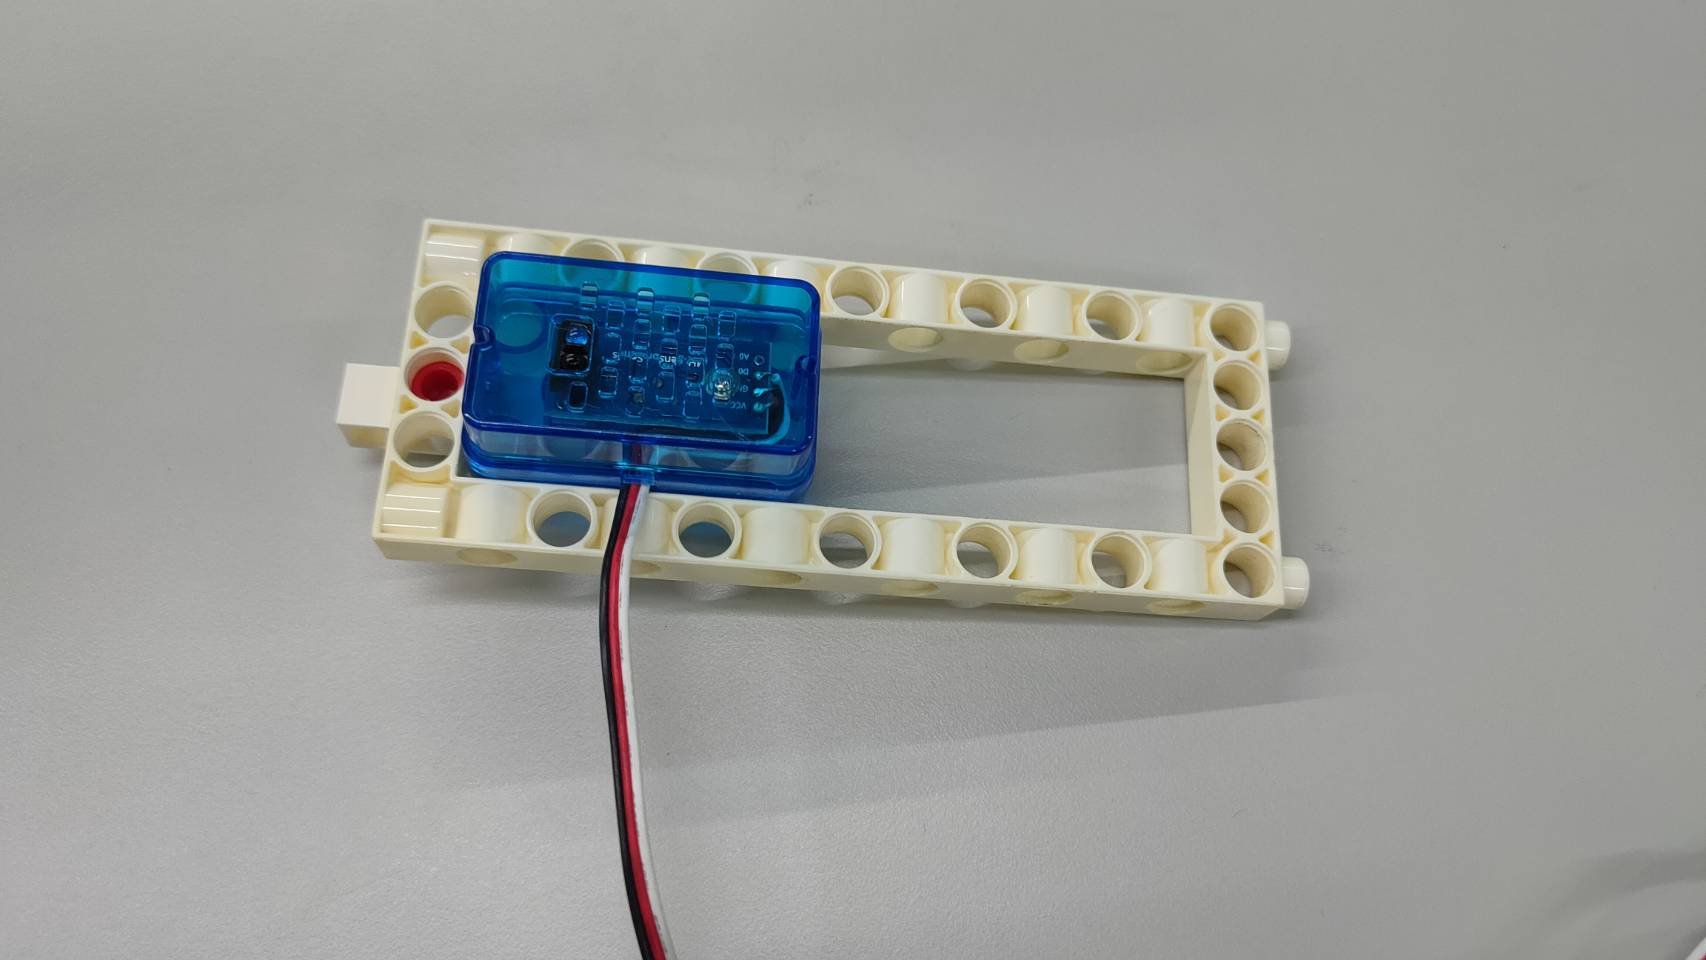
Step 8: Combine C-5x13 DUAL FRAME, C-5 HOLD ROD and C-Gigo micro:bit CONTROL BOX as shown.
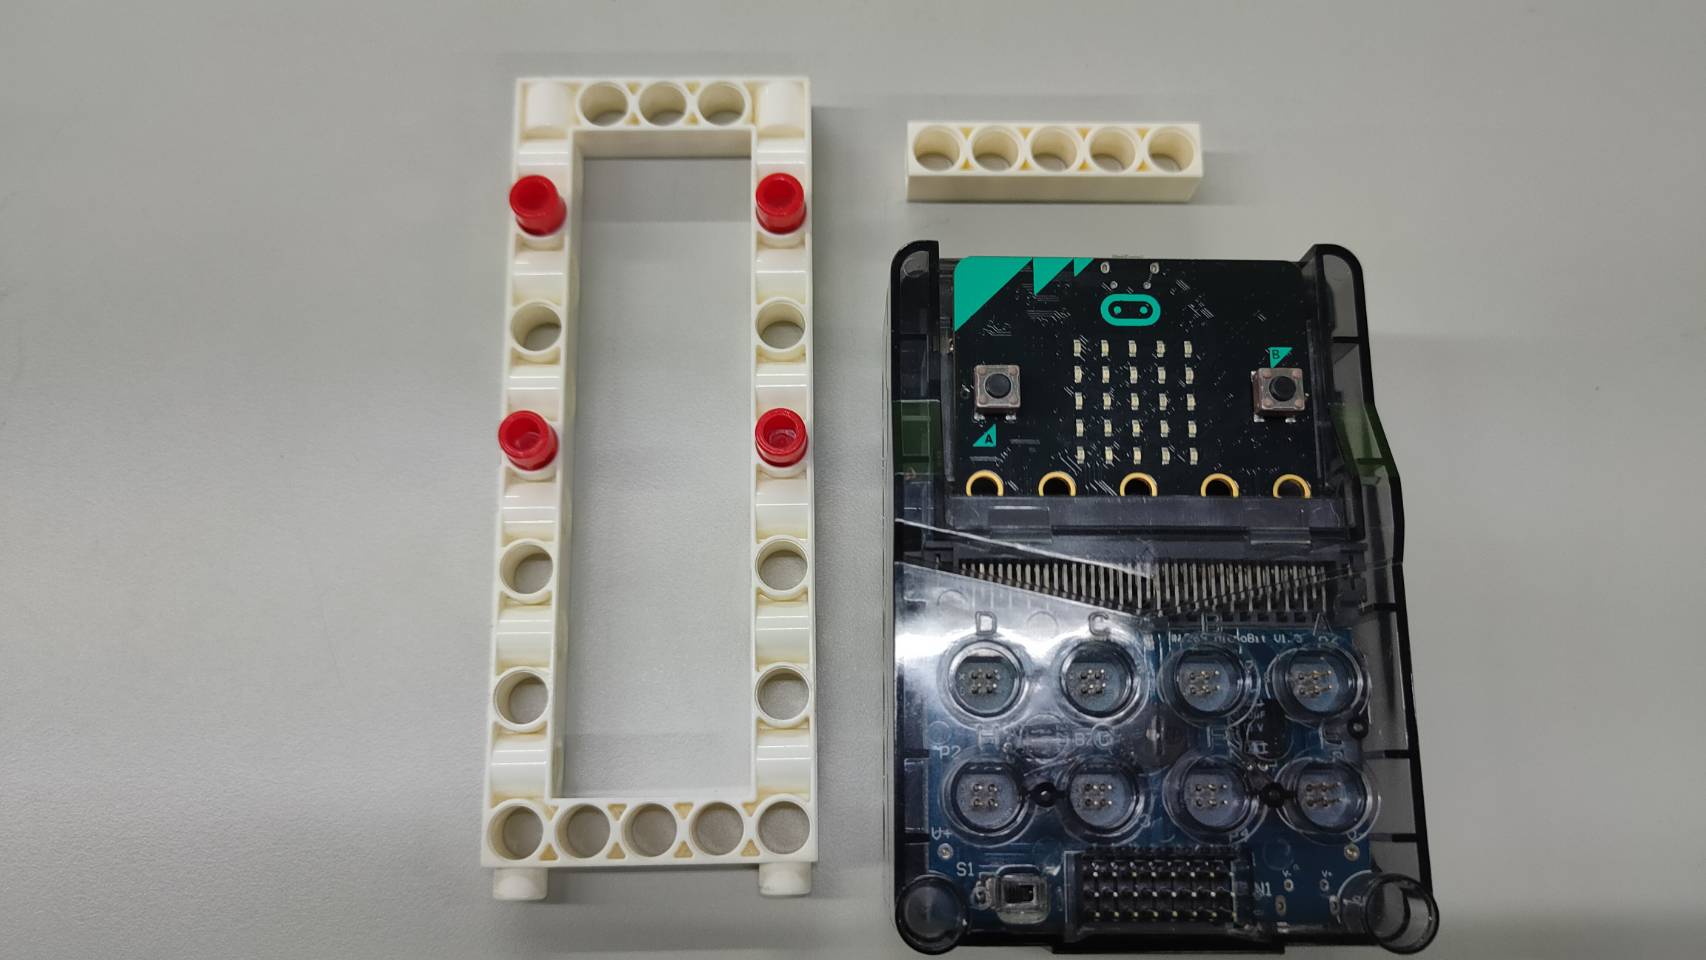
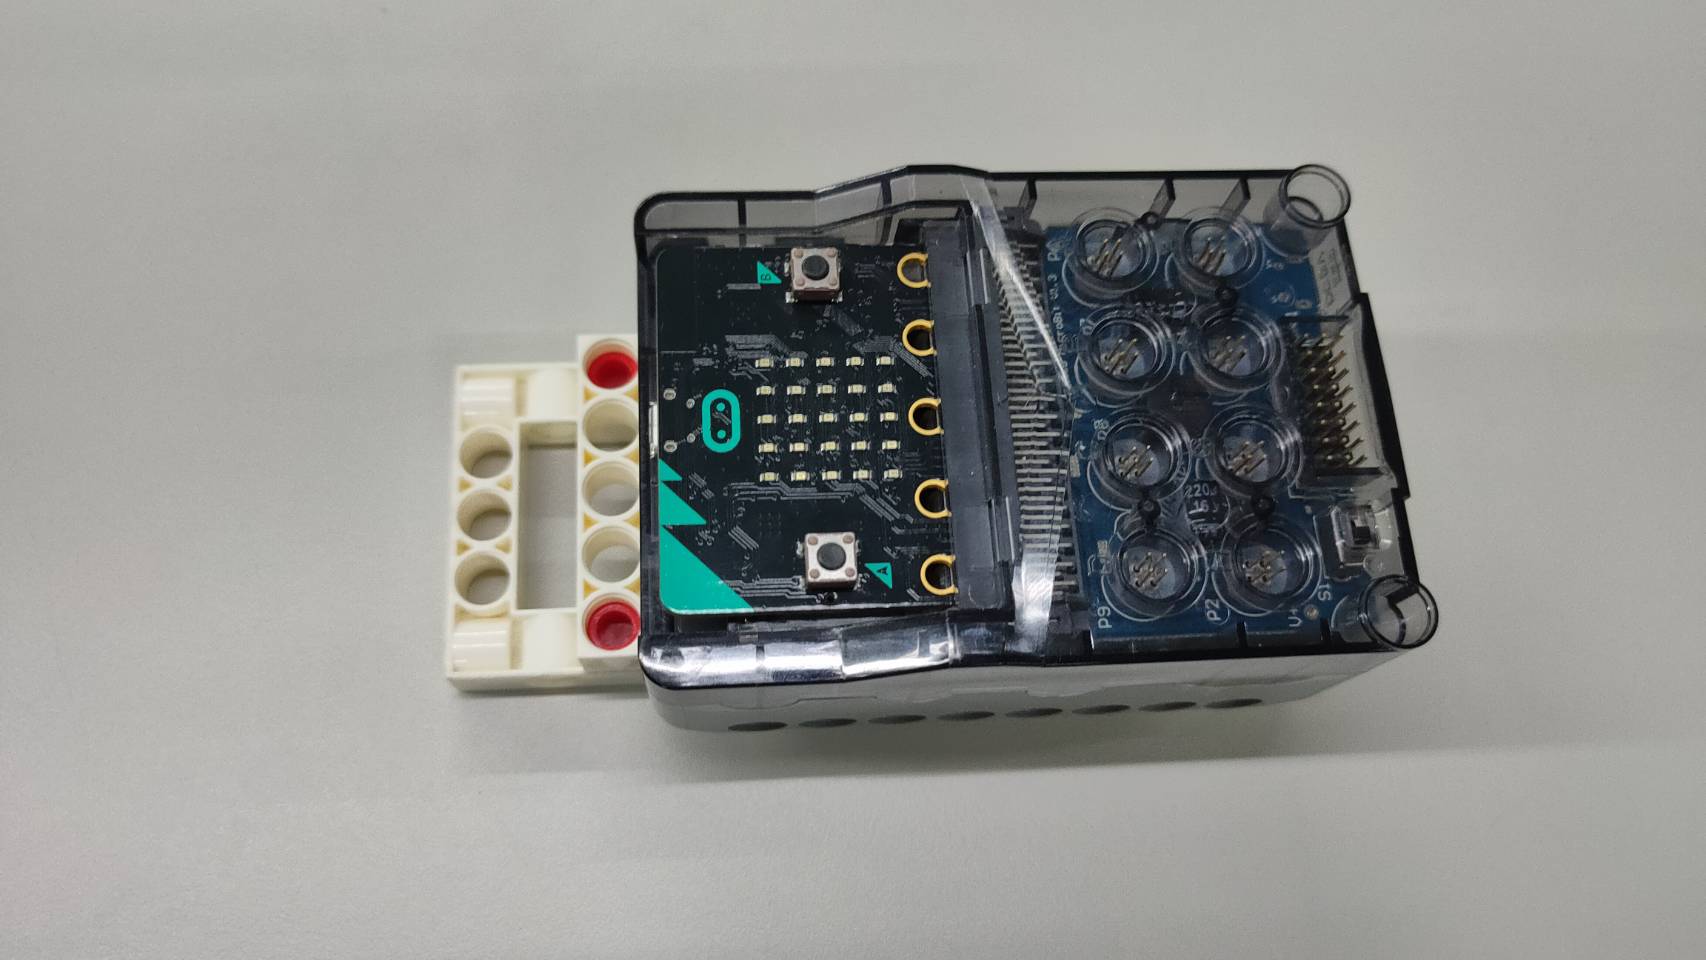
Step 9: Place the C-IR SENSOR and C-Gigo micro:bit CONTROL BOX on the the C-BASE GRID, and there should be more than 3 holes between the two.
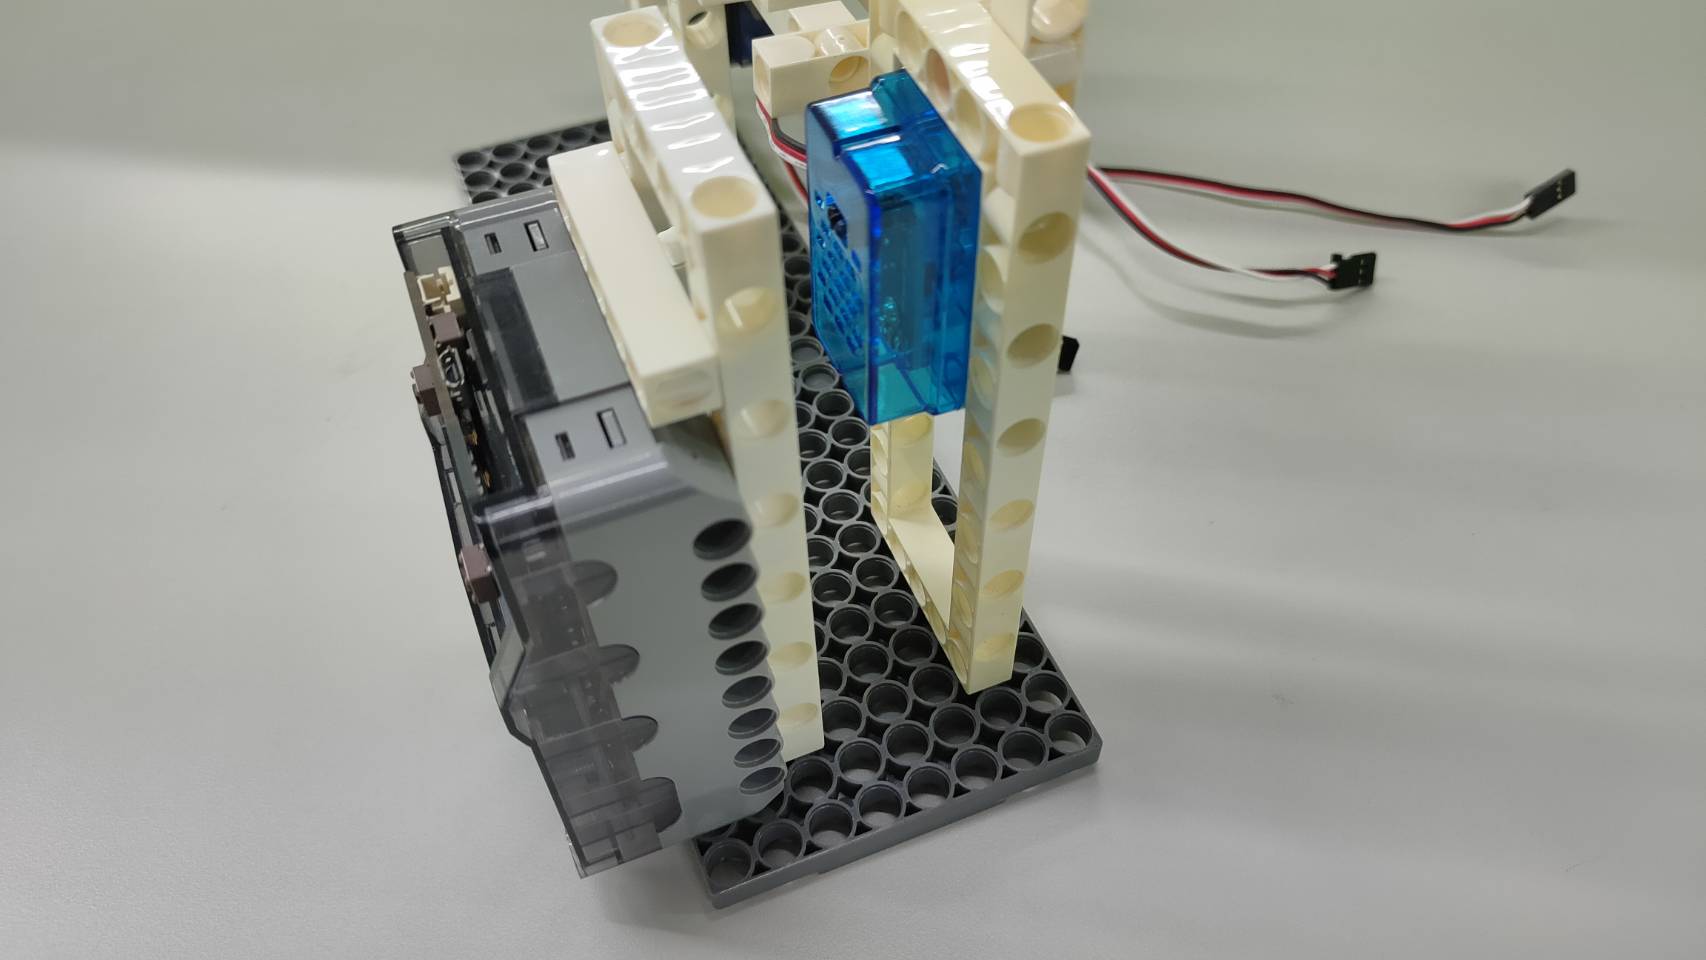
Step 10: Connect the left C-180° SERVO MOTOR to P1 DuPont port, the right C-180° SERVO MOTOR to P2 DuPont port, and the C-IR SENSOR to P8 DuPont port.
Be sure to install to the correct ports so the model can work!
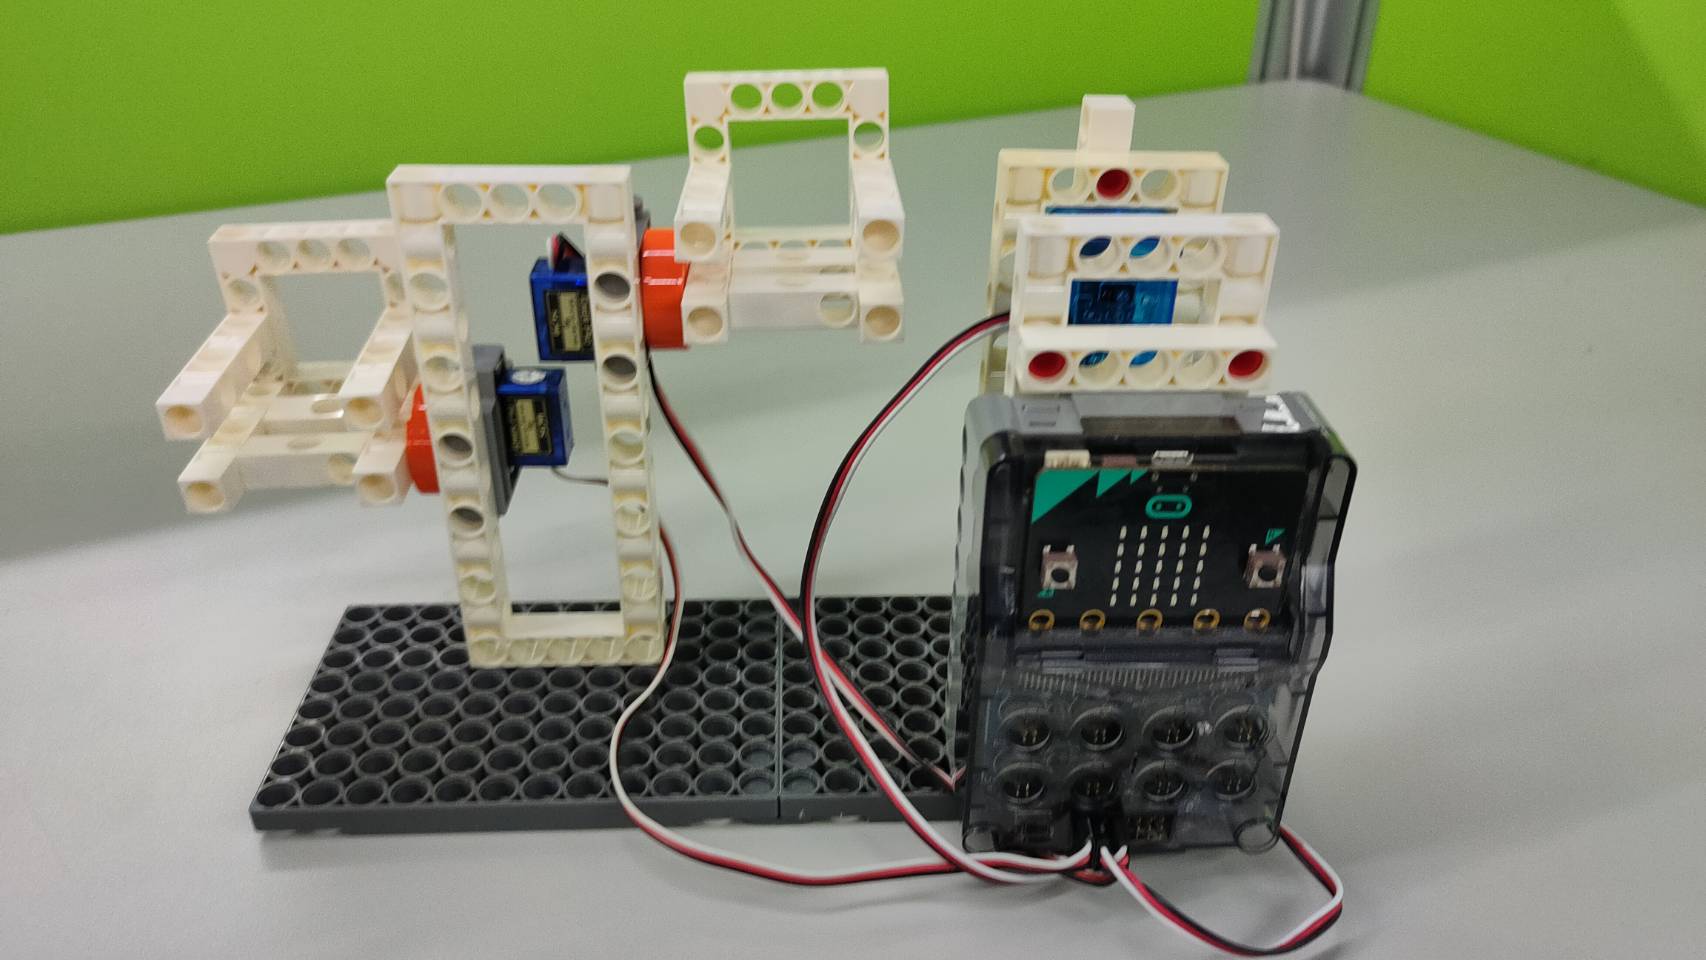

Step 11: Got to the webpage to write the following program.
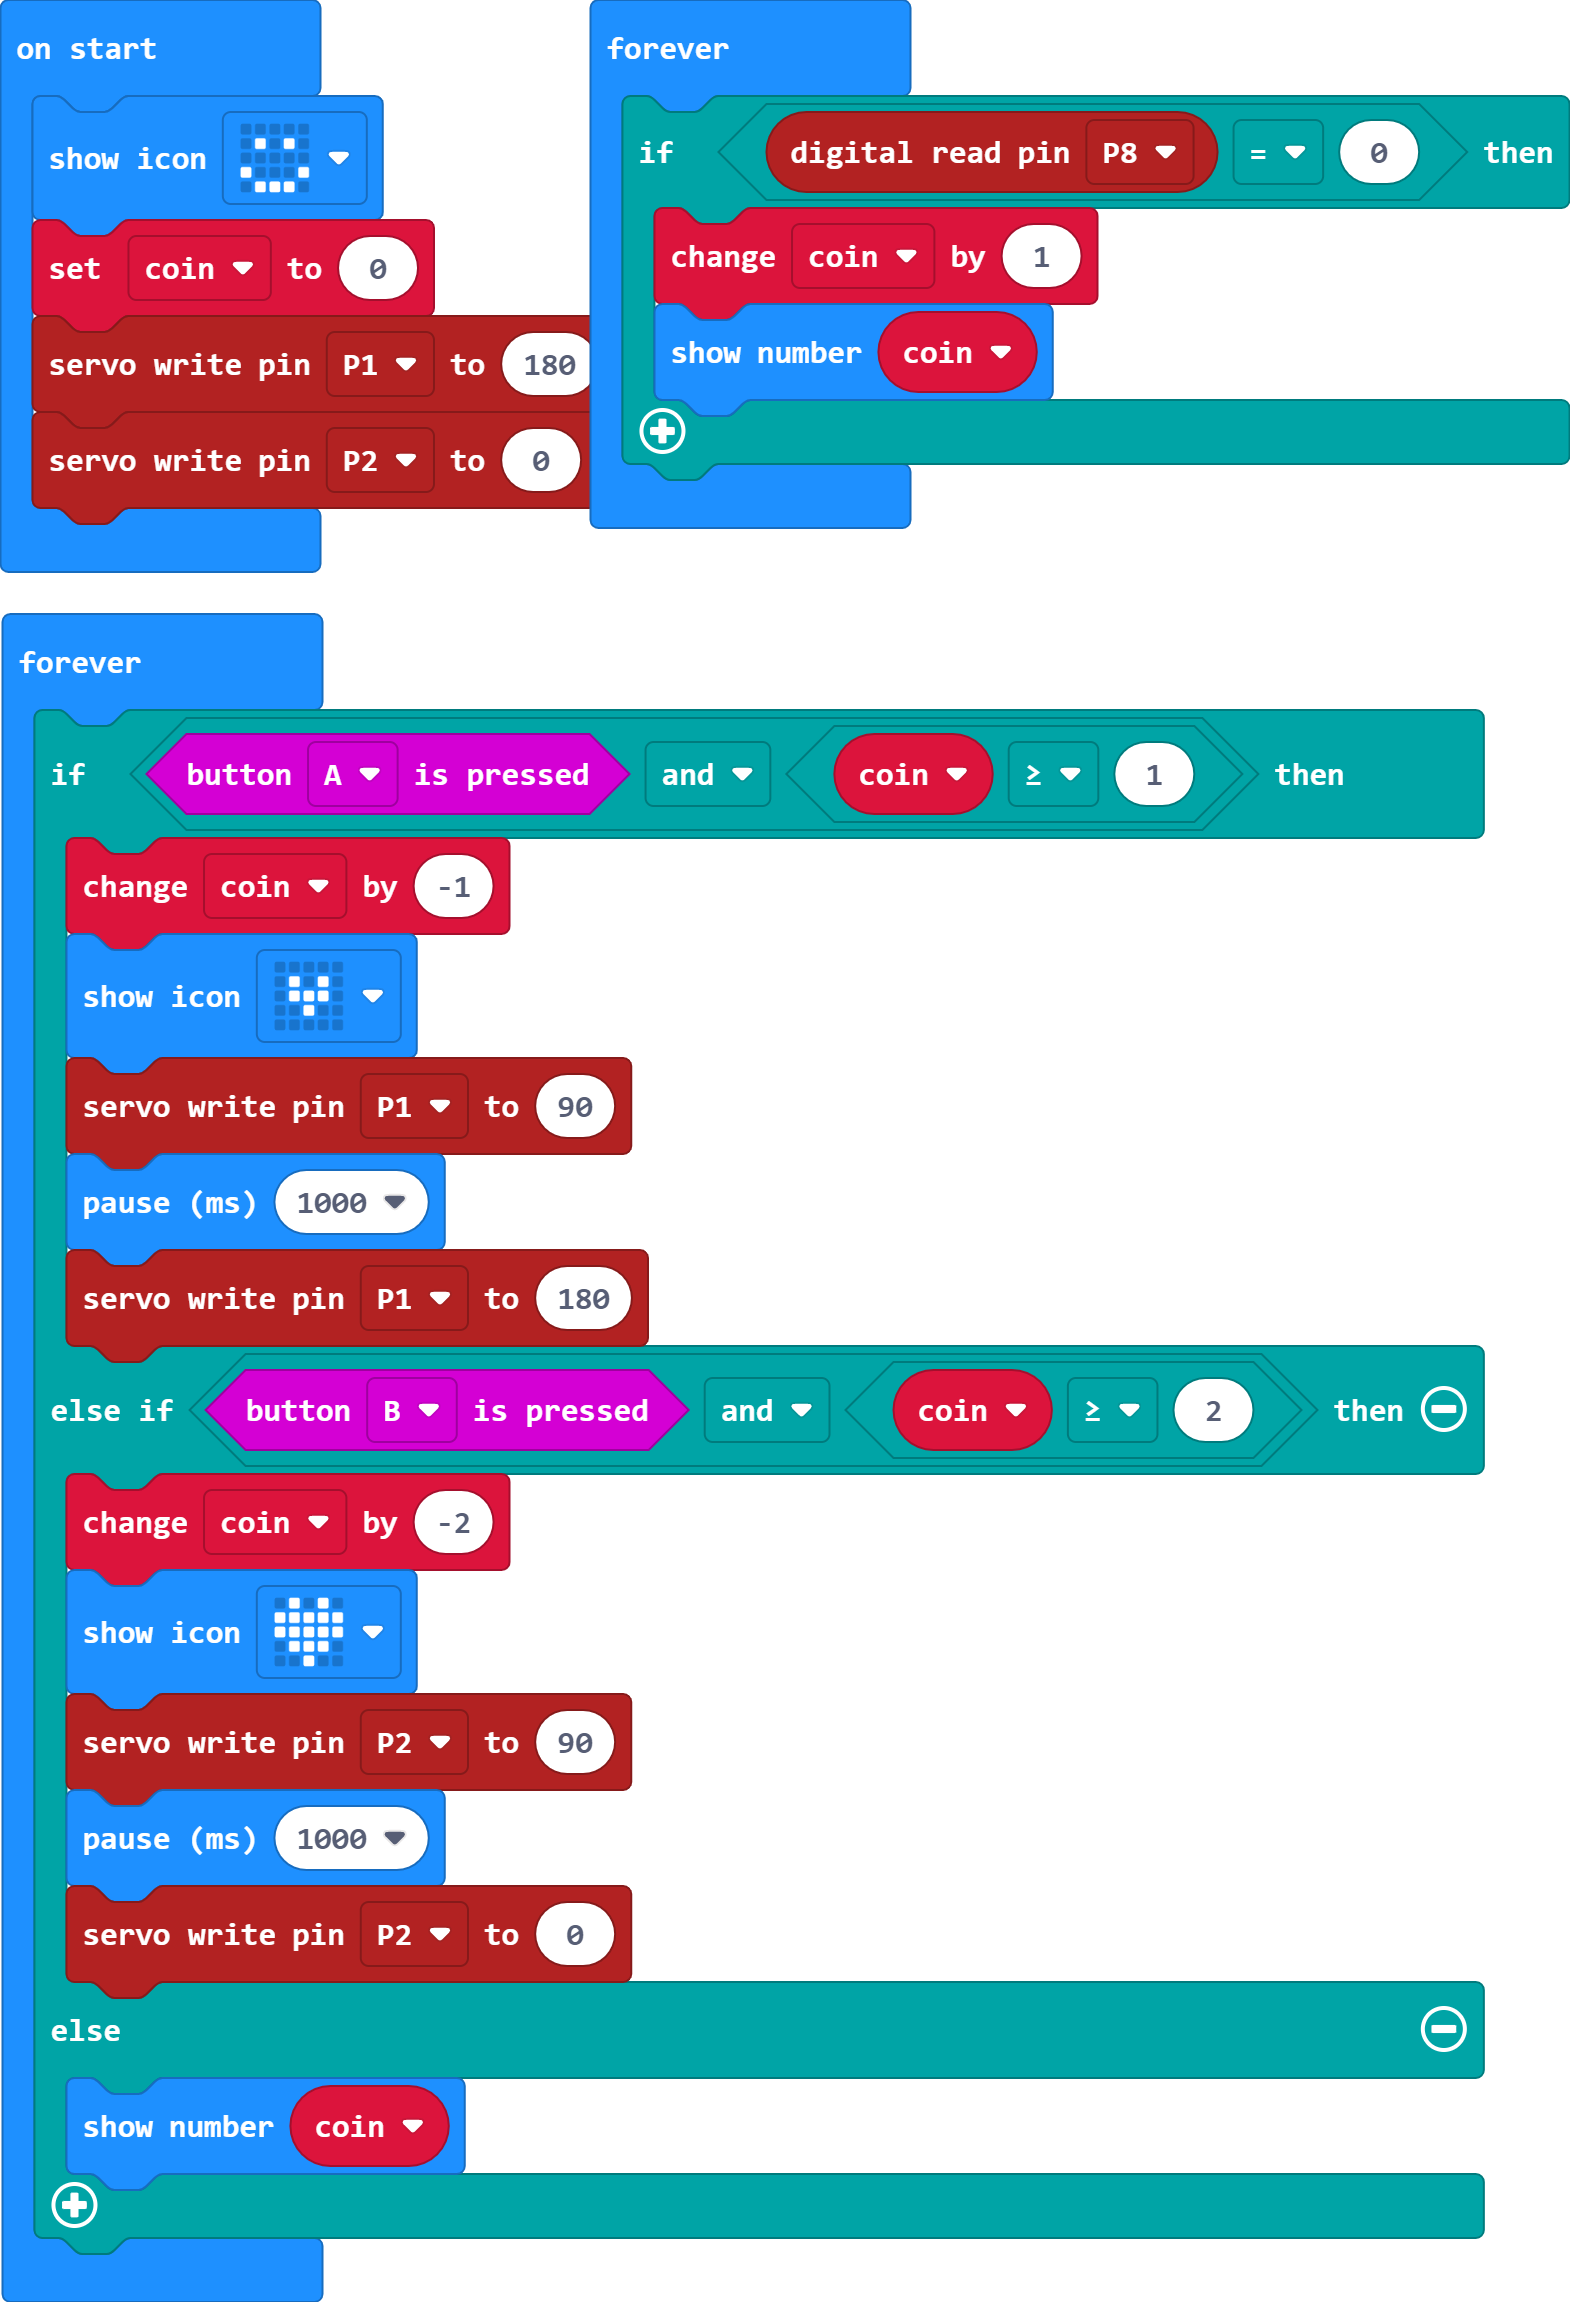
Program logic:
1. Create a variable coin to record the number of coin insertions, and reset the variable of coin to zero and position the item rack when the program is started.
2. When the IR sensor detects coin insertion, the variable of coin will be increased by 1 and the current number of coin insertions will be displayed.
3. If the A button is pressed and the number of coin insertions is ≥ 1, then the variable of coin will be decreased by 1 and the item on the left will be dropped.
4. If the B button is pressed and the number of coin insertions is ≥ 2, the variable of coin will be decreased by 2 and the item on the right will be dropped.
◆Production and Play (25 minutes)
1. The students assemble the vending machine model on their own while the teacher only provides assistance as needed.
2. Once the students have finished assembling the model, they can adjust the model's shape to change the appearance.
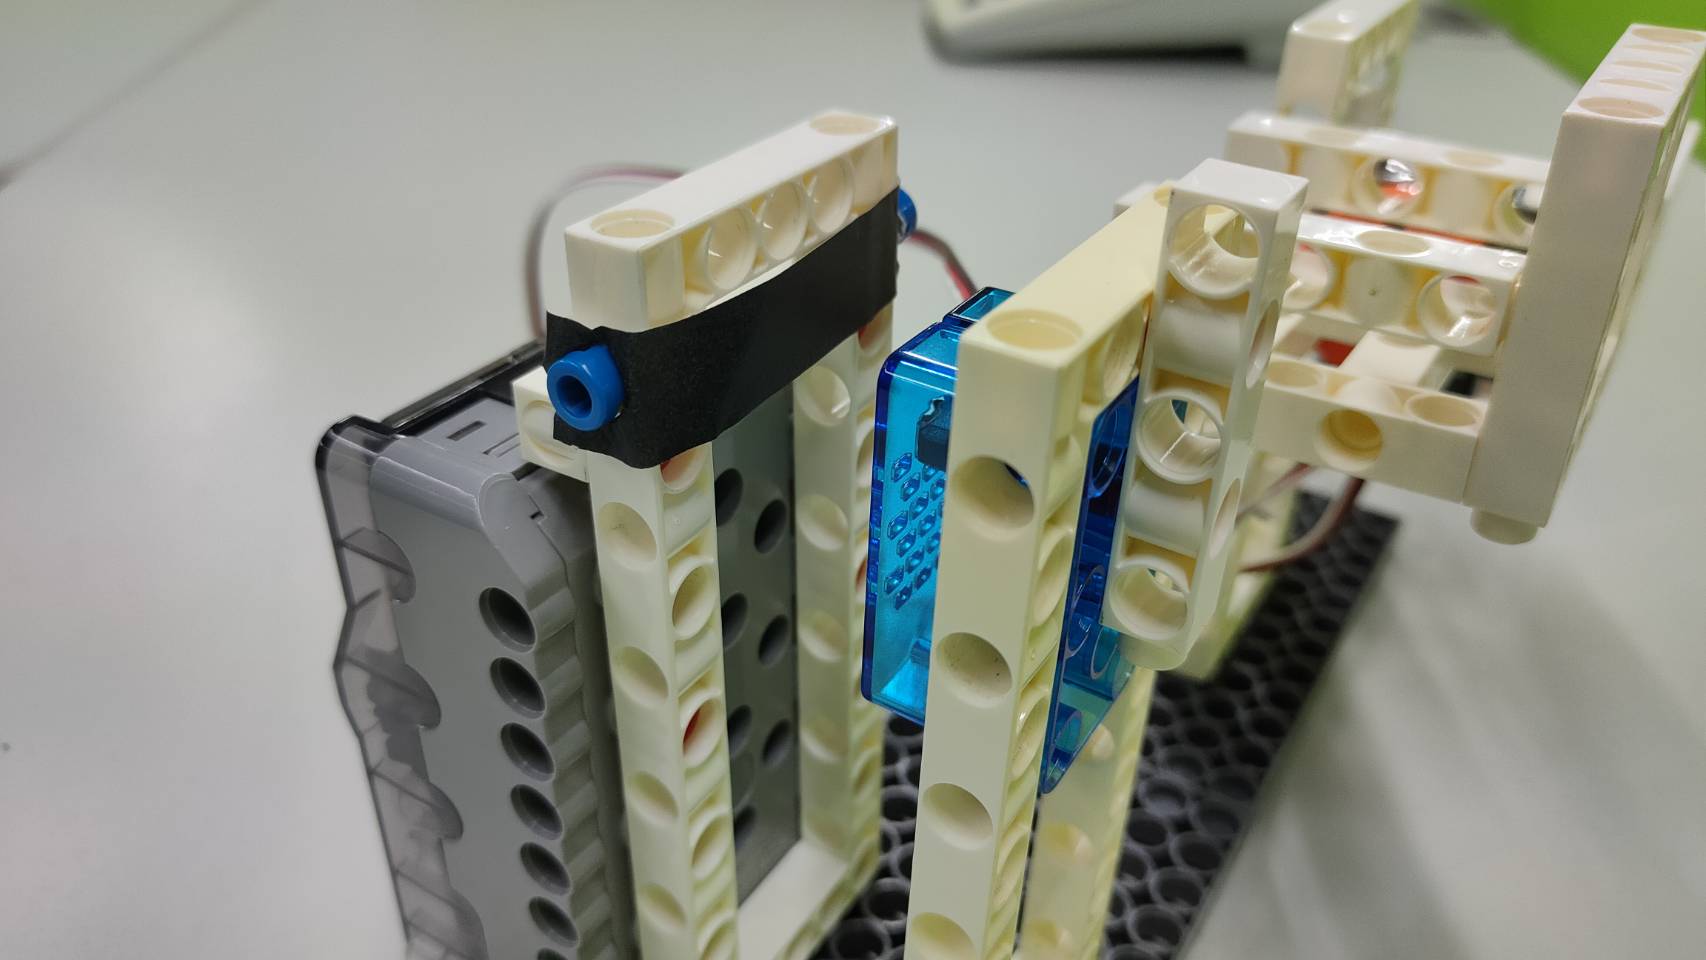
※If the IR sensor keeps detecting items, you can add a black paper behind the coin slot so that the IR sensor will not determine that it has detected an item when it is idle.
◆Summary and Tidy up (10 minutes)
1. At the end of the course, teachers can give a summary that includes the history of vending machine.
2. Ask the students to take apart the models, sort the pieces, and put them back in their proper places. Remind them to use a peg remover to take the parts apart instead of forcing them.
◆Scientific Principles
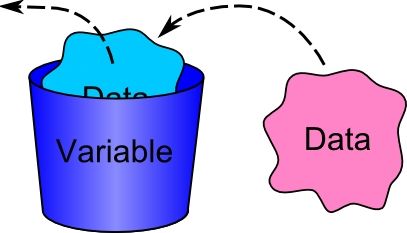
The scientific principle employed in this model is known as "variables."
In programming, a "variable" represents a value that is not fixed and can be altered at any given time. Variables are utilized to store and track changing data or values, commonly used for tracking variables like health points, lives, or cumulative counts in games. Variables serve as convenient containers for storing desired data or values that can be easily modified.
In this model, we employ variables to keep track of the number of coins tossed, allowing for continuous increment or decrement. This enables us to sell various items at different prices based on the recorded variable values.
◆Postscript
The micro:bit is a widely popular programming teaching tool that has gained global recognition in recent years. Its standout feature is its immediate execution upon connecting it to a computer via USB. The advantage of not needing to spend time on assembling parts, installing software, or purchasing a complete set of sensors and electronic components is invaluable, especially within a limited teaching session.
There are still numerous untapped functions and possibilities awaiting exploration with micro:bit. Let us anticipate our next adventure together!
Keywords:
Coding Education, micro:bit, Vending Machine, Infrared Sensing, Variables.
Curriculum:
3-PS2-1 Plan and conduct an investigation to provide evidence of the effects of balanced and unbalanced forces on the motion of an object.
3-5-ETS1-1 Define a simple design problem reflecting a need or a want that includes specified criteria for success and constraints on materials, time, or cost.
3-5-ETS1-2 Generate and compare multiple possible solutions to a problem based on how well each is likely to meet the criteria and constraints of the problem.
Please sign in to vote.
