[Educational Time Machine EP1] Light and Shadow in Daily Science - Projector, the Predecessor of Computer

![[Educational Time Machine EP1] Light and Shadow in Daily Science - Projector, the Predecessor of Computer](/content/images/size/w2000/2023/01/327900.jpg)
An old saying is "Ten years to grow trees, a hundred years to grow people". From the oldest murals, the creation of characters, and the production of paper, people have continuously improved teaching methods in order to transfer knowledge effectively, especially after the emergence of digital technology.
In digital technology era, learning has more diversified development. However, in the era without portable computers and the Internet, there was a machine that was commonly used as teaching equipment. It could present large and bright images and attracted the attention of students. It is the projector, here we want to introduce.
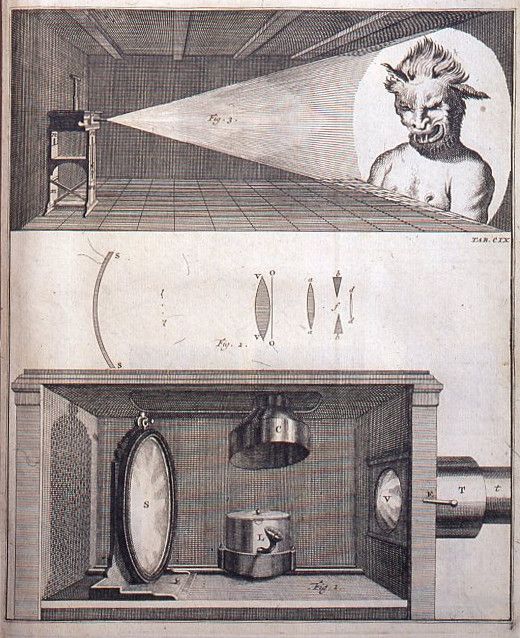
The projector is a visual communication medium that is easy to operate and used widely. We only need to write data diagrams or texts on the transparent sheet, and use the light to project the information on the transparent sheet through the refracting mirror; after the enlargement, the information can clearly appears on the curtain or wall, which satisfies the need for showing data quickly in classroom that the traditional blackboards cannot do.
Now let us make a miniature projector together and design a course!
◆Preparation (5 minutes)
1. Prepare pictures and videos about the projector, or let students directly observe the projector equipment
2. Encourage students to discuss the working principle of the projector, and then explain that the early projectors could project the information on the transparent sheet after the light source irradiated the refracting mirror.
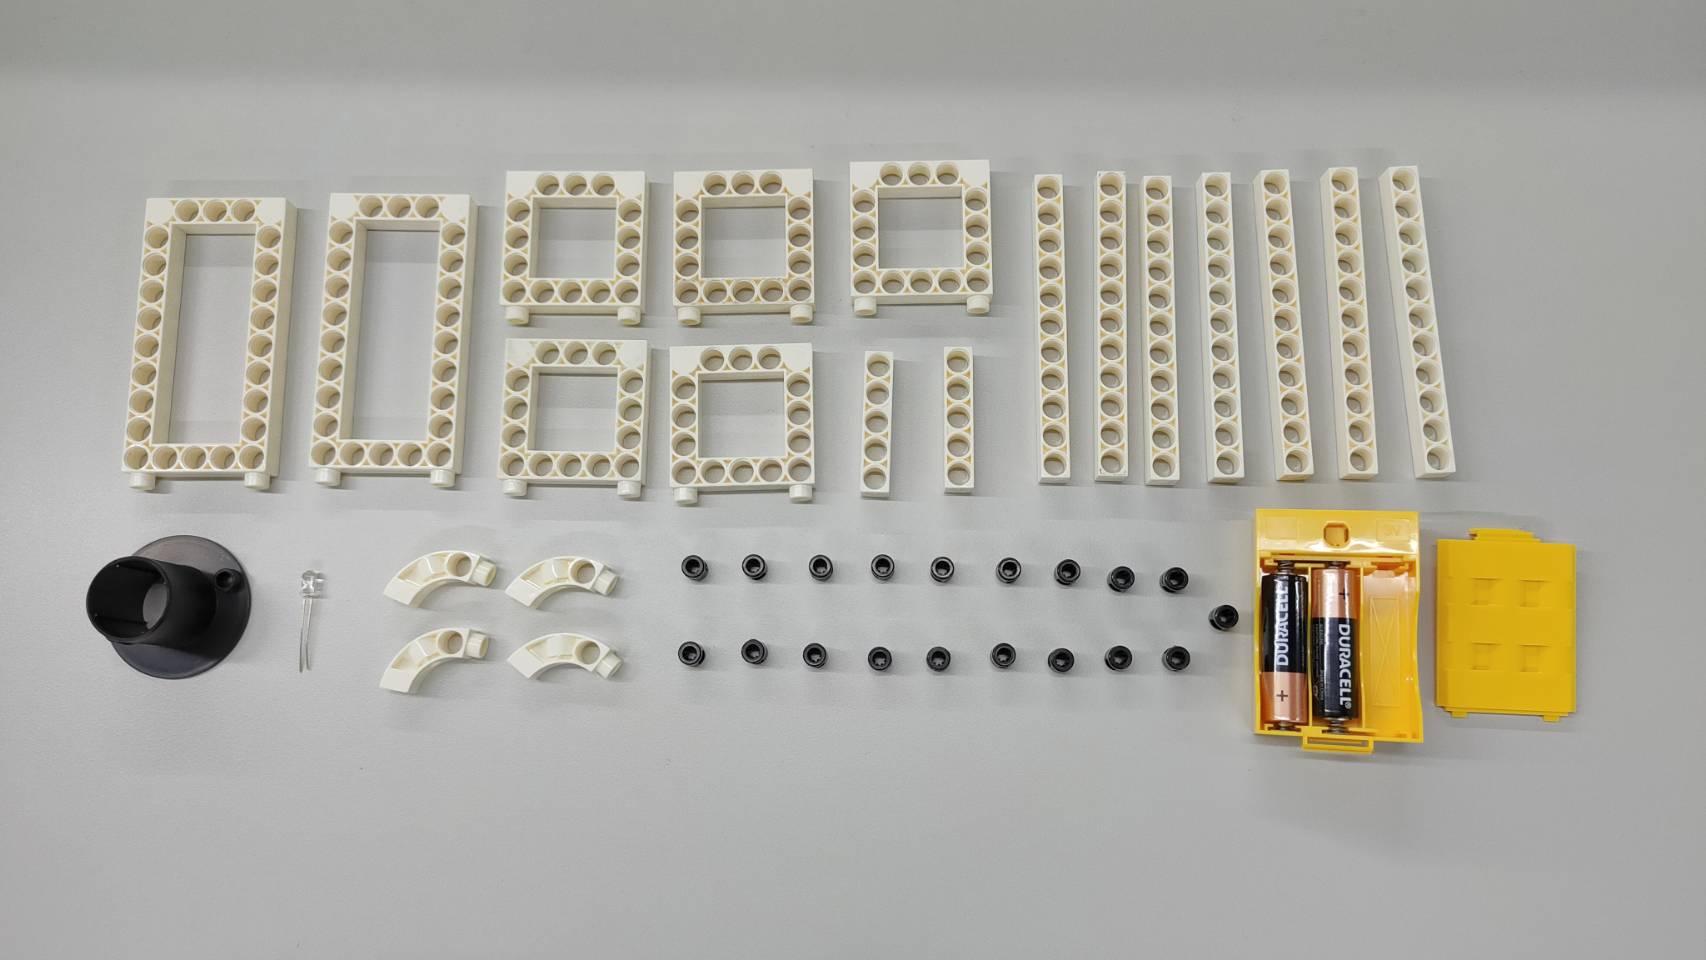
3. Prepare the components required for the model, including the C-EYEPIECE BASE in the #1243R Optical Device as shown in the figure below.
◆Demonstration of model making (10 minutes)
You can refer to the following assembly steps to make the model.
* It is recommended to review the functions of components with students during the demonstration, such as B-SHORT PEG and C-LONG PEG .
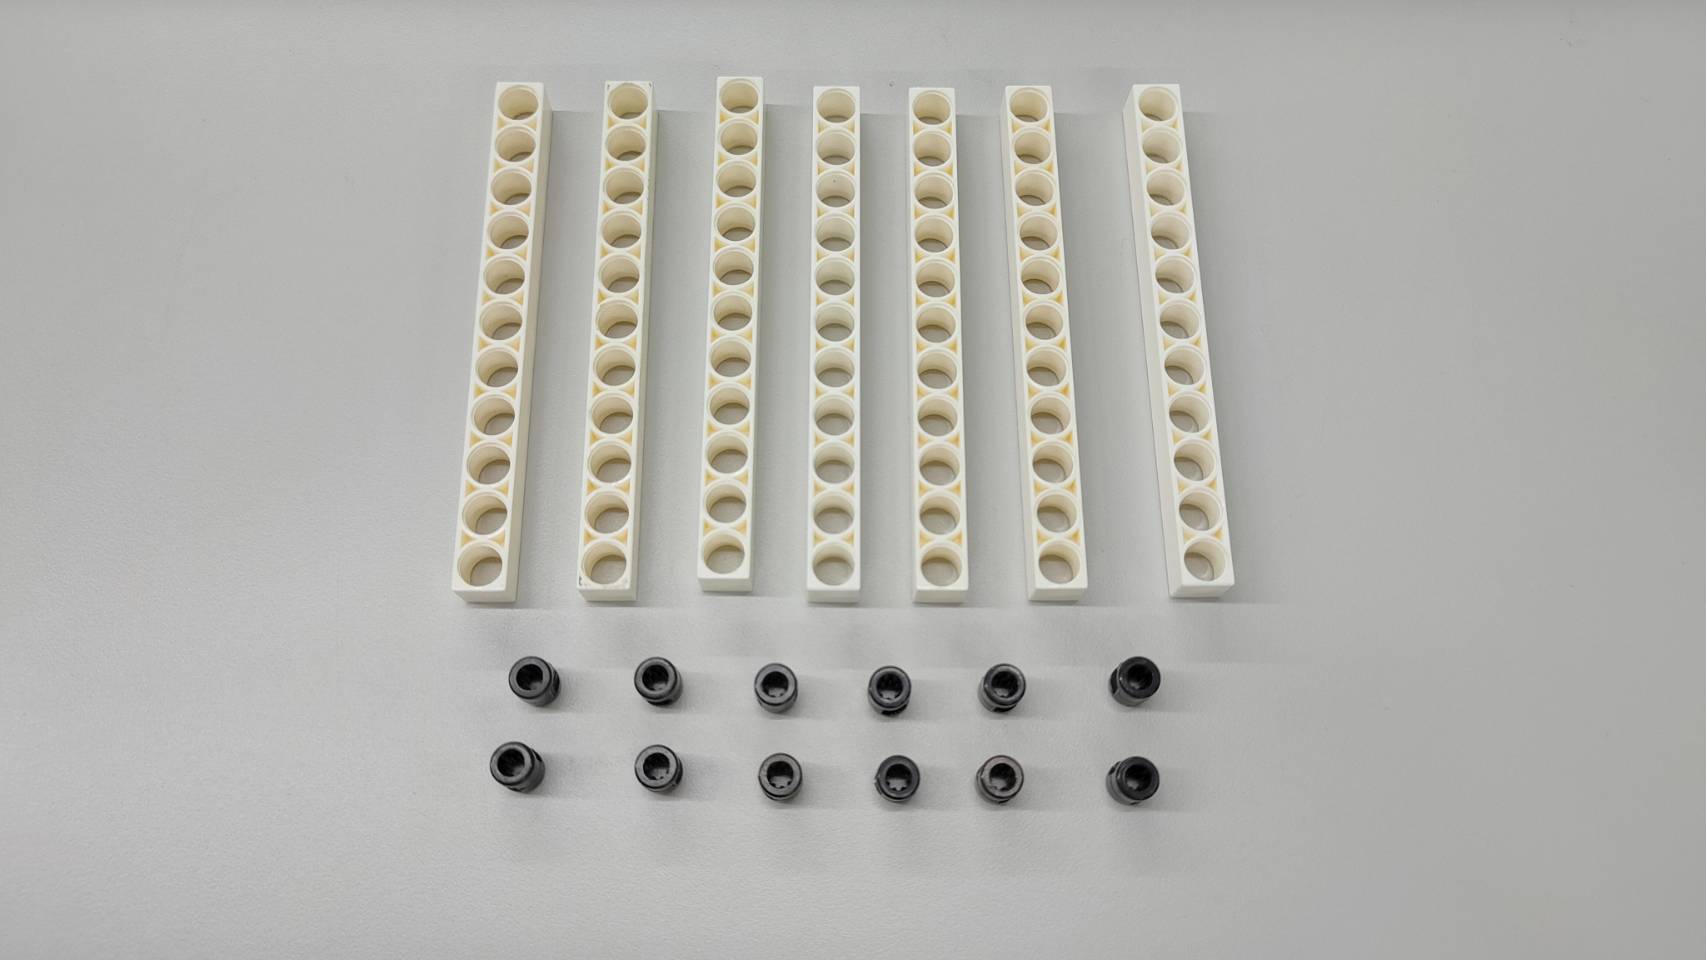
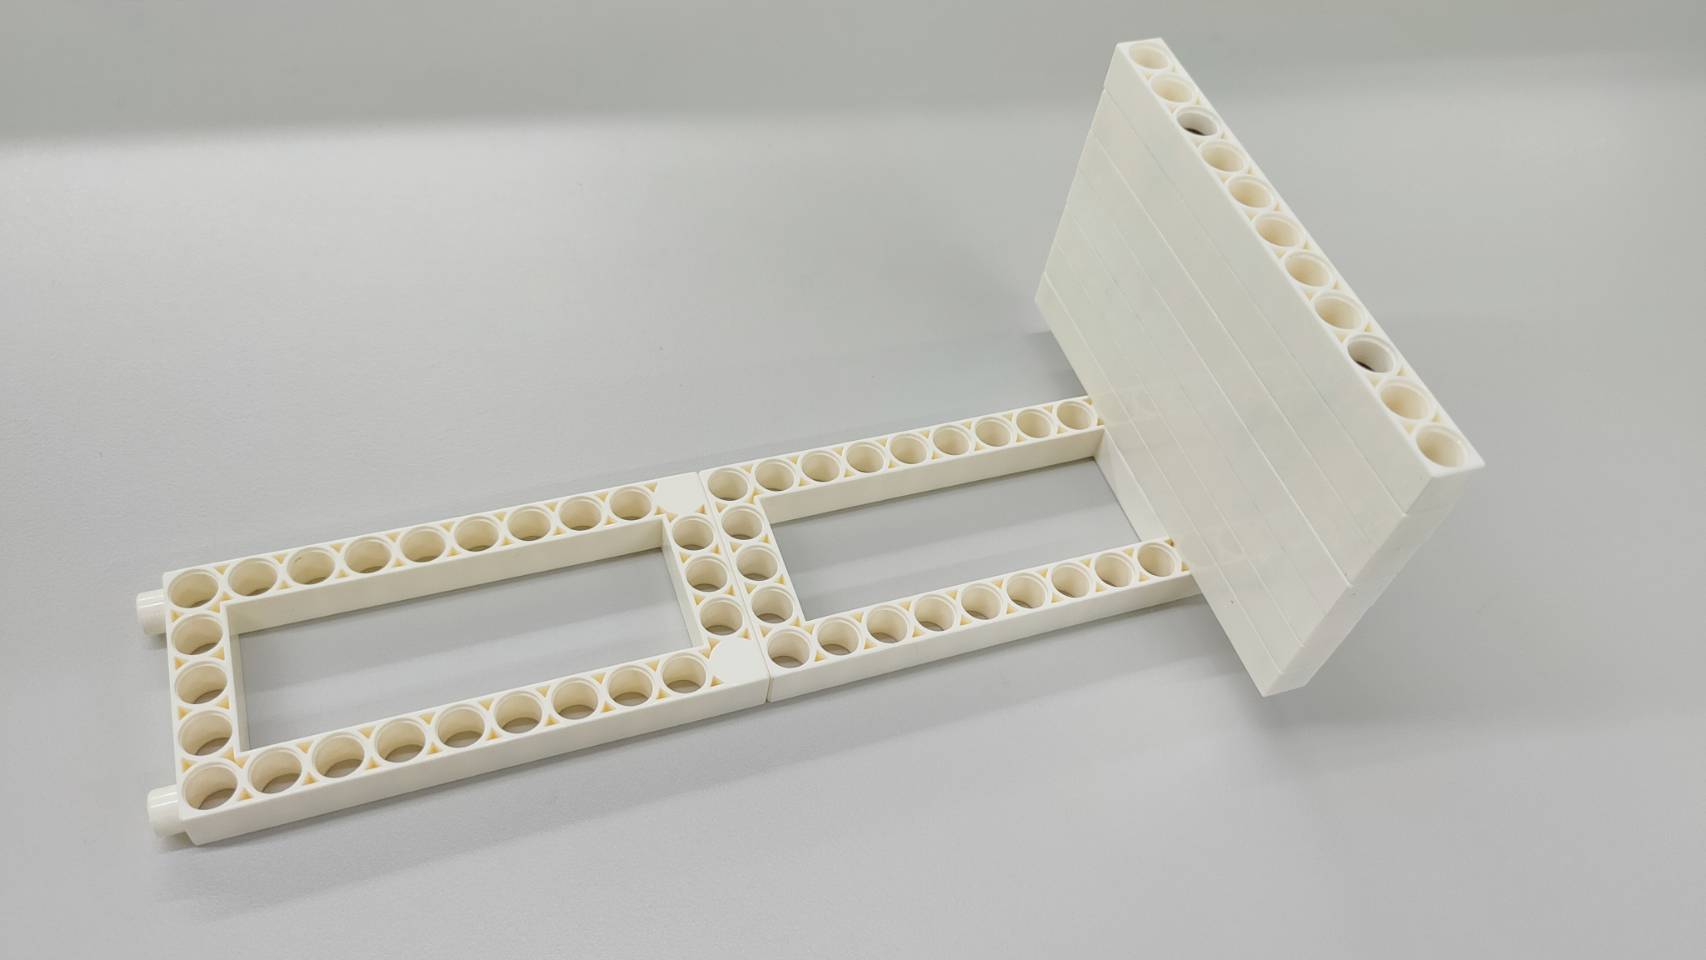
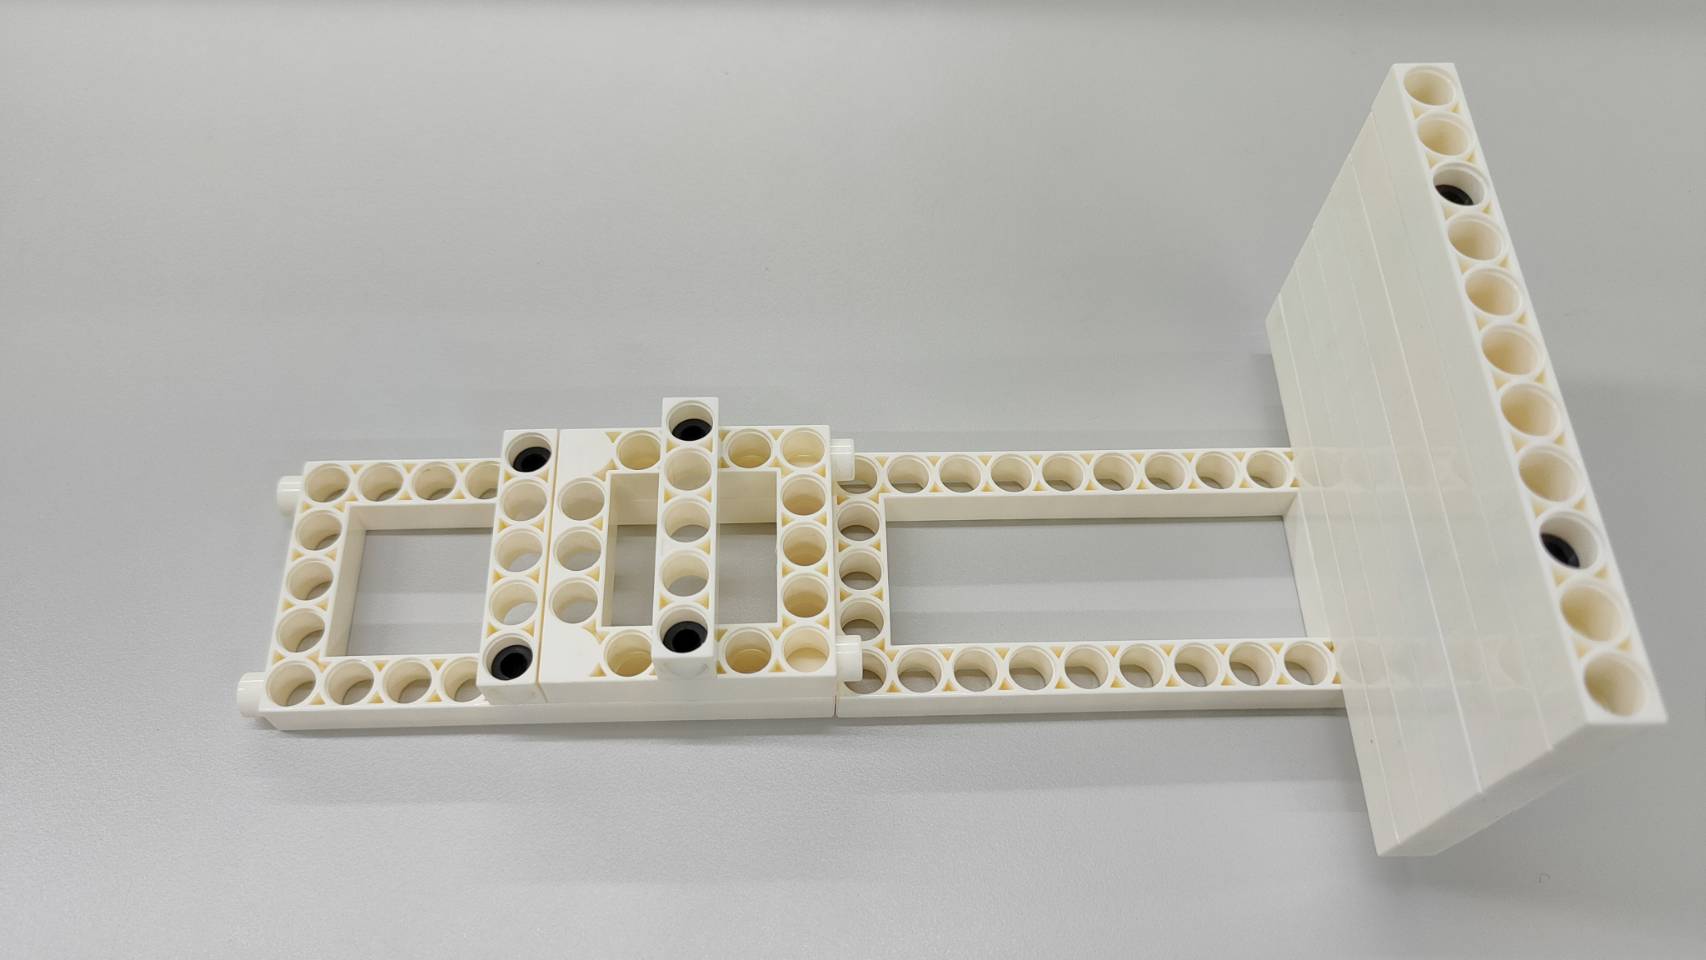
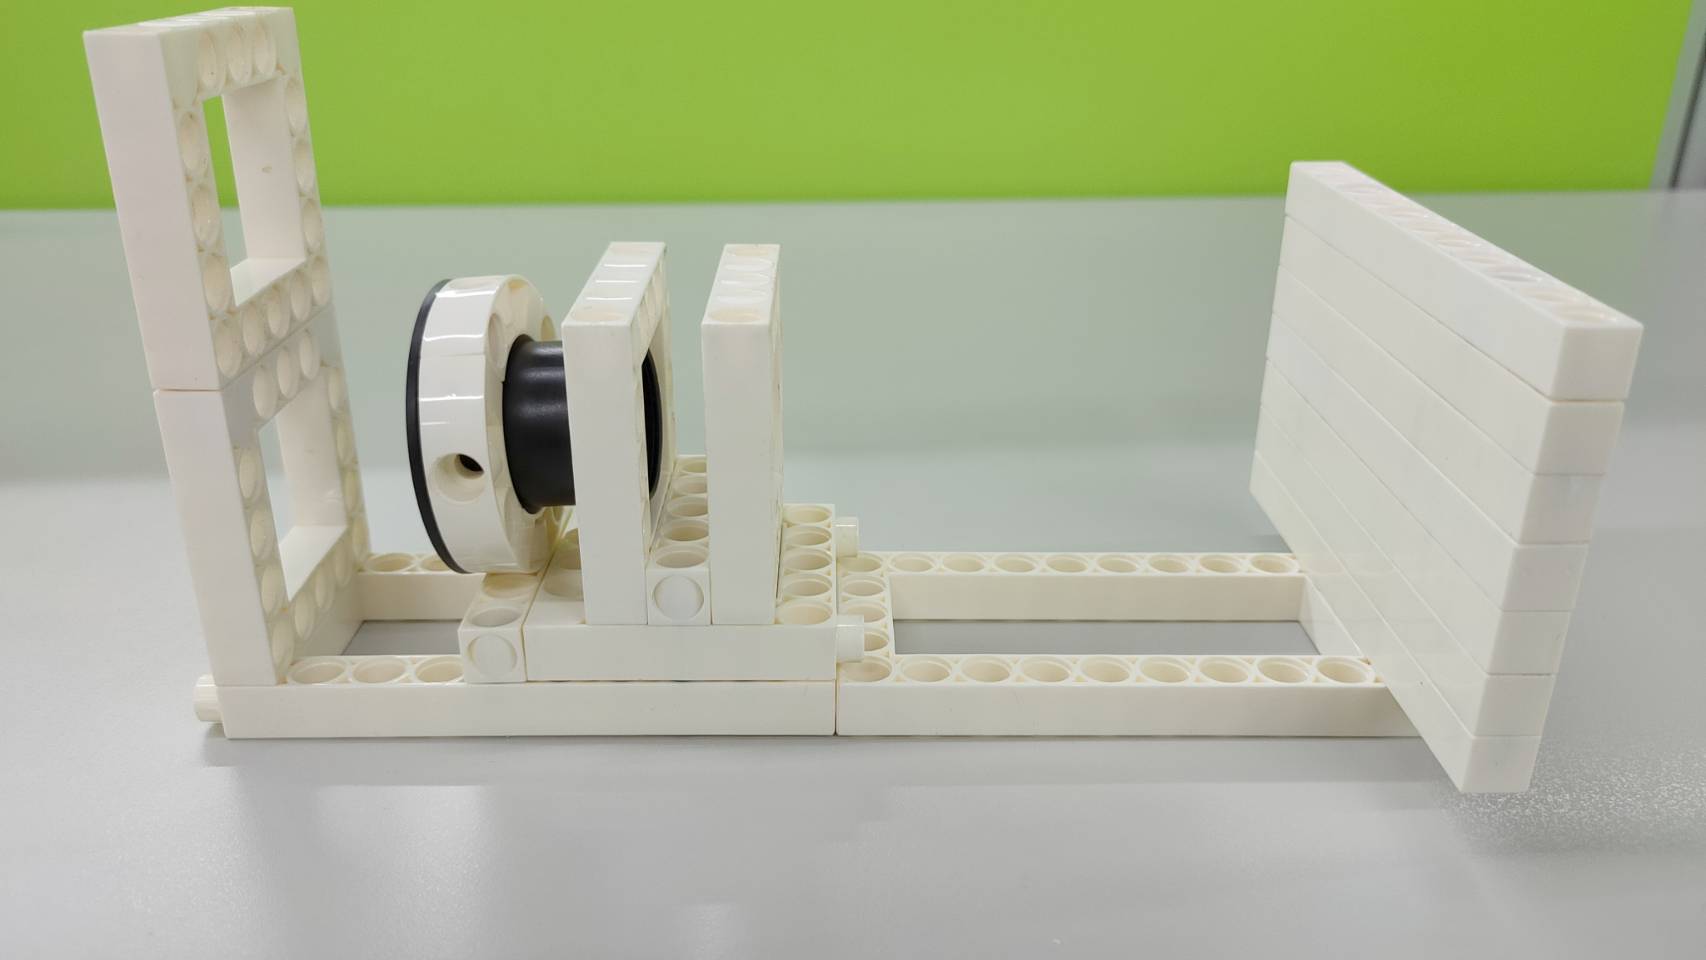
Step 1: Use B-SHORT PEG to combine all C-11 HOLE ROD to make a projection screen.
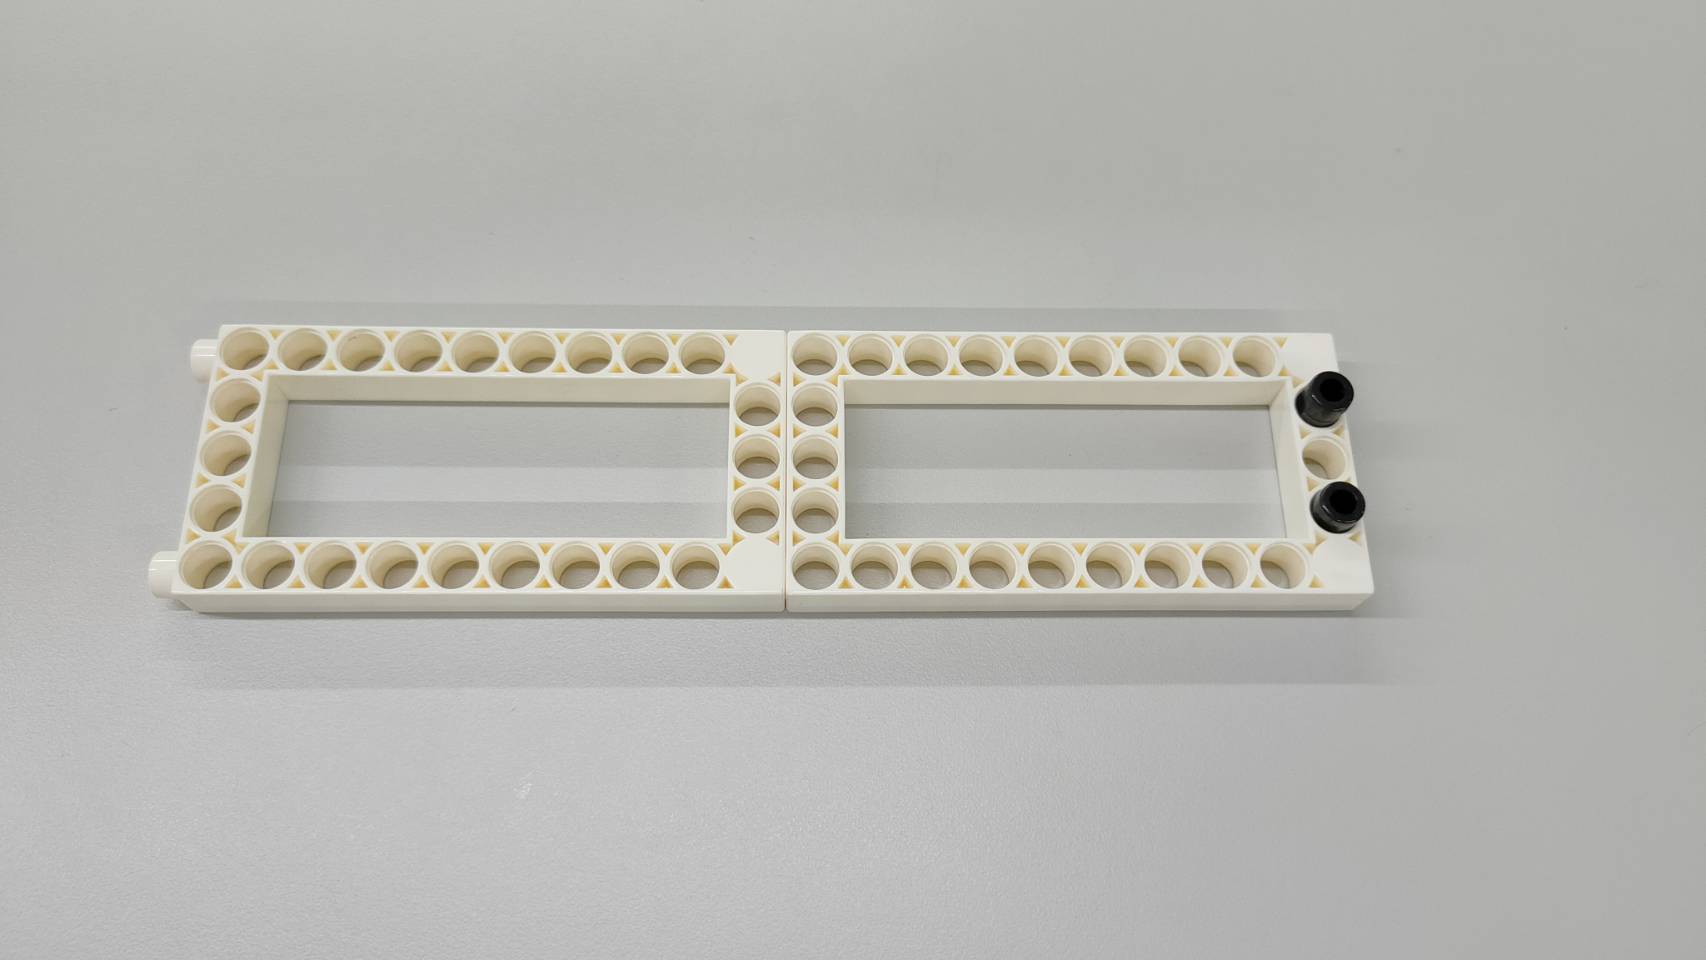
Step 2: Connect the two C-5X10 FRAME, and install the B-SHORT PEG and the projection screen in sequence.
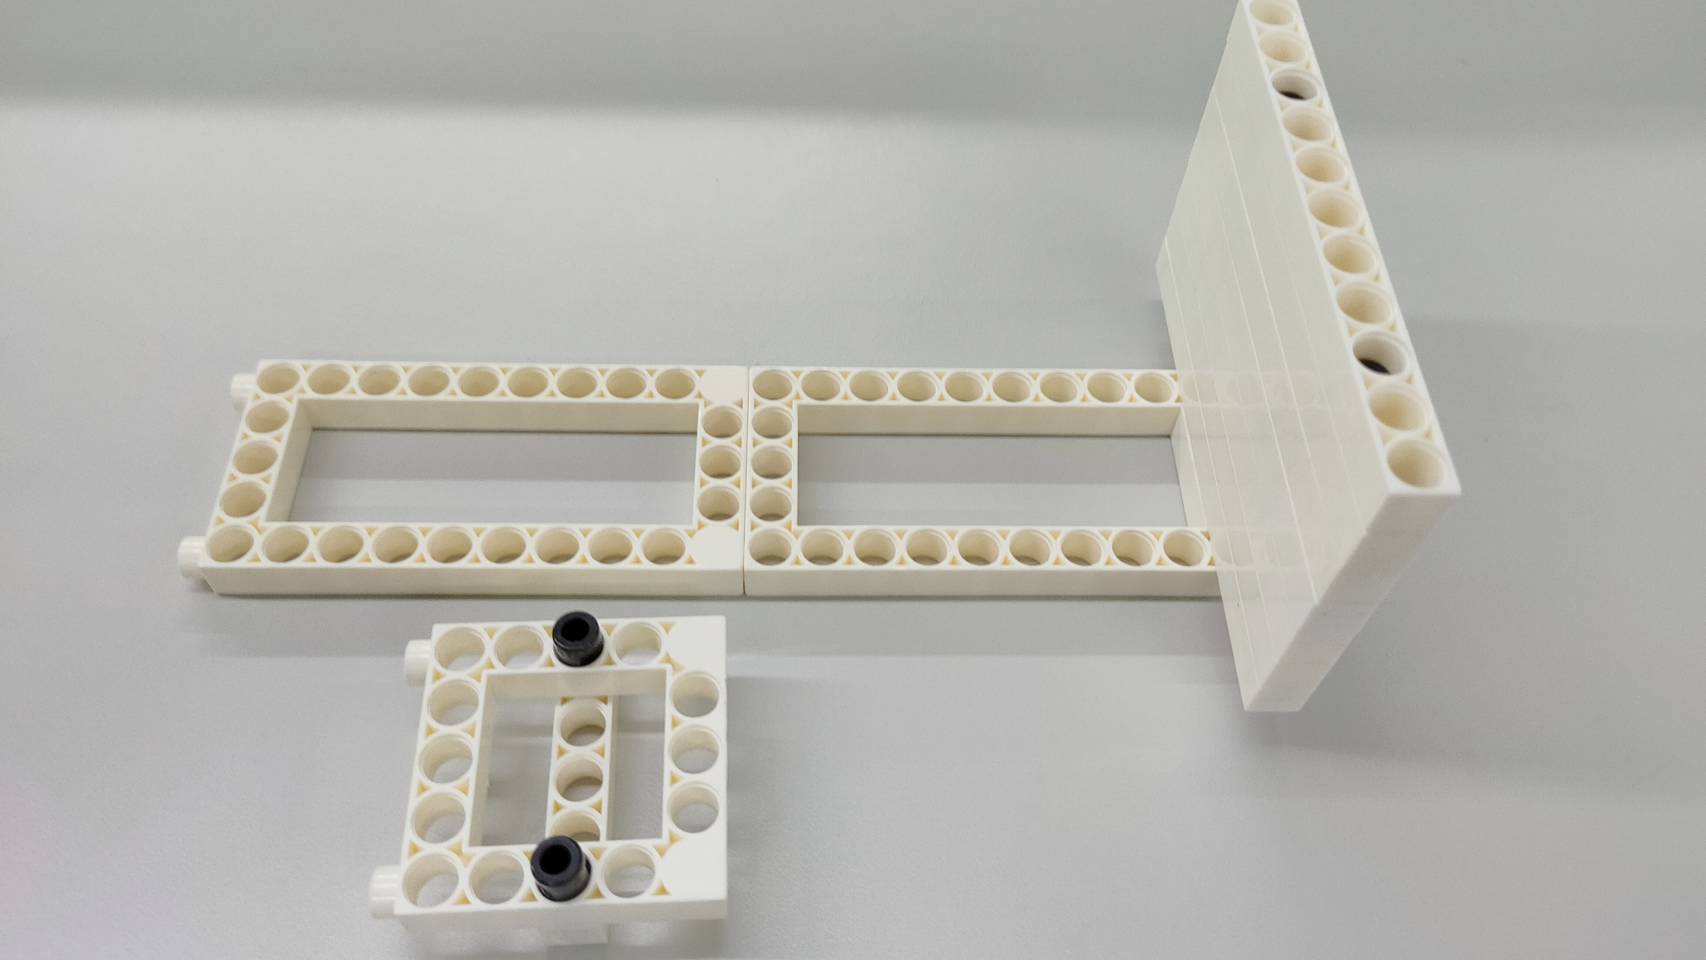
Step 3: Connect the B-SHORT PEG, the C-5X5 FRAME, and the C-5 HOLE ROD as shown in the figure, and install them on the base.
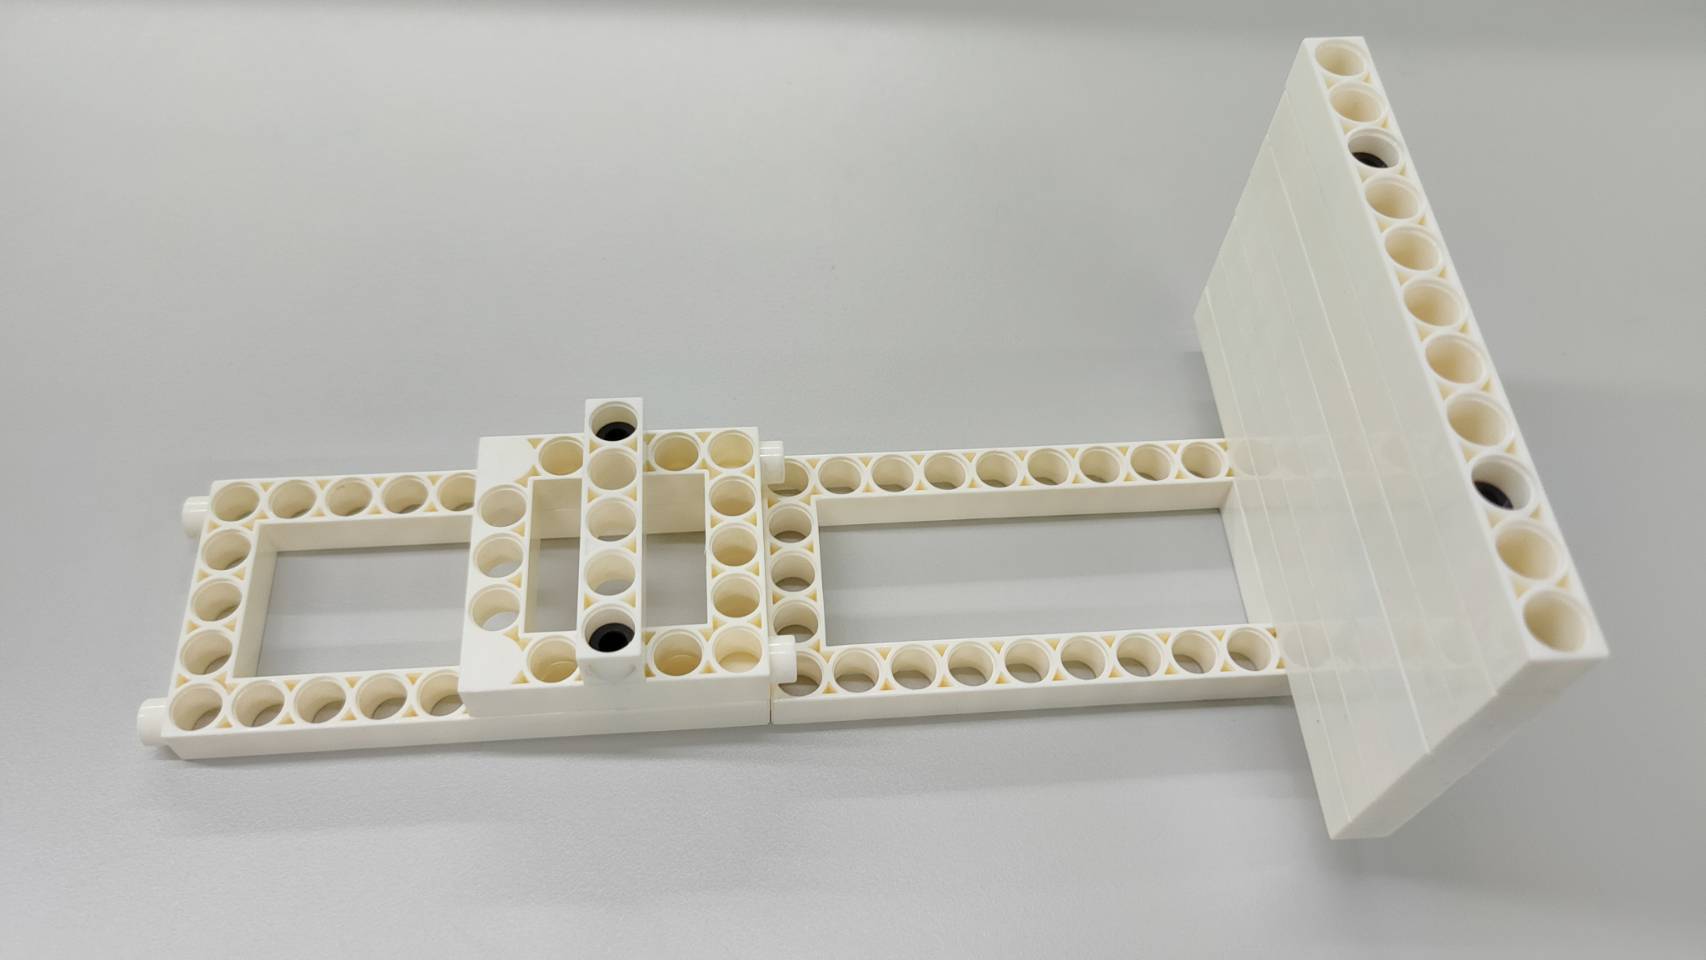
Step 4: Install the B-SHORT PEG, the C-5X5 FRAME, and the C-5 HOLE ROD to the corresponding positions in sequence according to the figure.
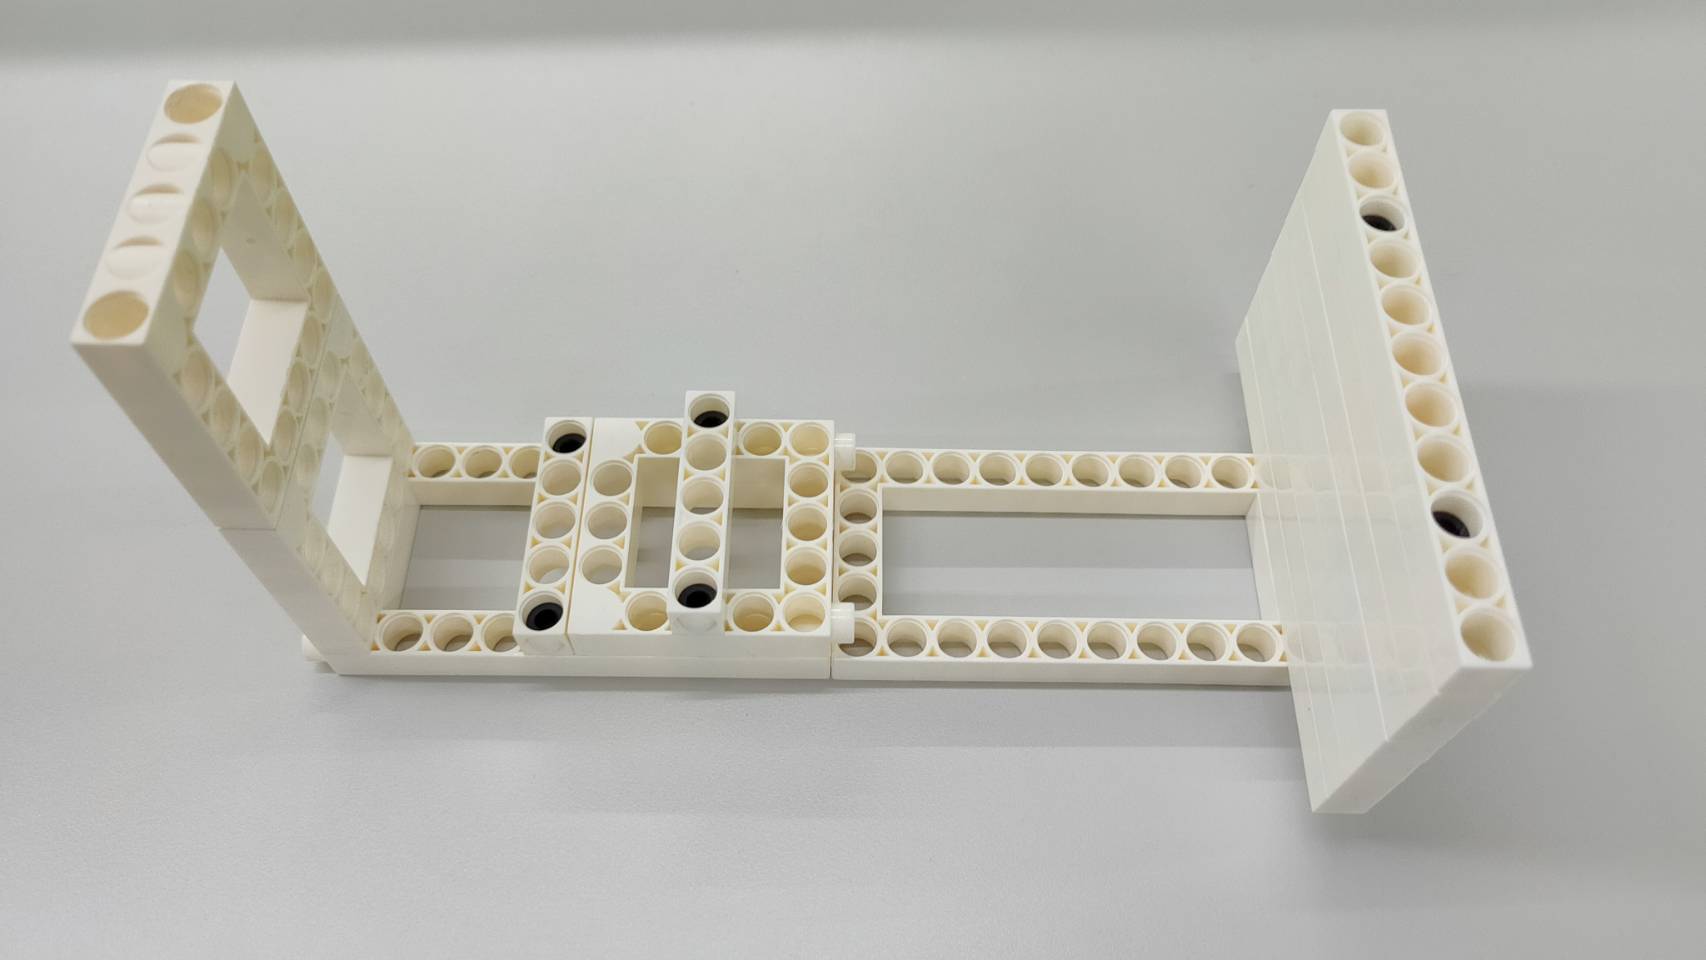
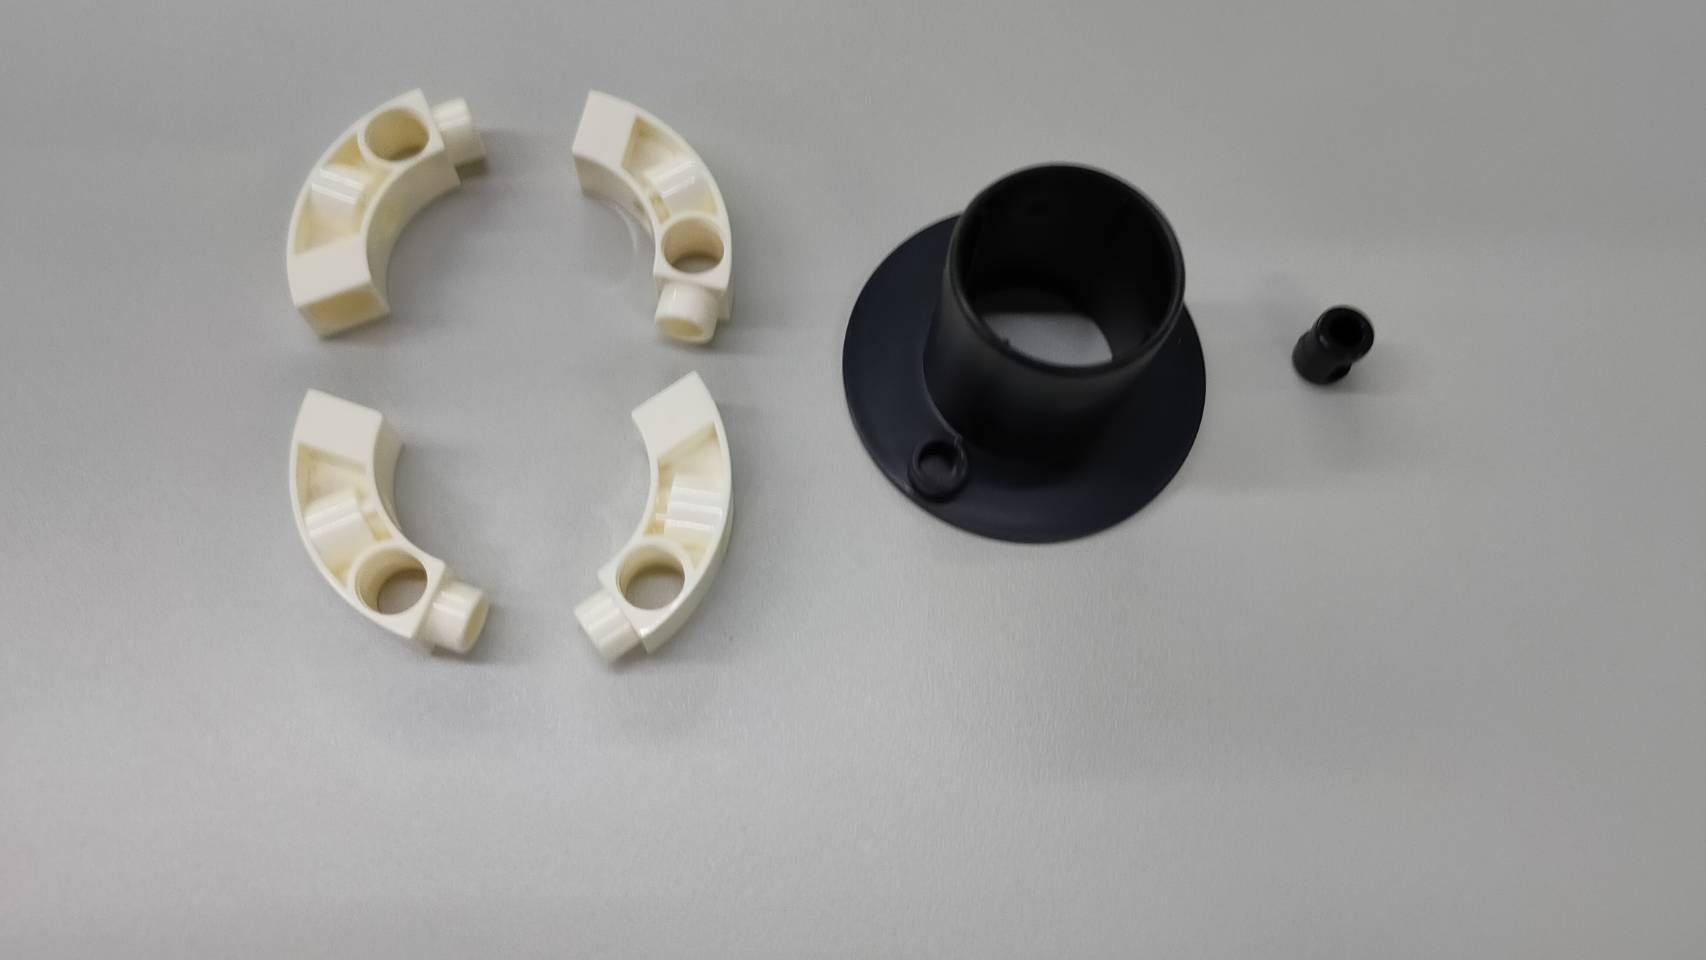
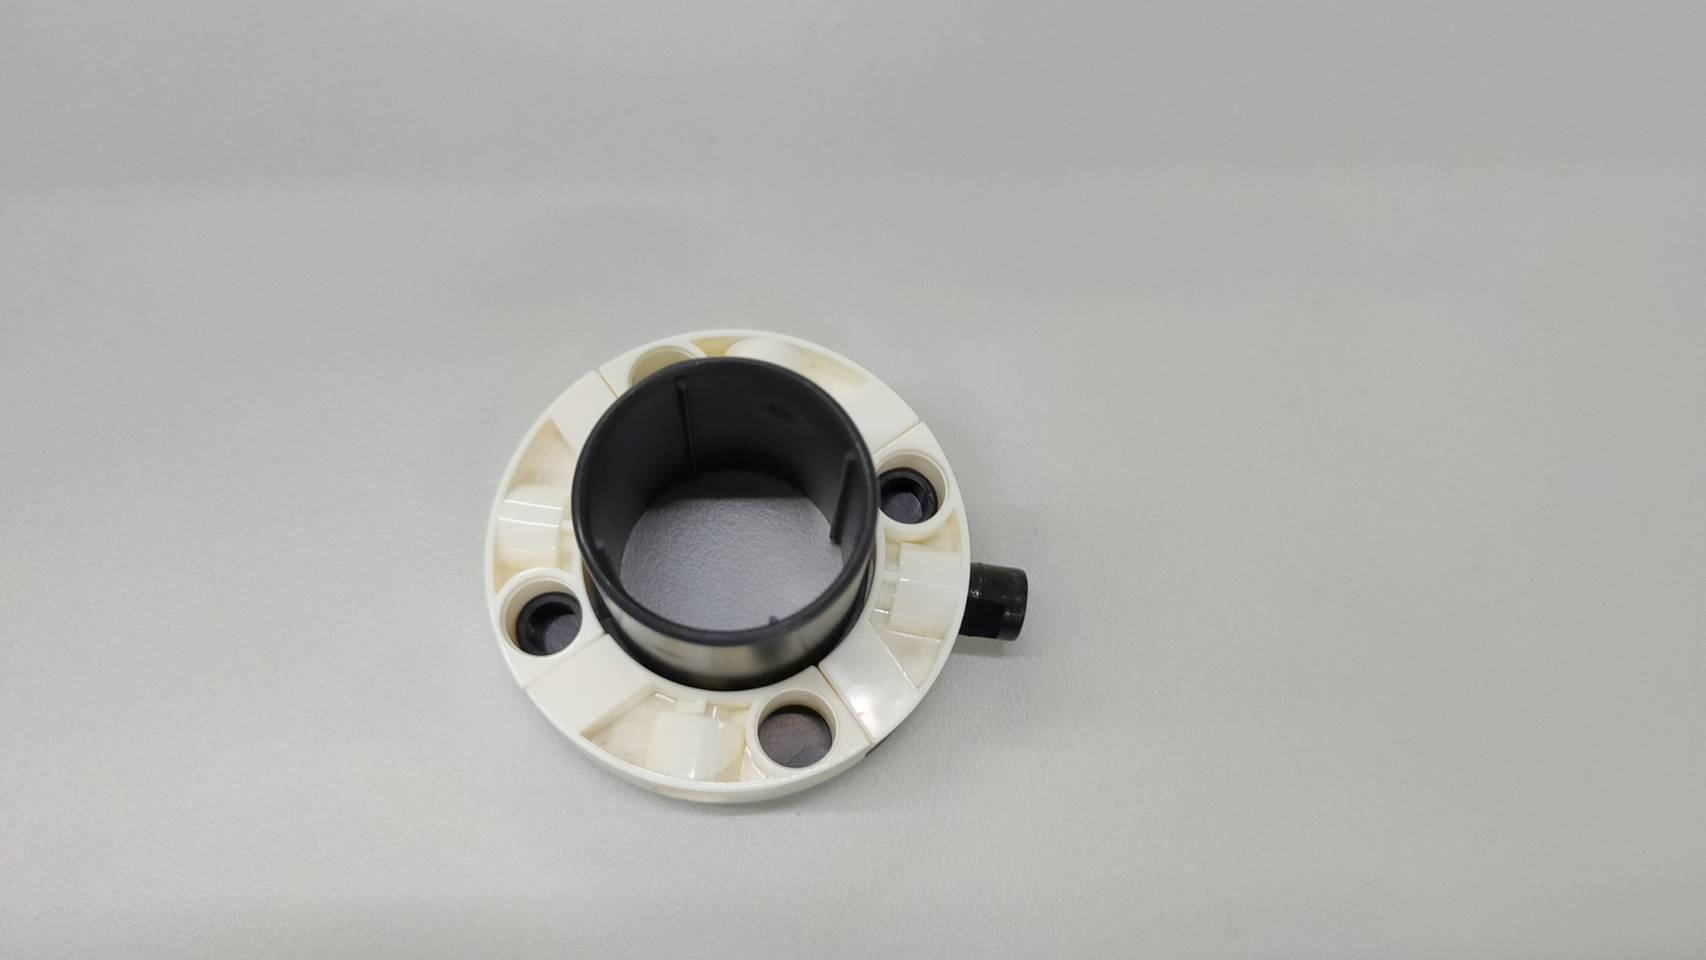
Step 5: Take four C-BENDED ARCH ROD and make a circle, and combine the circle with C-EYEPIECE BASE and B-SHORT PEG.
Step 6: Install the C-EYEPIECE BASE and the two C-5X5 FRAME to the corresponding positions according to the figure.
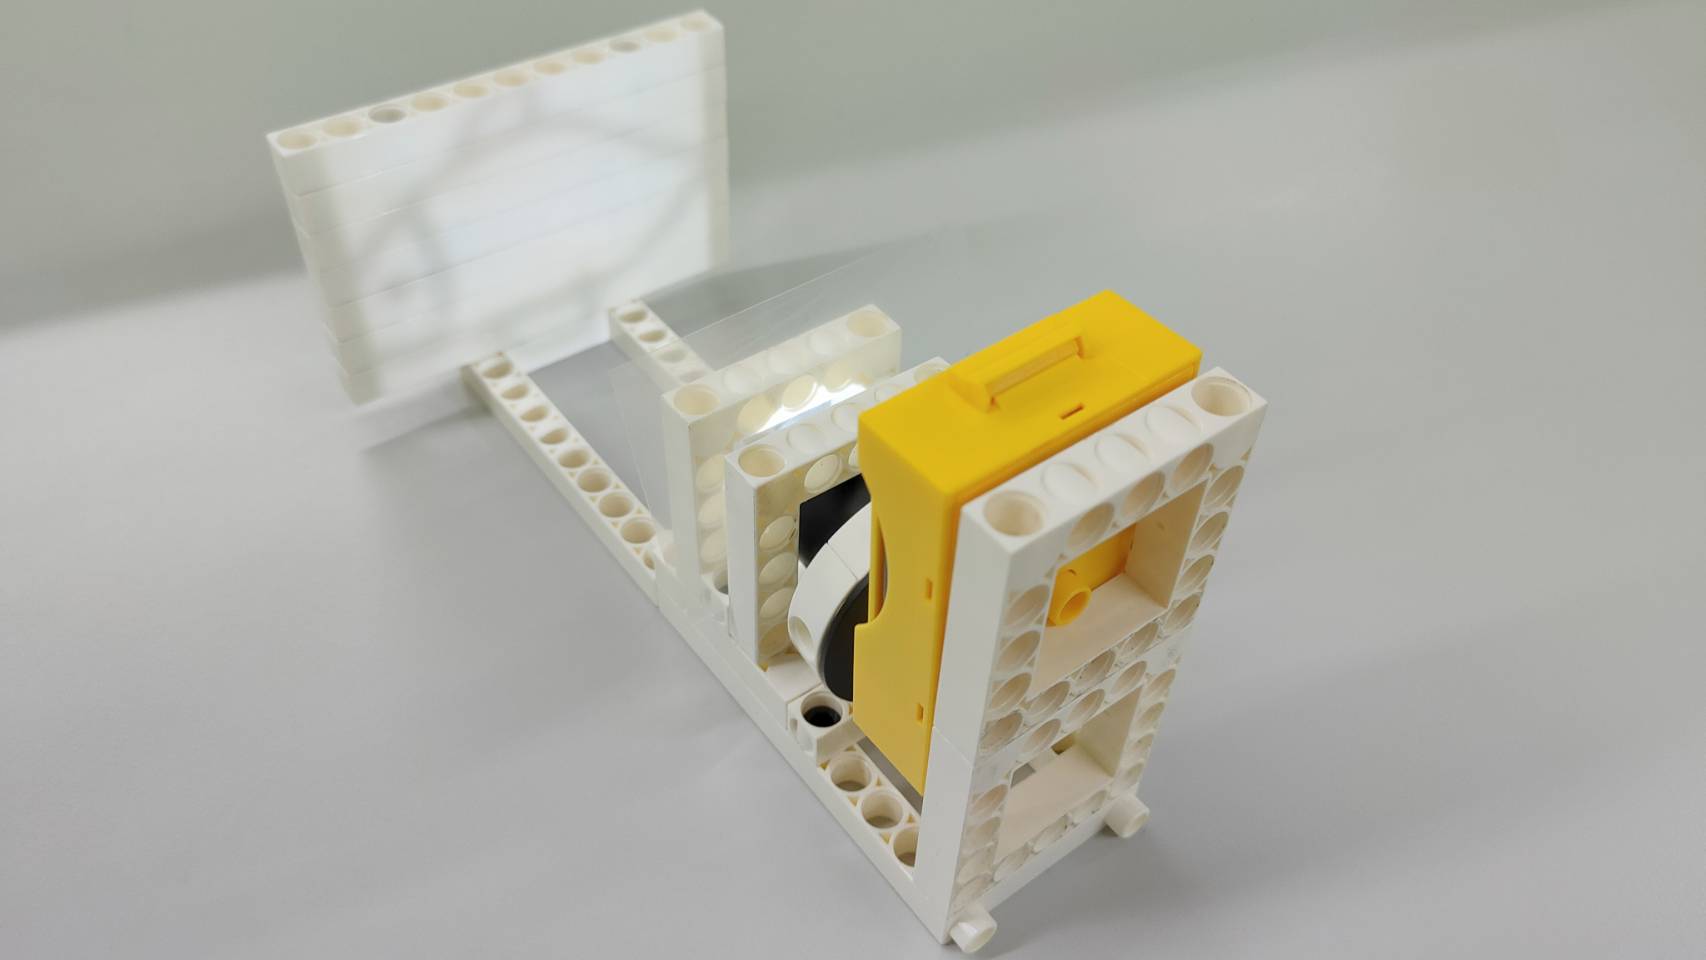
Step 7: Install the LED light bulb on the battery holder and place it in front of the light tube
(it is recommended to use a white LED light)

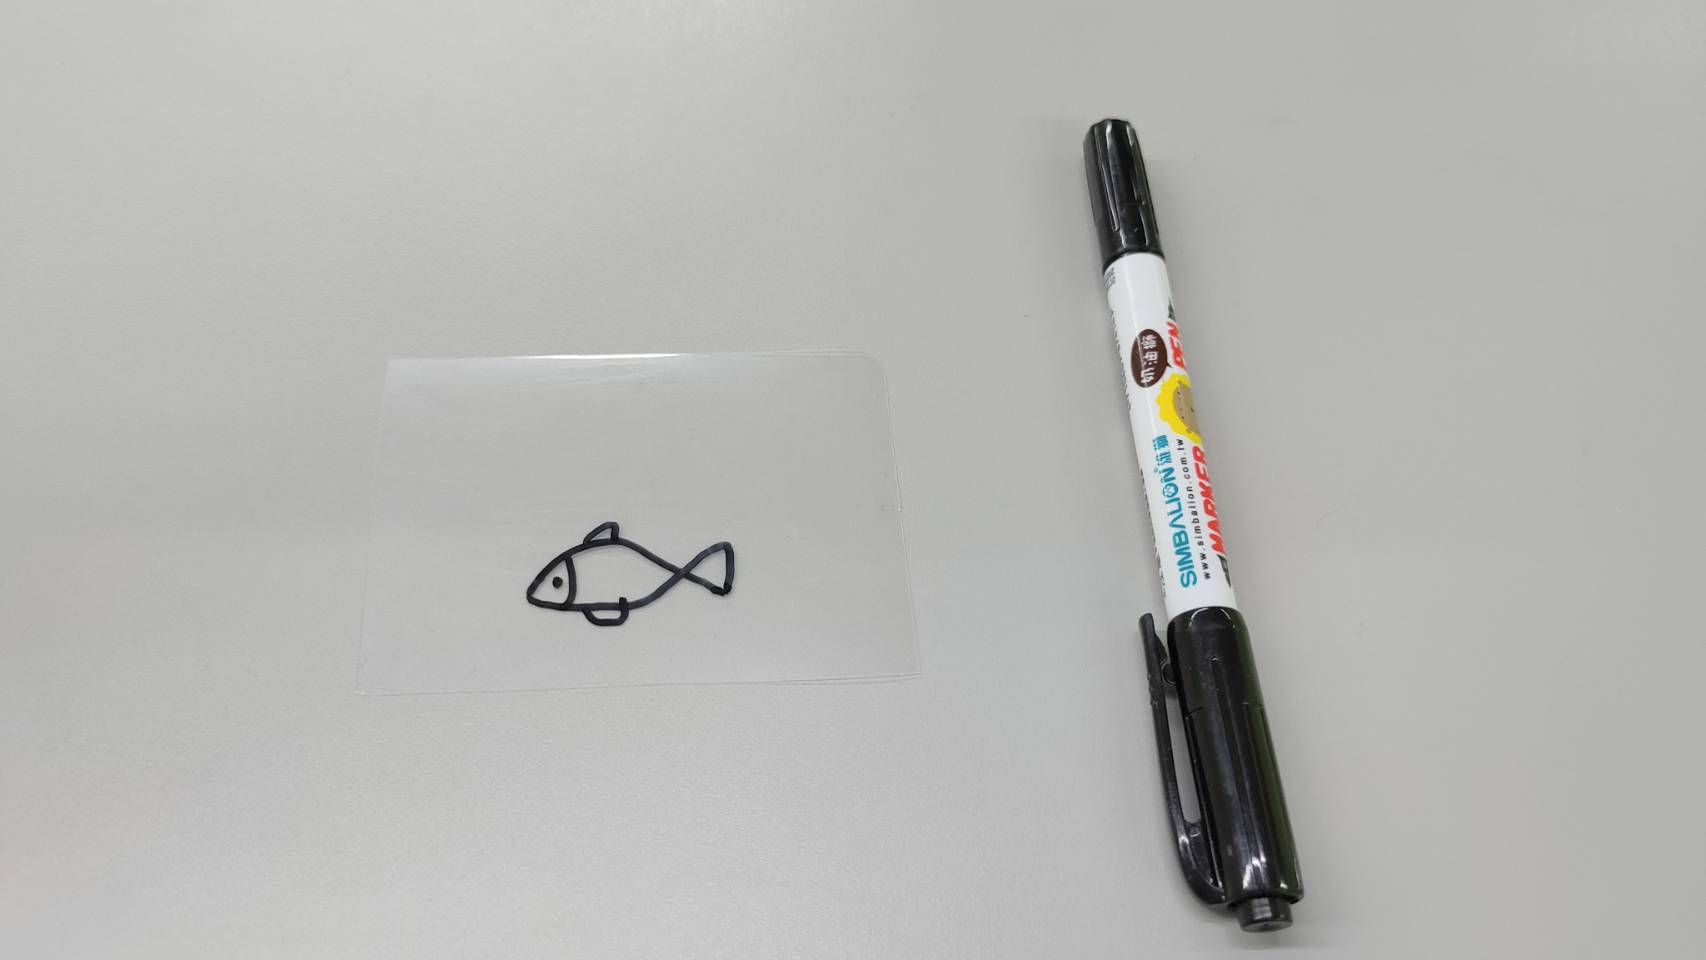
Step 8: Use a permanent marker to draw any pattern on the top of the transparent plastic sheet, and place it in the middle of the C-5X5 FRAME after completion.
◆Production and Play (20 minutes)
1. Let the students assemble the projector model by themselves, and the teacher can provide assistance in due course.
2. If students have completed the model, students can draw patterns on the transparent sheet. Let’s see what creativity everyone can have.
3. If we change the position of the slide, what will happen if it is closer to the light source or farther away from the light source?
4. If time is sufficient, students can draw a series of patterns and form an animation story with explanations.
◆Summary and Tidy up (5 minutes)
1. Teachers can make a summary at the end of the course and talk about the scientific principles used in this model.
*This model uses the principle of light and shadow:
Because the transparent sheet is transparent, light will pass through it directly after being irradiated.
However, the pattern drawn by the permanent marker does not transmit light, so it blocks the light and forms a shadow, and the closer the light source is to the transparent sheet, the larger the shadow formed.
2. Teachers can explain different types of projectors, so that students can understand how projectors evolve into digital projectors.
3. Ask the students to disassemble the models, classify them and return them to their correct positions. Remind students to use a peg remover to disassemble parts safely.
◆Postscript
With the rapid development of technology, today's projectors are directly connected to computers, DVDs, game consoles, DVs and other equipment to present colorful images. Through this model, we can help students understand the evolution of technology, and students can experience how traditional slides work, draw their favorite patterns, and gain a sense of accomplishment!
Let us jump into the next adventure of the educational time machine!
1-PS4-2
Make observations to contruct an evidence-based account that objects in darkness can be seen only when illuminated.
1-PS4-3
Plan and conduct investigations to determine the effect of placing objects made with different materials in the path of a beam of light.
3-5-ETS1-1
Define a simple design problem reflecting a need or a want that includes specified criteria for success and constraints on materials, time, or cost.
3-5-ETS1-3
Plan and carry out fair tests in which variables are controlled and failure points are considered to identify aspects of a model or prototype that can be improved.
MS-PS4-2
Develop and use a model to describe that waves are reflected, absorbed, or transmitted through various materials.
Keywords:
Optics, shadow, lens, projector, technology, education
Please sign in to vote.