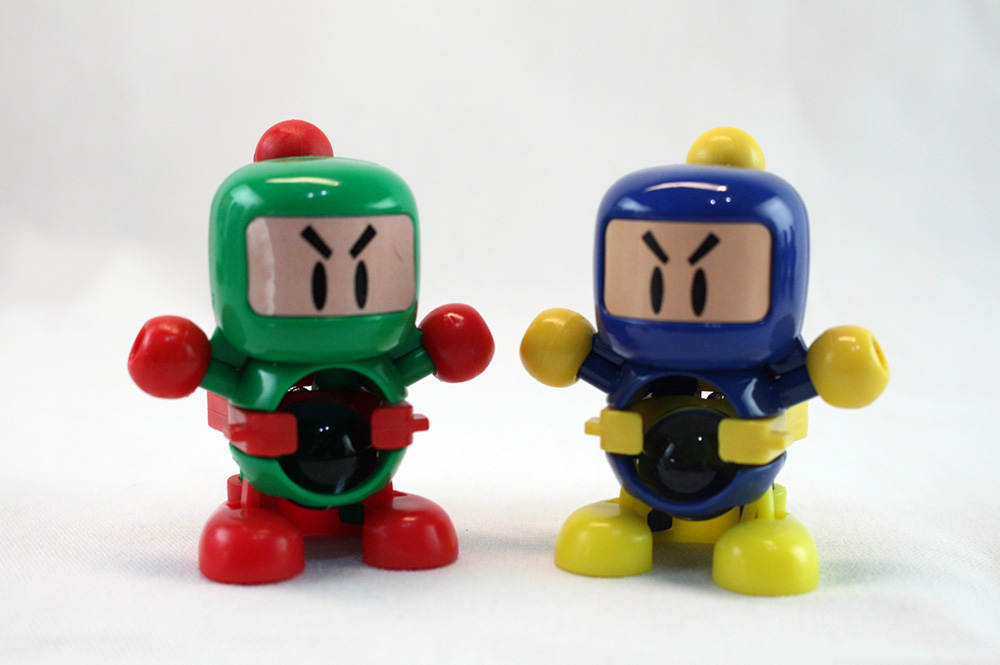
[Creative Treasure Box EP4] Bottle cap ready! Bottle cap battle! Here coms the Bottle cap hero!

![[Creative Treasure Box EP4] Bottle cap ready! Bottle cap battle! Here coms the Bottle cap hero!](/content/images/size/w2000/2024/12/376123_0.jpg)
Hello everyone, I'm Teacher Sloth! In this series, Teacher Sloth will share some block creations, some may be complex mechanical designs, while others may be simple model creations, so that every time you click on an article, it's like opening a "Creative Treasure Box," always full of unexpected surprises!
"1, 2, 3... Fire!" Hearing this phrase probably brings back fond childhood memories for those born in the '70s and '80s. It's the iconic toy that took the streets by storm—Marble Heroes!
Marble Heroes is a fun toy designed to load and launch marbles. Its cool design and exciting gameplay made it a favorite among kids and adults alike. Back in the days before 3C devices became widespread, almost everyone had their own Marble Hero, ready to engage in thrilling battles with friends!
Over time, incidents occurred where children accidentally swallowed marbles or were injured by shattered marbles. These safety concerns led people to rethink and modify the toy. What kind of component could be easily accessible, safe to launch, and free from the risk of accidental ingestion?
That’s when people turned to bottle caps, and the all-new Bottle Cap Heroeswere born! Along with this evolution came a new slogan: Bottle cap ready! Bottle cap battle!

Today, let’s create a Bottle Cap Hero using Gigo building blocks and design your very own ultimate hero!
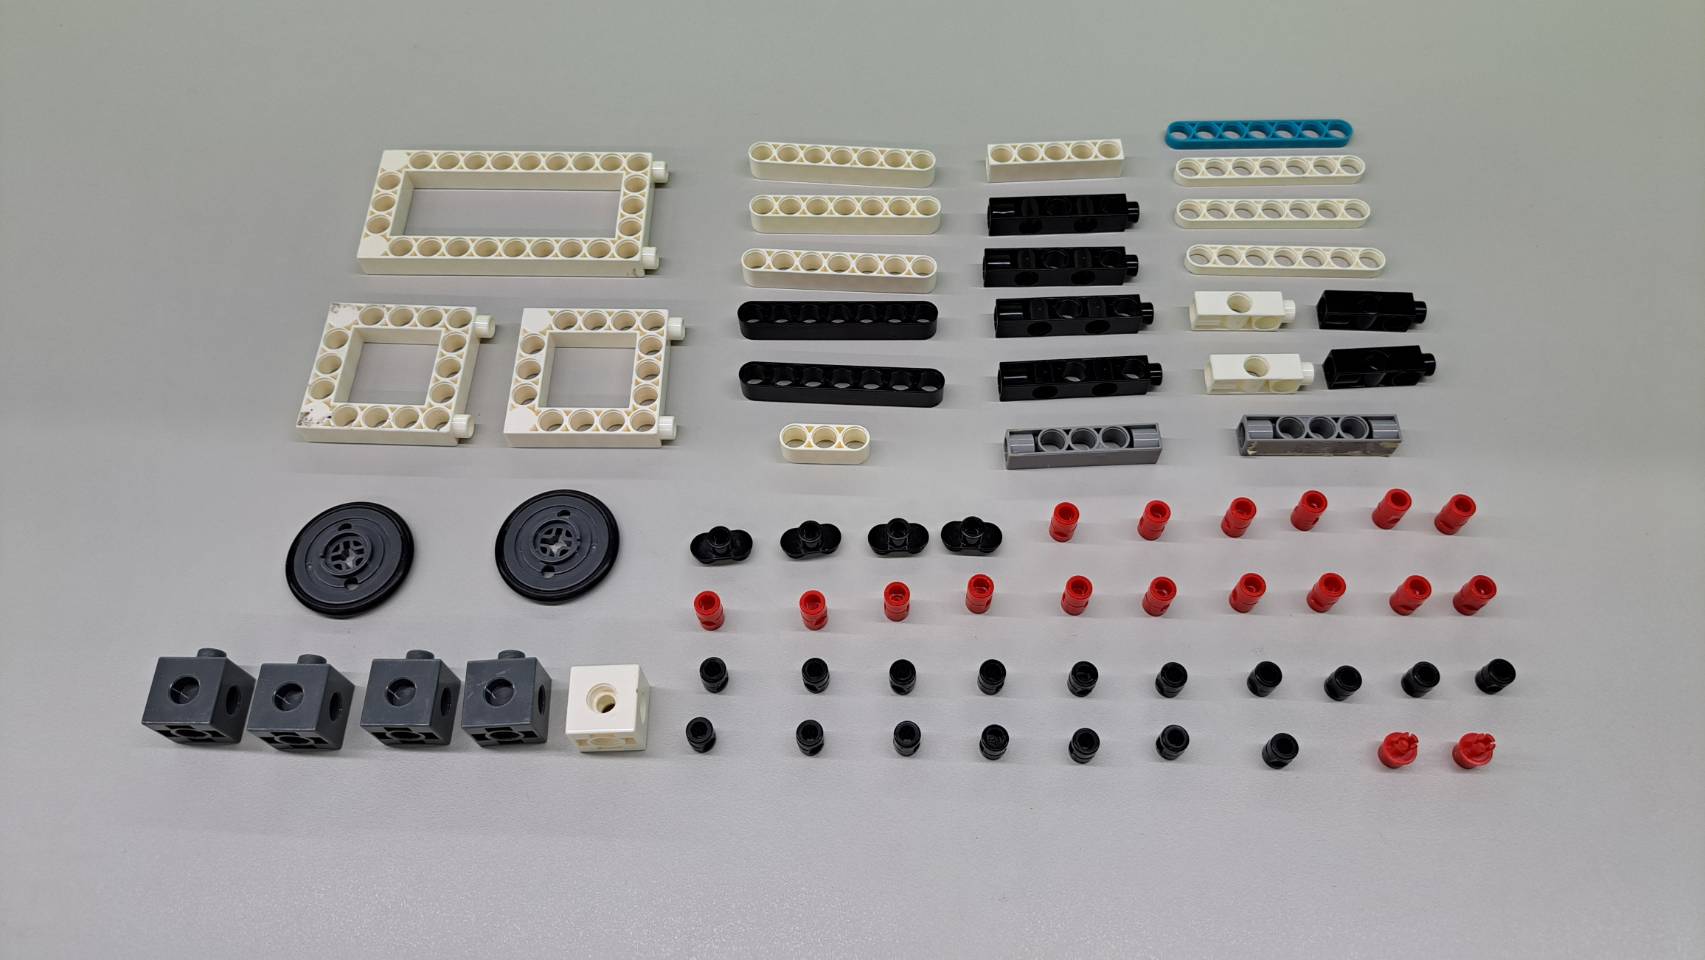
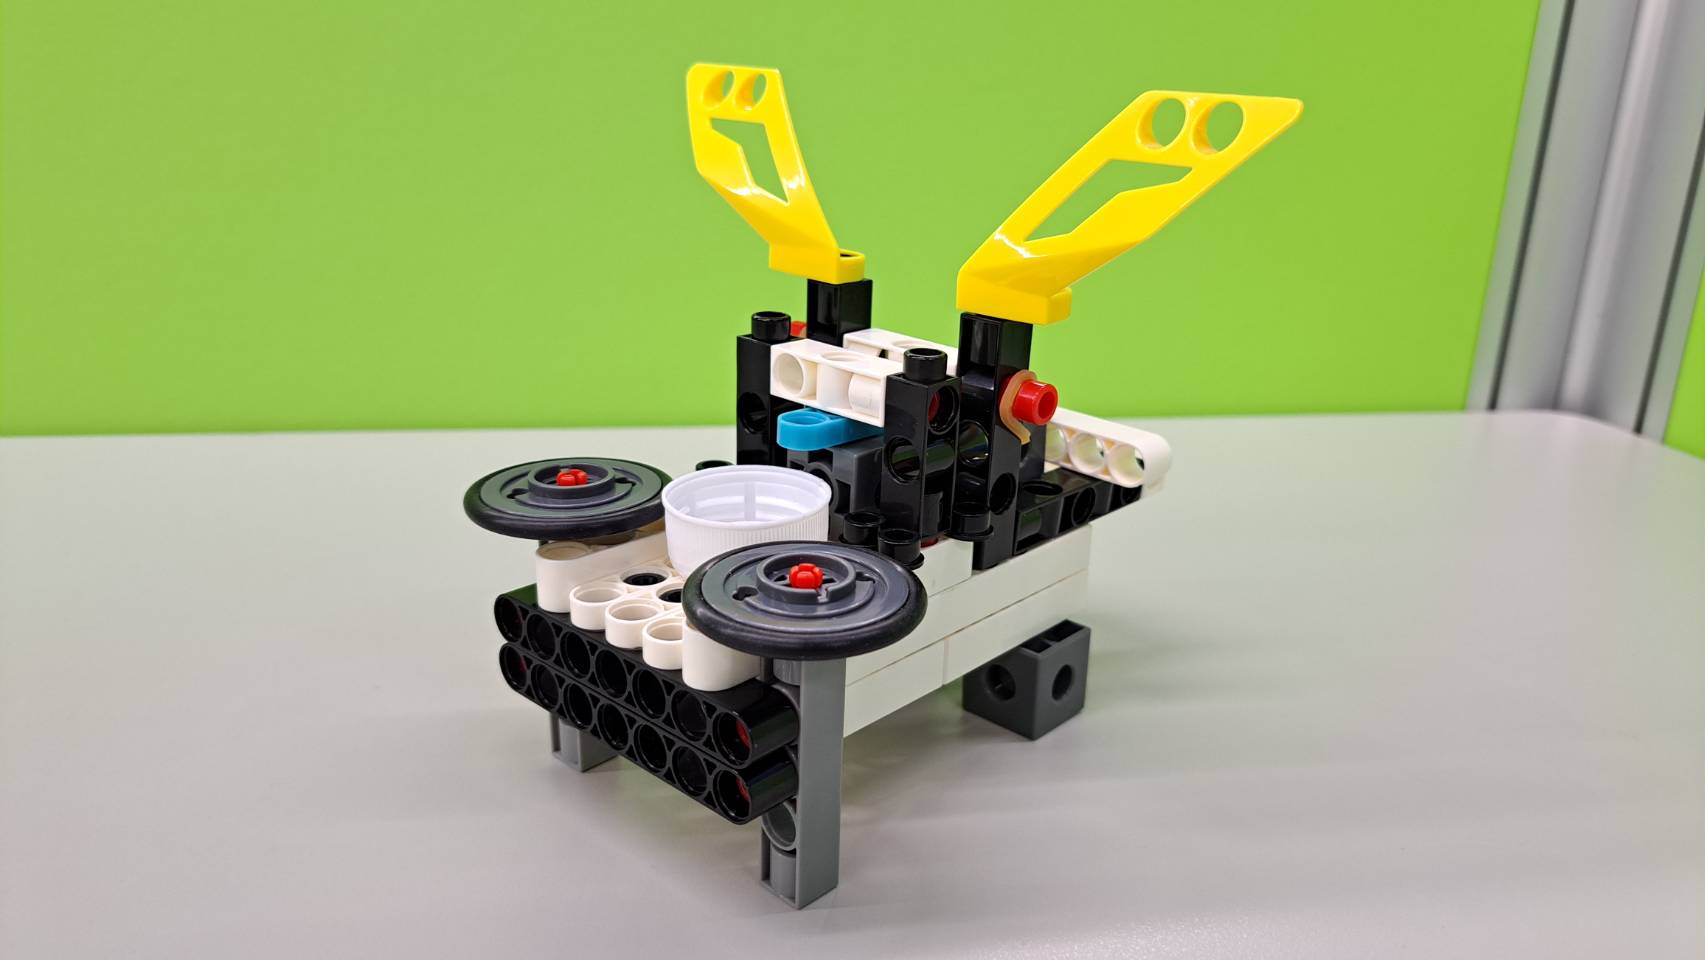
★ Parts Preparation
Here are the parts needed for this model. You can choose the colors to make your Bottle Cap Hero even more stylish and cool!
★ Assembly Steps
This assembly includes many detailed steps, so be sure to carefully check both the pictures and the text instructions!
Main Structure
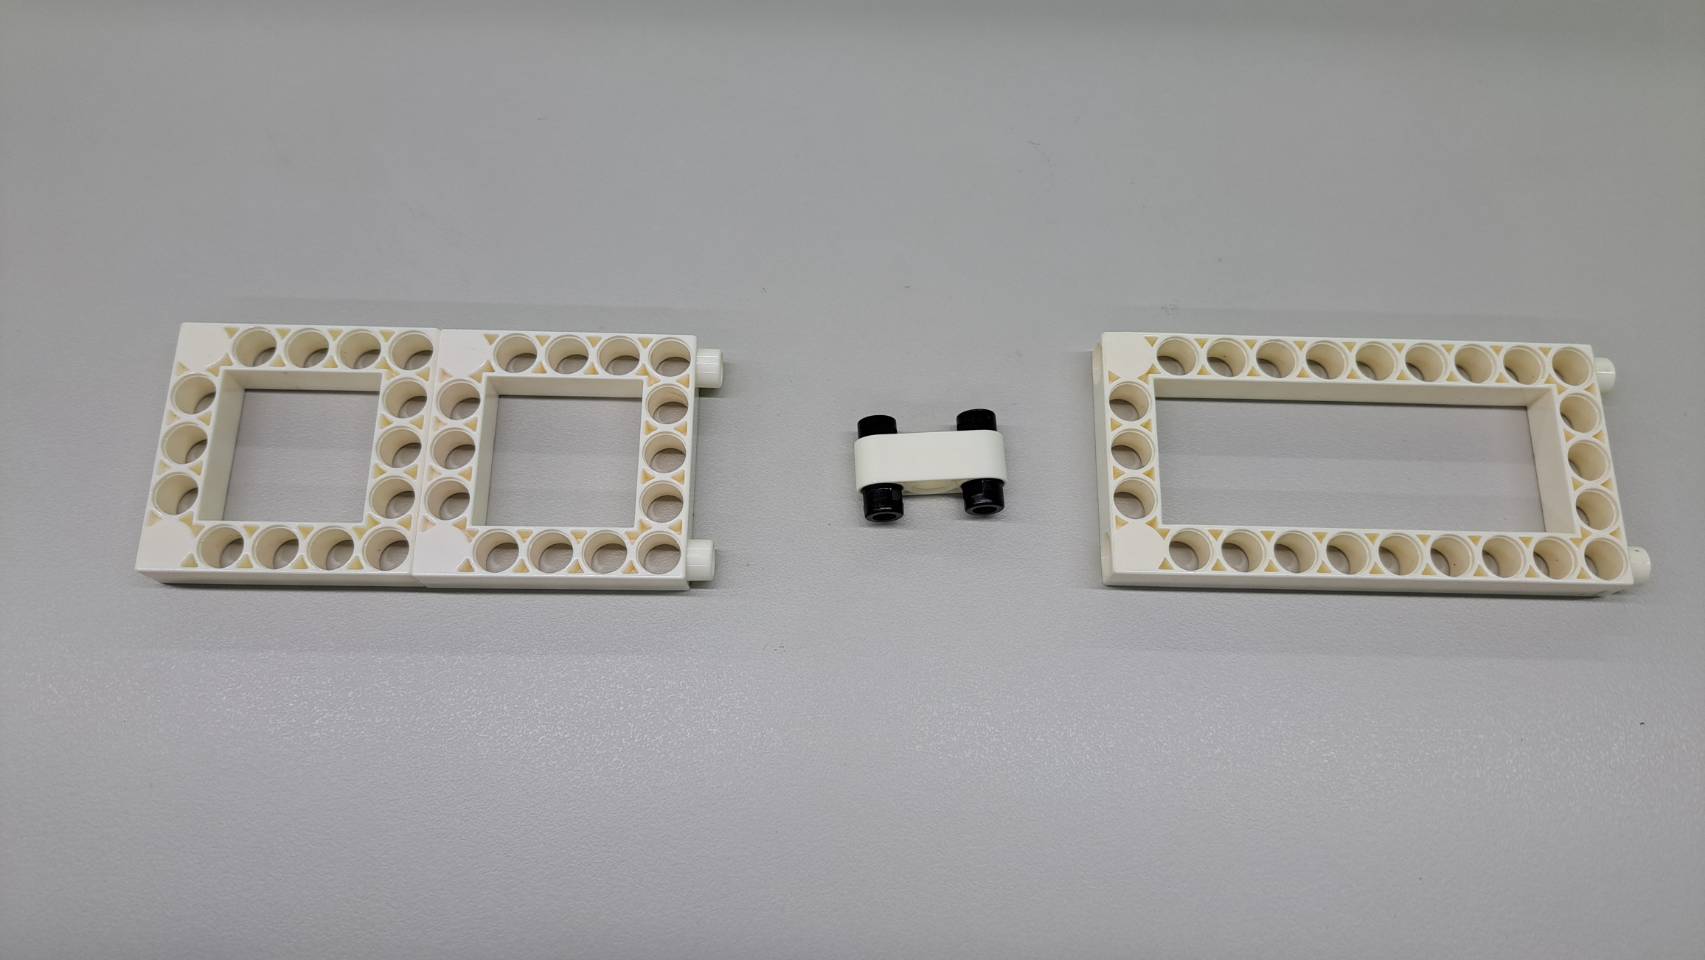
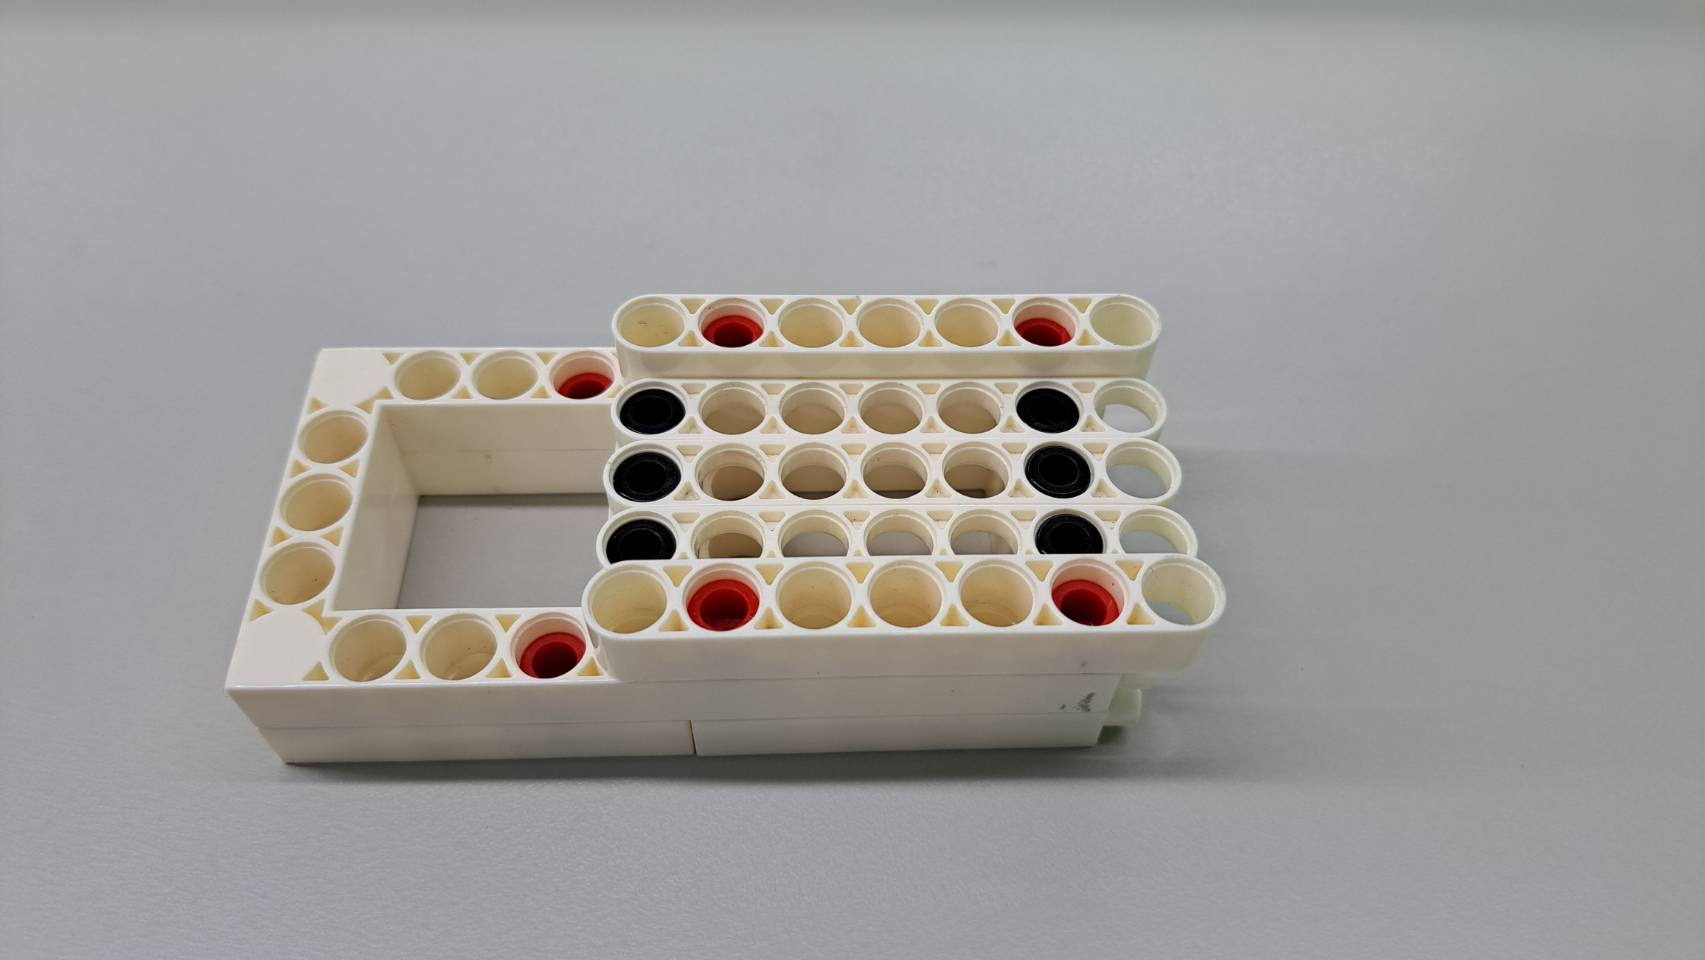
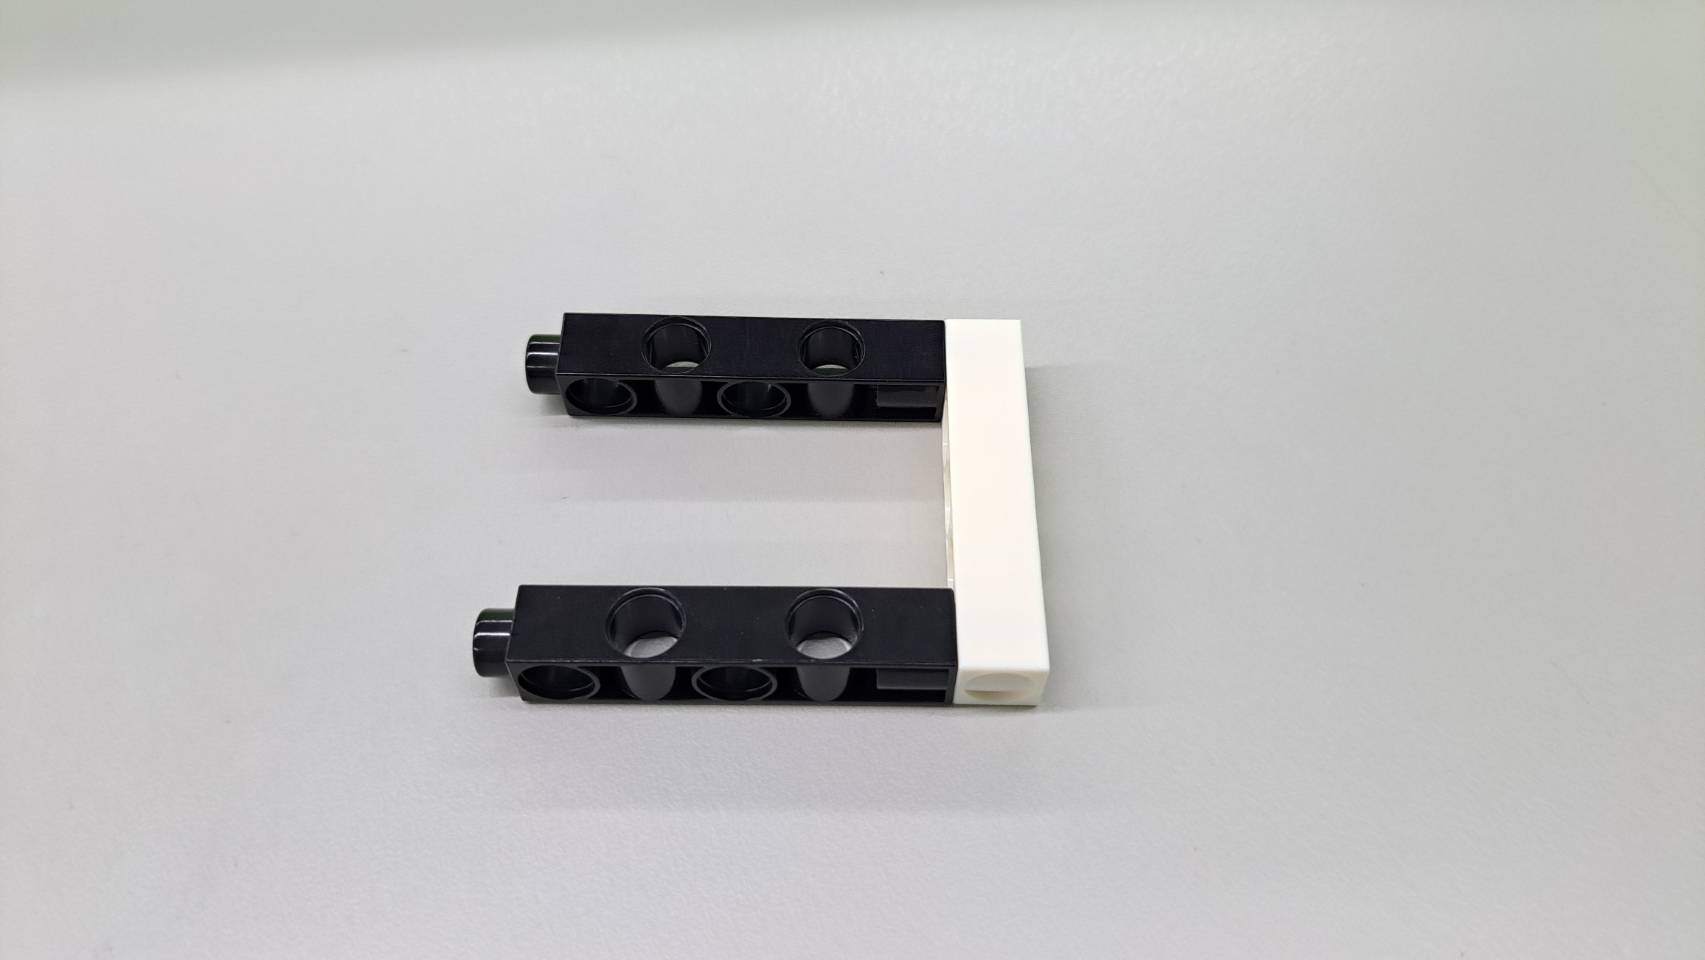
- Combine the C-5×5 FRAME, C-5×10 FRAME, and C-3 HOLE ROUND ROD as shown in the image.
Be sure to use B-SHORT PEG to avoid tolerance issues during assembly.
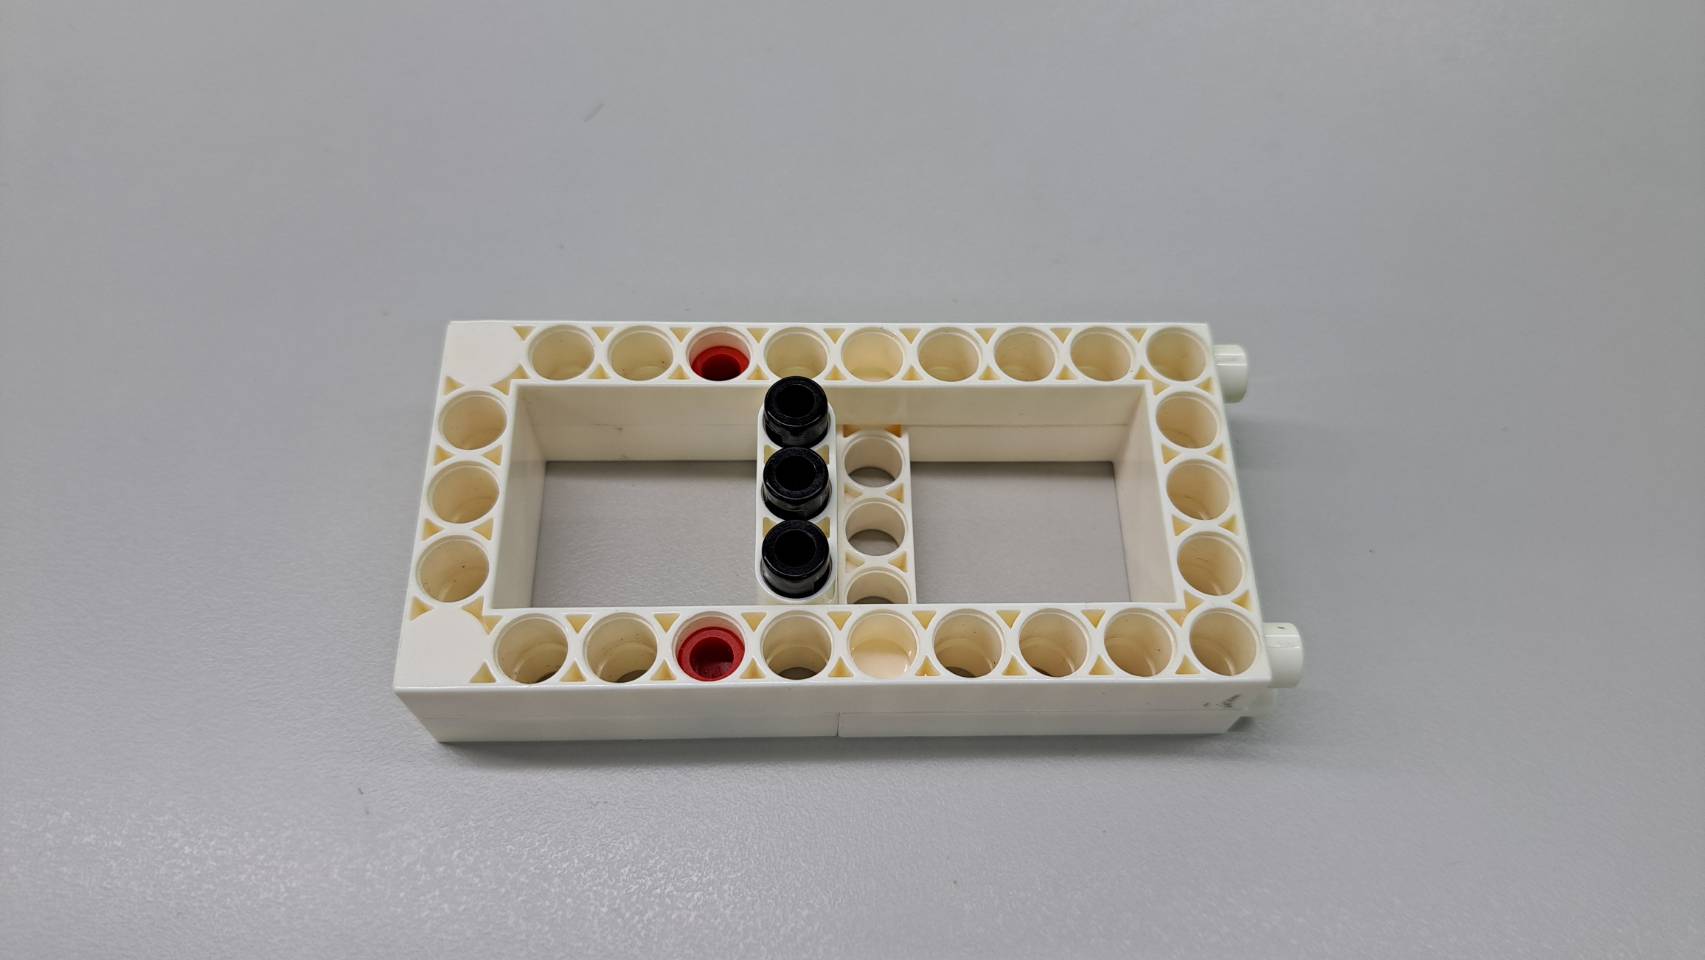
2. Attach three C-7 HOLE WIDE PROLATE ROD using B-SHORT PEG, as shown.
Important: Ensure that you use C-7 HOLE WIDE PROLATE ROD to avoid height differences in subsequent assembly steps.
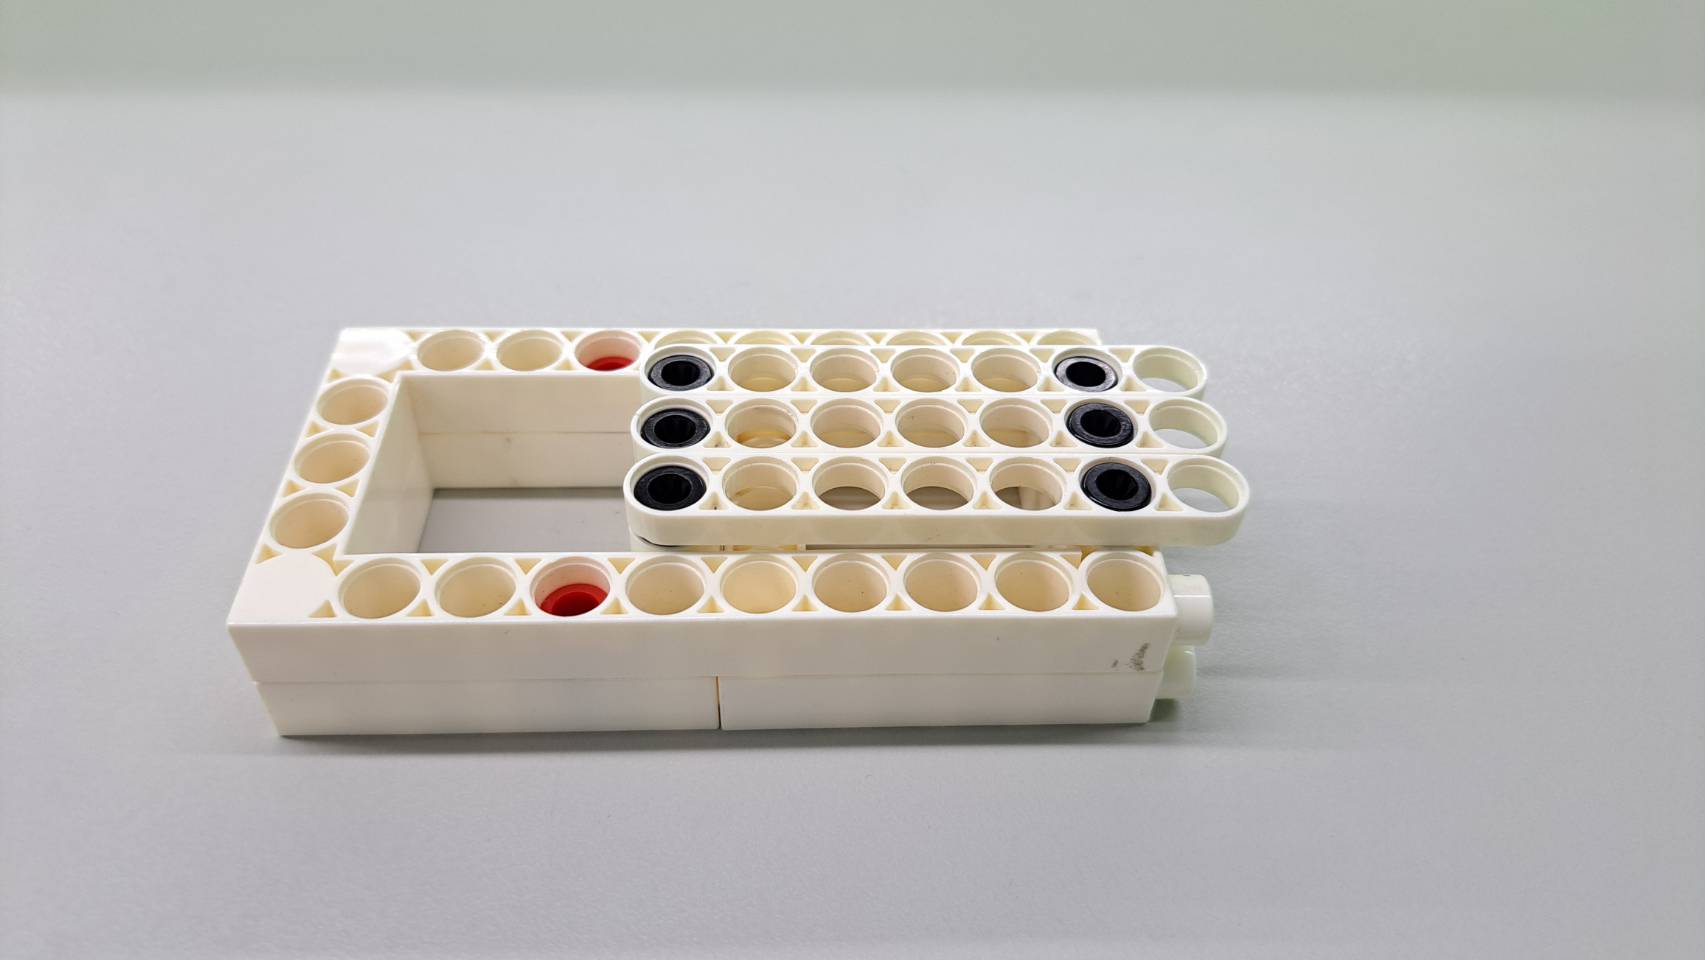
3. Attach C-7 HOLE WIDE PROLATE ROD to both sides and the front of the C-7 HOLE ROUND ROD, as shown in the diagram. This completes the main structure!

Launcher
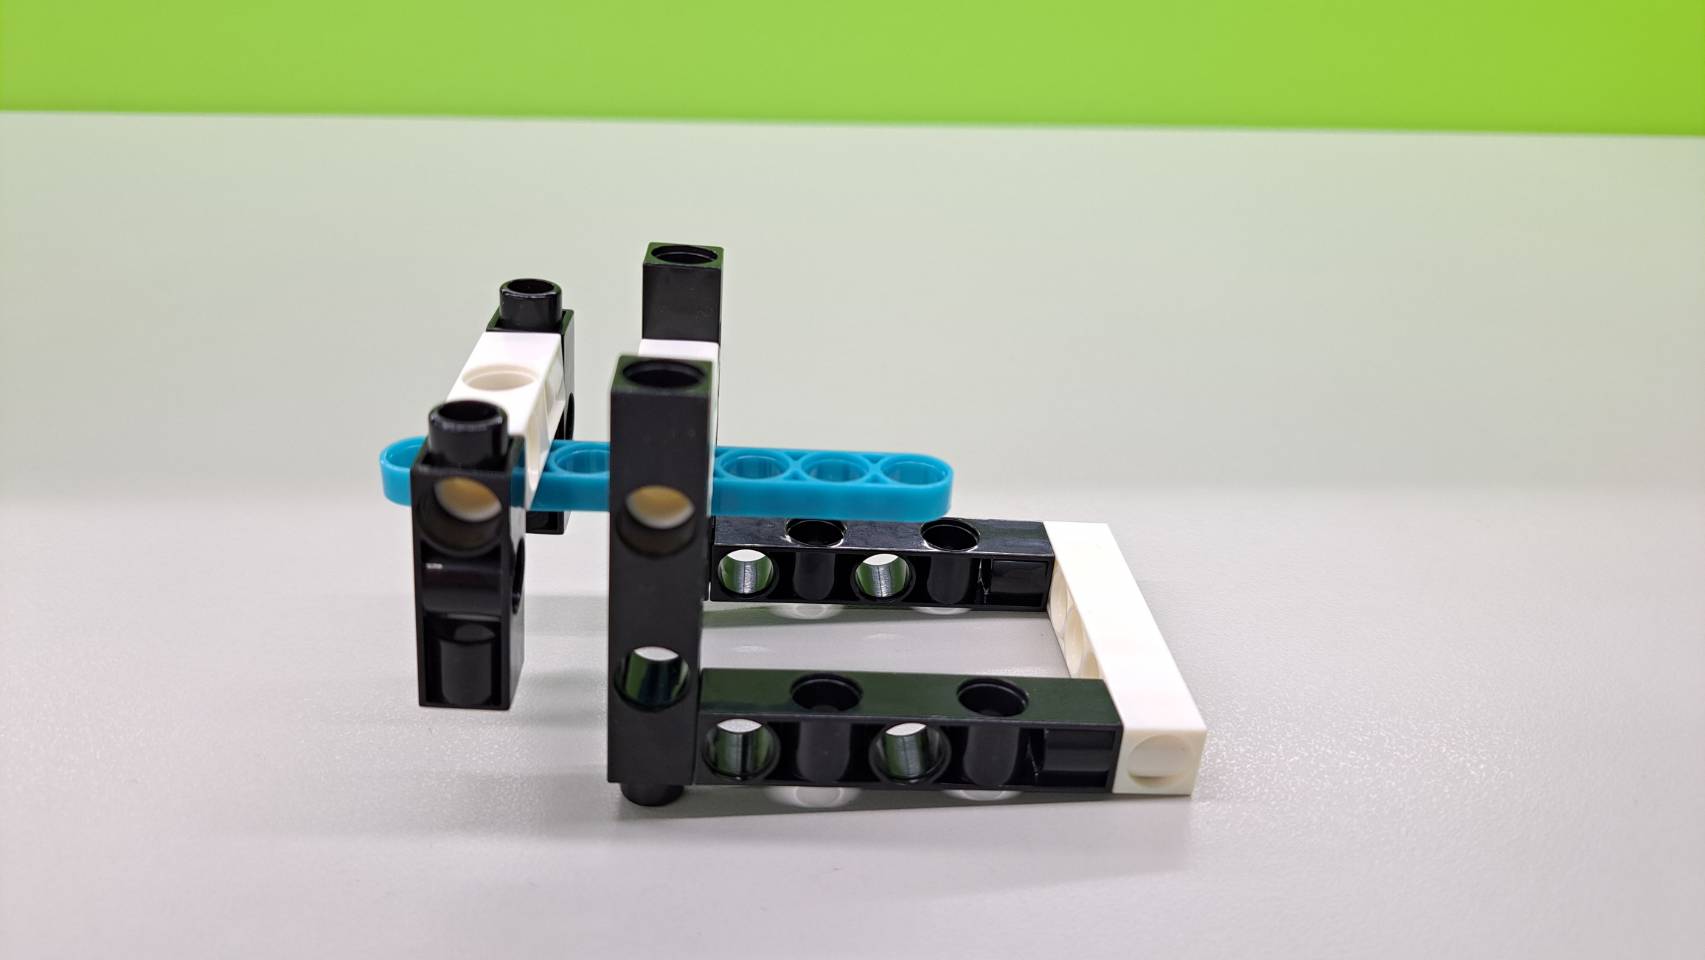
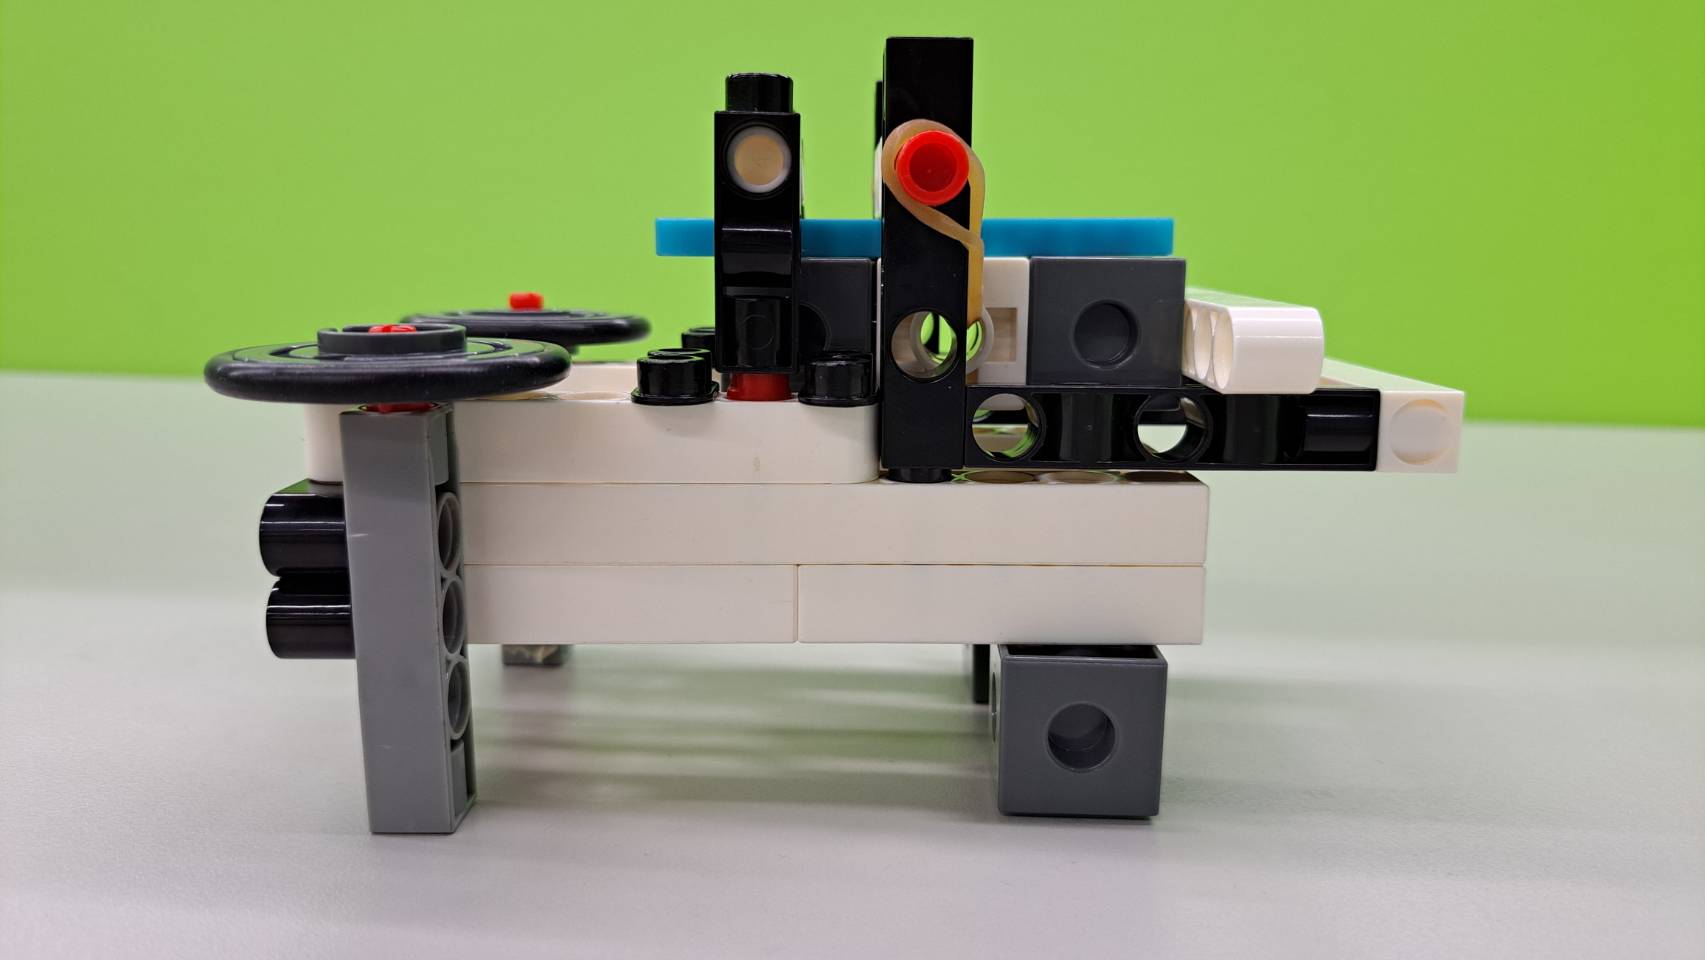
1. Connect two C-3 HOLE DUAL ROD and one C-5 HOLE DUAL ROD using another C-3 HOLE DUAL ROD, as shown.
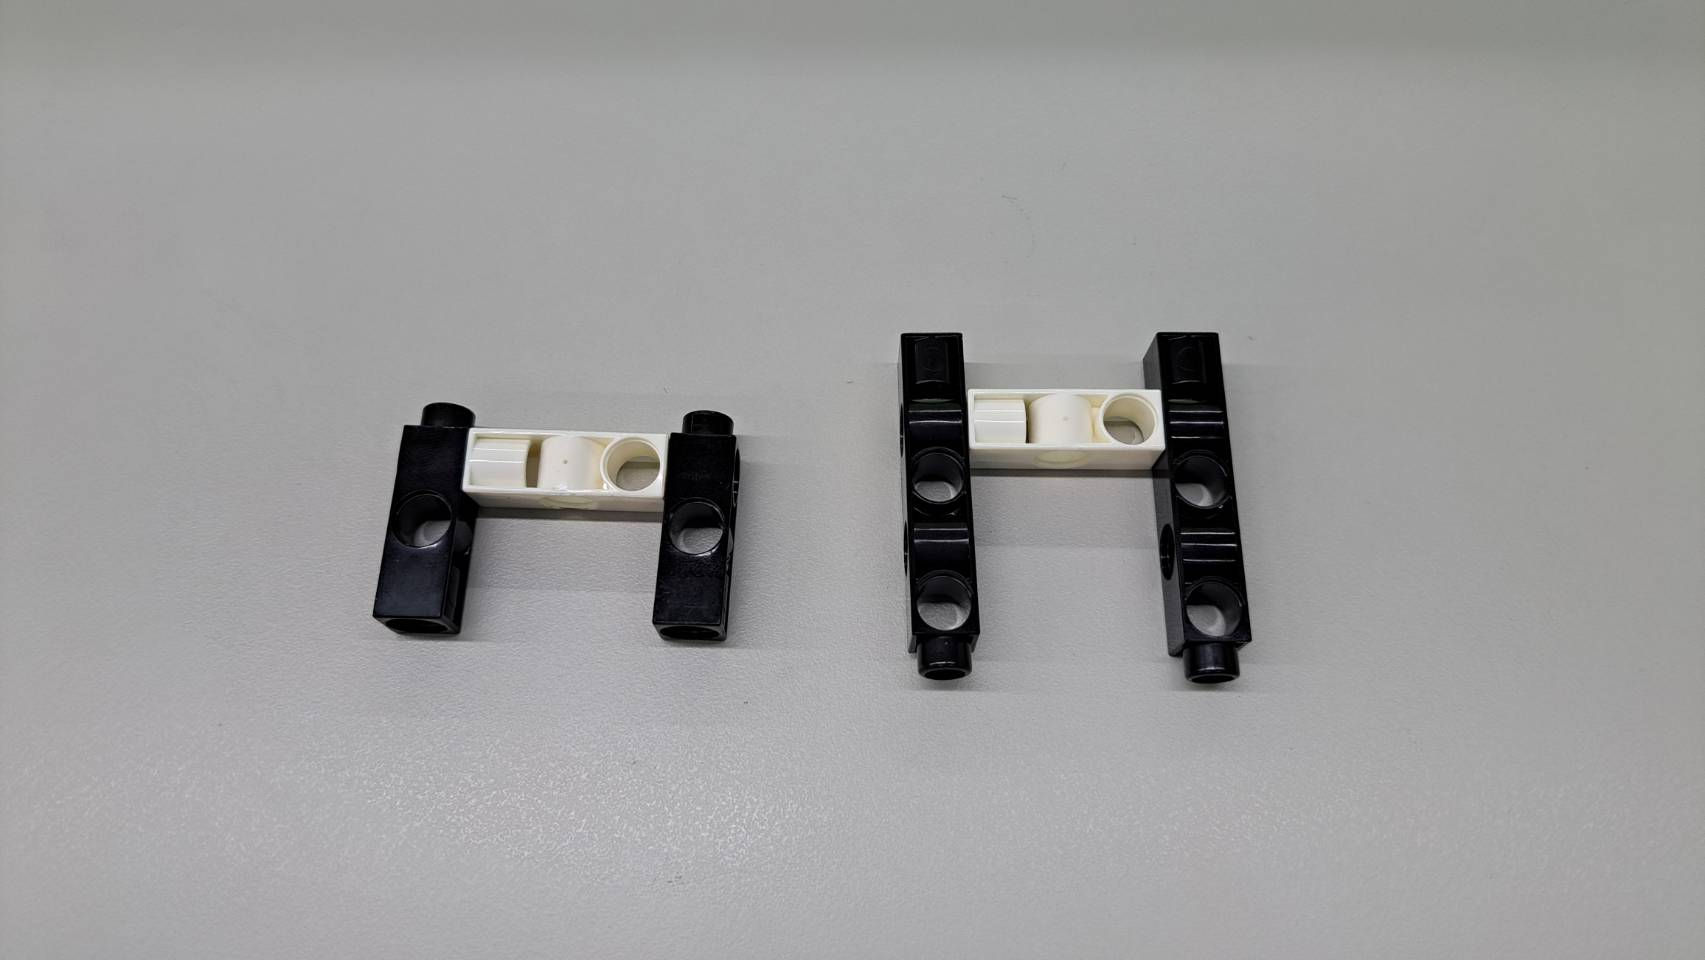
2. Next, attach a B-SHORT PEG and a C-7 HOLE WIDE PROLATE ROD to the center C-3 HOLE DUAL ROD.
※ Ensure to use the C-7 HOLE WIDE PROLATE ROD to avoid height discrepancies in later assembly steps.
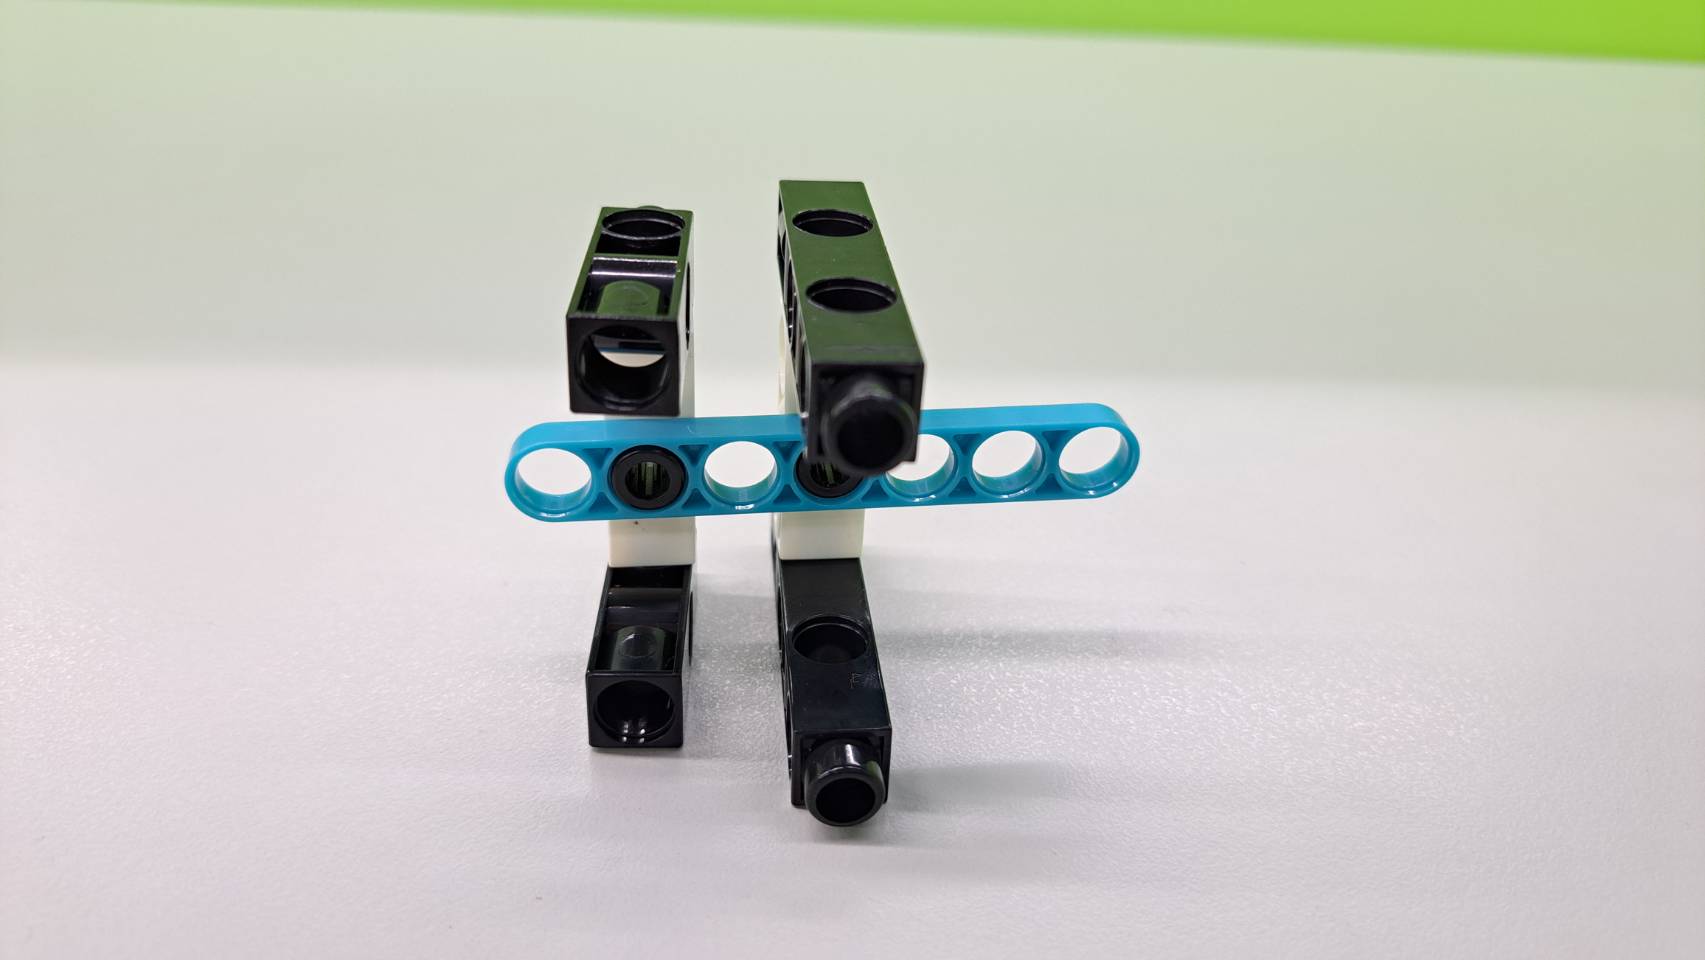
3. Use a C-5 HOLE DUAL ROD and a C-5 HOLE ROD to form a U-shaped structure, then connect it to the assembly from Step 2.
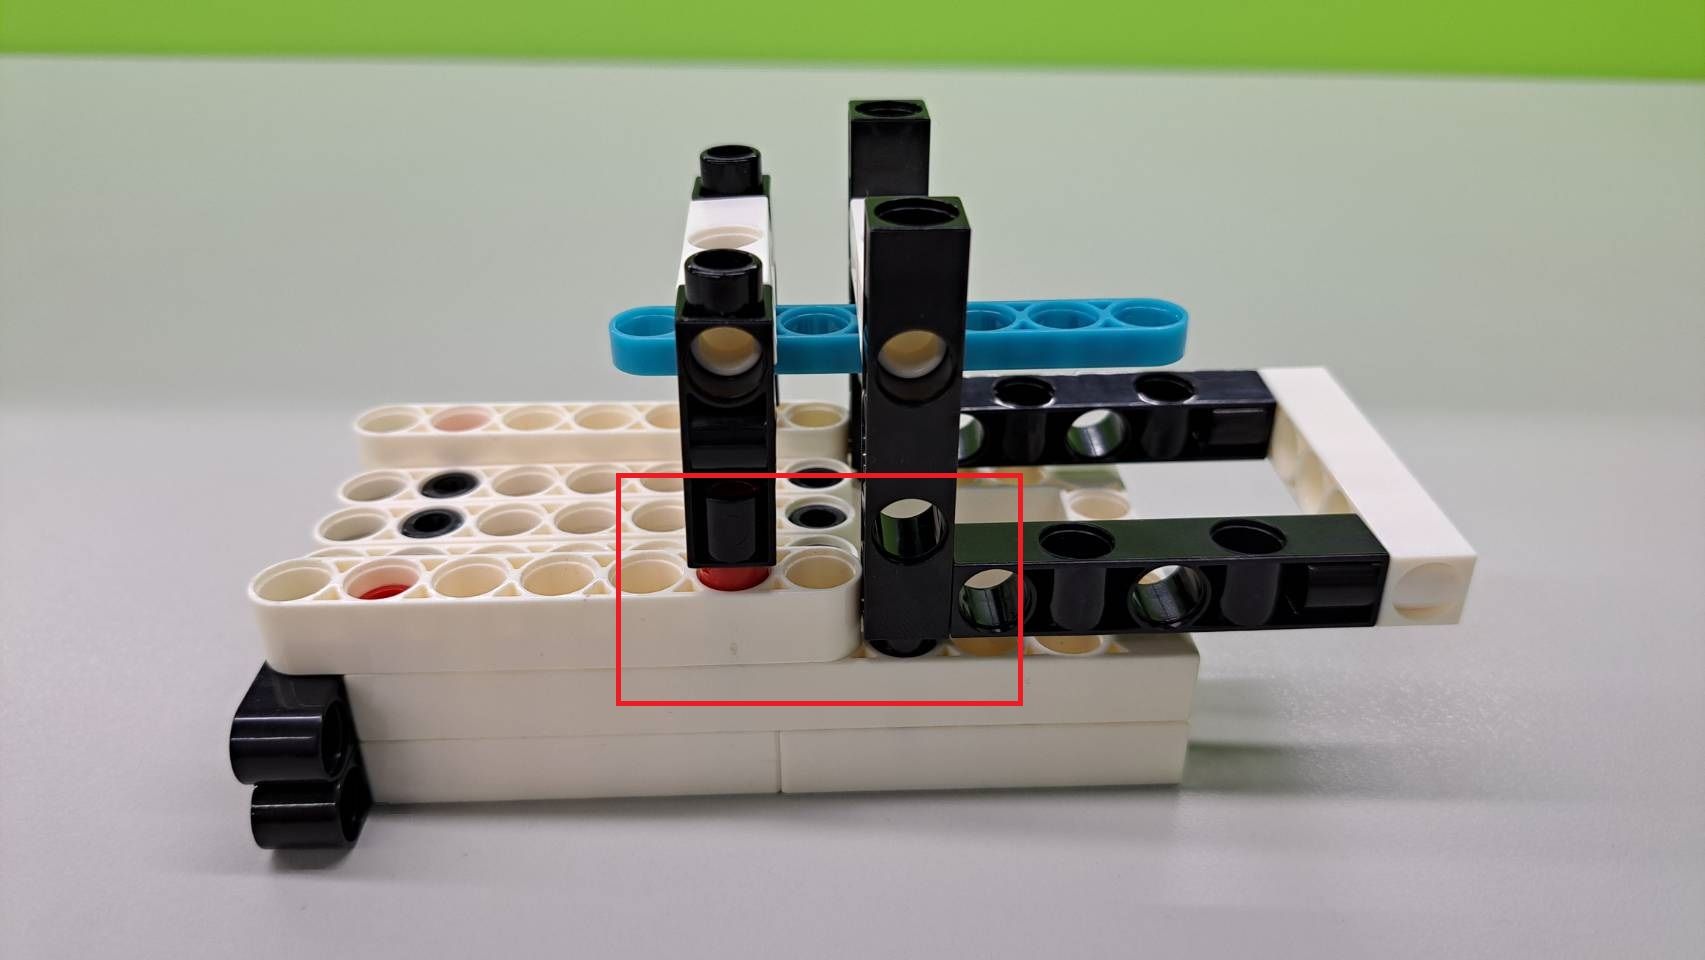
4. Place the assembly from Step 3 onto the main structure.
※ Leave some space in the red-boxed area to prevent it from getting stuck during operation!
5. The launching rod can be created by yourself. It is recommended to use a B-6 HOLE CUBE combined with a rubber band to provide stable elastic power for the launcher.
※ You can attach C-TWO-IN-ONE CONVERTER around the launching rod to prevent it from shifting.
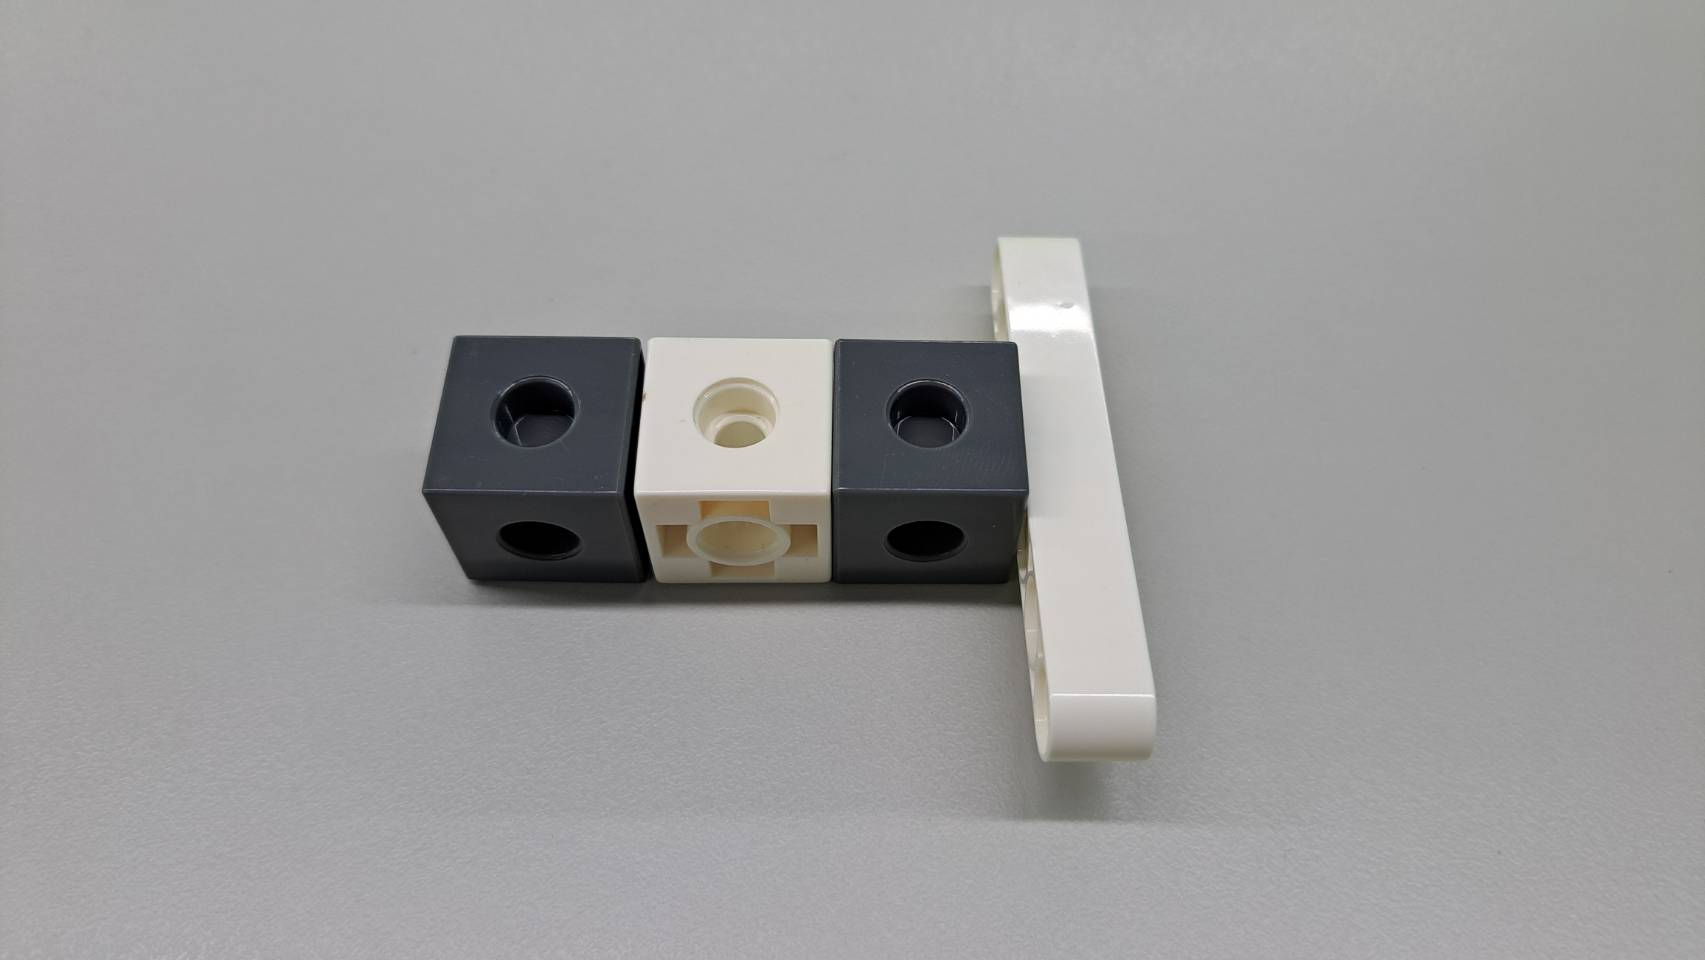

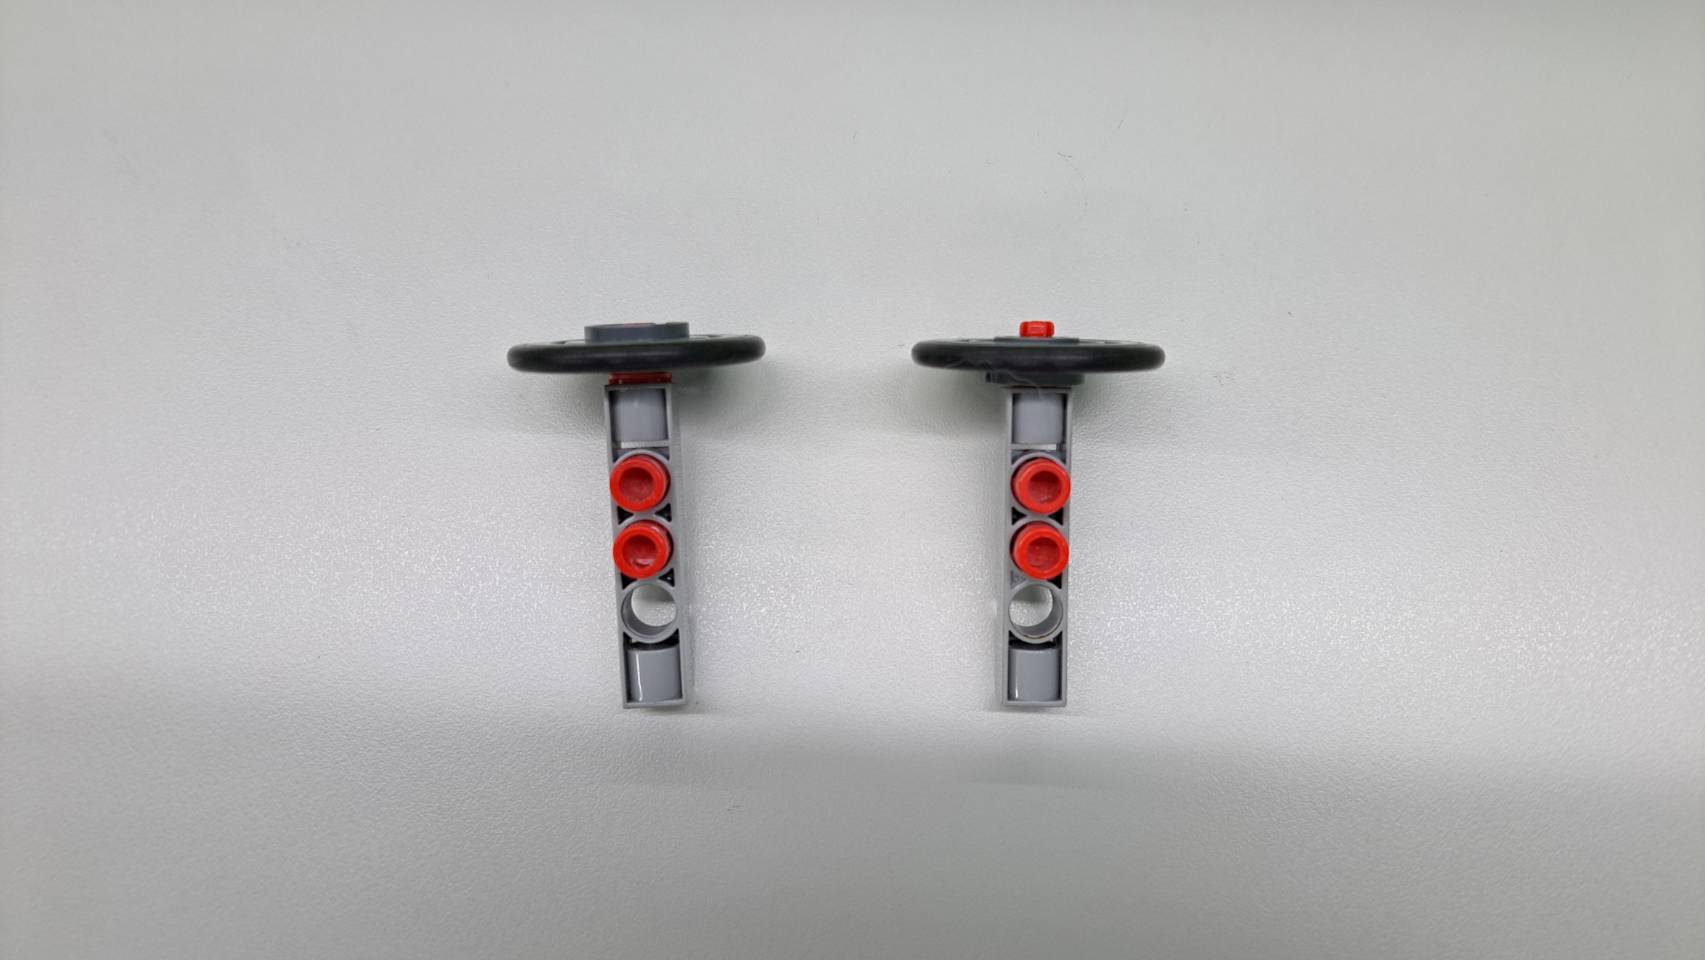
6. Place the C-5 HOLE ROD FRONT CLOSED and the C-OD23mm PULLEY at the front of the model, as shown.
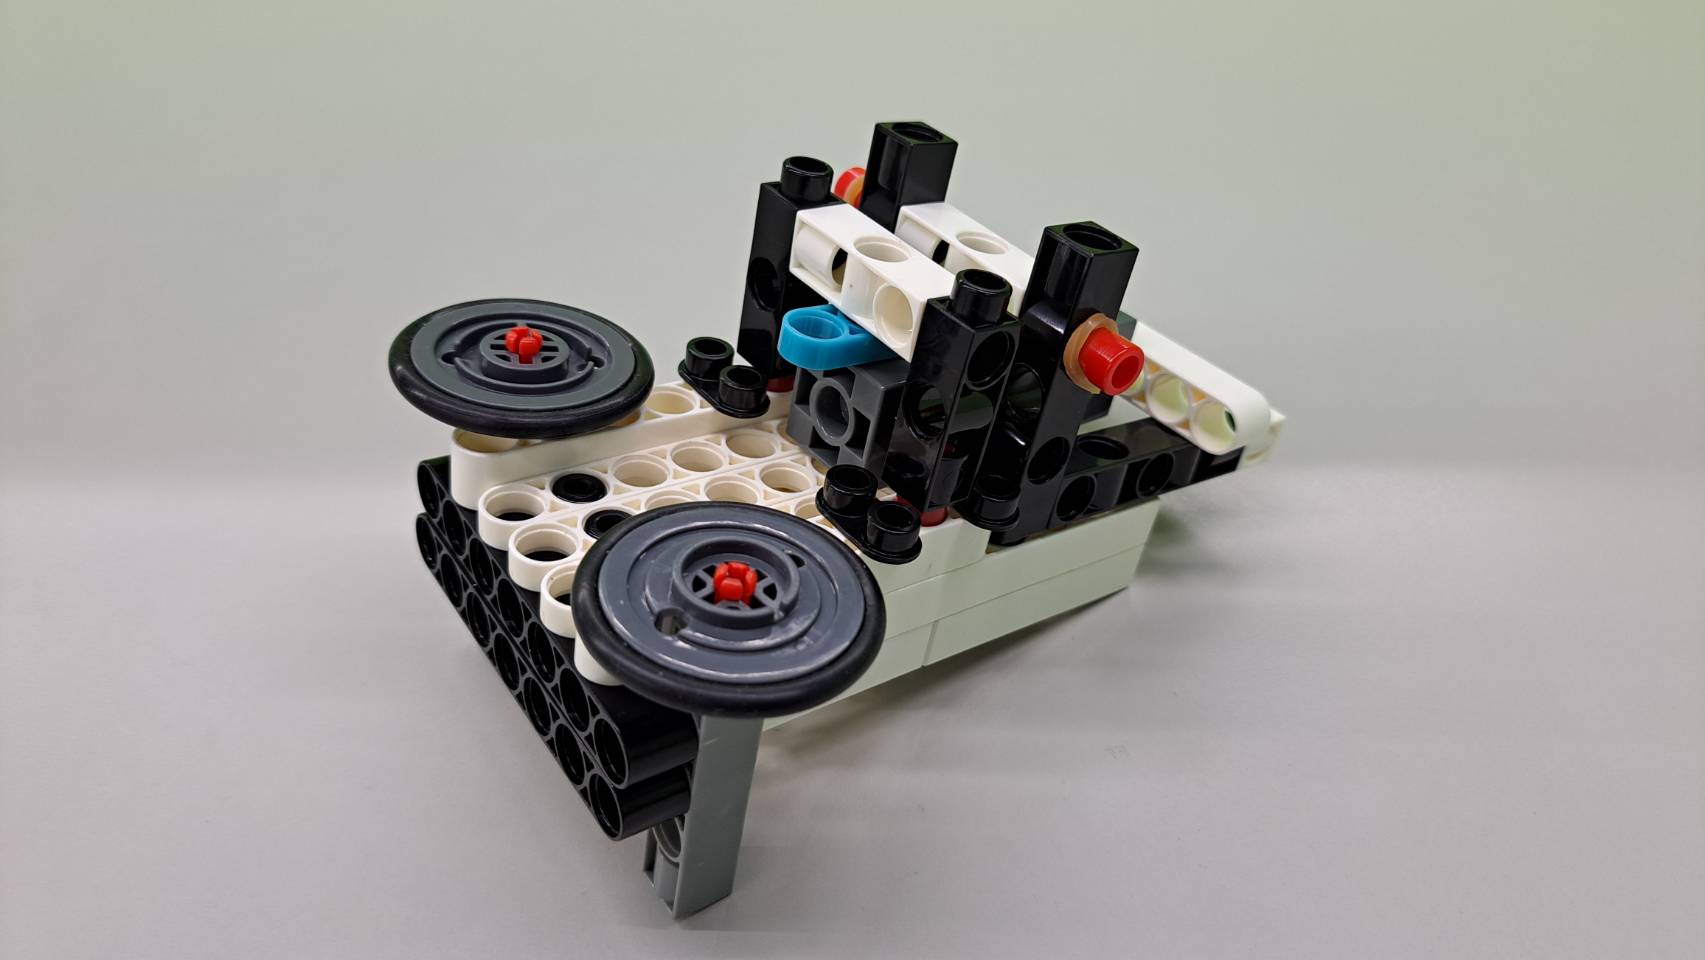
7. Finally, place two one-peg-five-hole blocks at the back to make the model stand up, and the bottle cap superhero is complete!
★ How to Play
Place your middle and ring fingers on the front to prepare the bottle cap, then shout "Bottle Cap Battle!" and use your thumb to push the launcher with force to launch the bottle cap!
★ Scientific Principle
The scientific principle used in this model is the commonly encountered "elastic force" in everyday life.
Elastic force refers to the force exerted by an object that has undergone elastic deformation as it tries to return to its original shape. A common application of elastic force in daily life is the rubber band. By stretching and deforming the rubber band, potential energy is stored, and when released, the elastic force is released, causing the rubber band to fly out.
In this model, we utilize two types of elastic force:
- Elastic Force of the Rubber Band on the Launcher: The rubber band increases the launcher's power by storing energy through stretching.
- Elastic Force of the Bottle Cap: When the launcher compresses the bottle cap, it undergoes elastic deformation, and upon release, the stored energy propels the bottle cap.
★ Postscript
Looking back on childhood, one of my favorite memories was battling with my customized Marble Shooter against classmates, relishing the joy of competition. However, limited pocket money often meant I couldn’t buy the toys I truly wanted. So why not create your own? Build the most unique Bottle Cap Shooter that’s truly yours!
The Creative Treasure Box has even more fascinating ideas waiting to be explored—let’s look forward to the next unboxing article!
Keywords:
Bottle Cap Shooter, Marble Shooter, Elastic Force, Creative Models, Design Creations, Sloth Teacher, Gigo Blocks
Curriculum Reference:
- SEP1: Asking Questions and Defining Problems—Relating science and engineering to everyday scenarios.
- SEP3: Planning and Carrying Out Investigations—Engaging in exploratory learning and problem-solving.
- SEP4: Analyzing and Interpreting Data—Using data collection tools to answer real-world questions.
- PS2.A: Forces and Motion—How structures and mechanisms influence motion.
- ETS1.C: Optimizing the Design Solution—Designing and refining mechanisms for functionality.
Please sign in to vote.