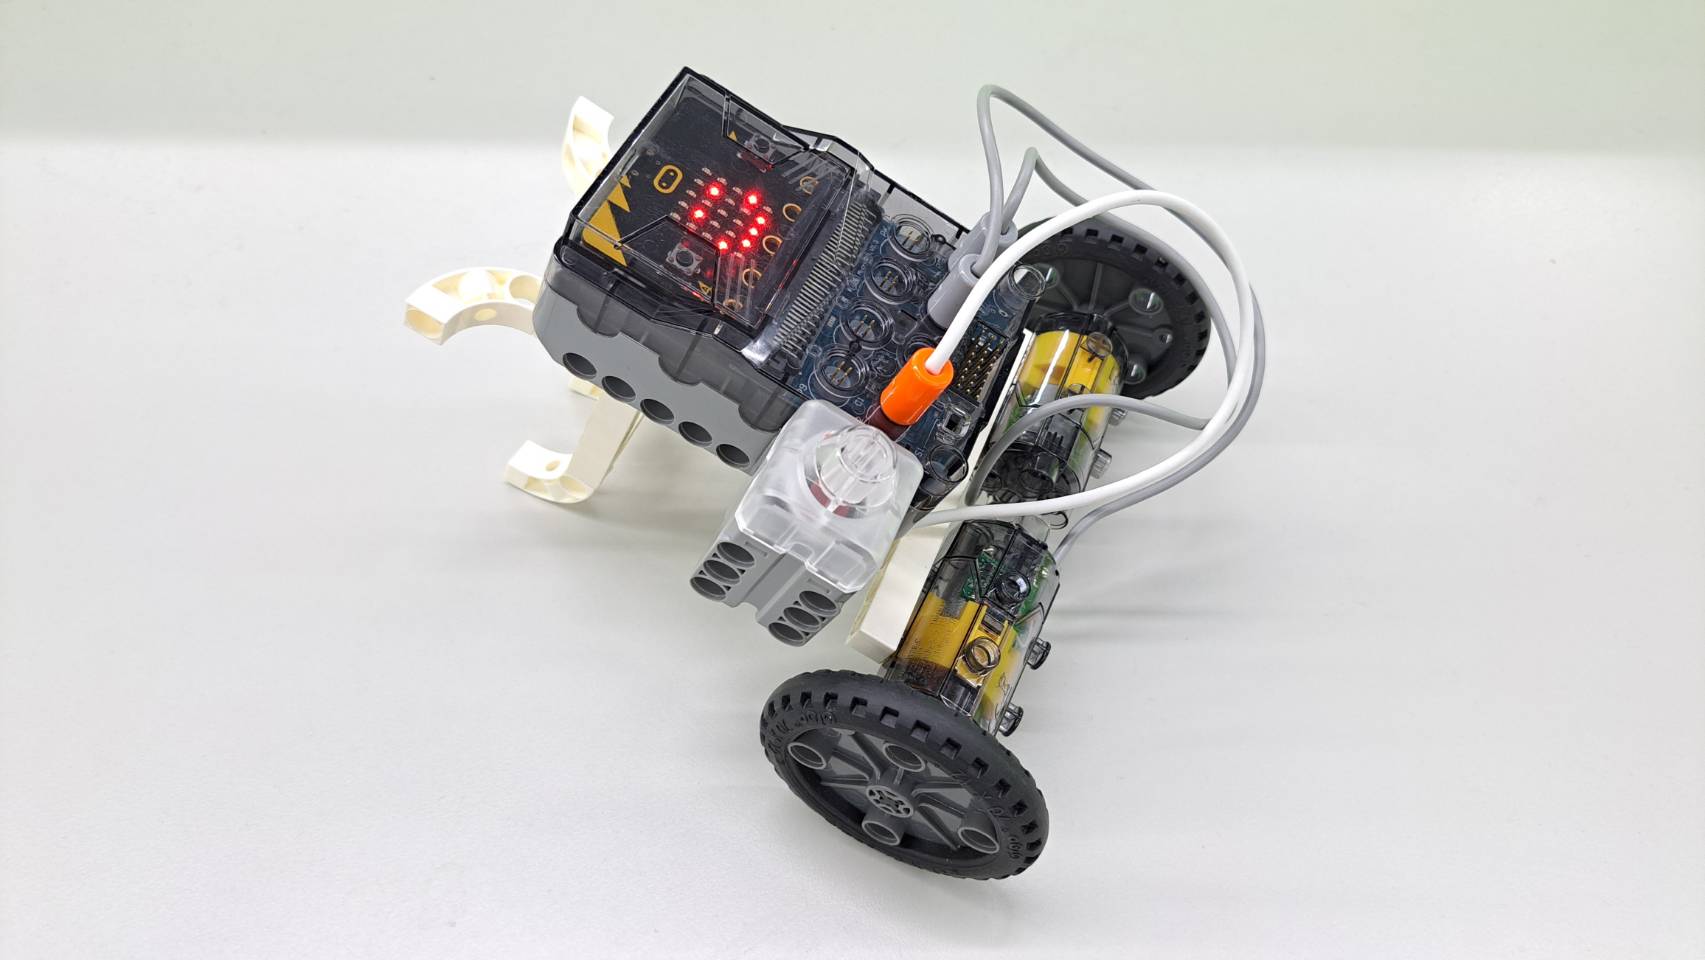
[Educational Time Machine EP7] micro:bit x Utimate Code

![[Educational Time Machine EP7] micro:bit x Utimate Code](/content/images/size/w2000/2023/07/315091.jpg)
In [Educational Time Machine EP6], we introduced the battle robot, and the interactive duel reminded me of the joy of playing games with my friends when I was a child.
In our childhood, there are always different ways to play the games. Among them, the one that impressed me the most is "Ultimate Code".
Ultimate Code is a multiplayer interactive game. One of them is the banker, given a range of numbers, and then chooses a number from it. This number is called a "code", which cannot be known to other players involved in the game. The game participants take turns guessing the number. Every time a number is guessed, the banker will inform the player whether the number is greater or less than the code until the correct code is guessed.
Let us use Gigo #1269 - micro:bit COMPATIBLE ROBOTS kit today to make an ultimate code model and enjoy the game with friends!
◆Preparation (10 minutes)
1. Describe the gameplay and rules of Ultimate Code.
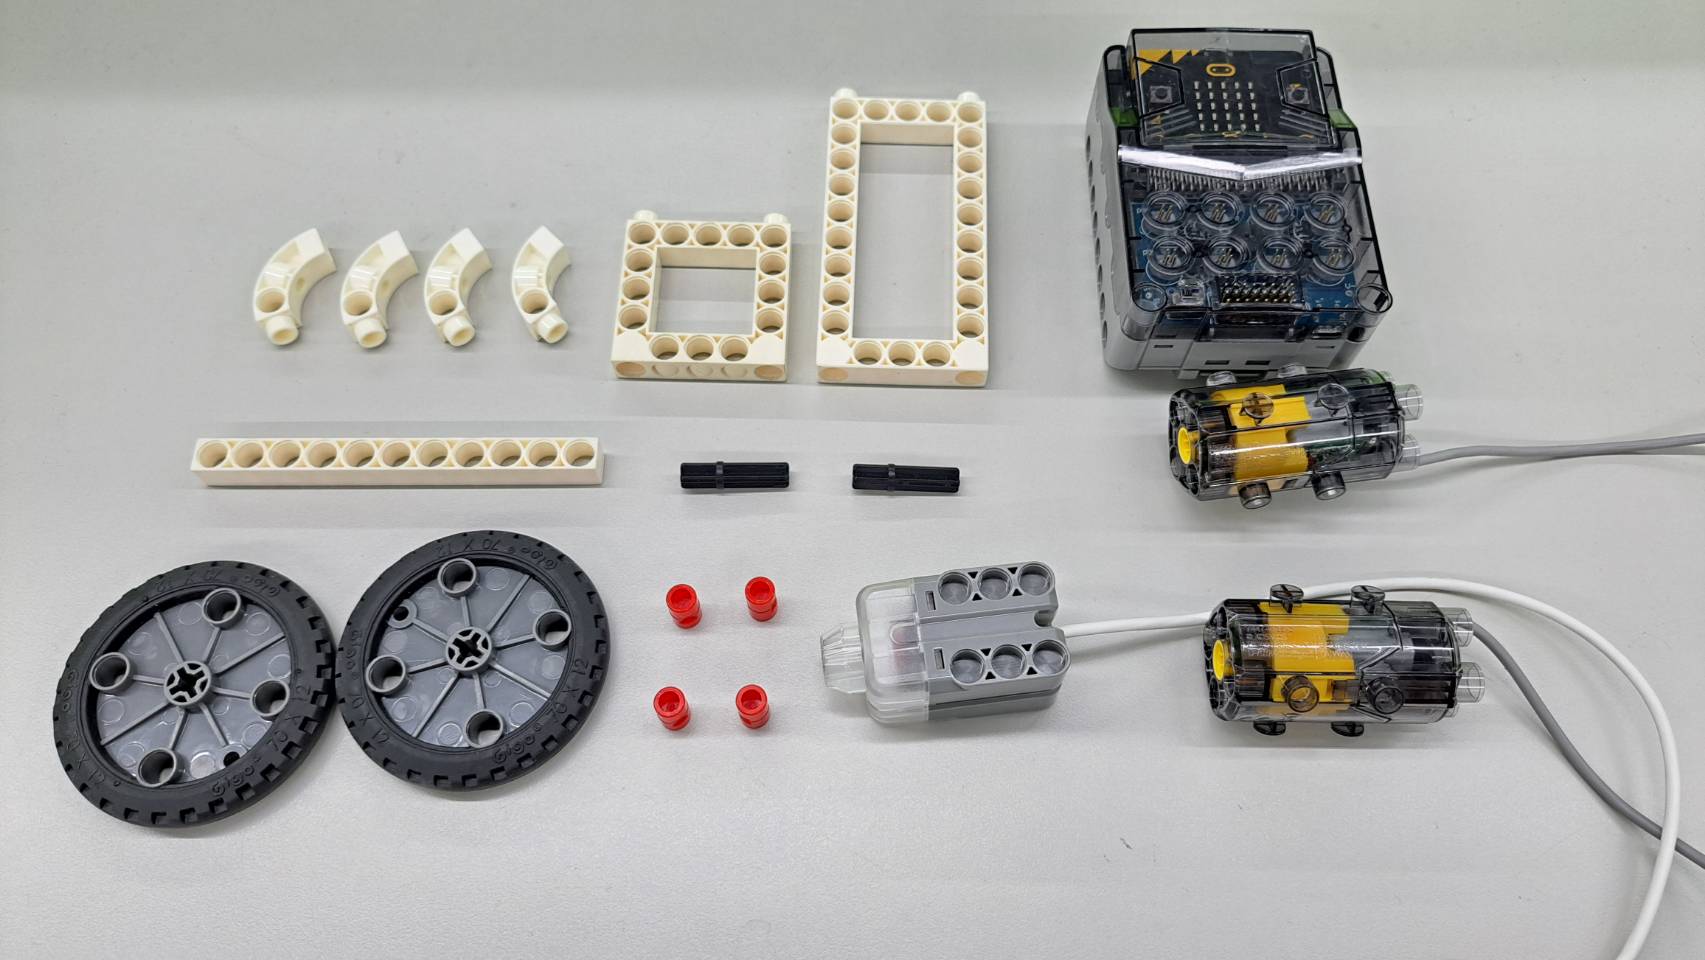
2. Prepare the parts required for the model. The main control box needs to use 3 AA batteries.
◆Demonstration of model making (40 minutes)
You can follow the assembly steps to build the model.
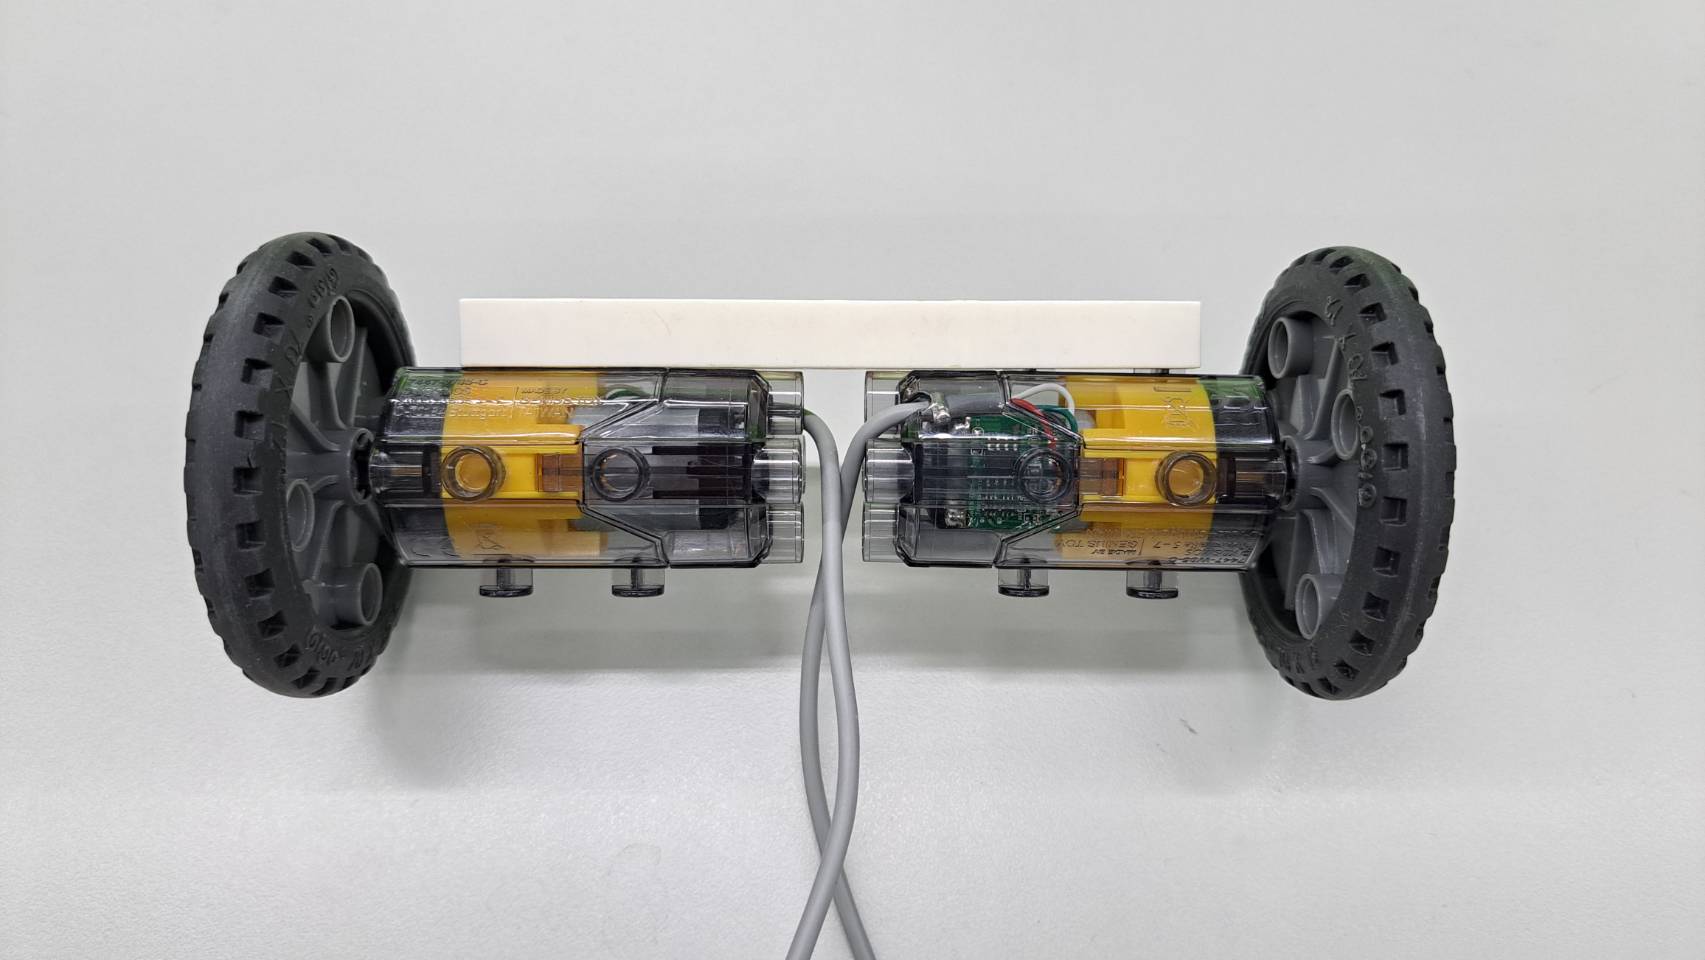
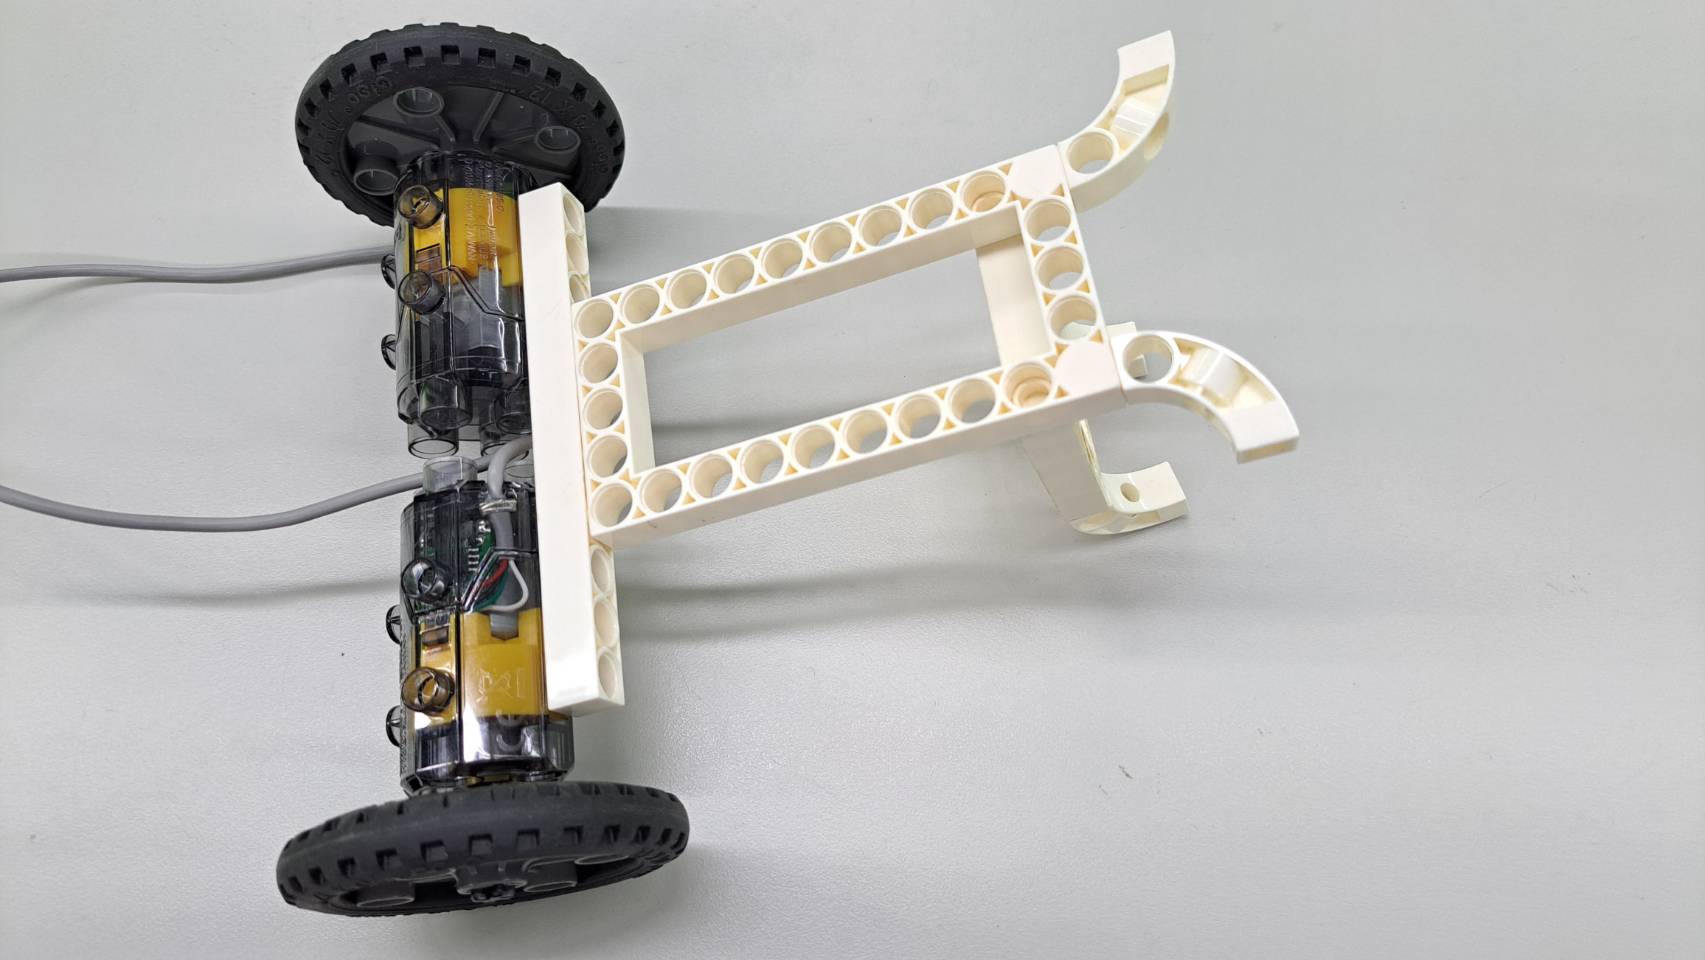
Step 1: Place two C-50X PLANETARY GEARBOX on the two sides of the C-11 HOLE ROD as shown.

Step 2: Add C-30mm AXLE Ⅱ and C-RACING TIRE to complete the rear wheel part.
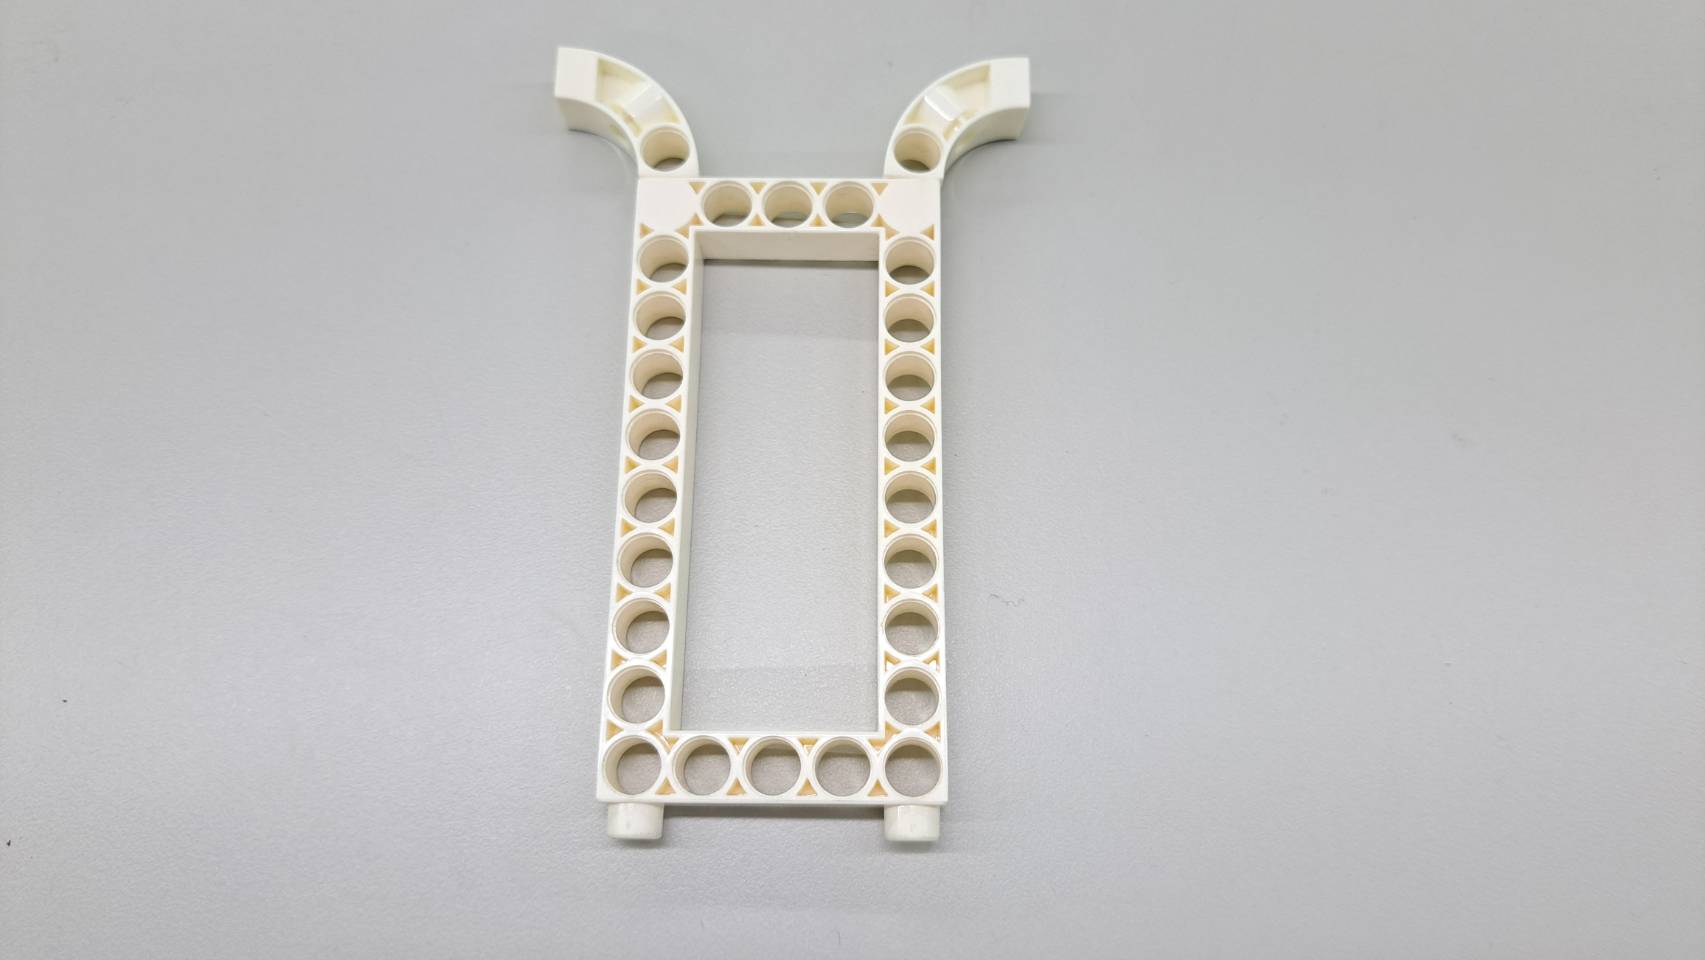
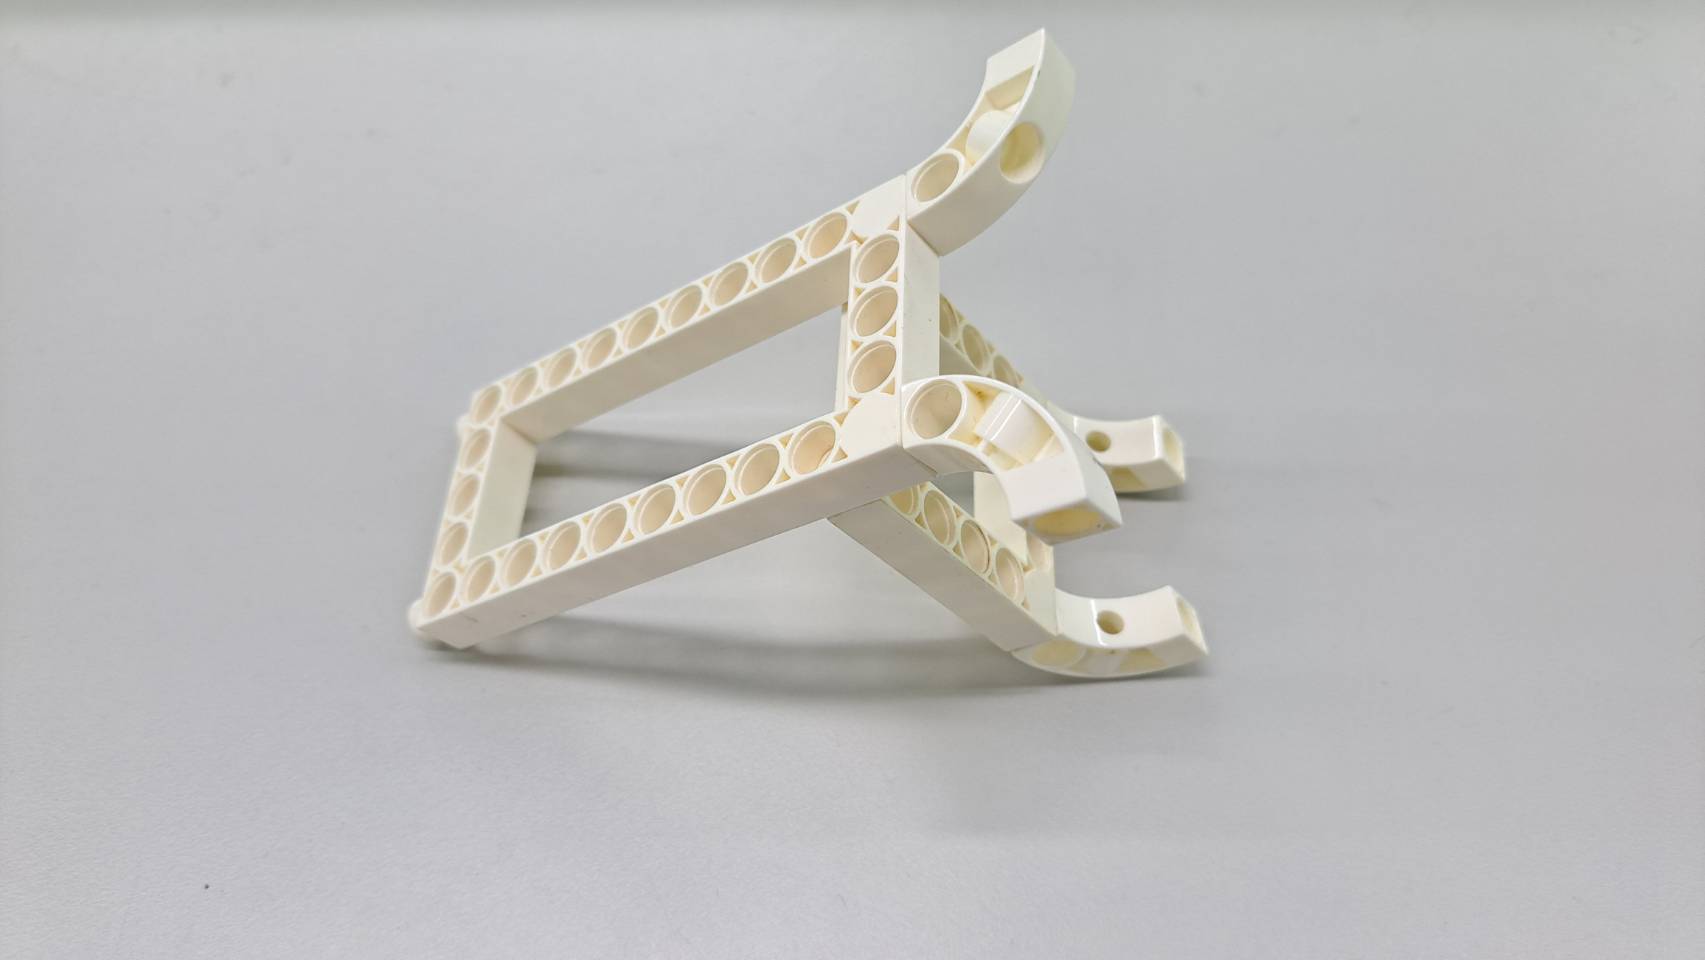
Step 3: Add two C-BENDED ROD to the C-5X10 FRAME to complete the car body part.
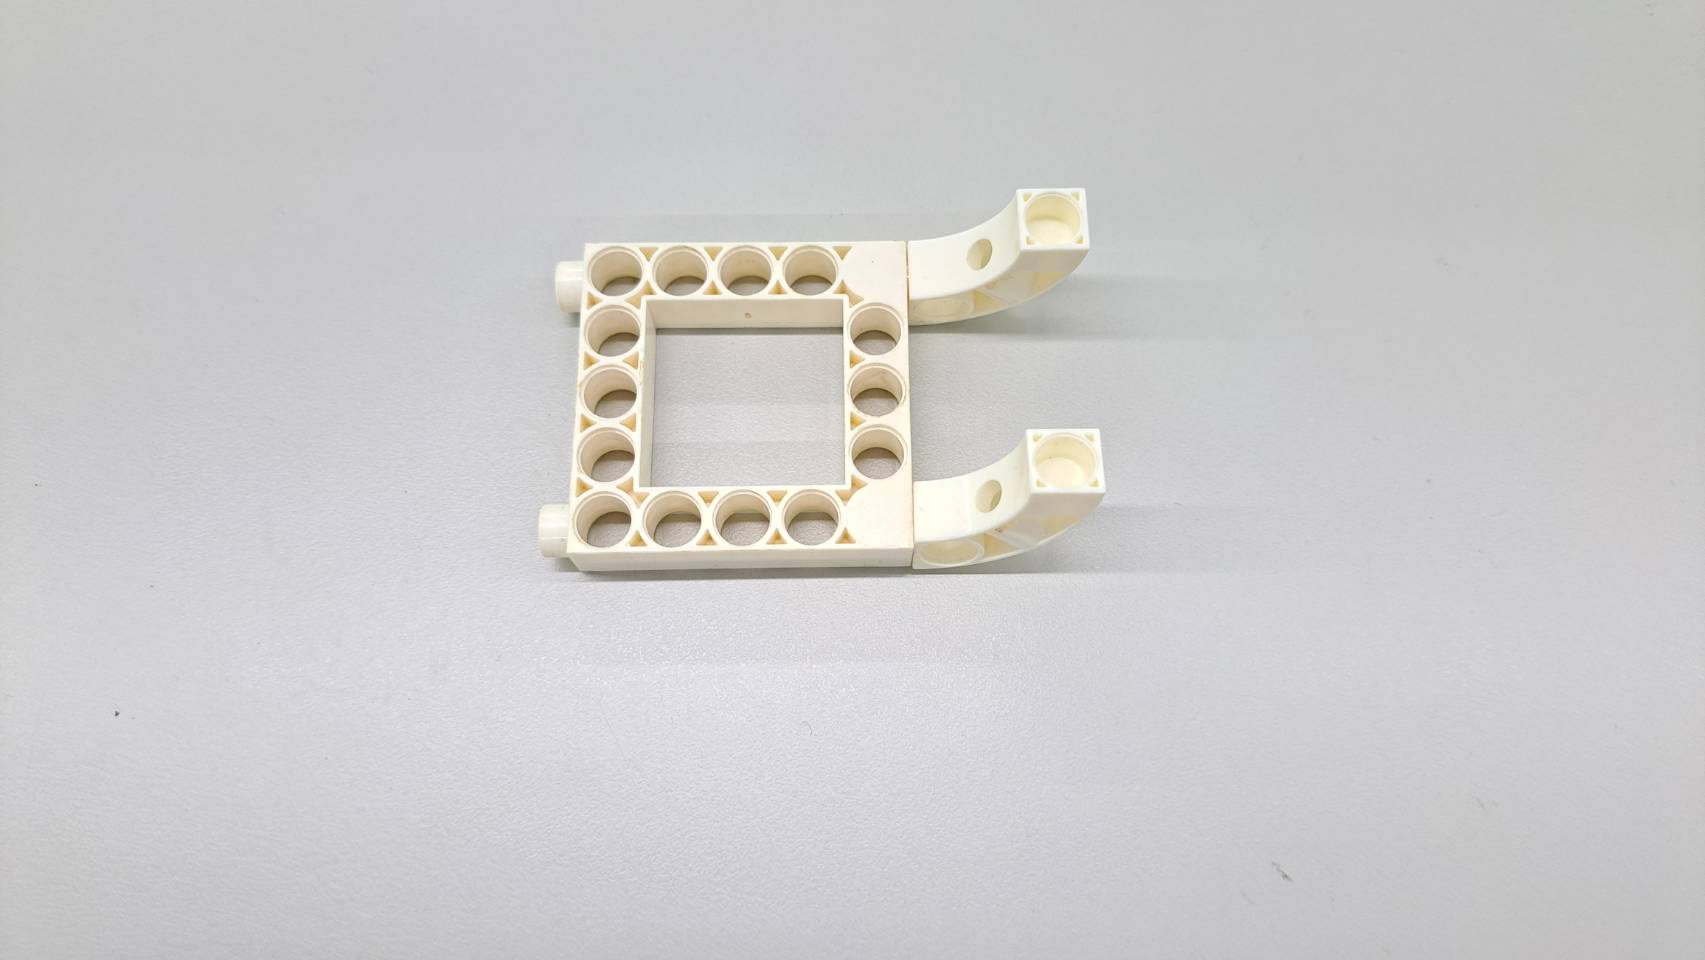
Step 4: Add two C-BENDED ROD to the C-5X5 FRAME to complete the front wheel part.
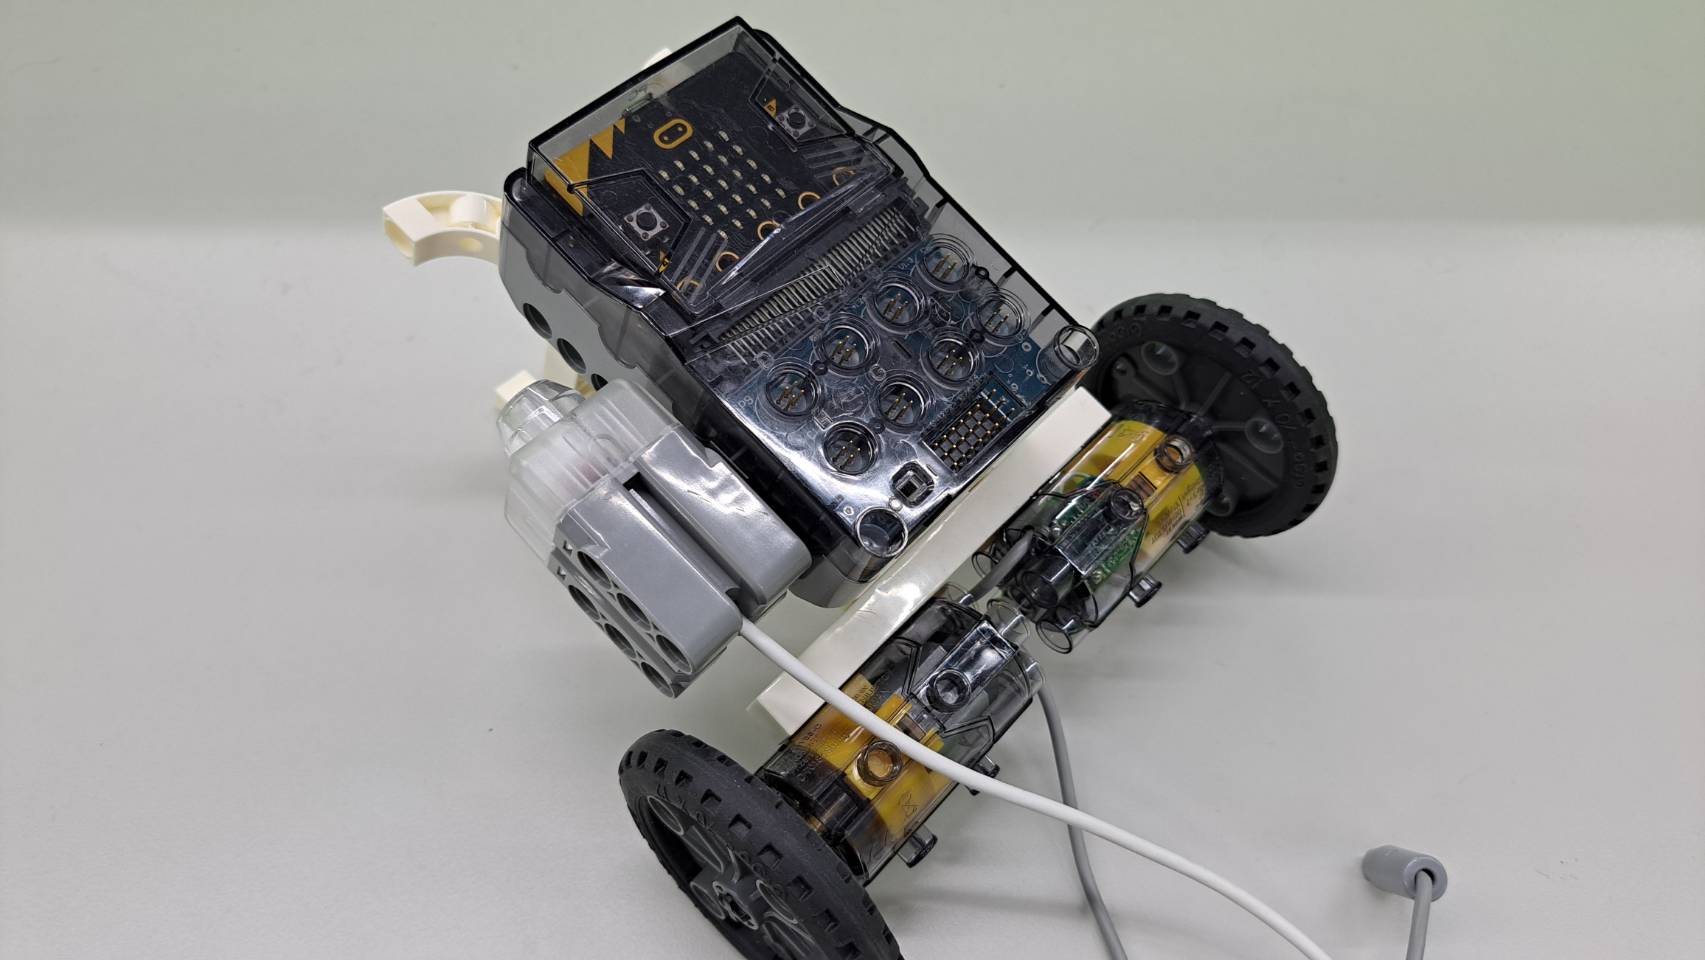
Step 5: Assemble the front wheel, car body, and rear wheel as shown.
Step 6: Connect the C-FORCE SENSOR with the C-Gigo micro:bit CONTROL BOX using the C-LONG PEG, and install it on the C-5X10 FRAME.
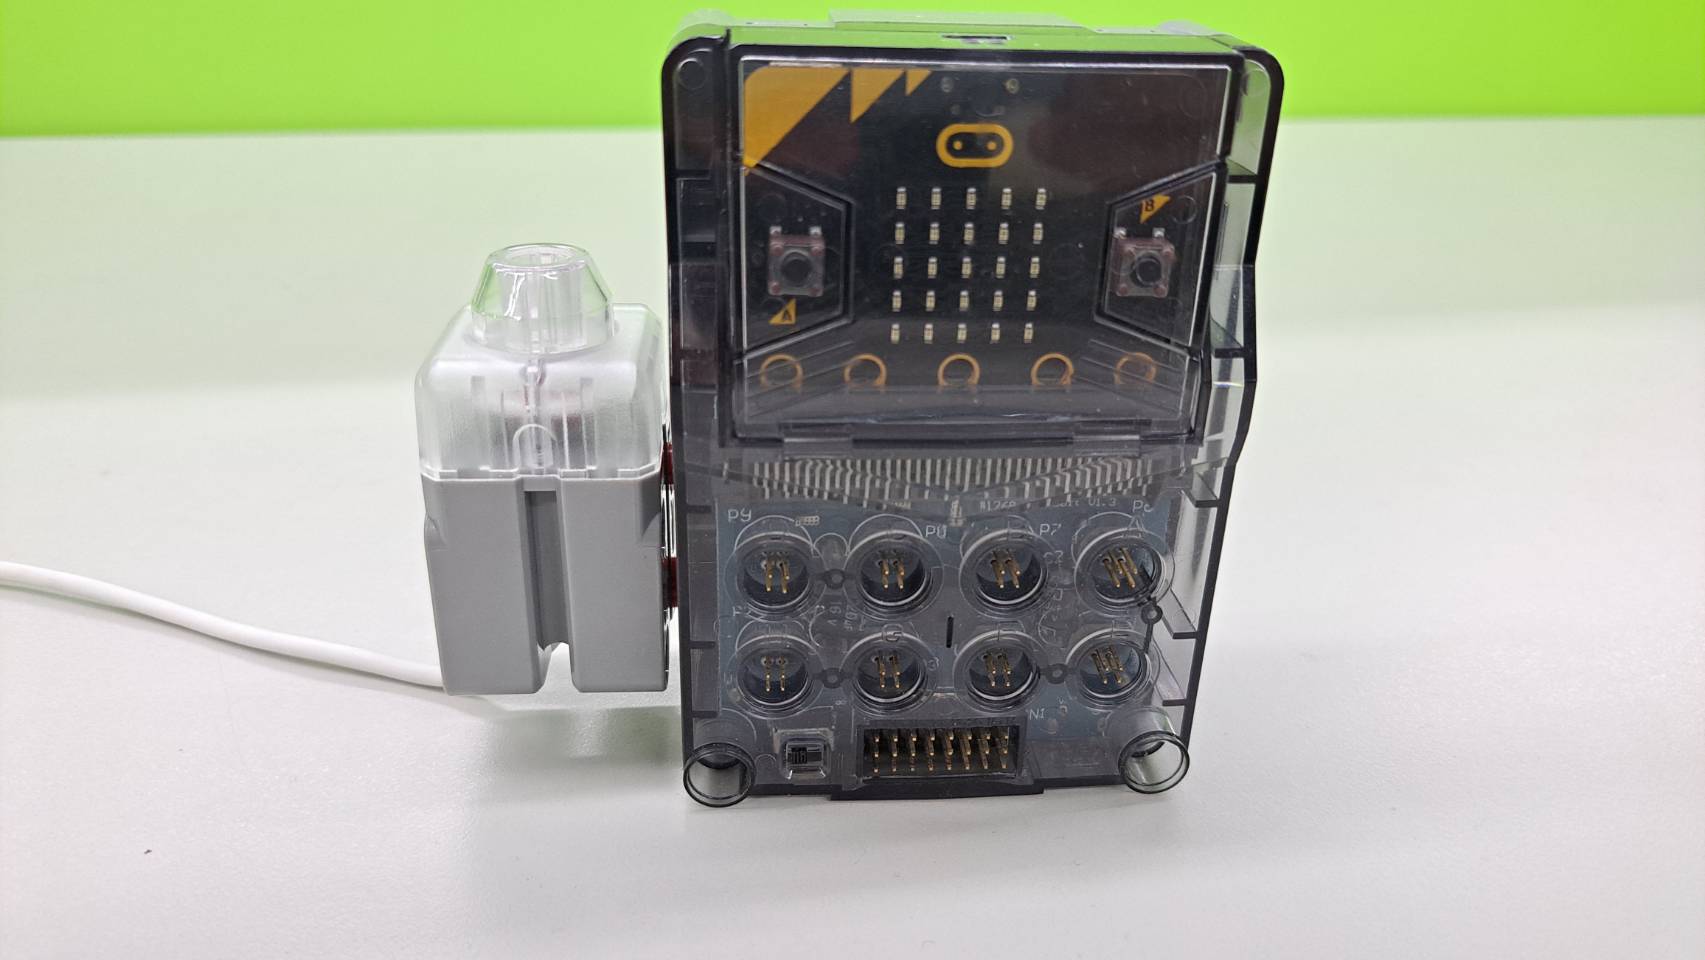
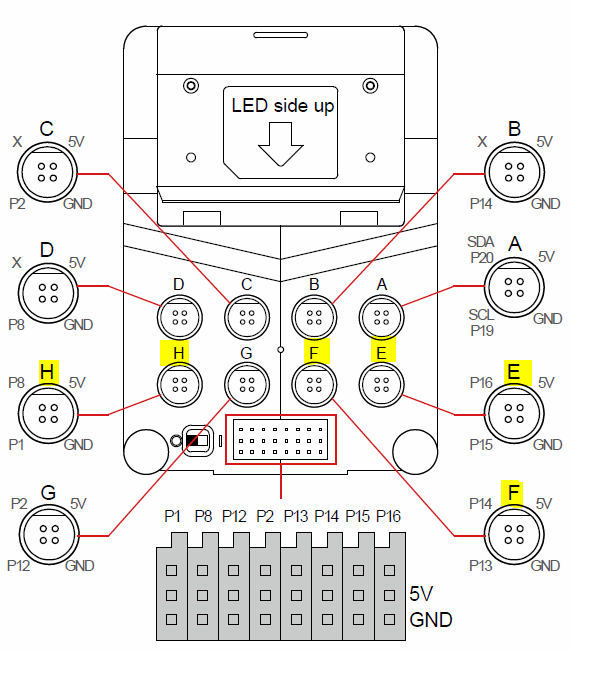
Step 7: The connection holes between the motor and the C-FORCE SENSOR are shown in the figure below.
Make sure to install to the correct numbered connector, so that the model can work!
Step 8: Got to the webpage to write the following program.
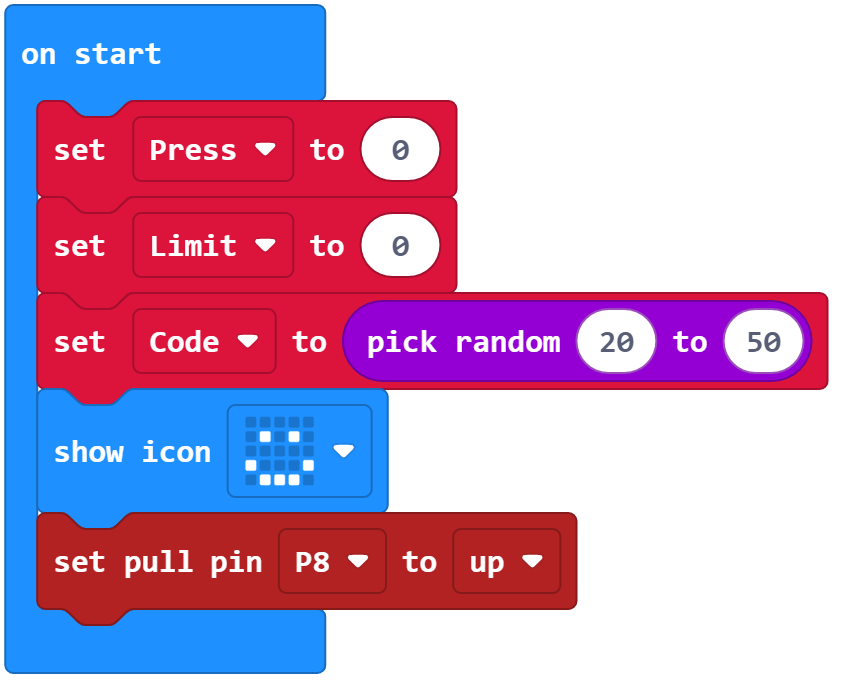
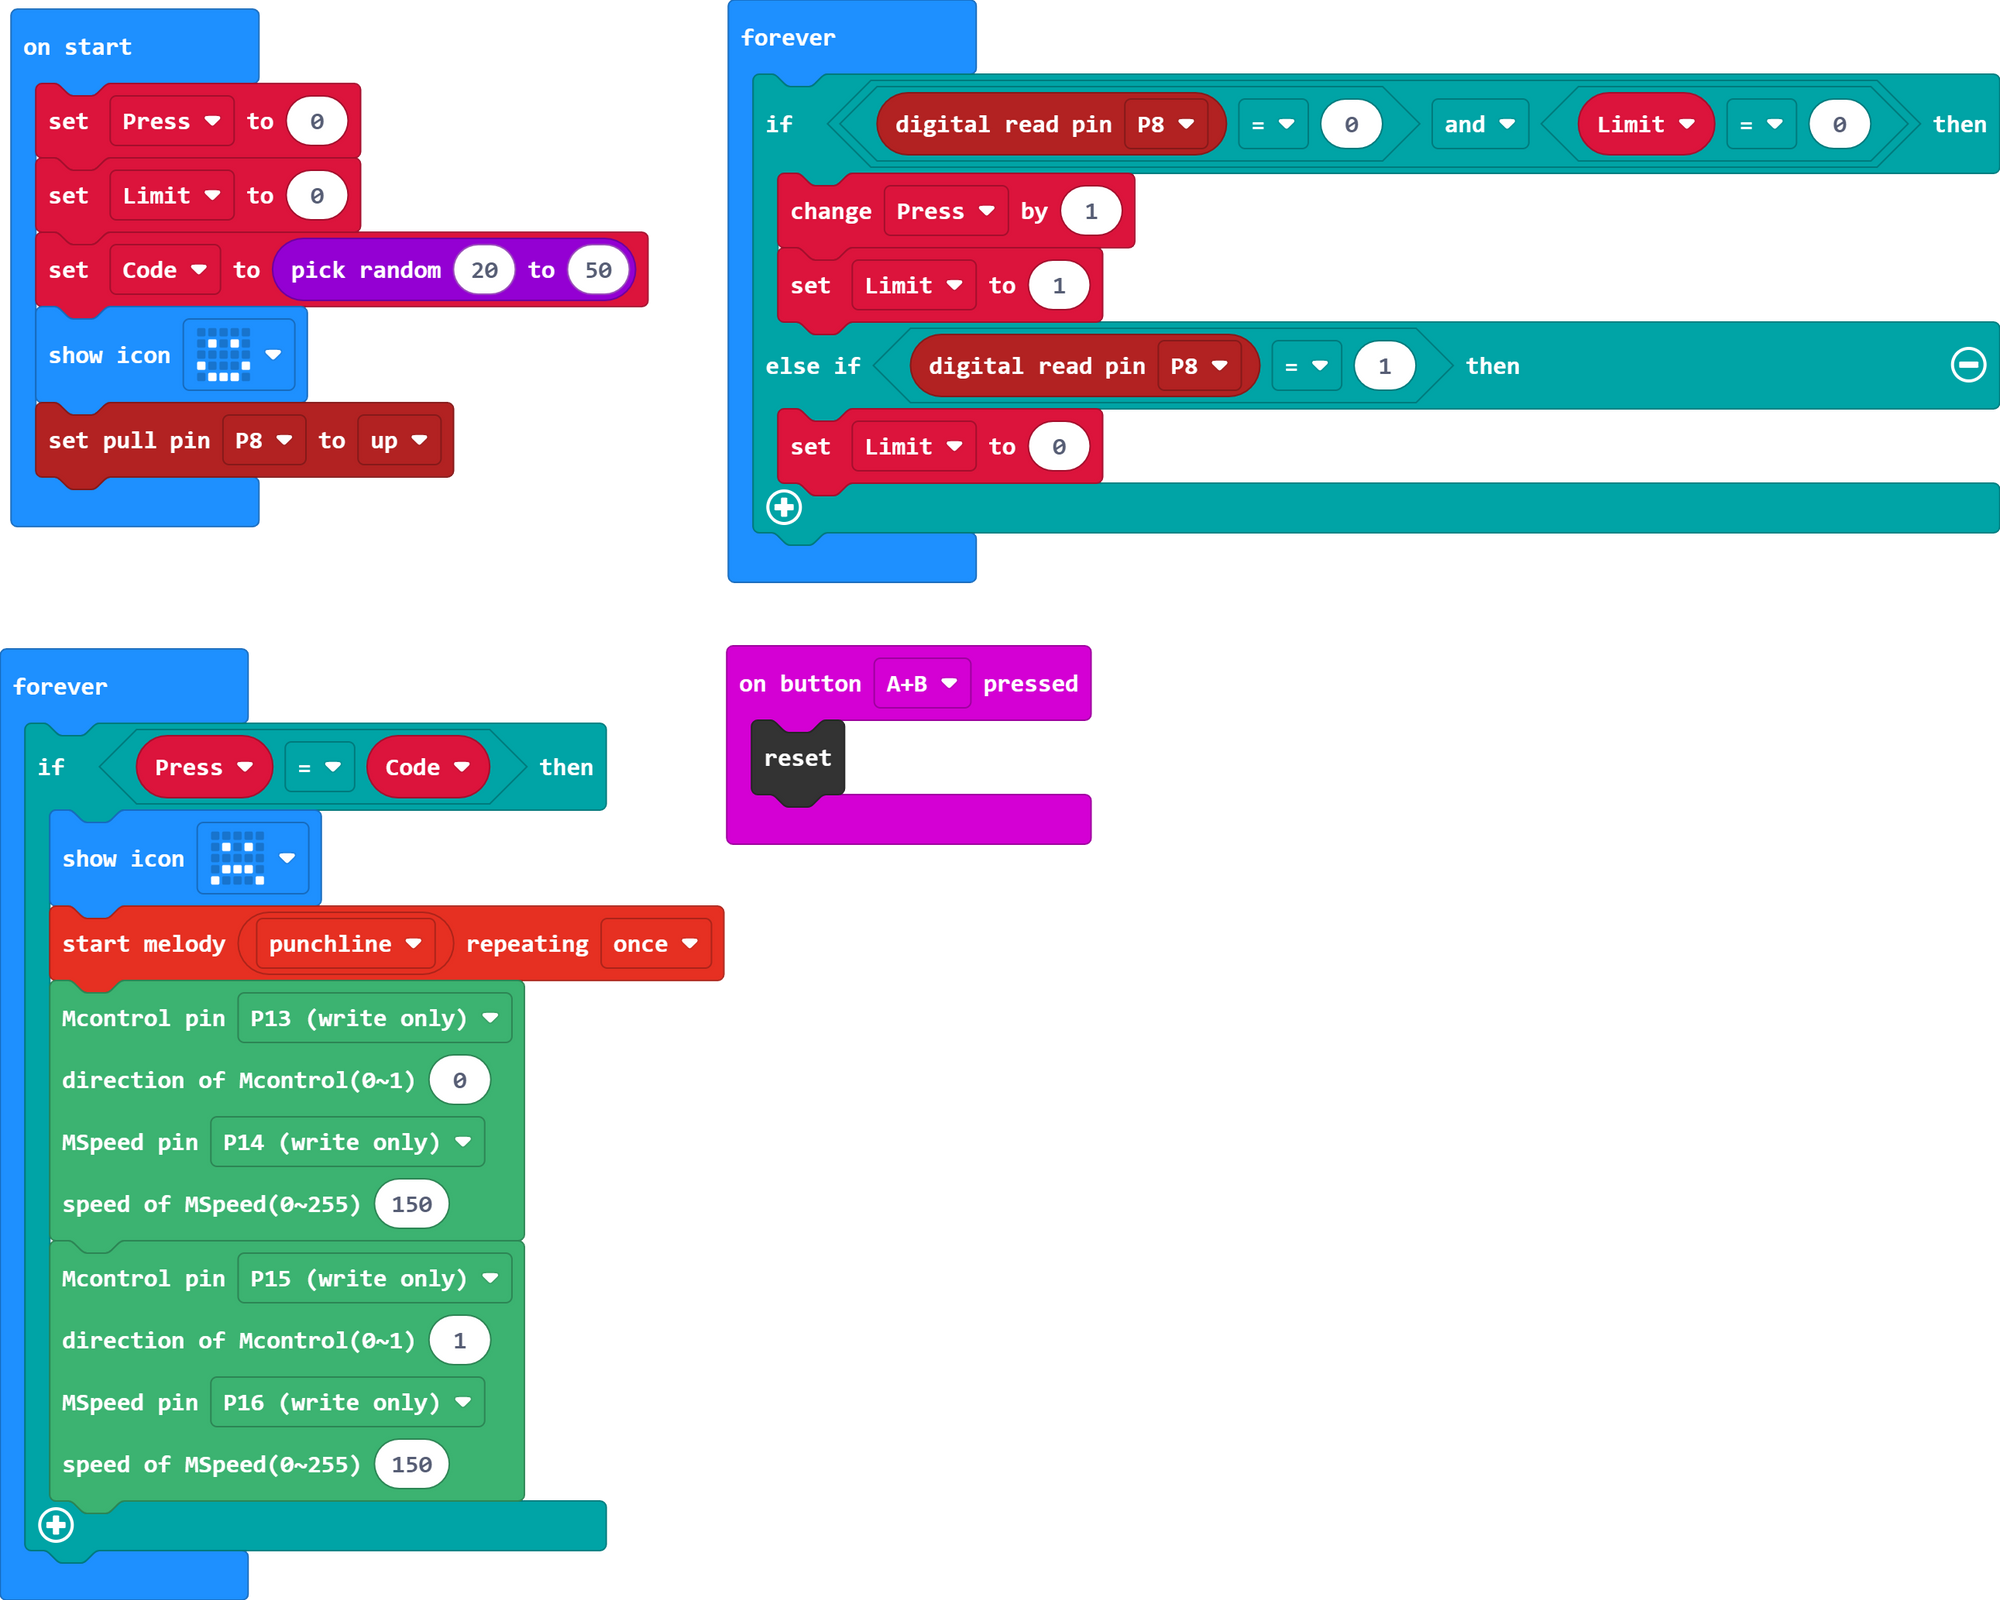
1. Please create three variables: press (press times), Limit (press limit), code (password).
When starting up, first set the variable “press” and the variable “limit” to 0, use the program of random access to make the password different every time, and add the program of "setting the resistance of pin p8 as up" to make the C-FORCE SENSOR work.
※Please note that due to the official revision of the micro:bit, if you want to use the pressure sensor (C-FORCE SENSOR), you must add the program of "setting the resistance of pin p8 as up" so that the pressure sensor can work.
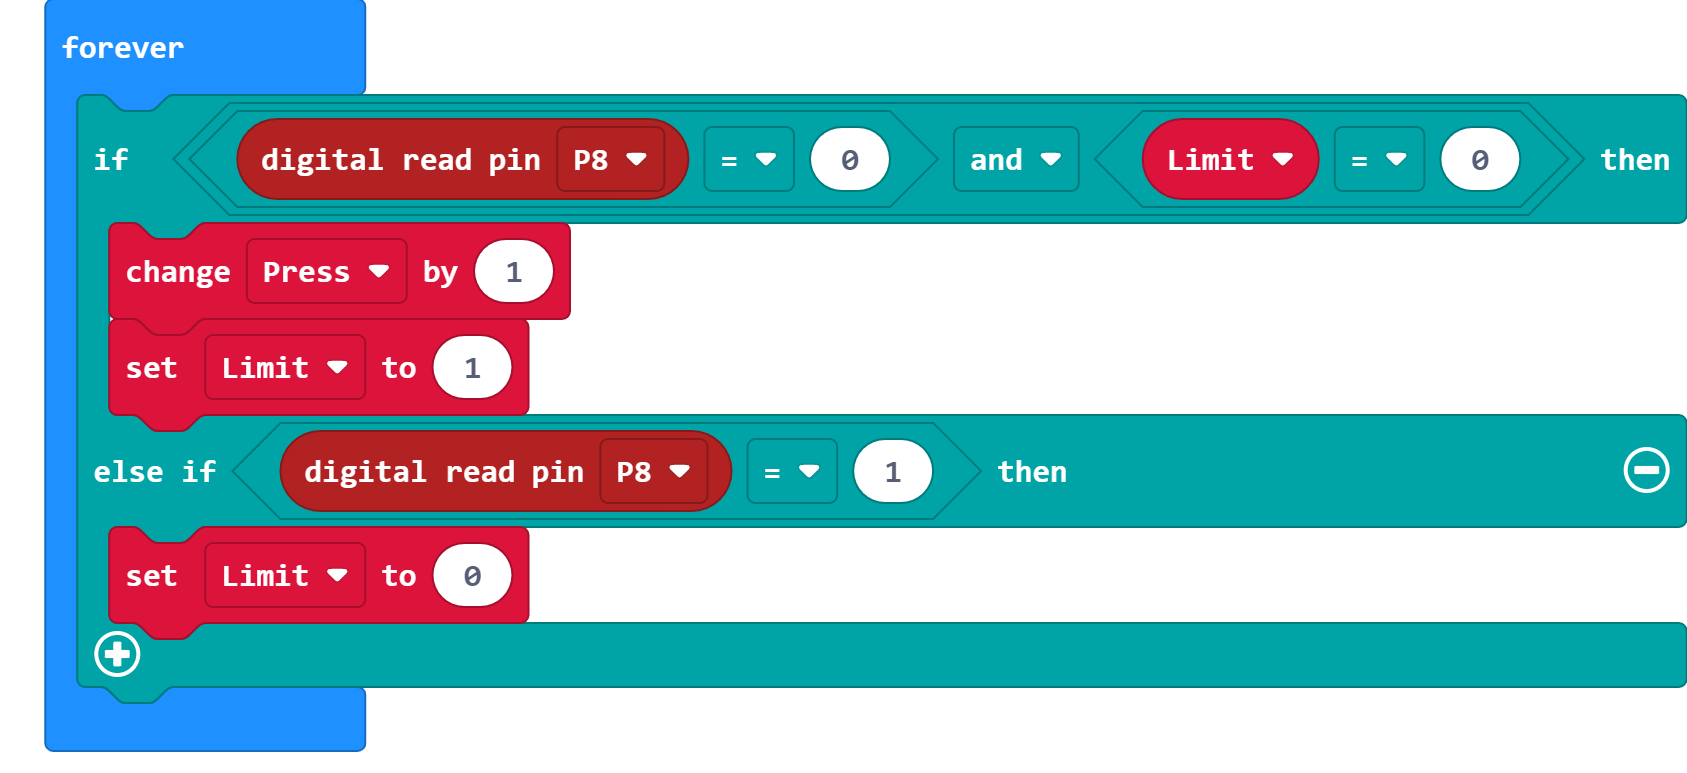
2. We must ensure that the pressure sensor will only increase one at a time when it is pressed, instead of repeating accumulation.
When the pressure sensor is pressed (pin p8 = 0), we need to make the variable “limit” become 1, and set the variable “limit” to become 0 when the pressure sensor is released (pin p8 = 1), and only then can the next press be performed.
3. We can set the actions that the car will perform when the number of presses is equal to the code. It is recommended to add the reset program and then play again.
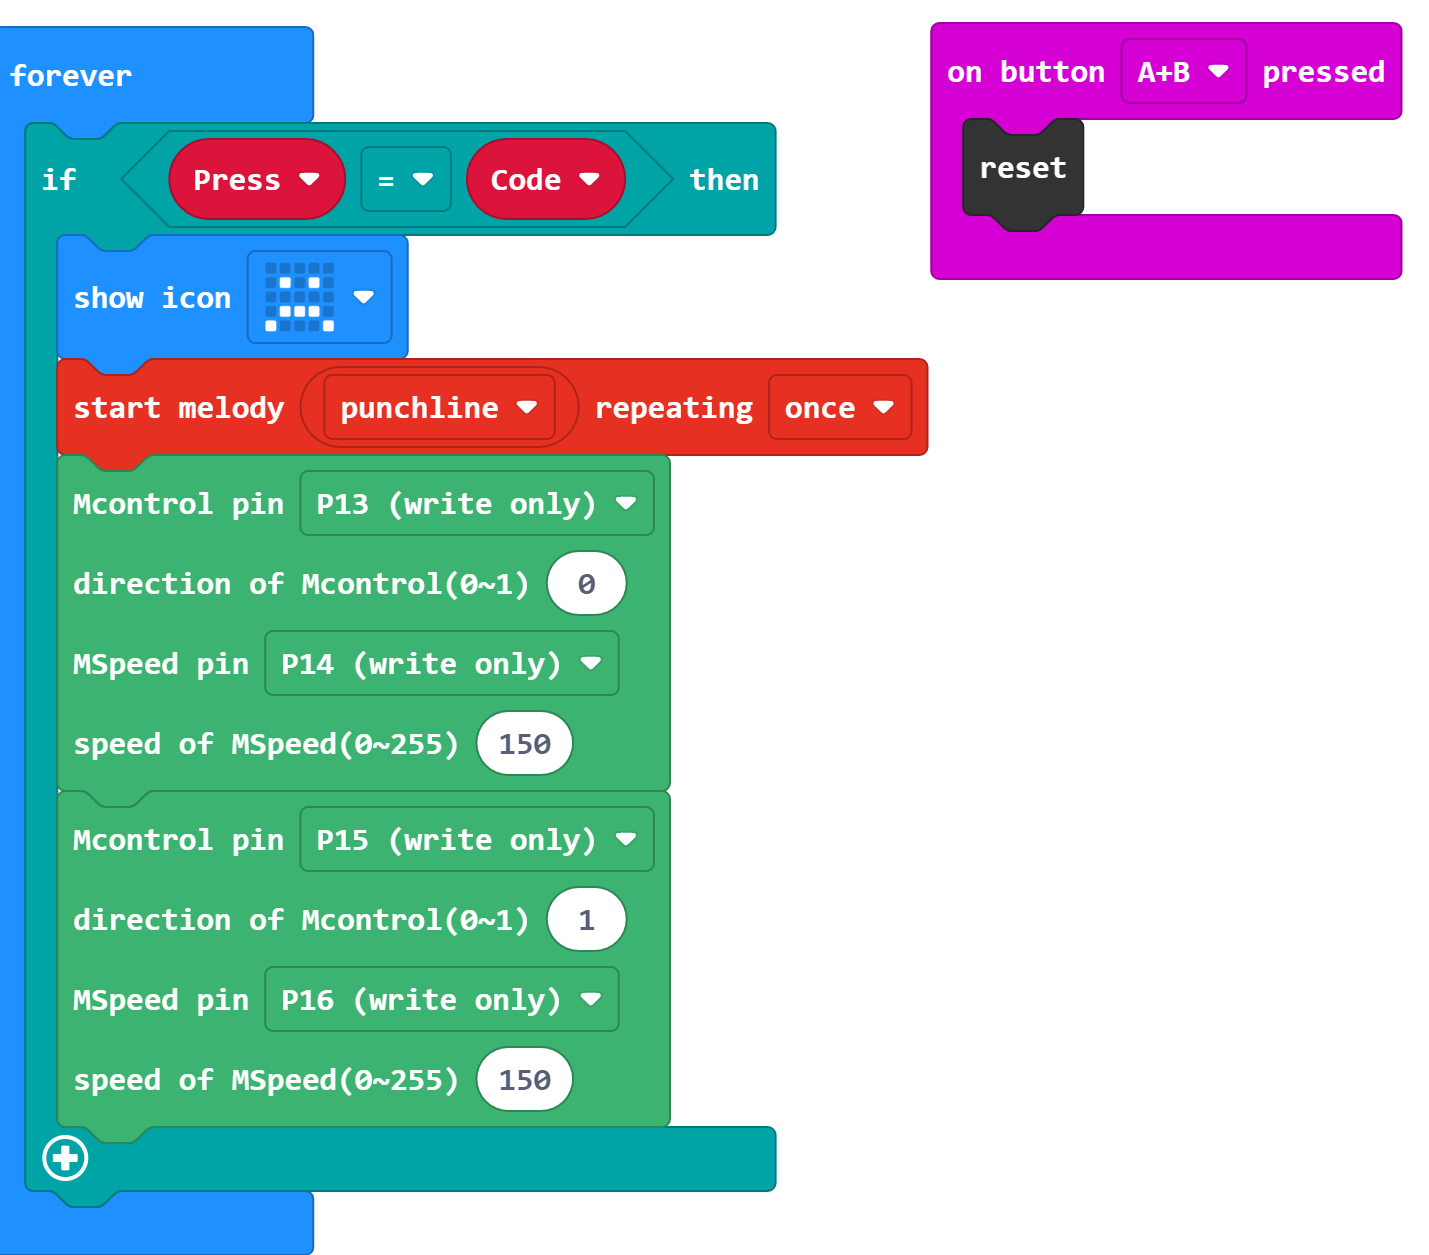
4. The complete program is as follows.
Step 9: Find a good friend. Let's duel!
◆ How to play
Each person can press 1 to 5 times arbitrarily, whoever presses the code number first will lose!
Let's see if you have both luck and courage!
◆Production and Play (30 minutes)
1. Encourage students to complete the model and write the program on their own, and the teacher can help in a timely manner.
2. Students who’ve completed the models and program can find a friend to start the battle, or they can try to modify the model to increase the variability.
◆Summary and Tidy up (10 minutes)
1. Teachers can conclude the course and help students review the programming concepts learned in this model.
2. Ask the students to take apart the models, sort the pieces, and put them back in their proper places. Remind them to use a peg remover to take the parts apart instead of forcing them.
◆Programming concept
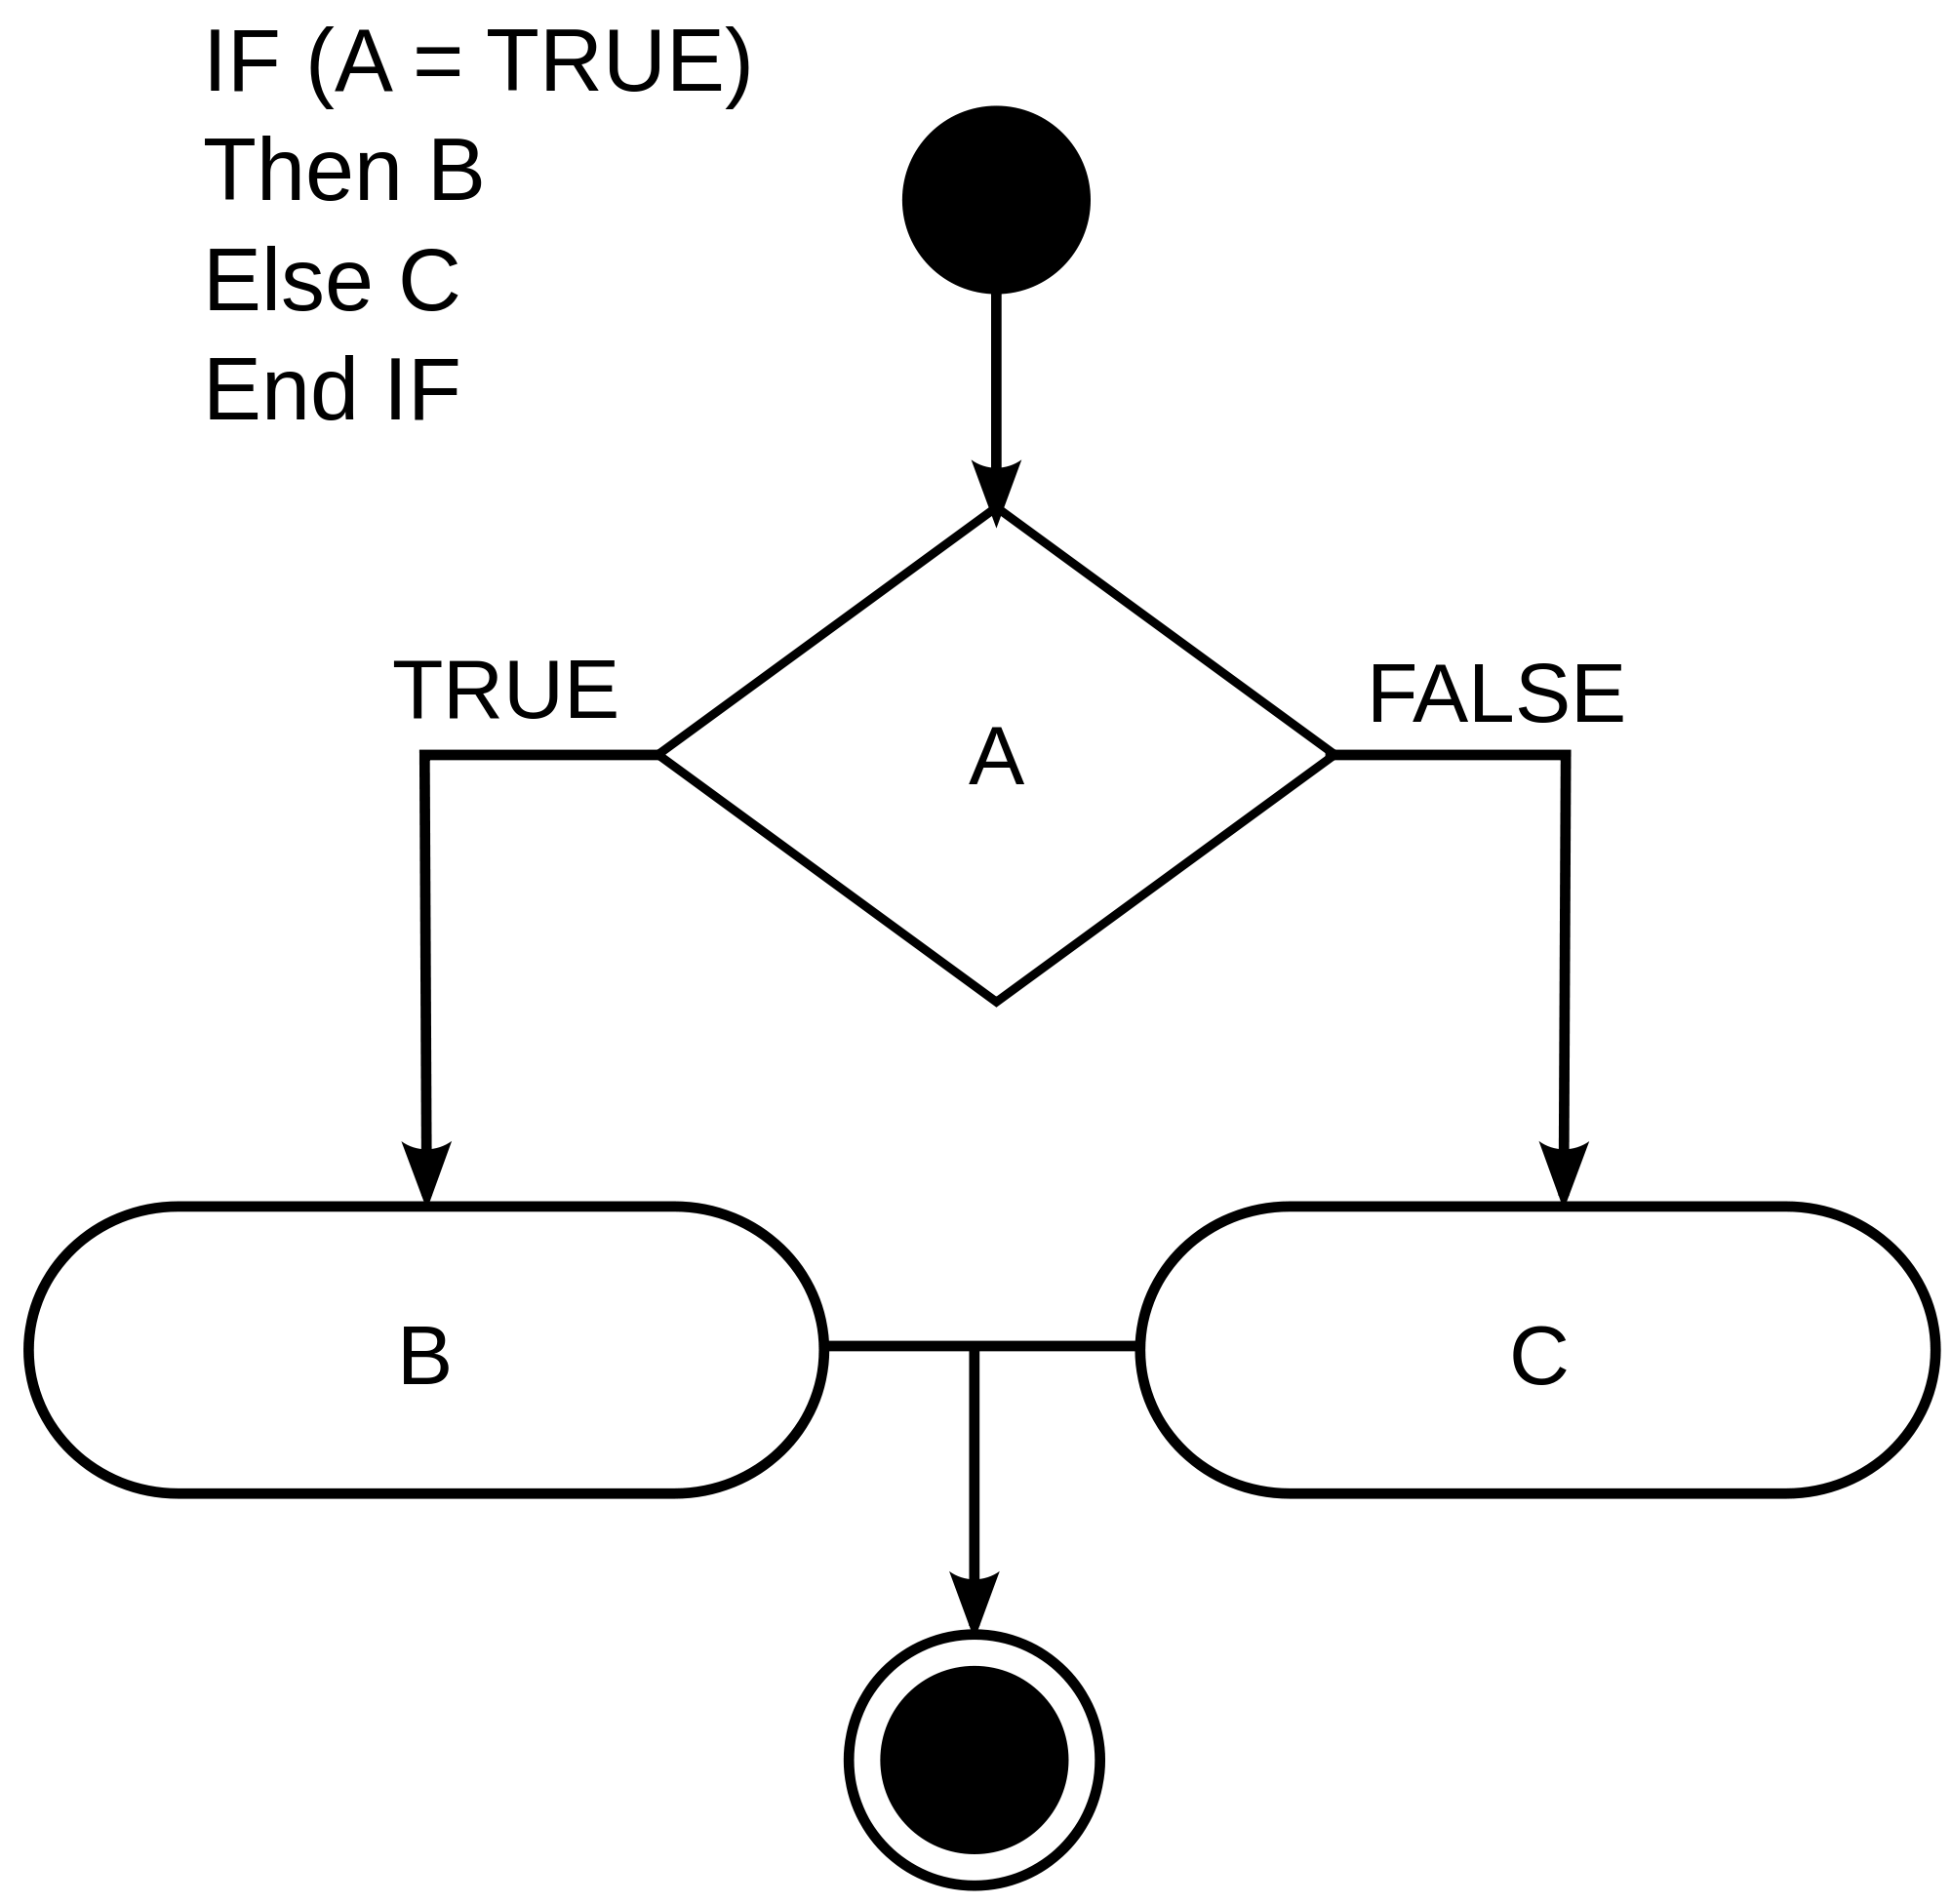
The programming instructions used in this model are called "conditional statements."
These statements allow a computer or robot to perform different actions based on specific conditions. If the specified conditions are true, the corresponding instructions are executed. However, if the conditions are false, the computer or robot follows a different set of instructions. Conditional statements can also combine multiple conditions in various ways.
In this model, we have defined three distinct conditions:
1. When the pressure sensor is pressed.
2. When the pressure sensor is released.
3. When the number of presses is equal to the password.
Additionally, we have incorporated a double condition setting using the variable limit. This ensures that the pressure sensor does not register repetitive presses.
◆Postscript
As I grow older, some of my cherished childhood games have become challenging to revisit. However, we can recreate those timeless games using Gigo Blocks and micro:bits, bringing back the joyous memories of playing with friends during our childhood.
Keywords:
Coding Education, micro:bit, Battle Robot, Jousting, Motors, Functions, Remote Control.
Curriculum(NGSS):
3-PS2-1 Plan and conduct an investigation to provide evidence of the effects of balanced and unbalanced forces on the motion of an object.
3-5-ETS1-1 Define a simple design problem reflecting a need or a want that includes specified criteria for success and constraints on materials, time, or cost.
3-5-ETS1-2 Generate and compare multiple possible solutions to a problem based on how well each is likely to meet the criteria and constraints of the problem.
Please sign in to vote.